
1. Introduction
Thank you for choosing the Ehaho 10" 1600W Slim Underseat Car Powered Subwoofer. This device is designed to enhance your vehicle's audio system with powerful bass and customizable RGB lighting. Please read this manual thoroughly before installation and operation to ensure proper use and optimal performance.
This subwoofer features a compact design for discreet placement, an integrated amplifier, and dynamic RGB lighting controllable via a mobile application or remote.
2. Safety Information
WARNING: Improper installation or use can lead to serious injury or product damage. Always consult a professional car audio installer if you are unsure about any steps.
- Ensure the vehicle's battery is disconnected before starting any wiring.
- Use appropriate wire gauges and fuses as specified to prevent electrical hazards.
- Mount the subwoofer securely to prevent movement during vehicle operation.
- Avoid placing the subwoofer in areas that obstruct vehicle controls or safety devices.
- Do not expose the unit to excessive moisture or extreme temperatures.
- Built-in safeguards include thermal protection and short-circuit prevention.
3. Package Contents
Verify that all items are present and in good condition:
- Ehaho 10" Slim Underseat Car Powered Subwoofer
- Remote Control
- Mounting Iron Sheets & Screws
- Bass Level Controller
- RCA Audio Cable
- Positive Power Cable (+12V) + Fuse
- Delayed High-to-Low Signal Converter (DHLC)
- REM Cable
- GND Cable
- Connector Terminals
- Installation Guide (Product User Manual)
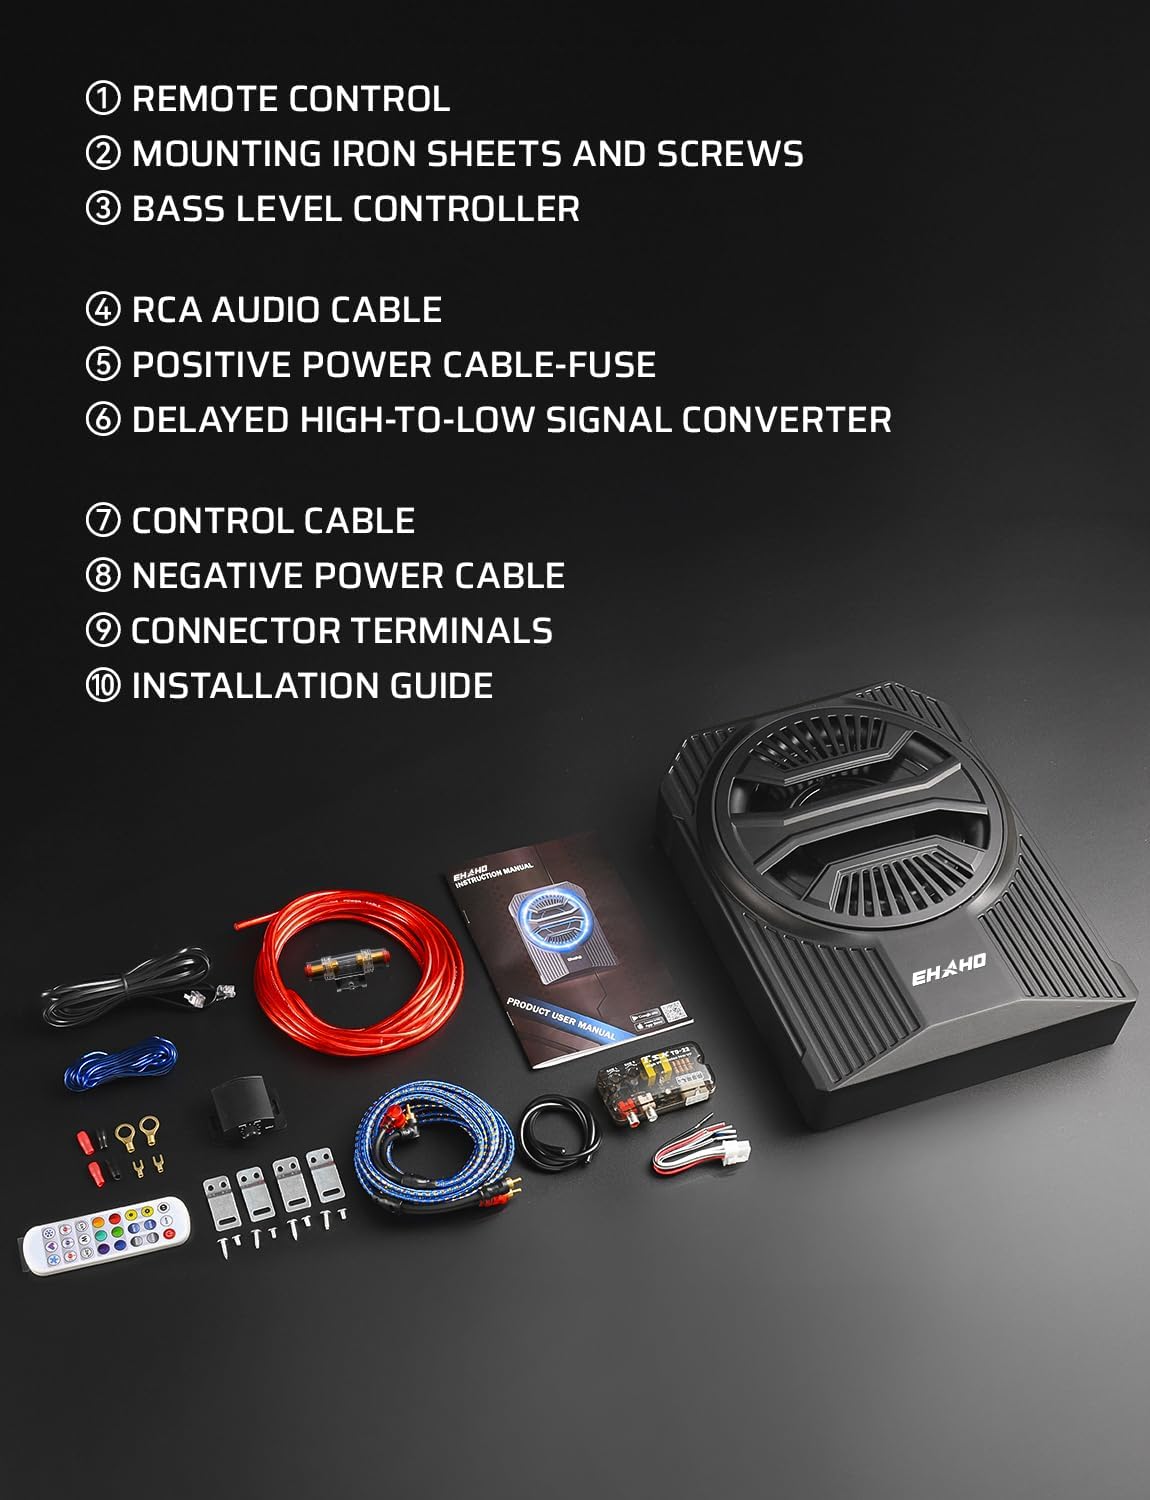
Image: All components included in the Ehaho subwoofer package, laid out for inspection.
4. Product Overview (Panel Controls and Features)
Familiarize yourself with the control panel located on the side of the subwoofer:

Image: Diagram of the subwoofer's control panel, showing various inputs and adjustment knobs.
- A. Power Status LED: Green indicates power on, Red indicates protection mode.
- B. Phase Shift: Adjusts the phase of the subwoofer output (0° or 180°) to match other speakers.
- C. Auto Power On: Switch to enable or disable automatic power on/off with signal detection.
- D. Low-Pass Filter: Adjusts the frequency range (35Hz-150Hz) for bass output.
- E. Bass Boost: Enhances low-frequency response (0-12dB @20Hz).
- F. Input Gain Control: Adjusts the input sensitivity to match the head unit's output.
- G. Remote Level Control Port: Connects the wired bass level controller.
- H. High-Level (Speaker Level) Inputs: For head units without RCA outputs.
- I. Low-Level RCA Inputs: For head units with RCA outputs.
- J. Fuse: Protects the unit from overcurrent. Replace only with the specified rating (15A).
- K. Power Input Terminal: Connections for +12V, GND (Ground), and REM (Remote Turn-On).
5. Installation
Proper installation is crucial for optimal performance and safety. If you are not confident in your ability to install the subwoofer, seek professional assistance.
5.1. Mounting the Subwoofer
The slim design allows for flexible mounting options, such as under a seat or in the trunk. Ensure adequate air circulation around the unit for proper heat dissipation.
- Select a suitable location that does not obstruct vehicle operation or safety.
- Use the provided mounting iron sheets and screws to secure the subwoofer.
- Drill pilot holes (4.0 mm) as needed for the mounting screws.

Image: The slim subwoofer installed discreetly under a car seat, demonstrating its compact size.

Image: The subwoofer installed in a car trunk, showing its versatility in placement.
5.2. Power Connections
- Connect the GND (Ground) terminal to the closest point on the vehicle chassis. Ensure the ground wire is less than 39" (100 cm) in length.
- Connect the +12V terminal to the positive terminal of the car battery via the provided fuse holder.
- Connect the REM (Remote Turn-On) terminal to the remote output of your head unit. If your head unit does not have a remote output, you can use the Auto Power On feature (if available) or connect to an accessory wire that turns on with the ignition.

Image: Diagram illustrating the power connections for the subwoofer, including ground, remote, and +12V battery connections.
5.3. Signal Input (Low-Level RCA or High-Level Speaker Inputs)
Choose the appropriate input method based on your head unit's capabilities. Do not use both high-level and low-level inputs simultaneously.
- Low-Level RCA Input: Preferred for best audio performance. Connect RCA cables from your head unit's RCA outputs to the subwoofer's Low-Level inputs.
- High-Level Speaker Input: Use this if your head unit lacks RCA outputs. Connect the speaker wires from your head unit to the subwoofer's High-Level inputs. The provided DHLC (Delayed High-to-Low Signal Converter) can be used for this purpose.

Image: Diagram showing how to connect the subwoofer using low-level RCA inputs.

Image: Diagram showing how to connect the subwoofer using high-level speaker inputs.
5.4. Remote Level Control Connection
Connect the provided wired bass level controller to the "REMOTE CONTROL" port on the subwoofer. Install the controller securely under the dashboard or in a similar location that does not distract the driver.
6. Operating the Subwoofer
6.1. App Operation (Magic Lantern)
The Ehaho subwoofer features dynamic RGB lighting controllable via the "Magic Lantern" app. This app is compatible with iOS and Android systems.
- Download the "Magic Lantern" app from Google Play or the Apple App Store.
- Ensure your phone's Bluetooth is enabled and connect to the subwoofer.
- Use the app to customize brightness, colors, and choose from over 100 dynamic RGB effects, including music-synced beats.

Image: Screenshots of the "Magic Lantern" app interface, showing color wheel, mode selection, and music sync options.
6.2. Remote Control
The included wireless remote provides convenient control over the RGB lighting effects. Use it to switch between colors, modes, and adjust brightness.

Image: The remote control for the RGB lighting, showing various color and mode buttons.
7. Troubleshooting
If you experience issues with your subwoofer, refer to the table below for common problems and solutions:
| Symptom | Possible Remedy |
|---|---|
| Amplifier will not power up | Check all power connections (GND, REM, +12V). Verify fuse is intact. Ensure Auto Power On switch is in the correct position. |
| No output | Check input signal connections (RCA or speaker level). Verify gain input is set correctly. Check speaker wiring. |
| Distorted sound | Adjust input gain. Check speaker impedance. Ensure proper air circulation around the amplifier. |
| Engine noise (static type) | Ensure RCA cables are high-quality and routed away from power cables. Verify proper grounding. |
| Squealing noise is present | Check for improperly grounded RCA interconnects. |
8. Specifications
- Peak Power: 1,600W
- RMS Power: 220W @2.5Ω
- THD: <0.4%
- SNR: >90dB
- Frequency Response: 20Hz-150Hz
- Input Sensitivity: High-Level 0.9V / Low-Level 300mV
- Low-Pass Filter: 35Hz-150Hz
- Bass Boost: 0-12dB @20Hz
- Built-in Subsonic Filter: 20Hz
- Fuse Rating: 15A
- Dimensions: 13.98"x10.63"x3.15" (35.5x27x8cm)
- Enclosure Material: Aircraft-grade aluminum
- Control Method: App, Remote

Image: Diagram showing the dimensions of the Ehaho subwoofer (354mm x 266mm x 83mm).
9. Warranty and Support
Ehaho provides a warranty from the date of purchase for defective products. For warranty claims or assistance, please contact customer service:
- Email: support@ehaho.com
- Website: https://www.ehaho.com
Please provide proof of purchase and a detailed description of the issue, including relevant pictures or videos, when making a warranty claim. Our team will respond to your inquiries within 24 hours on weekdays.
10. Product Videos
Ehaho 10" Car Subwoofer Product Showcase
Video: A dynamic product showcase highlighting the features, RGB lighting, and powerful bass of the Ehaho 10" Car Subwoofer.
Ehaho Subwoofer Unboxing and Initial Setup
Video: An unboxing of the Ehaho subwoofer, showing all included components and a demonstration of initial power-up and RGB lighting.
Ehaho Subwoofer Installation and Sound Test
Video: Demonstration of the subwoofer's installation in a vehicle, followed by a sound test to showcase its bass performance.
Ehaho Subwoofer RGB Lighting Demo
Video: A short clip demonstrating the various RGB lighting colors and effects of the Ehaho subwoofer.
Ehaho Subwoofer Installation Steps
Video: Step-by-step guide on how to install the Ehaho subwoofer, covering wiring and connections.