
ASURE 4Core 4GB+64GB
ASURE 9-inch Android 15 Car Stereo Radio for Nissan Altima V L33 (2013-2017) Instruction Manual
Model: 4Core 4GB+64GB
1. Introduction
This manual provides detailed instructions for the installation, operation, and maintenance of your ASURE 9-inch Android 15 Car Stereo Radio. Designed for Nissan Altima V L33 models from 2013-2017, this unit offers advanced features including Wireless CarPlay, Android Auto, GPS navigation, Bluetooth 5.4, and Wi-Fi 6.0 for an enhanced in-car experience.
1.1. Compatibility
This unit is compatible with Nissan Altima 2.5 / 2.5S models from 2013-2017. For models 2.5 SV, 2.5 SL, 3.5 S, 3.5 SV, 3.5 SL, or vehicles with an OEM NAVI screen, an extra wiring kit may be required. Please ensure compatibility before installation.
1.2. Key Features
- 9-inch 1280x800 HD Touchscreen: Provides clear visuals and responsive touch control.
- Android 15 System: Offers smooth performance with a 4-core processor, 4GB RAM, and 64GB ROM.
- Wireless CarPlay & Android Auto: Seamless smartphone integration via Bluetooth for hands-free control and navigation.
- Wi-Fi 6.0 Dual-Band: Supports 2.4GHz/5GHz for fast downloads and stable connectivity.
- Bluetooth 5.4: Enables crystal-clear hands-free calls and high-fidelity music streaming.
- GPS Navigation: Supports online and offline navigation with pre-installed maps.
- Steering Wheel Control: Compatible with original car steering wheel controls for convenience.
- AHD Reversing Camera Support: Enhances safety with clear night vision and 170° wide-angle view.
2. What's in the Box
Verify that all components are present before beginning installation:
- 1x Car Radio
- 1x Install Bezel
- 1x Wiring Harness Kit
- 1x USB Adaptor
- 1x CAN BUS Module
- 1x 8-Pin Converter of AV Audio connectors
- 1x Audio Video Ports cable
- 1x Wifi/BT antenna
- 1x Reversing Camera Input cable
- 1x GPS Cable
- 2x USB Cables
- 1x Microphone
- 1x Screwdriver
- 1x User Manual
- 1x Reversing Camera

Image: All included accessories for the ASURE Car Stereo installation.
3. Setup and Installation
3.1. Safety First: Disconnect Battery
- Open the vehicle's hood.
- Locate the car battery.
- Disconnect the negative terminal of the battery. Use a 10mm socket or pliers if your terminal has a wing nut. Secure the wing nut back onto the terminal to prevent loss.
Video: Step-by-step guide on how to disconnect the car battery's negative terminal for safety during installation.
3.2. Disassembly of Existing Components
- Remove Instrument Side Finisher: Using a trim removal tool, gently pry away the instrument side finisher on the driver's side until it detaches. Set it aside.
- Unseat Instrument Lower Panel: Use a trim removal tool to pry the instrument lower panel (below the steering wheel) until it pops out slightly.
- Remove Center Stack Side Finishers: These are the two silver-colored finishers flanking the existing radio. Use a trim removal tool to pry them from the bottom, then gently pull them upwards to release from the top clips. Set them aside.
- Remove Front Air Control Screws (2): Locate the two Phillips head screws securing the front air control panel. Remove them carefully to avoid dropping.
- Remove Front Air Control: Gently pull the front air control panel out. Disconnect the single wiring harness by pressing the thumb tab and wiggling it out. Set the panel aside.
- Remove Cluster Lid (C) Screws (2): Locate the two Phillips head screws for the cluster lid (C) above the radio. Remove them.
- Remove Cluster Lid (C): Gently pull the cluster lid (C) upwards to detach. Turn it over and disconnect the two wiring harnesses. One requires needle nose pliers to pull out, the other needs a push on a notch with a trim removal tool. Set the lid aside.
- Remove Audio Unit Screws (4): Locate the four Phillips head screws securing the existing audio unit. Remove them carefully. A magnetic tool may be helpful to prevent dropping.
- Remove Audio Unit: Gently pull the audio unit out. Disconnect the four wiring harnesses from the back of the unit. Set the old audio unit aside.

Image: Comparison of the car dashboard before and after the ASURE Car Stereo installation, showing the integrated display.
3.3. New Unit Preparation
- Unpack New Radio and Frame: Carefully unbox your new ASURE car stereo and its accompanying frame.
- Install Brackets to Screen Frame (2): Attach the provided brackets to the new screen frame using the included screws and Phillips screwdriver. Ensure they are securely fastened.
3.4. Wiring Connections
Connect the following harnesses to the new ASURE car stereo. Note that connectors are typically keyed to fit only in their correct ports.
- Connect RCA AUX IN (2): Match the red and white RCA auxiliary input cables to their corresponding ports on the new unit.
- Connect CAN-BUS Module: Locate the white connector on the main wiring harness and plug in the CAN-BUS module.
- Connect Reverse Camera Input: Connect the yellow RCA cable from the reverse camera to the yellow input port on the unit.
- Connect GPS Antenna: Screw the GPS antenna into its designated port on the back of the unit.
- Install Harness Connections (7): Plug in the remaining seven harness connections to their respective ports on the new unit. These are typically plug-and-play.
- Connect Harness to Factory Plugs (4): Connect the new unit's harnesses to the vehicle's existing factory plugs. These are also keyed to fit only one way.

Image: Detailed wiring diagram showing connections for the ASURE Car Stereo unit.
3.5. Cable Management
- Run USB Cables (2): Feed the USB cables down through an available opening behind the radio to keep them tidy. These may not be used if wireless CarPlay/Android Auto is preferred.
- Attach GPS Antenna to Surface: Remove the liner from the adhesive backing of the GPS antenna and stick it to a suitable surface behind the radio, ensuring it has a clear view for satellite reception.
3.6. Install New Car Stereo
Carefully align the new ASURE car stereo with the dashboard opening and push it firmly into place until it snaps securely. Ensure all clips are engaged.
3.7. Reassembly
Reinstall the removed components in reverse order of disassembly:
- Reinstall Cluster Lid (C): Connect the wiring harnesses, then snap the cluster lid back into place.
- Reinstall Front Air Control: Connect the wiring harness, then align the front air control panel and push it into place.
- Install Cluster Lid/Air Control Screws (4): Secure the four Phillips head screws for the cluster lid and front air control.
- Install Center Stack Side Finishers: Align the side finishers and push them firmly into place, starting from the top and working your way down.
- Reseat Instrument Lower Panel: Push the instrument lower panel back into its original position until it snaps.
- Install Instrument Side Finisher: Align the instrument side finisher and push it back into place until it snaps securely.
3.8. Final Power Up
- Reconnect Ground Cable: Reconnect the negative terminal of the car battery and tighten it securely.
- Turn on Vehicle: Start your vehicle to power on the new car stereo.
3.9. Initial Setup: CAN-BUS Configuration
To ensure proper communication with your vehicle's systems, configure the CAN-BUS settings:
- Go to Settings on the car stereo.
- Select Factory.
- Enter the password: 3368 (or 1617 for N44/N84 series).
- Confirm the password.
- Navigate to Car Model or CAN Type Set.
- Select RZC (or Raise-Nissan for N44/N84 series).
- Choose Nissan as the Car Brand.
- Select All (or ALTIMA-2012-Now (Overseas)-12-Portrait (Single-Drive AC) for N44/N84 series).
- Select All for Car Model (if applicable).
- Exit the settings to apply changes.

Image: Screenshot of the ASURE Car Stereo interface showing the CAN-BUS setup menu.
4. Operating Instructions
4.1. Wireless CarPlay & Android Auto
Connect your smartphone wirelessly for seamless integration:
- Ensure Bluetooth is enabled on your smartphone and the car stereo.
- Pair your smartphone with the car stereo via Bluetooth.
- Once paired, click the "CarLink" icon on the stereo's main page to initiate CarPlay or Android Auto.
- For wired connection, use the 4-pin USB cable. The 6-pin USB cable is for charging only.

Image: Screenshot of the ASURE Car Stereo displaying the Wireless CarPlay interface.

Image: Visual representation of Wireless CarPlay, Android Auto, and Screen Mirroring capabilities.
4.2. GPS Navigation & Wi-Fi Connection
Utilize the built-in GPS and Wi-Fi for navigation and online services:
- The unit supports both online and offline navigation. Pre-installed maps are available, and additional offline maps can be downloaded from the Play Store.
- Connect to Wi-Fi 6.0 (2.4GHz/5GHz) for internet access, app downloads, and real-time traffic updates.
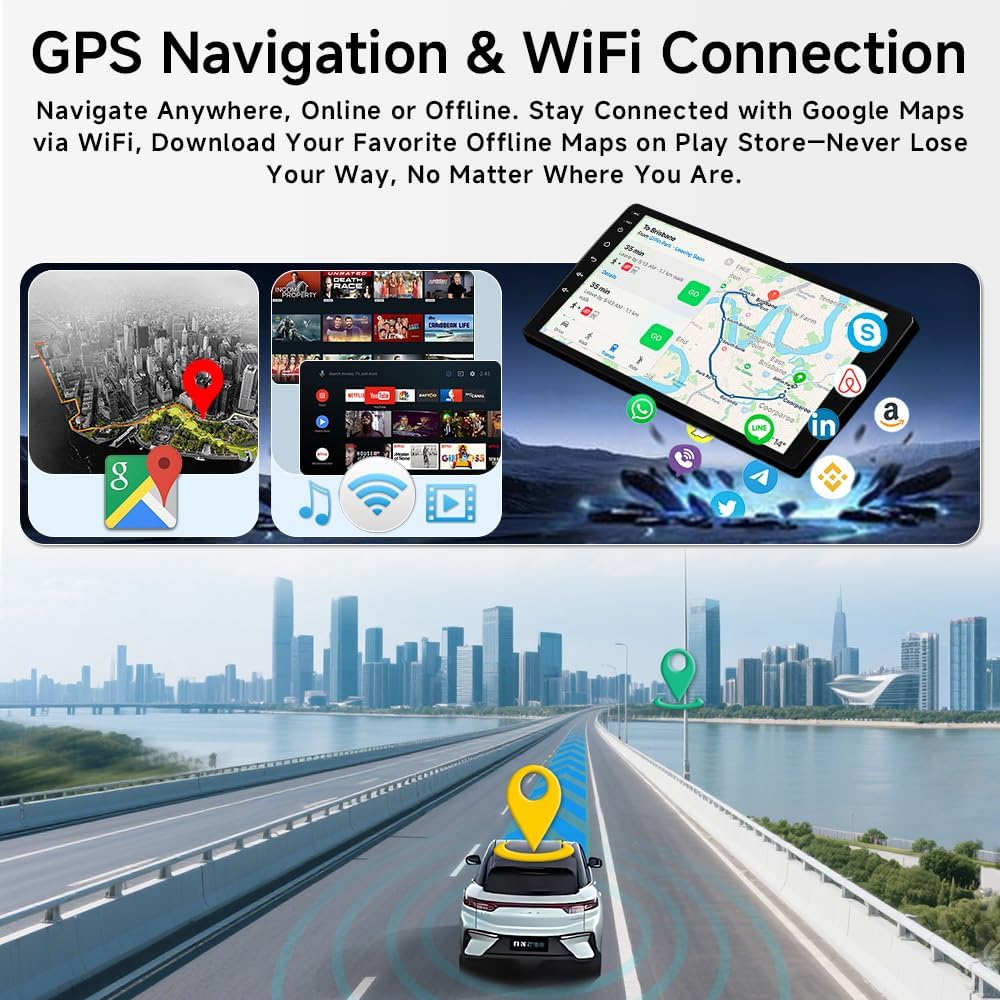
Image: Display showing GPS navigation and Wi-Fi connectivity features on the ASURE Car Stereo.
4.3. Bluetooth 5.4 & FM/RDS Radio
- Bluetooth: Pair your smartphone via Bluetooth 5.4 for hands-free calling and audio streaming. Access your phone's dialer and contacts directly from the stereo.
- FM/RDS Radio: Tune into your favorite FM stations. RDS (Radio Data System) provides additional information like station name and song title where available.

Image: Screenshots demonstrating Bluetooth pairing and FM/RDS radio interfaces on the ASURE Car Stereo.
4.4. AHD Reversing Camera
The included AHD reversing camera provides clear rear visibility:
- Features night vision for low-light conditions.
- Offers a 170° wide-angle view to minimize blind spots.
- Waterproof design ensures durability.
- Includes F1.4 aperture for enhanced image quality and distance level warnings.

Image: Visual representation of the AHD reversing camera's features, including night vision, wide-angle, and waterproof design.
Video: Installation guide for the backup camera, demonstrating wiring and mounting.
4.5. Steering Wheel Control Programming
Program your original steering wheel control buttons for convenient operation:
- Go to CarSetting on the stereo.
- Select Factory Setting.
- Enter the password: 1617.
- Navigate to CAN Type Set.
- Select Raise-Nissan.
- Choose ALTIMA-2012-Now (Overseas)-12-Portrait (Single-Drive AC).
- Follow on-screen prompts to program and customize buttons.
- If SWC cables require manual wiring or do not work, contact customer support.
4.6. Screen Brightness Adjustment
Adjust the screen brightness for optimal viewing, especially at night:
- Go to Settings on the car stereo.
- Select Factory.
- Enter the password: 3368.
- Navigate to Backlight current adjustment.
- Lower the "Minimum" value by sliding down from the top of the screen.
- Click "save" and "confirm" icons to apply changes.
Video: Guide on adjusting screen brightness and calibrating the touchscreen.
4.7. Touch Screen Calibration
If the touchscreen responsiveness is not optimal, it can be recalibrated:
- Go to Settings on the car stereo.
- Select Factory.
- Enter the password: 3368.
- Navigate to Touch Screen Calibration.
- Follow the on-screen instructions to recalibrate the touch points.
5. Maintenance
- Screen Cleaning: Use a soft, lint-free cloth to clean the touchscreen. Avoid abrasive cleaners or solvents.
- Software Updates: Periodically check for software updates to ensure optimal performance and access to new features.
- General Care: Avoid exposing the unit to extreme temperatures or direct sunlight for prolonged periods.
6. Troubleshooting
| Issue | Possible Cause | Solution |
|---|---|---|
| Wireless CarPlay/Android Auto disconnects frequently. | Weak Bluetooth signal, interference, or software glitch. | Ensure strong Bluetooth connection. Try restarting both phone and stereo. Check for software updates. Consider wired connection if persistent. |
| Poor sound quality (e.g., weak bass, unclear calls). | Incorrect audio settings, wiring issues, or microphone placement. | Adjust equalizer settings. Verify all audio connections are secure. Ensure microphone is not obstructed for calls. |
| GPS not working or inaccurate. | GPS antenna not properly installed or obstructed. | Ensure GPS antenna is securely connected and placed in a location with a clear view of the sky. |
| Slow boot-up time. | Normal for Android systems, or excessive background apps. | Allow time for the system to boot. Close unnecessary background applications. |
| LED buttons stopped working. | Wiring issue or internal fault. | Check connections to the LED buttons. If issue persists, contact customer support. |
| Steering Wheel Controls not working. | Incorrect CAN-BUS setup or wiring. | Verify CAN-BUS settings (refer to section 3.9). Check SWC wiring connections. |
7. Specifications
| Feature | Detail |
|---|---|
| Brand | ASURE |
| Model Name | Altima V L33 |
| Screen Size | 9 Inches |
| Display Type | LCD, Capacitive Touchscreen |
| Resolution | 1280x800 HD |
| Operating System | Android 15 |
| Processor | 4-Core CPU |
| Memory (RAM) | 4GB |
| Storage (ROM) | 64GB |
| Connectivity | Bluetooth 5.4, Wi-Fi 6.0 (2.4GHz/5GHz), USB |
| Navigation System | GLONASS, GPS (Worldwide Map Type) |
| Audio Output Mode | Stereo |
| Mounting Type | Dashboard Mount |
| Item Dimensions L x W x H | 8.9"L x 5.1"W x 1.6"H |
| Item Weight | 1.61 Kilograms |
8. Warranty & Support
Your ASURE car stereo comes with the following warranty and support:
- 30 Days: Free return and replacement.
- 1 Year: Repair service.
For any technical assistance or warranty claims, please contact ASURE customer support.
Related documents4Core 4GB+64GB


Ask a question about this manual
Ask about setup, troubleshooting, compatibility, parts, safety, or missing instructions. Manuals+ will review the question and use this page’s manual context to help answer it.