1. Introduction
Thank you for choosing the DreamSky DS2208 Wooden Digital Alarm Clock. This manual provides detailed instructions for setting up and operating your new alarm clock. Please read it thoroughly to ensure proper use and to maximize the features of your device. Keep this manual for future reference.

Image 1.1: Front view of the DreamSky DS2208 Wooden Digital Alarm Clock.
2. Safety Information
- Ensure the power adapter is connected to a suitable power outlet.
- Do not expose the clock to water or excessive moisture.
- Avoid placing the clock in direct sunlight or near heat sources.
- Use only the provided power adapter.
- Keep out of reach of children.
3. Package Contents
Please check the package for the following items:
- DreamSky DS2208 Wooden Digital Alarm Clock
- 5V/1.2A Power Adapter
- User Manual
Note: AAA batteries for alarm backup are not included.

Image 3.1: Included items and product dimensions.
4. Product Overview
The DreamSky DS2208 features a clear digital display and intuitive controls for ease of use.
4.1 Display Elements
- Large LED Numbers: Displays time, 1.8 inches tall for high visibility.
- AM/PM Indicator: For 12-hour format.
- Alarm Icon: Indicates when the alarm is active.
- DST Indicator: Shows when Daylight Saving Time is enabled.
4.2 Controls and Ports
- SNOOZE Button: Located on top, used for snooze and display brightness adjustment.
- Time Set Button: Typically on the back, for setting time.
- Alarm Set Button: Typically on the back, for setting alarm.
- Volume Control: For adjusting alarm volume.
- DST ON/OFF Button: For enabling/disabling Daylight Saving Time.
- 12/24HR Button: For switching between 12-hour and 24-hour time formats.
- DC IN Port: For connecting the power adapter.
- USB Charging Port: For charging external devices.
- Battery Compartment: For AAA backup batteries (not supplied).
5. Setup
5.1 Power Connection
- Insert 2 AAA batteries (not included) into the battery compartment for alarm backup during power outages. These batteries do not power the main display.
- Connect the provided 5V/1.2A power adapter to the DC IN port on the back of the clock.
- Plug the power adapter into a standard electrical outlet. The display will illuminate.
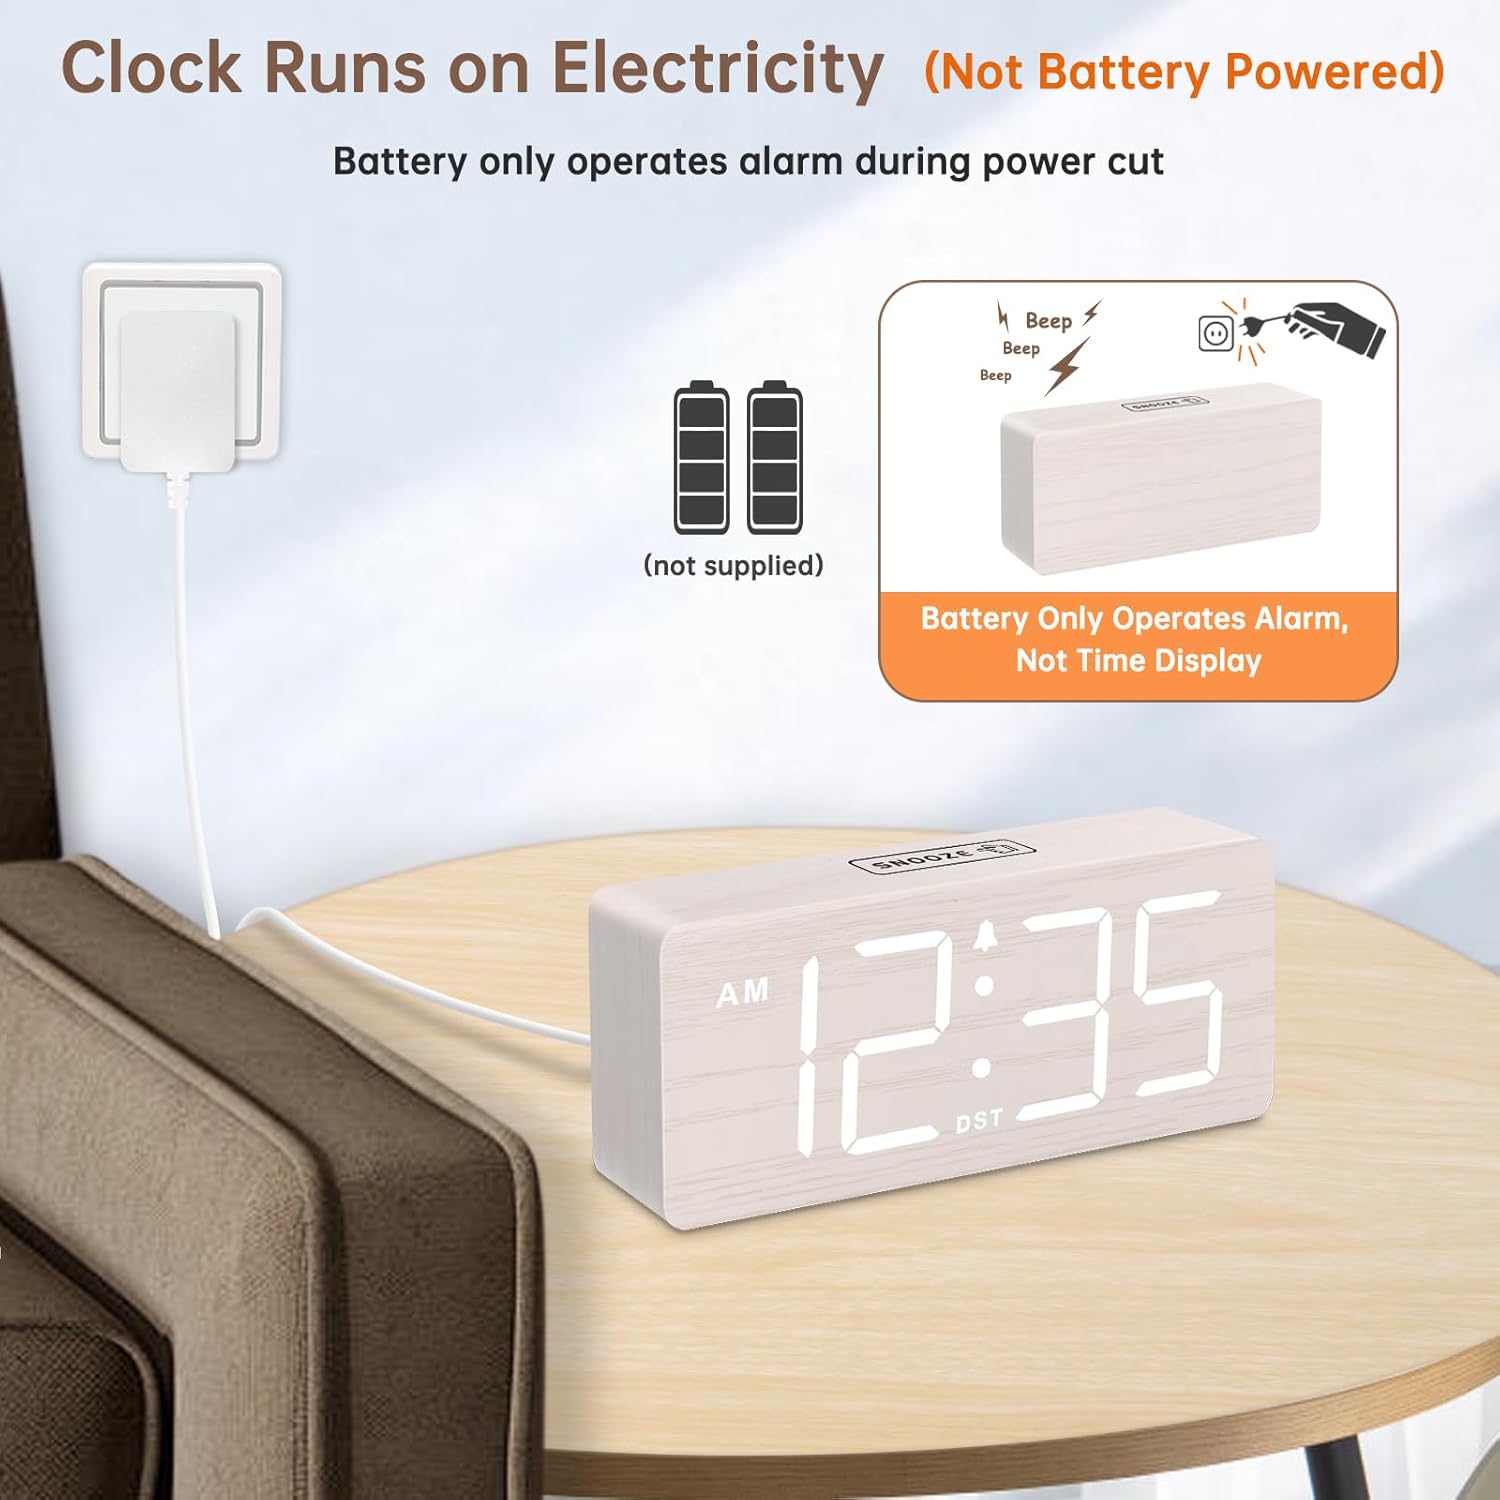
Image 5.1: Powering the clock via the included adapter. Batteries provide alarm backup only.
6. Operating Instructions
6.1 Setting the Time
- Press and hold the Time Set button (location typically on the back). The hour digits will flash.
- Use the +/- buttons (or similar, refer to specific button labels on your unit) to adjust the hour.
- Press Time Set again to confirm the hour and move to minute adjustment. The minute digits will flash.
- Use the +/- buttons to adjust the minutes.
- Press Time Set once more to save the time and exit time setting mode.
6.2 12/24 Hour Format
To switch between 12-hour (AM/PM) and 24-hour (military) time formats, press the 12/24HR button (typically on the back).

Image 6.1: Adjusting DST and 12/24-hour time format.
6.3 Setting the Alarm
- Press and hold the Alarm Set button. The alarm hour digits will flash.
- Use the +/- buttons to adjust the alarm hour.
- Press Alarm Set again to confirm the alarm hour and move to minute adjustment. The alarm minute digits will flash.
- Use the +/- buttons to adjust the alarm minutes.
- Press Alarm Set once more to save the alarm time. The alarm icon will appear on the display, indicating the alarm is active.
- To turn the alarm off, press the Alarm Set button briefly until the alarm icon disappears.
6.4 Adjusting Alarm Volume
The alarm volume can be adjusted to 5 levels (V1 to V5), ranging from 70dB to 105dB. While the alarm is sounding, press the Volume Control button (or a designated +/- button) to cycle through the volume levels.

Image 6.2: Adjustable alarm volume and snooze feature.
6.5 Snooze Function
When the alarm sounds, press the SNOOZE button on top of the clock. The alarm will pause for 9 minutes and then sound again. To cancel the snooze and turn off the alarm completely, press any other button (e.g., Alarm Set button).
6.6 Adjusting Display Brightness
The clock features 6 dimmable brightness levels (OFF, L1-L5). To adjust the brightness, press the SNOOZE button (or a dedicated dimmer button) repeatedly to cycle through the levels. Level OFF turns the display off completely.
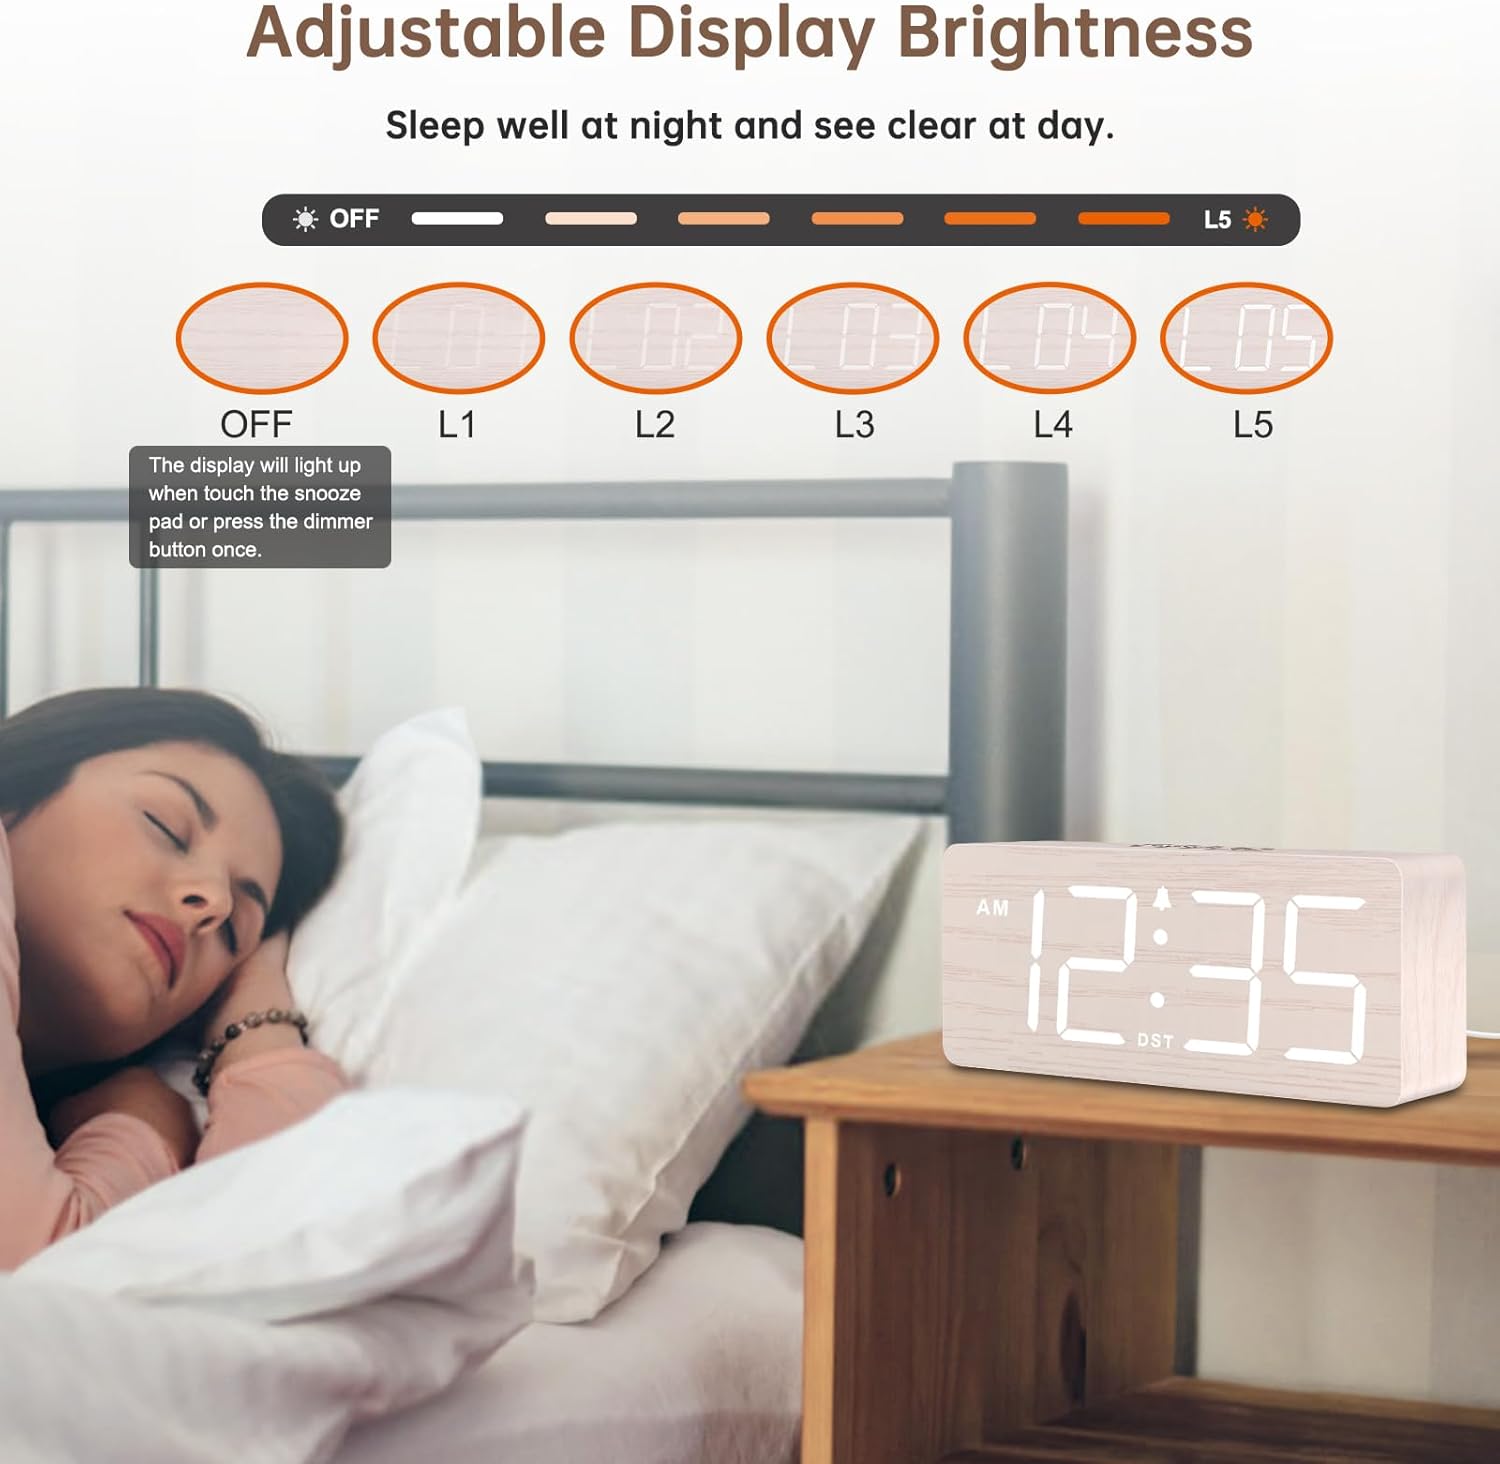
Image 6.3: Adjustable display brightness levels.
6.7 Daylight Saving Time (DST)
To enable or disable Daylight Saving Time, press the DST ON/OFF button (typically on the back). The time will adjust by one hour forward or backward, and the DST indicator will appear/disappear.
6.8 USB Charging Port
The clock includes an extra USB charging port on the back. You can use this port to charge your mobile devices (e.g., smartphone, tablet) while the clock is plugged into power.

Image 6.4: Using the extra USB charging port.
7. Maintenance
- Clean the clock with a soft, dry cloth. Do not use abrasive cleaners or solvents.
- If not in use for an extended period, unplug the clock and remove the backup batteries.
8. Troubleshooting
| Problem | Possible Cause | Solution |
|---|---|---|
| Display is off / Clock not working | Not plugged in; Power outage; Display brightness set to OFF. | Ensure power adapter is securely plugged in. Check power outlet. Press SNOOZE button to adjust brightness. |
| Alarm does not sound | Alarm not set; Alarm volume too low; Alarm turned off. | Verify alarm time is set and alarm icon is displayed. Adjust alarm volume. Ensure alarm is not deactivated. |
| Time is incorrect | Time not set correctly; DST enabled/disabled incorrectly. | Reset the time following section 6.1. Check DST setting. |
| USB charging not working | Clock not powered; Device cable faulty. | Ensure clock is plugged into a wall outlet. Try a different USB cable or device. |
9. Specifications
- Brand: DreamSky
- Model: DS2208
- Display Type: Digital LED
- Power Source: Corded Electric (5V/1.2A adapter)
- Battery Backup: 2 x AAA batteries (not included, for alarm only)
- Product Dimensions: 6.1"W x 2.8"H x 1.6"D
- Item Weight: 9.9 ounces (0.28 kg)
- Special Features: Large numbers, 6-level dimmer, 5-level adjustable alarm volume, Snooze, DST, 12/24-hour format, USB charging port.
- Material: Wood (finish)
10. Warranty and Support
This DreamSky product comes with a 1-year replacement warranty from the date of purchase.
For technical support, warranty claims, or any questions regarding your DreamSky DS2208 alarm clock, please contact DreamSky customer service through the retailer's platform or visit the official DreamSky website for contact information.
Please retain your purchase receipt as proof of purchase for warranty purposes.


