
Memphis SRXE12SA
Memphis SRXE12SA 12-inch Powered Subwoofer Instruction Manual
Model: SRXE12SA
Introduction
The Memphis SRXE12SA is an all-in-one bass system designed to integrate powerful bass into any vehicle audio setup. This unit features a single 12-inch subwoofer housed in a vented enclosure, powered by an integrated 300-watt amplifier. It includes customizable RGB LED lighting and a convenient bass knob for user control. This manual provides essential information for the proper installation, operation, and maintenance of your SRXE12SA subwoofer system.
Product Overview
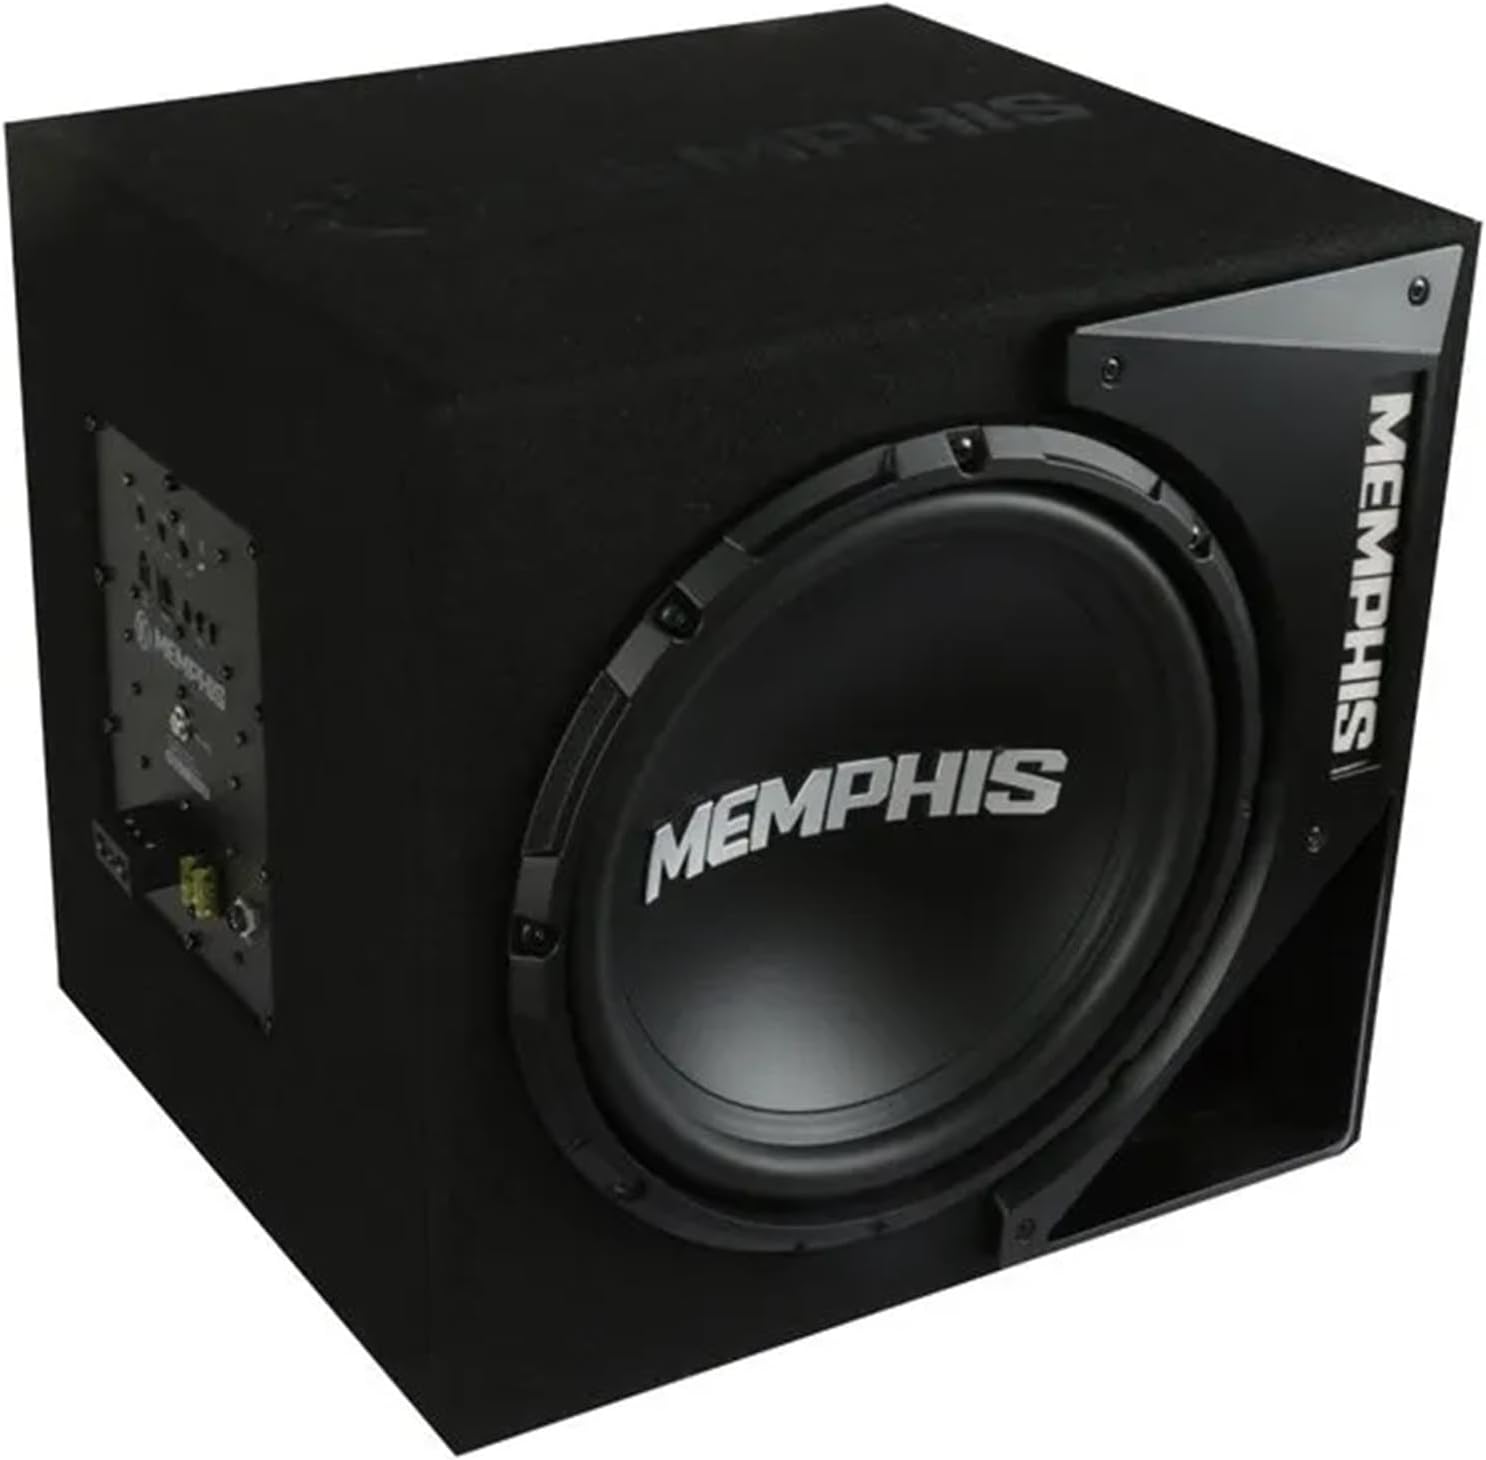
Figure 1: Front and side view of the Memphis SRXE12SA 12-inch powered subwoofer enclosure, highlighting the woofer and vented port.
What's in the Box
- Memphis SRXE12SA Powered 12-inch Subwoofer Enclosure
- Remote Bass Knob
- Wiring Harnesses (Power, Ground, Remote, High-Level Input)
- Mounting Hardware
- User Manual (this document)
Setup and Installation
Proper installation is crucial for optimal performance and safety. If you are unsure about any steps, consult a professional car audio installer.
1. Mounting Location
Select a secure and stable location in your vehicle, typically the trunk or cargo area. Ensure the enclosure is firmly mounted to prevent movement during driving. Allow adequate space for ventilation around the amplifier panel.
2. Power Connections
Connect the power wiring as follows:
- Power (B+): Connect to the positive terminal of your vehicle's battery using an appropriate gauge wire and an inline fuse (not included, recommended 30A).
- Ground (GND): Connect to a clean, unpainted metal surface of the vehicle chassis. Ensure a solid, low-resistance connection.
- Remote (REM): Connect to the remote turn-on output of your head unit. Alternatively, the unit supports DC sensing for automatic turn-on if a remote wire is not available.
3. Audio Input
The SRXE12SA supports both RCA (low-level) and high-level inputs:
- RCA Input: Connect RCA cables from your head unit's subwoofer or pre-amp output to the RCA inputs on the SRXE12SA amplifier panel.
- High-Level Input: If your head unit does not have RCA outputs, use the supplied high-level input harness. Connect the speaker wires from your head unit's speaker outputs to the corresponding wires on the harness.
4. Remote Bass Knob
Connect the included remote bass knob to the designated port on the amplifier panel. Mount the knob in an easily accessible location for convenient bass level adjustment.
5. RGB LED Illumination
The SRXE12SA features a built-in switch to select from 7 preset color options. For unlimited color possibilities and advanced control, you can pair the unit with an optional Memphis MXRRGBBTC LED controller (sold separately).

Figure 2: Rear amplifier control panel with power, input, and control connections.
Operating Instructions
1. Initial Power On
Once all connections are secure, turn on your vehicle's ignition and head unit. The subwoofer should power on, indicated by the LED on the amplifier panel.
2. Adjusting Settings
The SRXE12SA features several adjustable controls on its amplifier panel to fine-tune the bass output to your preference and vehicle acoustics:
- Variable LP 12dB Filter (Low Pass Filter): Adjust this knob (50Hz-200Hz) to control the upper frequency limit of the subwoofer. Set it to blend smoothly with your main speakers, typically around 80-100Hz.
- Variable Bass Boost: Use this control (0-12dB) to enhance the bass output at a specific frequency. Adjust carefully to avoid distortion.
- Phase Switch (0-180 degrees): This switch helps to align the subwoofer's output with your main speakers. Experiment with both settings to find the one that provides the most impactful and coherent bass.
- Gain Control: Adjust this to match the output level of your head unit. Start with the gain at minimum and slowly increase it until the bass blends well without distortion.
3. Using the Remote Bass Knob
The remote bass knob provides convenient, real-time adjustment of the subwoofer's output level from your driving position. This allows you to quickly increase or decrease bass intensity as needed for different music genres or listening preferences.
4. RGB LED Color Selection
Utilize the built-in switch on the enclosure to cycle through the 7 available preset RGB LED colors. If you have an optional MXRRGBBTC controller, refer to its manual for advanced color customization and effects.
Maintenance
- Cleaning: Periodically wipe the enclosure with a soft, dry cloth. Avoid using harsh chemicals or abrasive cleaners.
- Connections: Regularly check all power, ground, and signal connections to ensure they are secure and free from corrosion.
- Ventilation: Ensure that the amplifier panel and enclosure vents are not obstructed to prevent overheating.
- Environment: Protect the subwoofer from extreme temperatures, direct sunlight, and moisture.
Troubleshooting
| Problem | Possible Cause | Solution |
|---|---|---|
| No Sound from Subwoofer |
|
|
| Distorted Sound |
|
|
| Subwoofer Not Turning On |
|
|
Specifications
| Model | SRXE12SA |
| Woofer Size | 12 Inches |
| Amplifier Power (RMS) | 300 Watts |
| Speaker Maximum Output Power | 600 Watts |
| Enclosure Type | Vented (Ported) |
| Dimensions (L x H x D) | 16.75" x 15.75" x 15" (Depth at bottom: 15") |
| Item Weight | 41.9 Pounds |
| LP Filter | Variable 12dB (50Hz-200Hz) |
| Bass Boost | Variable (0-12dB) |
| Phase Switch | 0-180 degrees |
| Inputs | RCA, High-Level |
| Turn-On Options | DC Sensing, Remote (REM) |
| RGB LED Illumination | 7 preset colors (expandable with optional MXRRGBBTC) |
Warranty and Support
The Memphis SRXE12SA Powered Subwoofer is covered by a 1-Year Manufacturer Warranty from the date of purchase. This warranty covers defects in materials and workmanship under normal use.
For warranty claims, technical assistance, or product support, please contact Memphis Audio customer service. Keep your proof of purchase for warranty validation.
Contact Information: Refer to the official Memphis Audio website or your product packaging for the most current contact details.
Related documentsSRXE12SA


Ask a question about this manual
Ask about setup, troubleshooting, compatibility, parts, safety, or missing instructions. Manuals+ will review the question and use this page’s manual context to help answer it.