Introduction
This manual provides essential instructions for the safe and efficient operation of your Dreamtrue Aquarium Chiller 79 Gal. This 1/3 HP water chiller is designed to maintain optimal water temperatures for various aquatic environments, including freshwater and saltwater aquariums, as well as hydroponic systems. It features an energy-efficient compressor, a user-friendly LED display, and quiet operation to ensure a stable and healthy environment for your aquatic life.

Figure 1: Dreamtrue Aquarium Chiller 79 Gal in an aquarium setting, displaying its digital interface.
Package Contents
Before beginning installation, please verify that all components are present and undamaged.
- Dreamtrue Aquarium Chiller Unit
- Water Pump
- Hose (3 meters)
- Connectors (2 pieces)
- Hose Clamps (2 pieces)
- Power Cable
- Remote Control
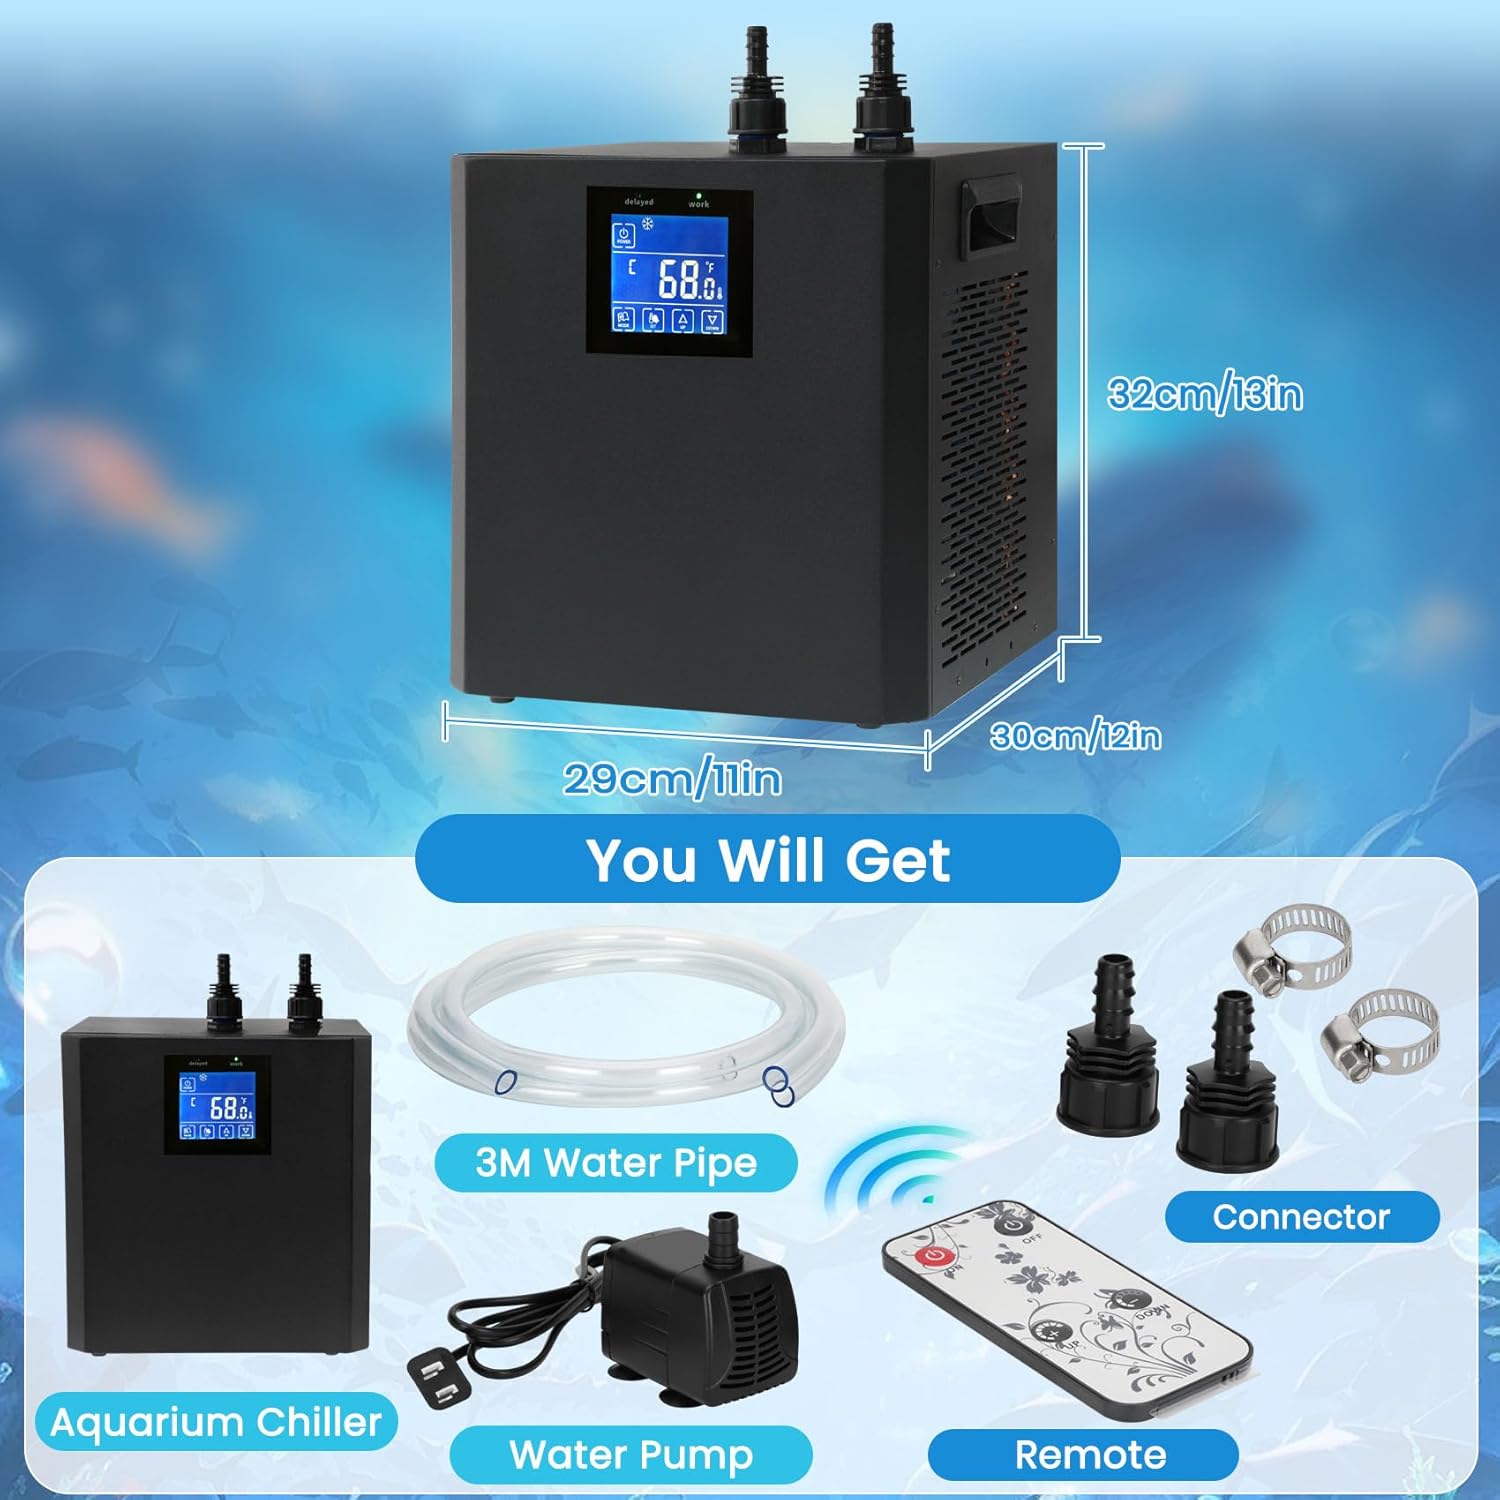
Figure 2: Included components: chiller, water pump, hose, connectors, and remote control.
Setup Instructions
- Placement: Position the chiller on a stable, level surface. Ensure adequate ventilation around the unit. Avoid enclosed spaces to prevent overheating. Maintain a distance from walls to allow proper airflow through the heat dissipation vents.
- Hose Connection: Connect one end of the provided hose to the outlet of the water pump and the other end to the chiller's water inlet. Connect a second hose from the chiller's water outlet back into your aquarium or hydroponic system. Use the provided hose clamps to secure all connections to prevent leaks. Note: The chiller's inlet and outlet ports are typically marked, but if not, refer to product images for guidance.
- Initial Rinse (Important): Before connecting to your main aquatic system, run the chiller with clean water (not from your main tank) for approximately one hour. This helps to flush out any manufacturing residues from the tubes and internal components. Dispose of this water safely.
- Power Connection: Plug the chiller's power cable into a dedicated electrical outlet. Ensure the outlet meets the power requirements specified on the chiller's label.

Figure 3: Example setup showing the chiller connected to an aquarium with a water pump.
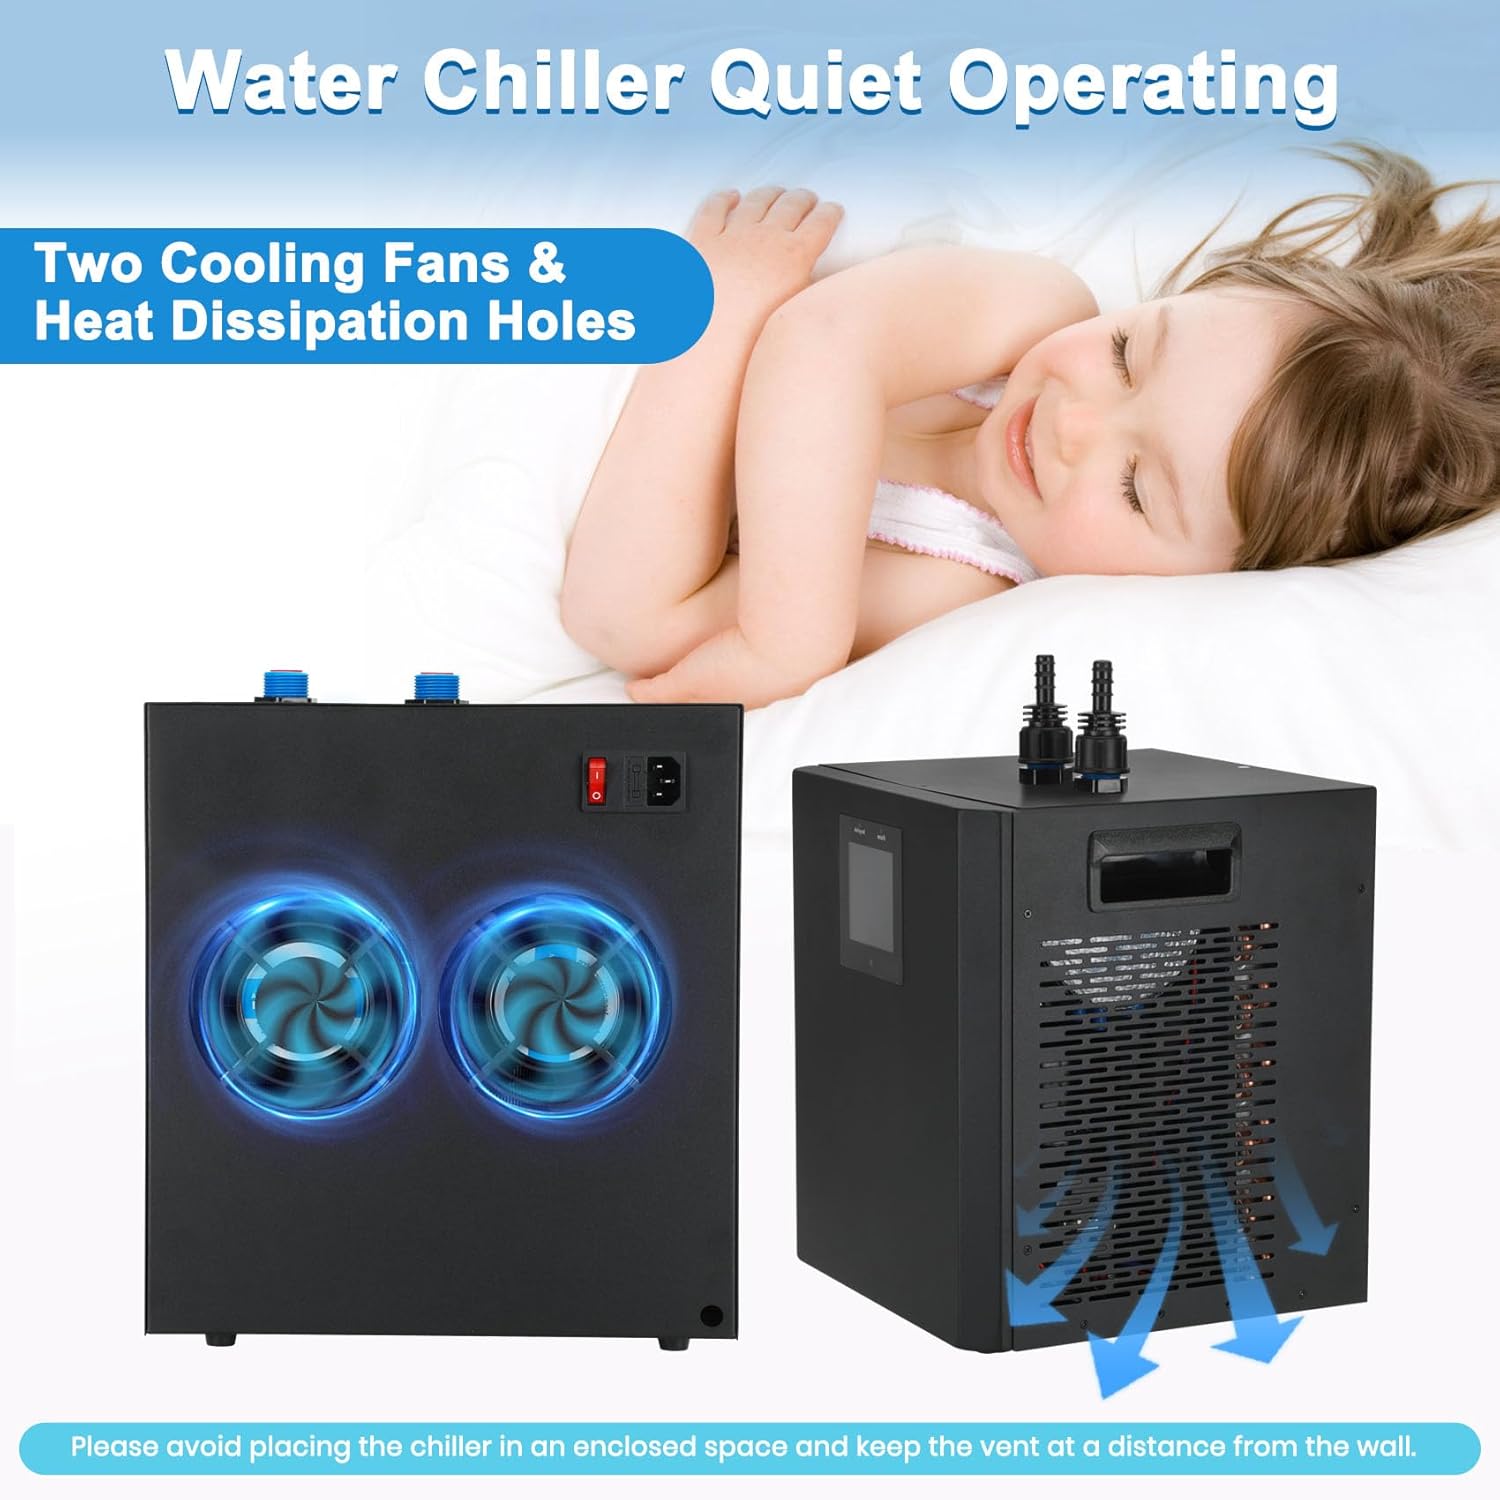
Figure 4: Proper placement requires adequate space for the cooling fans and heat dissipation vents.
Operating Instructions
The chiller features an upgraded LED display for easy temperature monitoring and adjustment.
- Power On/Off: Press the POWER button on the control panel to turn the unit on or off. The "Working Light" will illuminate when the chiller is active.
- Adjusting Temperature:
- Press the SET button. The temperature display will flash.
- Use the UP and DOWN buttons to set your desired water temperature.
- Press SET again to confirm the setting.
- Adjusting Mode (Advanced):
- Press and hold the MODE button until the P1 mode appears.
- Use the UP and DOWN buttons to adjust the hysteresis temperature (temperature differential). A common setting is 5°F.
- Refer to the full manual (if available) for detailed explanations of other advanced modes.
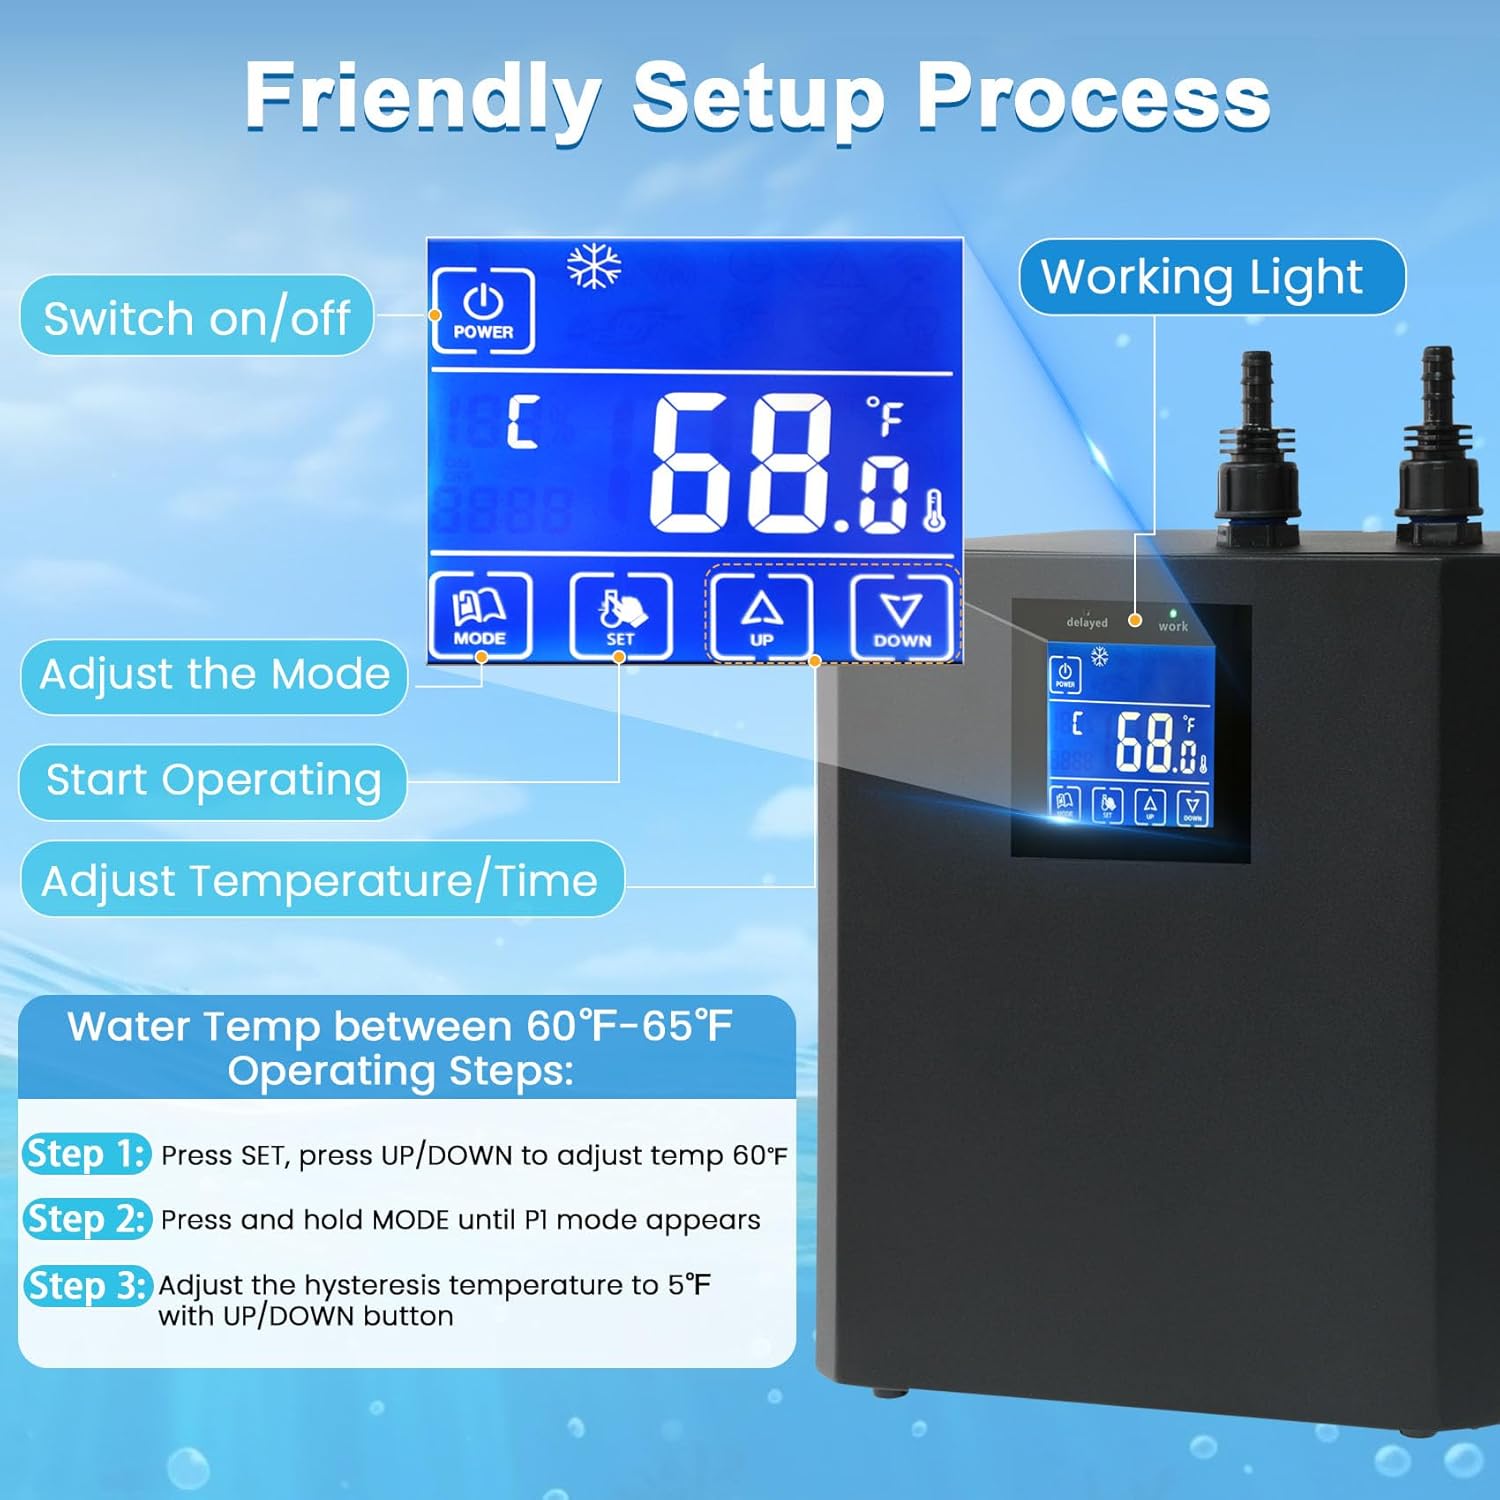
Figure 5: LED display and control panel for temperature and mode adjustments.
Maintenance
Regular maintenance ensures the longevity and efficient operation of your chiller.
- Clean Cooling Fins: Periodically inspect and clean the cooling fins and vents on the sides and back of the unit. Dust and debris can accumulate, reducing cooling efficiency. Use a soft brush or vacuum cleaner to remove buildup.
- Check Hoses and Connections: Regularly inspect all hoses and connections for signs of wear, kinks, or leaks. Replace damaged hoses immediately. Ensure hose clamps are secure.
- Water Pump Maintenance: Clean the water pump regularly according to its own instruction manual. Blockages in the pump can reduce water flow and chiller performance.
- Water Quality: Maintain good water quality in your aquarium or hydroponic system to prevent mineral buildup inside the chiller's internal components.
- Storage: If storing the chiller for an extended period, drain all water from the unit and hoses. Clean and dry all components thoroughly before storage in a cool, dry place.
Troubleshooting
This section addresses common issues you might encounter with your chiller.
| Problem | Possible Cause | Solution |
|---|---|---|
| Chiller not turning on | No power, loose connection, power button not pressed. | Check power cable, ensure it's plugged into a working outlet. Press the POWER button firmly. |
| Unit runs but water is not cooling | Insufficient water flow, clogged cooling fins, incorrect temperature setting, ambient temperature too high. | Check water pump for blockages. Clean cooling fins. Verify desired temperature setting. Ensure chiller is not in an enclosed space. |
| Water leaks from connections | Loose hose clamps, damaged hose, improper connection. | Tighten hose clamps. Inspect hoses for damage and replace if necessary. Ensure hoses are fully seated on connectors. |
| Unusual noise during operation | Vibrations, internal component issue, fan obstruction. | Ensure the unit is on a stable surface. Check for any obstructions near the fans. If noise persists, contact support. |
| Inaccurate temperature reading on display | Sensor malfunction, external interference. | Compare with an external thermometer. If consistently inaccurate, contact support. |
If you encounter issues not listed here or if the suggested solutions do not resolve the problem, please refer to the support section.
Specifications
| Feature | Detail |
|---|---|
| Brand | Dreamtrue |
| Model Number | Aquarium Chiller 79 Gal |
| Capacity | Up to 79 Gallons (approx.) |
| Horsepower | 1/3 HP |
| Cooling Capability | Reduces water temperature by 5-15°F below ambient |
| Color | Black |
| Material | Metal |
| Product Dimensions (L x W x H) | 11"L x 12"W x 13"H (approx. 29cm L x 30cm W x 32cm H) |
| Item Weight | 32.1 Pounds |
| Power Source | Corded Electric |
| Noise Level | Approximately 30-40 dB |
| Included Components | Water Chiller Machine, Hose, Water Pump, Cable, Remote Control, Manual |
Warranty and Support
For warranty information and customer support, please refer to the documentation provided at the time of purchase or contact the retailer where the product was acquired. Specific manufacturer contact details for direct support are not available in this manual.
Important Note: Some users have reported difficulties in contacting direct seller support. It is recommended to retain your proof of purchase and contact the platform or retailer for any warranty claims or technical assistance.
Video Resources
No official product videos from the seller were provided in the product data. For visual guides, please refer to the images within this manual or search for user-generated content online.


