1. Introduction
This manual provides essential information for the safe installation, operation, and maintenance of your XtremepowerUS 1.75 HP Variable Speed Swimming Pool Pump. This pump is designed for efficient water circulation in in-ground pools, offering variable speed control for optimized performance and energy savings. Please read this manual thoroughly before installation and use to ensure proper function and longevity of your equipment.

Figure 1.1: XtremepowerUS 1.75 HP Variable Speed Swimming Pool Pump.
2. Important Safety Information
WARNING: Failure to follow these instructions can result in serious injury or death. All electrical work must be performed by a qualified electrician and comply with all local and national electrical codes.
- Always disconnect power to the pump at the circuit breaker before performing any service or maintenance.
- This pump is designed for 230V electrical supply. Ensure the power source matches the pump's requirements.
- Do not operate the pump if it is damaged or has exposed electrical wiring.
- Keep children away from the pump and all electrical connections.
- Ensure proper grounding to prevent electrical shock.
- Do not run the pump dry. Ensure the pump is primed with water before starting.
- Install the pump in a well-ventilated area, protected from direct sunlight and excessive moisture.
3. Package Contents
Verify that all components are present and undamaged upon unpacking. If any parts are missing or damaged, contact customer support immediately.
- XtremepowerUS 1.75 HP Variable Speed Swimming Pool Pump Unit
- 2-inch Fittings (for inlet/outlet connections)
- 1.5-inch Adapters (for flexible installation options)
- O-rings (for sealing connections)
- Instruction Manual
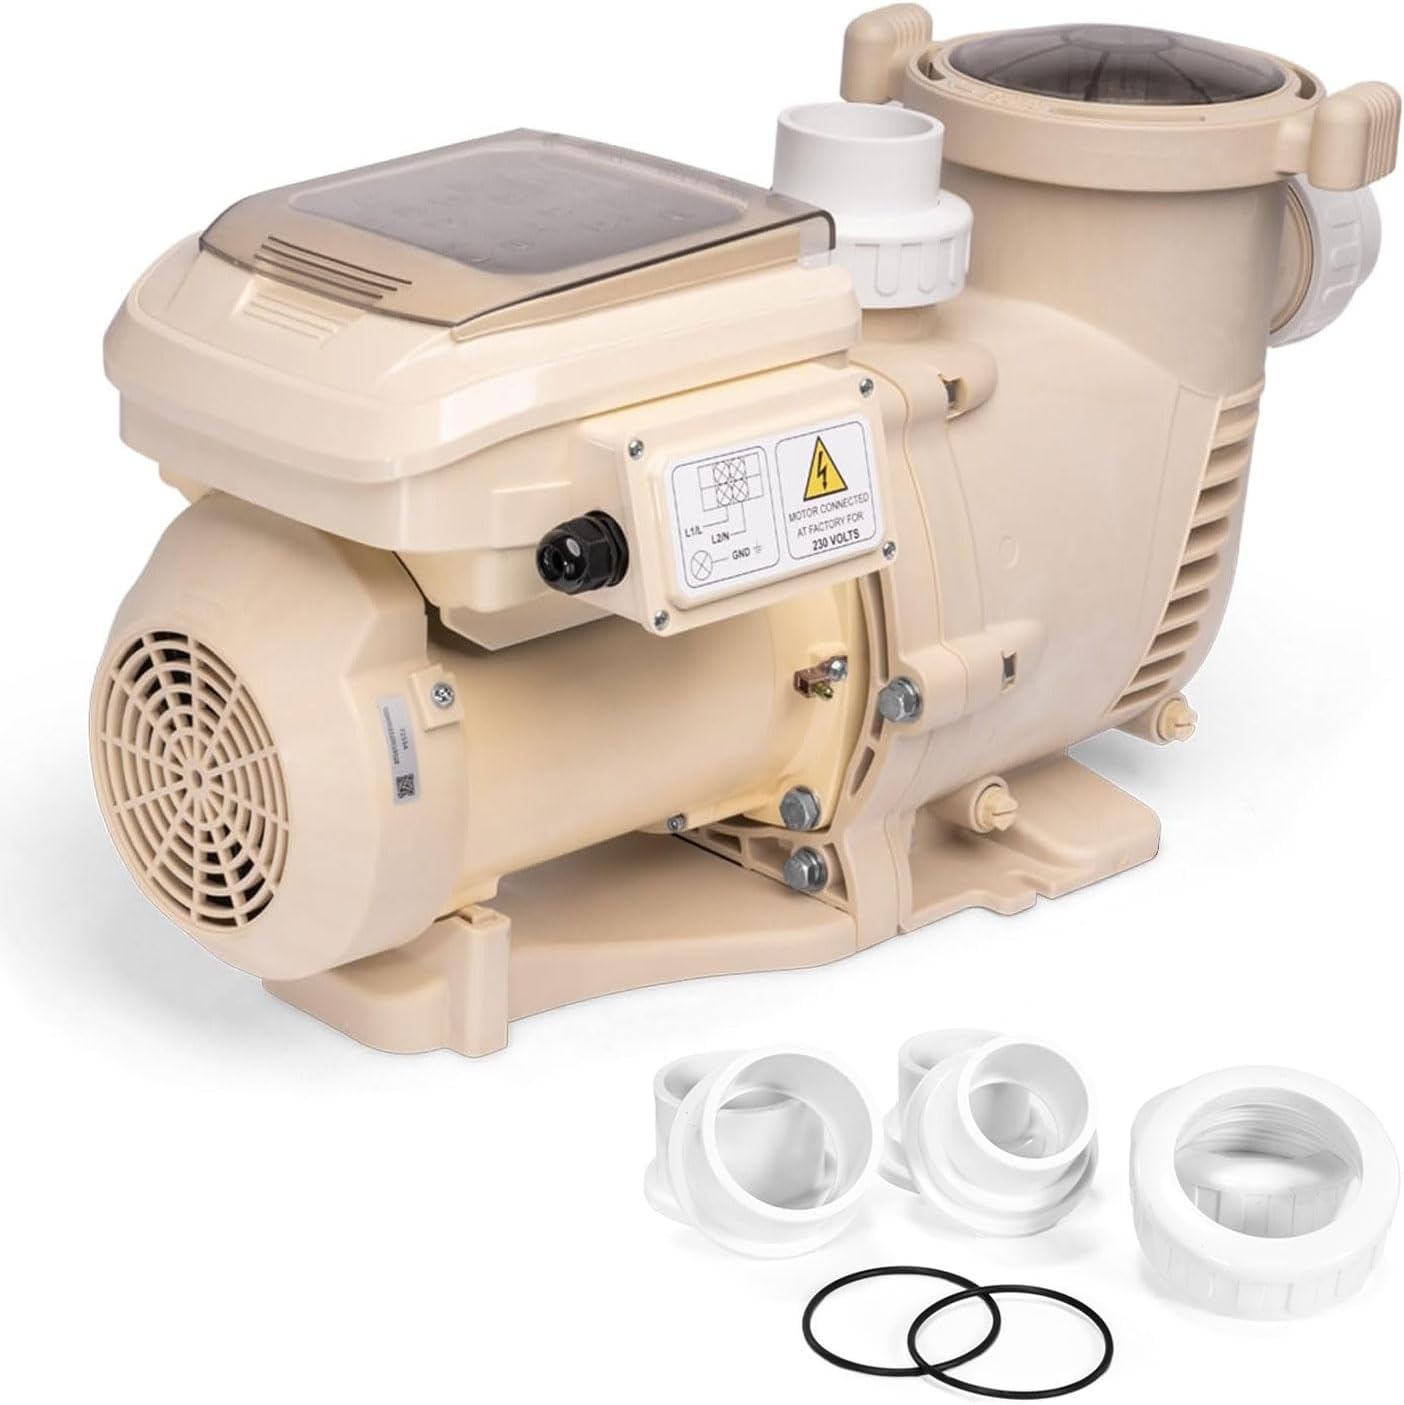
Figure 3.1: Pool pump unit with included fittings and O-rings.
4. Product Overview
The XtremepowerUS Variable Speed Pool Pump features a robust design with a commercial-grade reinforced thermoplastic body for durability. Key components include the motor, pump housing, strainer basket with a clear lid, and an integrated control panel for speed management.
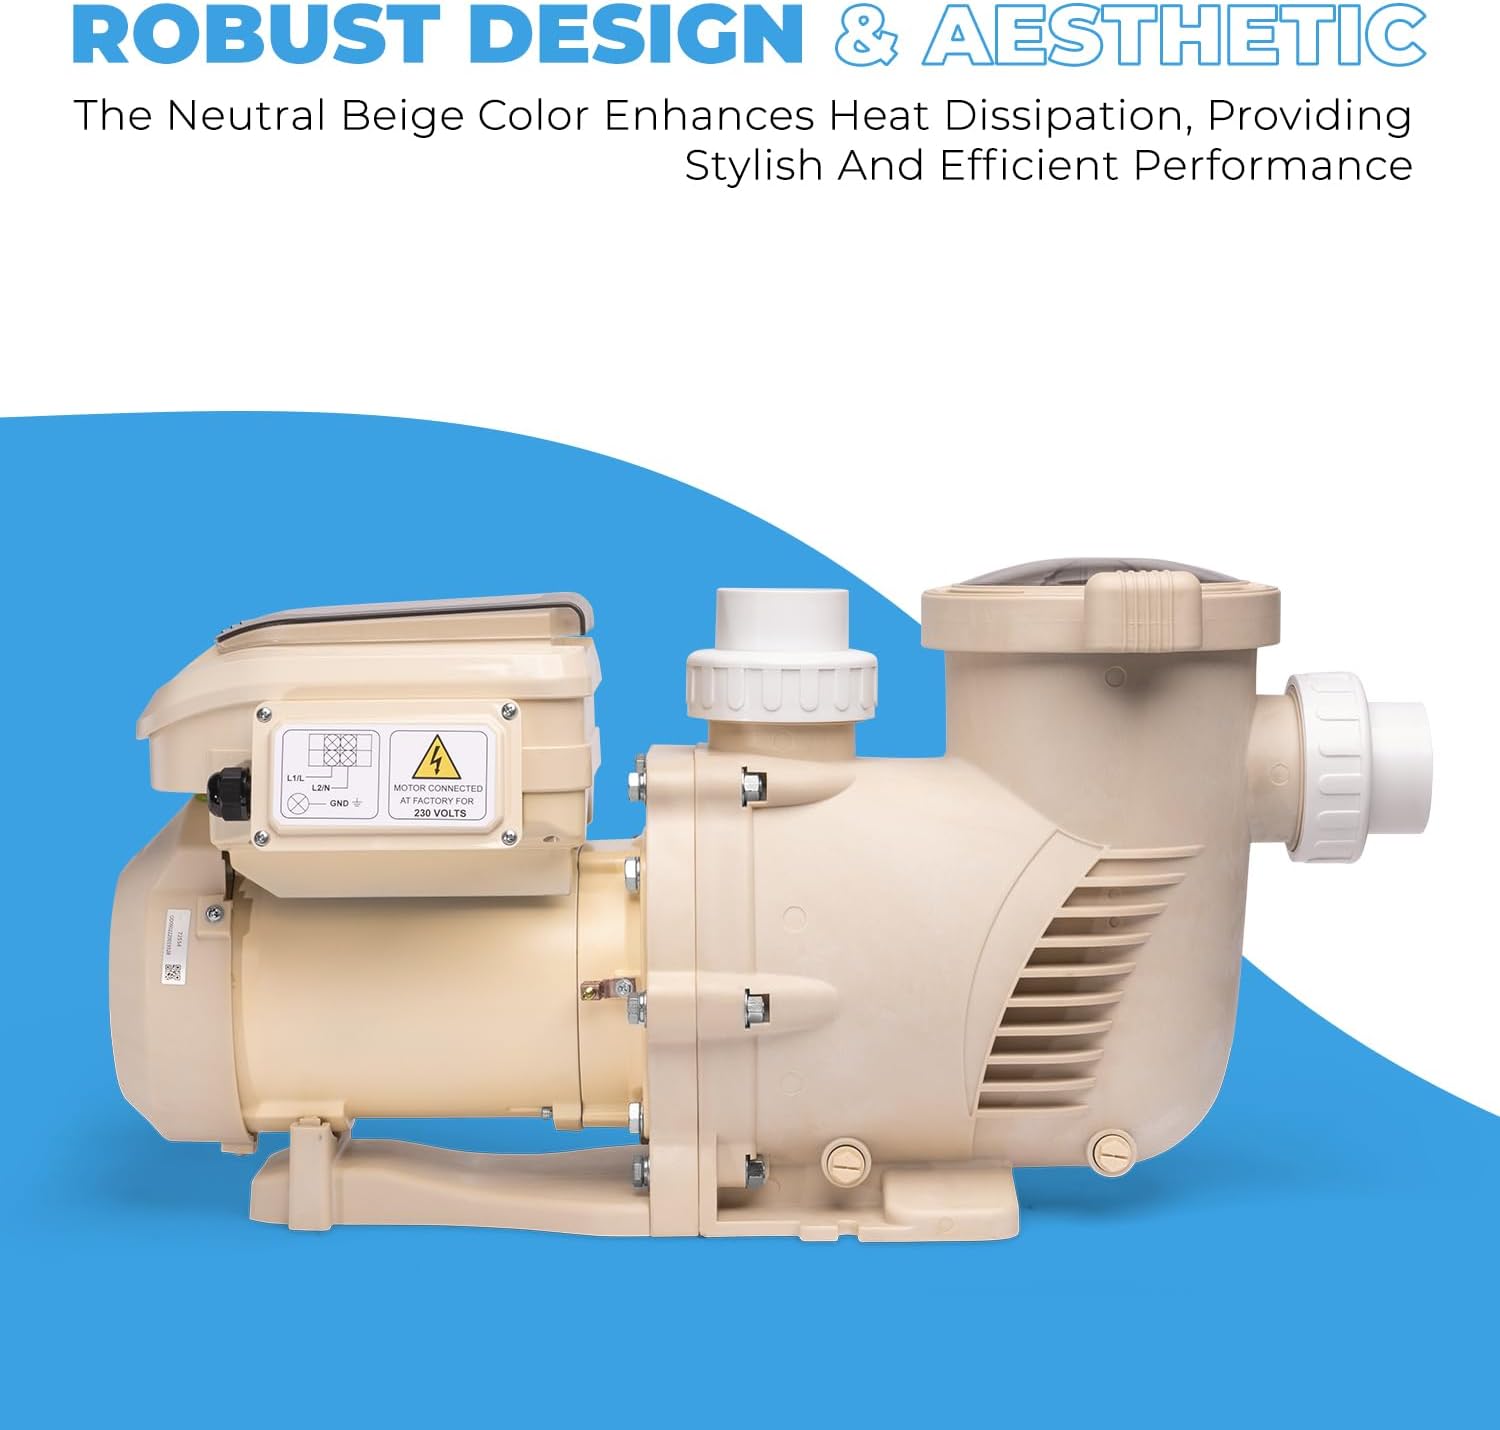
Figure 4.1: Side view of the pool pump highlighting its robust construction.
5. Setup and Installation
5.1 Site Selection
- Choose a dry, level, and well-ventilated location.
- Ensure the pump is protected from direct weather elements.
- The site should allow for easy access for maintenance and service.
- Position the pump as close to the pool as possible to minimize friction loss in plumbing.
5.2 Plumbing Connections
The pump is equipped with 2-inch inlet and outlet ports. Use the provided 1.5-inch adapters if your plumbing system requires smaller connections. Ensure all connections are sealed properly with thread sealant to prevent leaks.
Figure 5.1: Flexible installation options with 2-inch fittings and 1.5-inch adapters.
5.3 Electrical Wiring
CAUTION: Electrical wiring must be performed by a licensed electrician in accordance with all local and national codes. The pump requires a 230V, 60Hz power supply. Ensure the circuit is protected by a Ground Fault Circuit Interrupter (GFCI).
- Turn off power at the main circuit breaker before beginning any wiring.
- Connect the power supply wires to the pump's terminal block as indicated on the wiring diagram located on the pump or in the electrical compartment.
- Ensure all connections are tight and secure.
- Close the electrical compartment cover securely.
6. Operating Instructions
The XtremepowerUS Variable Speed Pool Pump features an intuitive control panel for easy programming and operation.
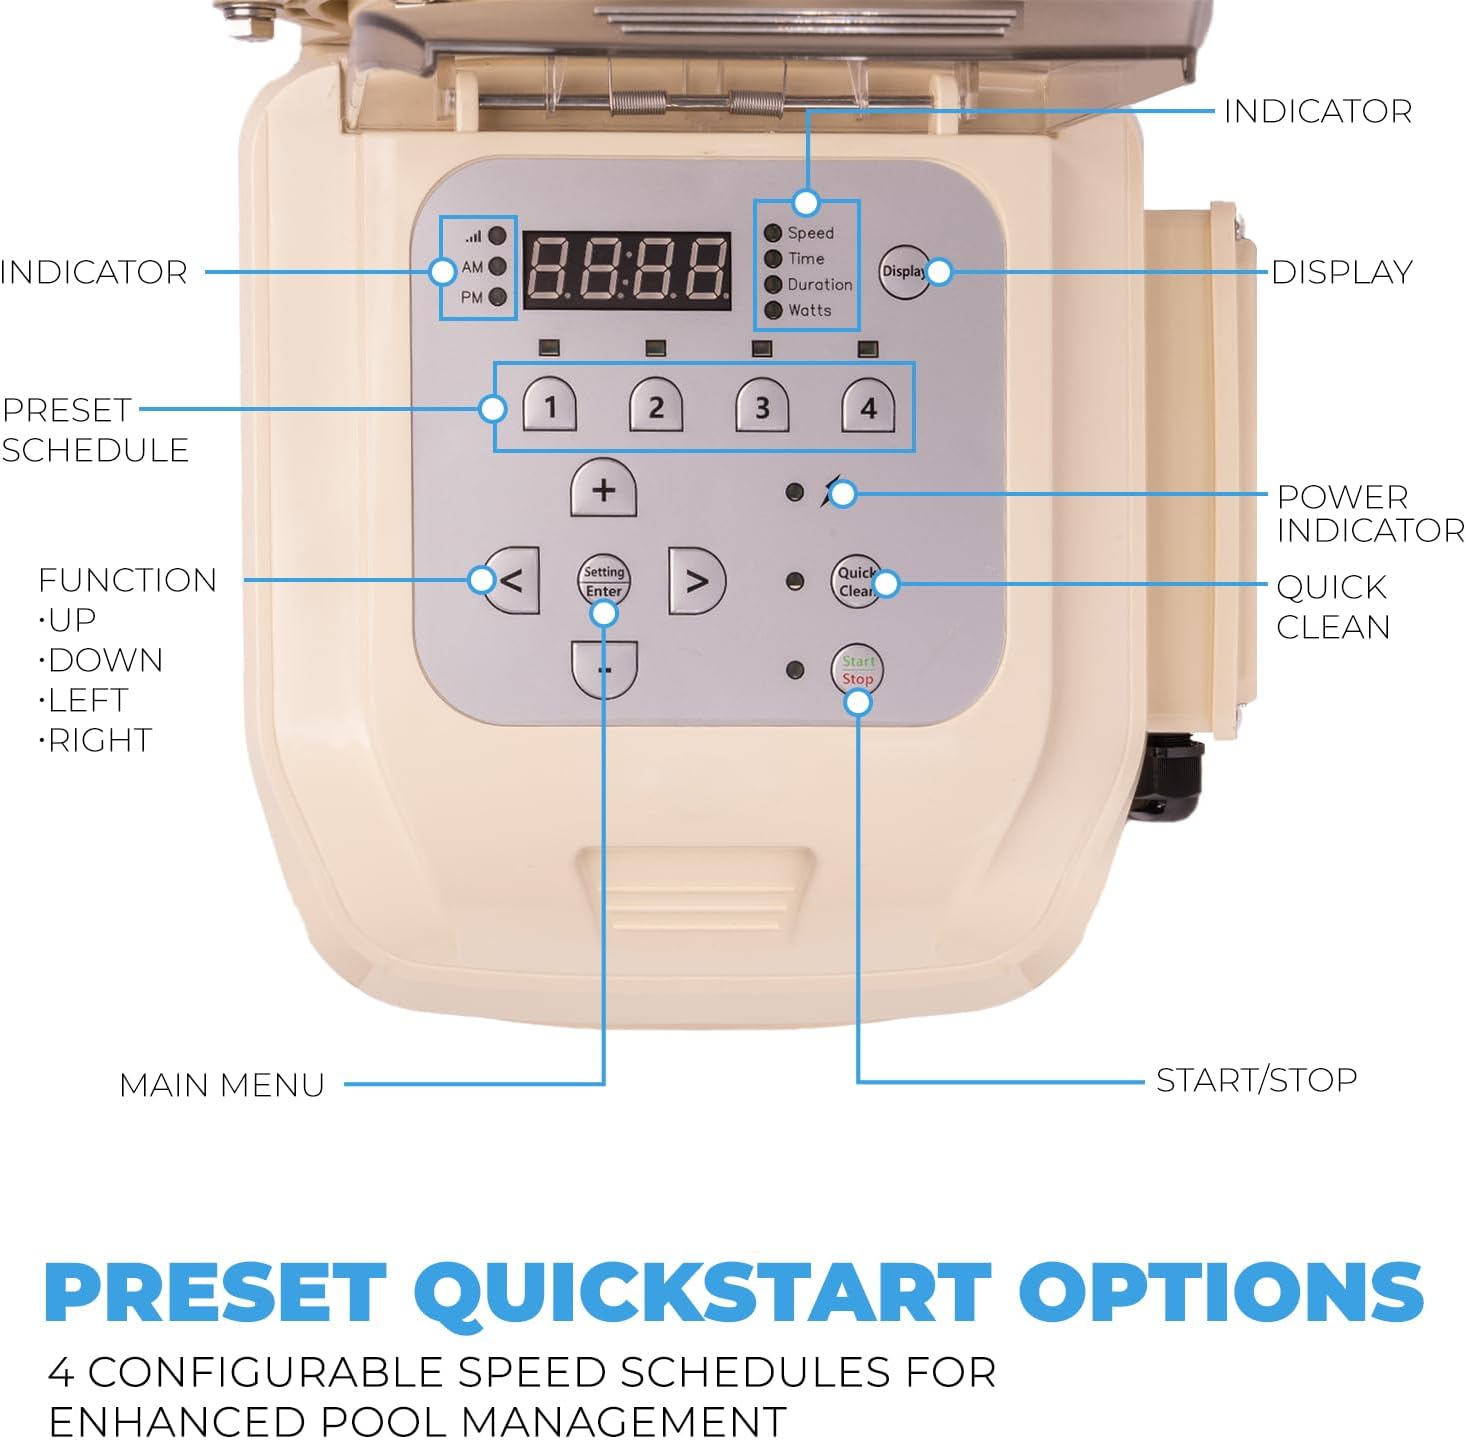
Figure 6.1: Control panel with indicator, display, preset schedule, function, power indicator, quick clean, and start/stop buttons.
6.1 Control Panel Overview
- Display: Shows current speed, time, duration, or wattage.
- Indicator Lights: Show active mode (Speed, Time, Duration, Watts).
- Preset Schedule Buttons (1-4): Allows selection of pre-configured speed programs.
- Function Buttons (<, >, Up, Down, Setting/Enter): Used for navigating menus and adjusting settings.
- Quick Clean: Activates a temporary high-speed cleaning cycle.
- Start/Stop: Turns the pump on or off.
6.2 Programming Speeds
The pump offers 4 configurable speed schedules to optimize filtration and energy consumption. Refer to the control panel diagram (Figure 6.1) for button locations.
- Press the 'Setting/Enter' button to enter programming mode.
- Use the 'Up'/'Down' arrows to select a preset schedule (1-4) to modify.
- Use the 'Up'/'Down' arrows to adjust the desired RPM for the selected schedule. Typical pre-set speeds include:
- 2,850 RPM: For 2-hour run time (e.g., backwashing)
- 1,730 RPM: For 10-hour run time (e.g., standard filtration)
- 2,300 RPM: For 2-hour run time (e.g., vacuuming)
- 1,150 RPM: For 8-hour run time (e.g., overnight circulation)
- Press 'Setting/Enter' to confirm the RPM.
- Adjust the desired run duration for the schedule using the 'Up'/'Down' arrows.
- Press 'Setting/Enter' to save the settings and exit programming mode.

Figure 6.2: Customizable 4-speed operation with pre-set RPM and suggested run times.
6.3 Quick Clean Function
Press the 'Quick Clean' button to initiate a temporary high-speed cycle (e.g., 1700-3450 RPM) for enhanced cleaning or vacuuming. The pump will return to its programmed schedule after the quick clean cycle completes.
7. Maintenance
Regular maintenance ensures optimal performance and extends the life of your pool pump.
7.1 Strainer Basket Cleaning
The strainer basket collects debris and should be inspected and cleaned regularly, especially if you notice reduced water flow.
- Turn off the pump at the control panel and the main circuit breaker.
- Close any necessary valves to prevent water flow to the pump.
- Unscrew the clear lid of the strainer basket counter-clockwise.
- Remove the basket and empty any debris.
- Rinse the basket thoroughly with water.
- Inspect the O-ring on the lid for cracks or wear. Replace if necessary.
- Place the clean basket back into the housing, ensuring it seats correctly.
- Replace the lid, ensuring the O-ring is properly seated, and tighten clockwise until snug. Do not overtighten.
- Open valves and restore power to the pump. Prime the pump if necessary before restarting.

Figure 7.1: Strainer basket with clear lid for easy inspection and cleaning.
7.2 Winterization
In areas subject to freezing temperatures, the pump must be properly winterized to prevent damage.
- Drain all water from the pump by removing the drain plugs.
- Store the drain plugs in the strainer basket to prevent loss.
- Disconnect the pump from the plumbing and store it in a dry, warm place, or cover it securely if it must remain outdoors.
8. Troubleshooting
This section addresses common issues you might encounter with your pool pump.
| Problem | Possible Cause | Solution |
|---|---|---|
| Pump does not start | No power; tripped breaker; faulty wiring; motor issue | Check power supply and circuit breaker. Verify wiring connections. Consult a qualified electrician if issues persist. |
| Low water flow | Clogged strainer basket; air leak in suction line; closed valves; low water level in pool | Clean strainer basket. Check for air leaks. Ensure all valves are open. Check pool water level. |
| Pump runs but does not prime | Air leak in suction line; low water level; clogged basket; pump not filled with water | Ensure pump housing is filled with water. Check for air leaks. Clean basket. Raise pool water level. |
| Unusual noise from pump | Air in system; cavitation; worn bearings; debris in impeller | Check for air leaks. Ensure proper water flow. If noise persists, professional service may be required. |
9. Specifications
Technical specifications for the XtremepowerUS 1.75 HP Variable Speed Swimming Pool Pump.
| Feature | Specification |
|---|---|
| Horsepower | 1.75 HP |
| Inlet/Outlet Size | 2 inches |
| Input Voltage | 230 Volts, 60 Hz, 6.47 Amps |
| Maximum Flow Rate | 6660 GPH (73.75 Gallons Per Minute) |
| Item Weight | 43.5 Pounds |
| Product Dimensions (L x W x H) | 25.5" x 11.3" x 14" |
| Material | Metal, PPGF30 (Commercial-grade reinforced thermoplastic) |
| Model Number | 75408 |
| UPC | 840166545591 |
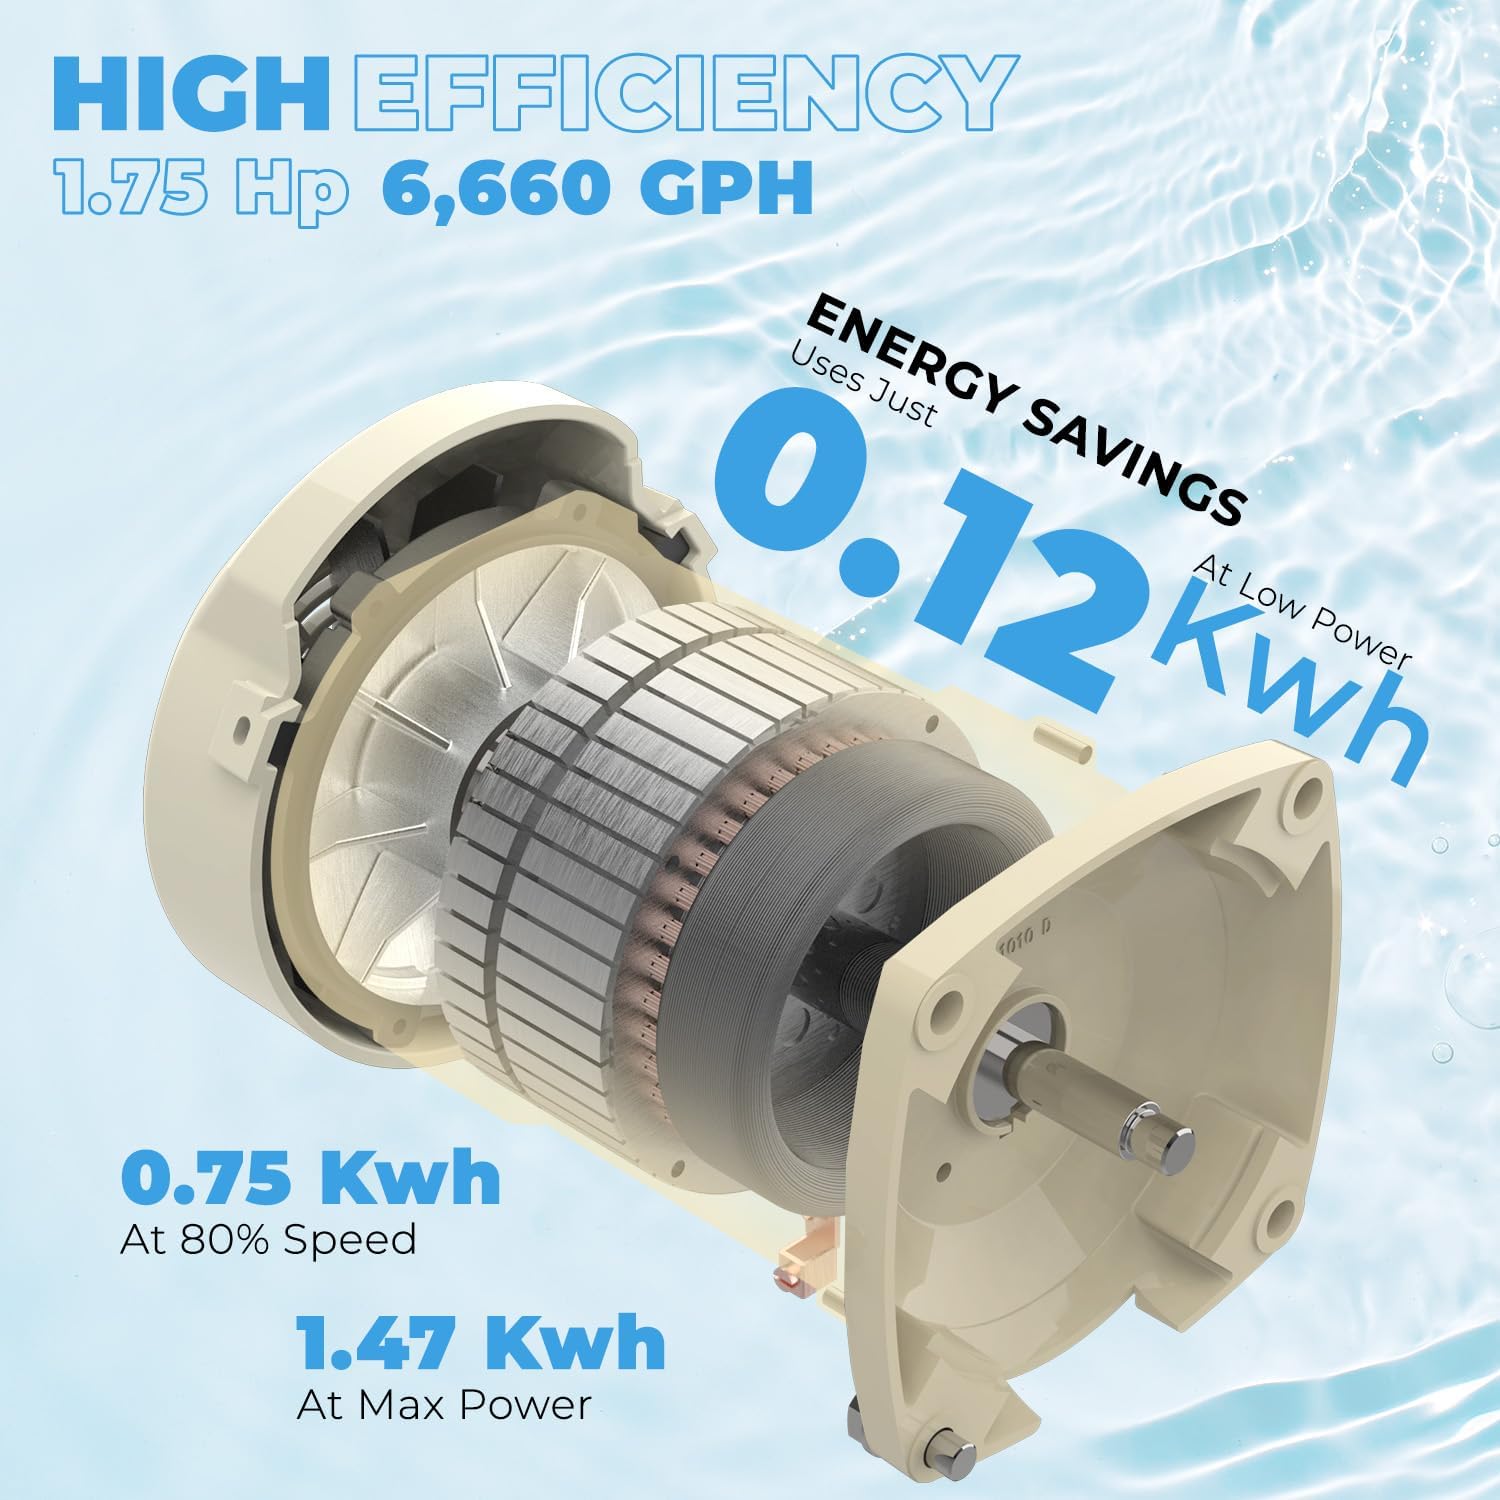
Figure 9.1: Internal motor components and energy efficiency details.
10. Warranty and Support
For warranty information and customer support, please refer to the documentation provided at the time of purchase or contact XtremepowerUS directly. It is recommended to retain your proof of purchase for warranty claims.
For technical assistance or service inquiries, please visit the official XtremepowerUS website or contact their customer service department via the contact information provided with your product.


