
1. Introduction
This manual provides detailed instructions for the installation, operation, and maintenance of your GeeekPi 12.6 Inch IPS LCD Touch Screen Monitor (Model EP-0190). This monitor features a 1920x515 FHD resolution, IPS panel for wide viewing angles, 10-point multi-touch functionality, and built-in dual speakers. It is designed for various applications, including use as a secondary monitor for CPU/GPU monitoring in PC cases like the Hyte Y60.
2. Safety Information
- Do not expose the monitor to rain or moisture to prevent fire or electric shock hazards.
- Avoid placing the monitor in direct sunlight or near heat sources.
- Use only the power adapter and cables specified by the manufacturer.
- Do not attempt to disassemble or modify the monitor. Refer all servicing to qualified personnel.
- Keep the monitor away from strong magnetic fields.
- Ensure proper ventilation around the monitor to prevent overheating.
3. Package Contents
Verify that all items listed below are included in your package. If any items are missing or damaged, please contact your retailer.
- GeeekPi 12.6 Inch IPS LCD Touch Screen Monitor (EP-0190)
- Mini HD Cable
- MicroUSB Cable (for touch screen and power)
- Cross Screwdriver
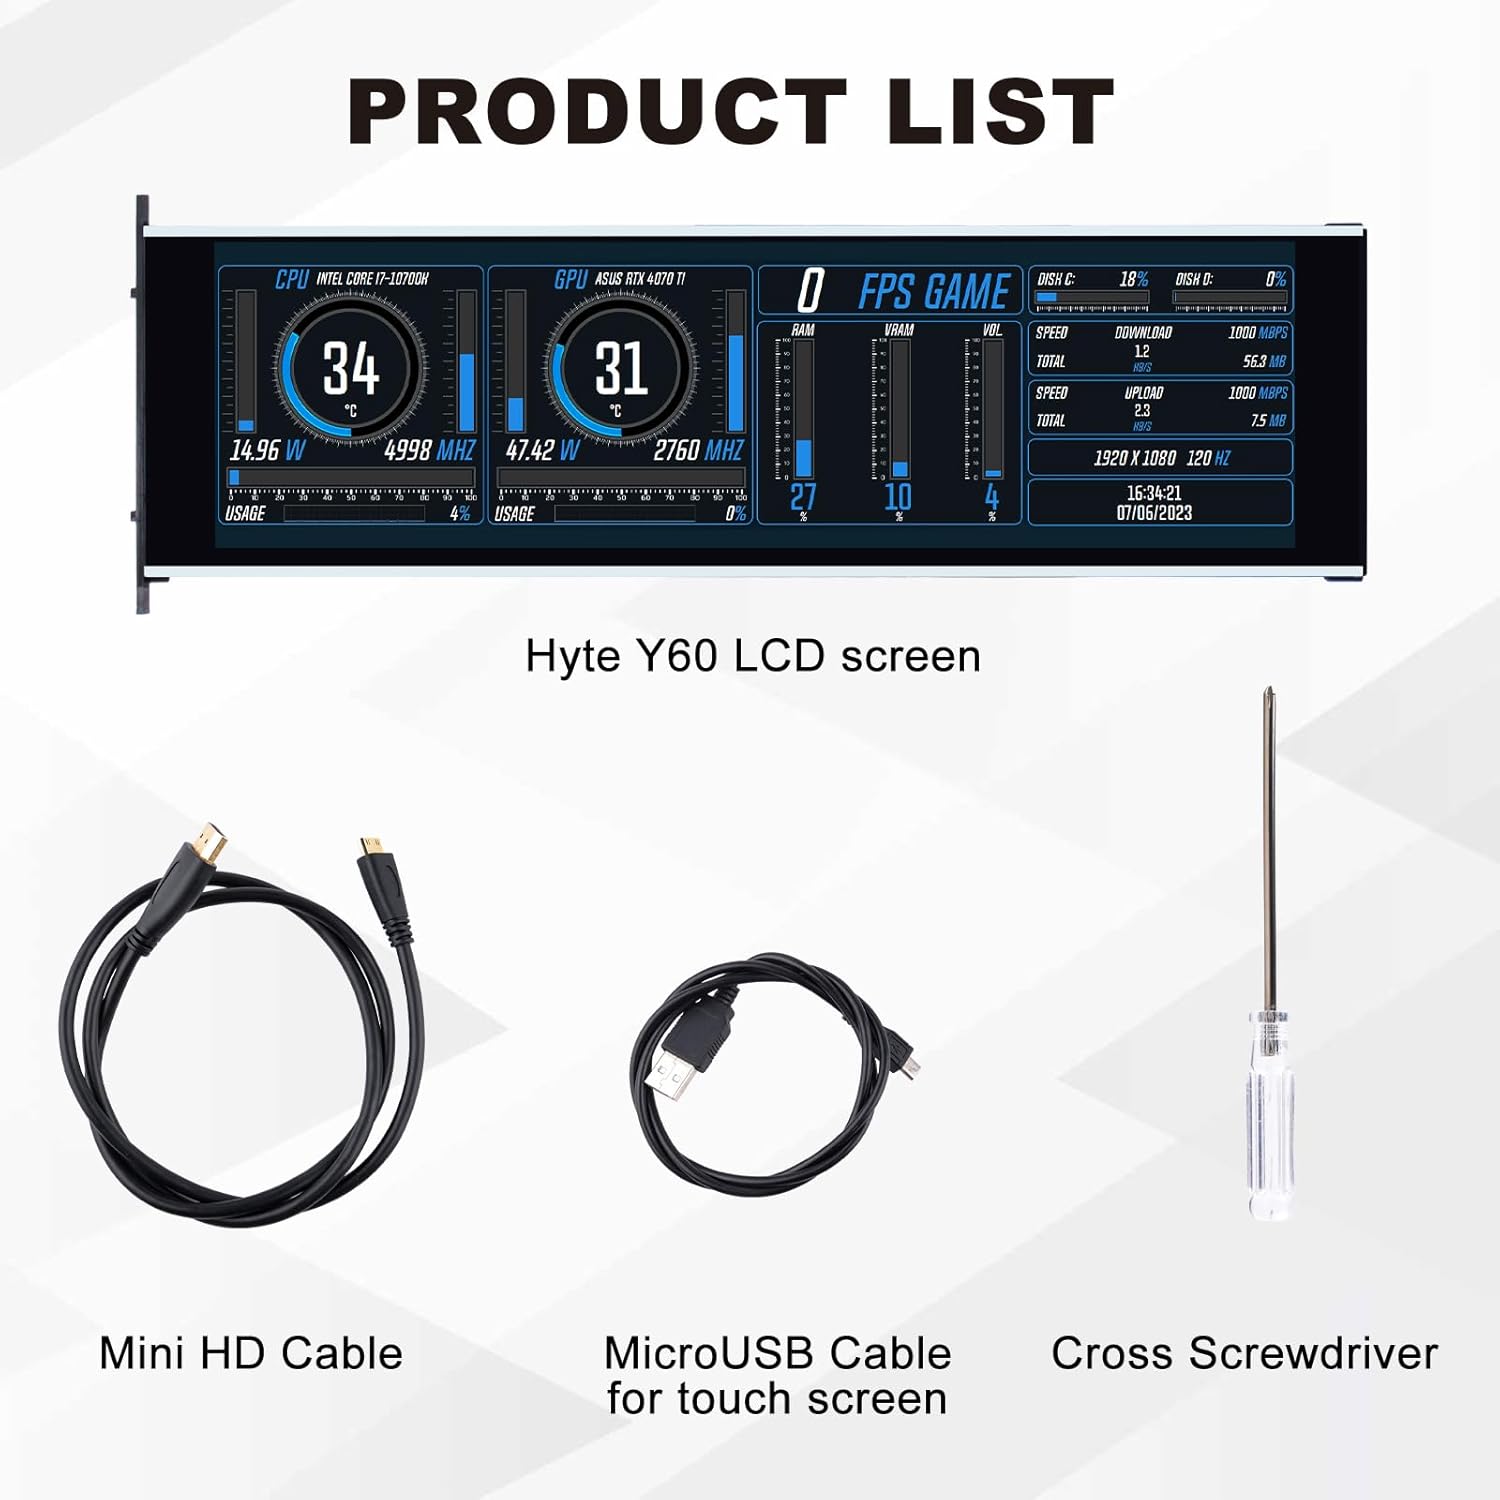
Image: Contents of the product package, including the monitor, Mini HD cable, MicroUSB cable, and a cross screwdriver.
4. Product Overview
Familiarize yourself with the monitor's components and interfaces.

Image: Diagram illustrating the dimensions, rear panel, and side panel connections of the GeeekPi 12.6 Inch monitor. Key features include HDMI inputs, 3.5mm audio out, DC power inputs, and control buttons (OSD menu, navigators, power).
4.1. Rear Panel Controls and Ports
- OSD Menu Button: Accesses the On-Screen Display menu.
- Left Navigator: Navigates left within menus or decreases values.
- Right Navigator: Navigates right within menus or increases values.
- Input Sources Selection Button: Switches between HDMI 1 and HDMI 0 inputs.
- Power ON/OFF Button: Turns the monitor on or off.
4.2. Side Panel Interfaces
- HDMI1 Input: Primary HDMI video input.
- HDMI0 Input: Secondary HDMI video input.
- 3.5mm Audio Out: For connecting external speakers or headphones.
- DC Input 5V and Touch Signal (MicroUSB): Provides power to the monitor and transmits touch data to the connected device.
- DC Input (5V-12V): Alternative power input.
- Speaker OUT: Integrated speaker output.
5. Setup
Follow these steps to set up your GeeekPi 12.6 Inch monitor.
5.1. Physical Installation (Hyte Y60 PC Case)
This monitor is specifically designed to fit the Hyte Y60 PC case. The installation process involves removing the existing glass panel and securing the monitor in its place.
- Carefully remove the screws securing the side glass panel of your Hyte Y60 PC case.
- Gently detach the glass panel.
- Position the GeeekPi monitor into the designated slot within the PC case.
- Secure the monitor using the provided screwdriver. No additional screws are typically required as it utilizes the existing mounting points.
- Ensure the monitor is firmly seated and stable.

Image: Step-by-step visual guide for installing the GeeekPi 12.6 Inch monitor into a Hyte Y60 PC case, showing screw removal and monitor placement.
5.2. Connections
- Video Connection: Connect one end of the Mini HD cable to the HDMI input on the monitor (HDMI1 or HDMI0) and the other end to an available HDMI port on your computer's graphics card or other video source.
- Touch and Power Connection: Connect the MicroUSB cable to the "DC Input 5V and Touch Signal" port on the monitor. Connect the other end of the MicroUSB cable to a USB-A port on your computer. This cable provides both power to the monitor and enables the touch functionality.
- Alternative Power (Optional): If the USB-A port does not provide sufficient power, or if you prefer a dedicated power source, connect a 5V-12V DC power adapter (not included) to the dedicated "DC Input (5V-12V)" port.
- Audio Output (Optional): If you wish to use external speakers or headphones, connect them to the 3.5mm Audio Out port.
6. Operating Instructions
6.1. Power On/Off
Press the Power ON/OFF Button located on the rear panel to turn the monitor on or off.
6.2. OSD Menu Navigation
The On-Screen Display (OSD) menu allows you to adjust various display settings.
- Press the OSD Menu Button to open the OSD menu.
- Use the Left Navigator and Right Navigator buttons to browse through menu options.
- Press the OSD Menu Button again to select an option or enter a sub-menu.
- Use the navigator buttons to adjust values or select settings.
- To exit the OSD menu, navigate to the 'Exit' option or wait for the menu to time out.
6.3. Input Source Selection
To switch between HDMI inputs, press the Input Sources Selection Button on the rear panel.
6.4. Touchscreen Functionality
The monitor supports up to 10-points of multi-touch. Once the MicroUSB cable is connected to your computer, the touch functionality should be automatically recognized by Windows 7/8/10 and macOS systems without additional drivers. You can use touch gestures as you would on a tablet or smartphone.
6.5. Display Orientation
The monitor supports both horizontal and vertical screen display settings. You may need to adjust the display orientation within your operating system's display settings (e.g., Windows Display Settings or macOS System Preferences) to match your desired physical orientation.
7. Maintenance
7.1. Cleaning the Screen
- Always turn off the monitor and disconnect it from the power source before cleaning.
- Use a soft, lint-free cloth lightly dampened with water or a non-abrasive screen cleaner.
- Do not spray cleaner directly onto the screen.
- Avoid using harsh chemicals, alcohol, or ammonia-based cleaners, as they can damage the screen surface.
7.2. General Care
- Keep the monitor in a clean, dry environment.
- Avoid placing heavy objects on the monitor.
- Do not block the ventilation openings.
8. Troubleshooting
If you encounter issues with your monitor, refer to the following common problems and solutions.
| Problem | Possible Cause | Solution |
|---|---|---|
| No image on screen | No power; Incorrect input source; Loose video cable | Ensure power cable is connected and monitor is on. Press the Input Sources Selection Button to cycle inputs. Check HDMI cable connection. |
| Touchscreen not responding | MicroUSB cable not connected; Faulty USB port | Ensure the MicroUSB cable is securely connected to both the monitor and the computer. Try a different USB port on your computer. |
| Image is distorted or incorrect resolution | Incorrect display settings on computer | Adjust display resolution and scaling settings in your computer's operating system to 1920x515. |
| No audio from built-in speakers | Audio output not selected; Volume too low | Ensure the monitor is selected as the audio output device in your computer's sound settings. Increase volume via OSD menu or computer. |
9. Specifications
Detailed technical specifications for the GeeekPi 12.6 Inch IPS LCD Touch Screen Monitor (EP-0190).

Image: A table summarizing the key specifications of the GeeekPi 12.6 Inch monitor, including size, resolution, refresh rate, brightness, display type, speakers, and interfaces.
| Feature | Specification |
|---|---|
| Brand | GeeekPi |
| Model Number | EP-0190 |
| Screen Size | 12.6 Inches |
| Resolution | 1920 x 515 (FHD) |
| Display Type | IPS LCD |
| Aspect Ratio | 16:9 (Effective) |
| Refresh Rate | 60 Hz |
| Brightness | 250 nits |
| Contrast Ratio | 1200:1 |
| Viewing Angle | 178 Degrees |
| Response Time | 3 Milliseconds |
| Touchscreen | 10-Points Multi-Touch (Capacitive) |
| Built-in Speakers | Yes, Dual Speakers |
| Connectivity | 2x Mini HDMI, 1x MicroUSB (for touch & power), 1x 3.5mm Audio Out, 1x DC Power Input (5-12V) |
| Power Input | 5 Volts (DC) via MicroUSB or dedicated DC input |
| Item Dimensions (D x W x H) | 1.5D x 30.5W x 9.9H centimetres |
| Item Weight | 1.09 Kilograms |
10. Warranty and Support
GeeekPi products are covered by a standard manufacturer's warranty. For specific warranty terms and conditions, please refer to the documentation provided with your purchase or visit the official GeeekPi website. For technical support, troubleshooting assistance, or to report issues, please contact GeeekPi customer service through their official channels or the retailer from whom you purchased the product.
Product Wiki: https://wiki.52pi.com/index.php?title=EP-0190