
Introduction
This instruction manual provides essential information for the safe and efficient operation, assembly, and maintenance of your Weber SPIRIT E-435 4-Burner Liquid Propane Gas Grill. Please read all instructions thoroughly before using the grill to ensure proper function and safety.

Figure 1: Front view of the Weber SPIRIT E-435 4-Burner Liquid Propane Gas Grill.
Safety Information
Always adhere to these safety guidelines to prevent injury or property damage.
- Outdoor Use Only: This grill is designed for outdoor use only. Do not operate indoors or in an enclosed area.
- Propane Gas: Use only liquid propane (LP) gas. Do not connect to a natural gas supply.
- Leak Check: Perform a leak test on all gas connections before initial use and after each cylinder change.
- Clearance: Maintain adequate clearance from combustible materials. Refer to the assembly instructions for specific distances.
- Supervision: Never leave a lit grill unattended. Keep children and pets away from the grill.
- Hot Surfaces: Grill surfaces become hot during operation. Use heat-resistant gloves and tools.
- Grease Fires: In case of a grease fire, turn off the gas supply and keep the lid open. Do not use water to extinguish.
Product Overview
Key Components
- Main Burners (4): Provide primary cooking heat.
- Sear Zone: Dedicated area with increased heat for searing.
- Side Burner: Auxiliary burner for sauces or side dishes.
- Porcelain-Enameled, Cast-Iron Cooking Grates: Retain heat for even cooking.
- FLAVORIZER Bars: Vaporize drippings to enhance flavor and reduce flare-ups.
- Snap-Jet Ignition System: Individual burner ignition.
- Side Tables: Provide workspace and feature Weber Works™ accessory rails.
- Enclosed Cabinet: Stores the LP tank and accessories.
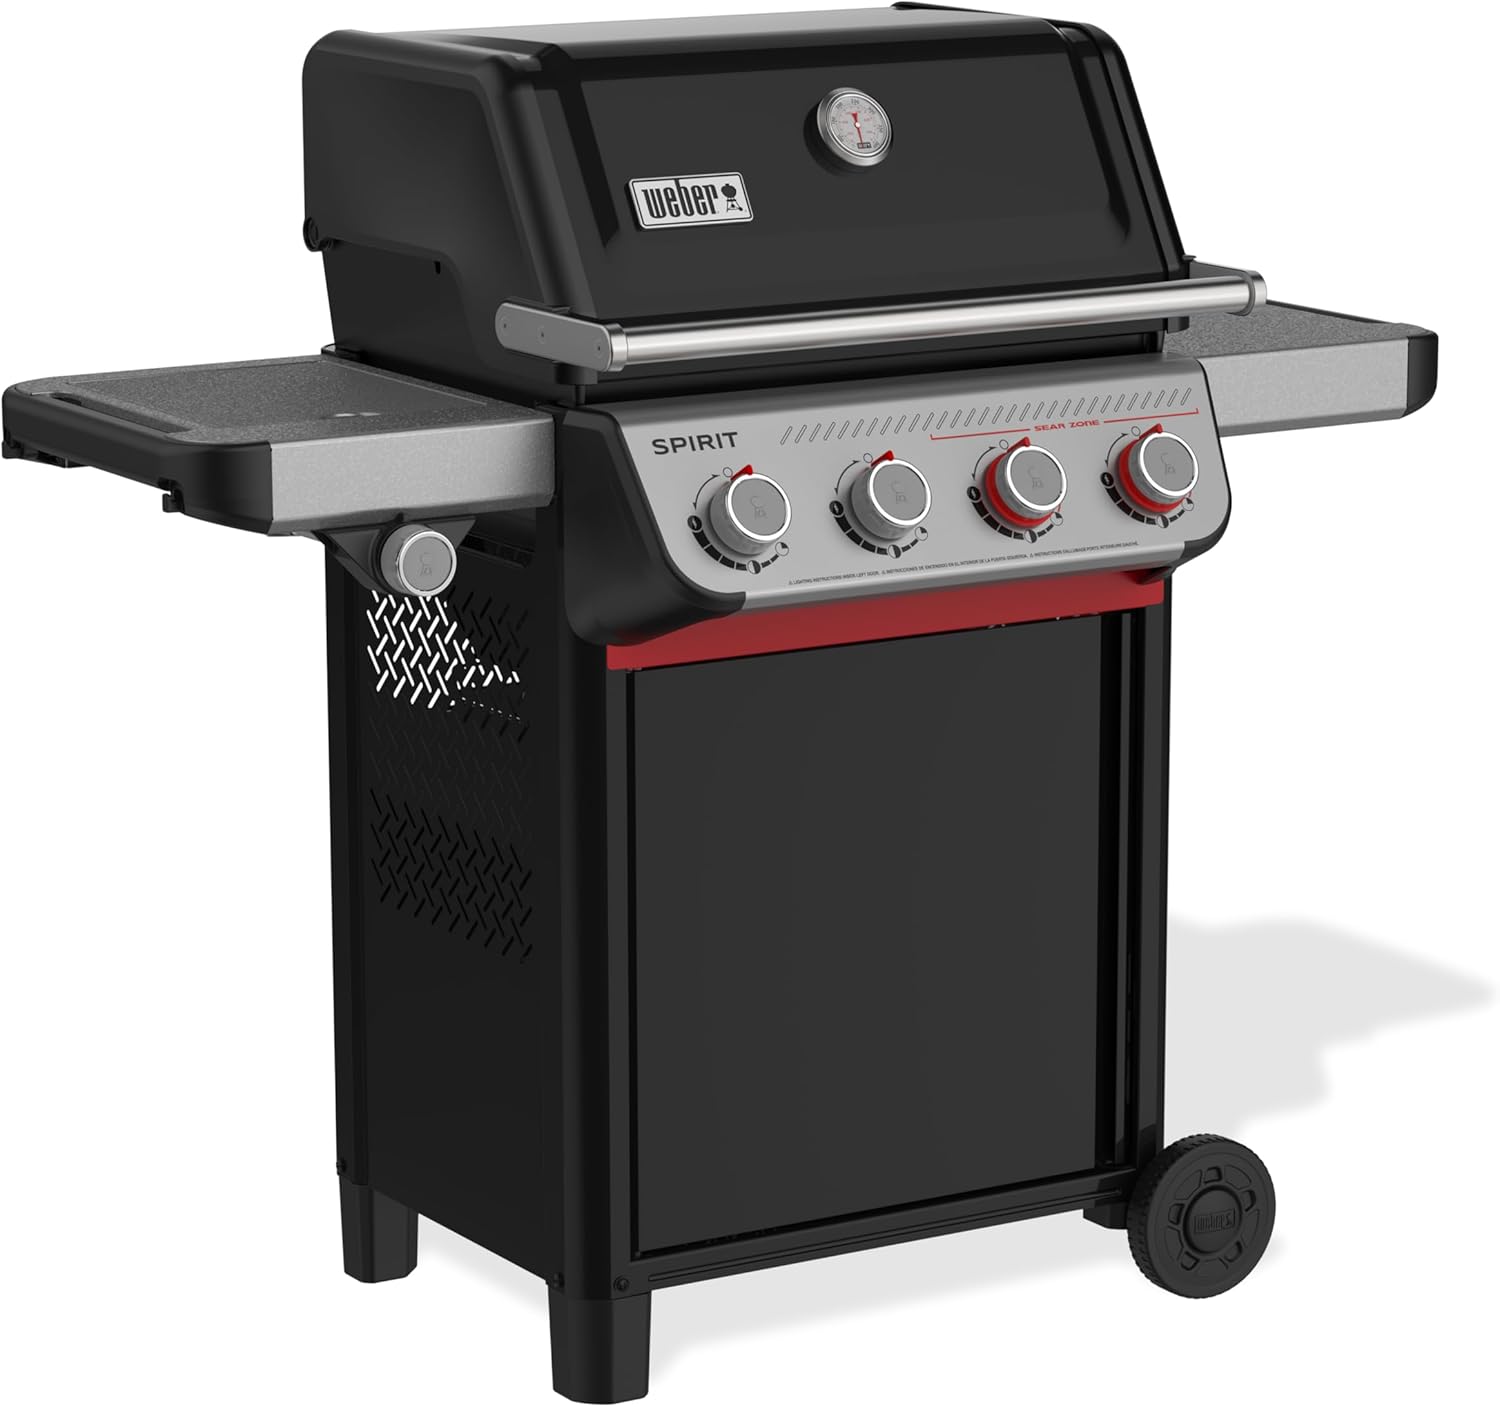
Figure 2: Angled front view highlighting control panel and side tables.

Figure 3: Side view showing the side burner and accessory rails.
Setup and Assembly
Unpacking
Carefully remove all components from the packaging. Inspect for any damage. Retain packaging materials until assembly is complete and the grill is confirmed to be in working order.
Assembly Steps
Detailed assembly instructions are provided in a separate guide included with your grill. Follow these instructions precisely. Ensure all fasteners are tightened securely. A second person may be helpful during certain assembly stages.

Figure 4: Rear view of the grill, showing gas connections and cabinet access.
Operating Instructions
Connecting the Propane Tank
- Ensure the LP tank valve is closed.
- Place the LP tank securely in the designated cabinet area.
- Connect the regulator hose to the LP tank valve, tightening by hand. Do not overtighten.
- Perform a leak test: Apply a soapy water solution to all connections. Bubbles indicate a leak. If a leak is detected, close the tank valve and re-tighten connections. Repeat the test. Do not operate the grill if a leak persists.
Ignition Procedure
- Open the LP tank valve slowly.
- Open the grill lid.
- Push and turn a main burner control knob to the START/HIGH position.
- Listen for the igniter spark and observe the burner lighting. If it does not light within 5 seconds, turn the knob off, wait 5 minutes, and repeat.
- Once lit, turn other desired main burners to the HIGH setting.
- Preheat the grill for 10-15 minutes with the lid closed.
Using the Sear Zone
The Sear Zone provides concentrated high heat for achieving optimal sear marks. After preheating the grill, turn the dedicated Sear Zone burner knob to the HIGH position. Allow it to heat for an additional 2-3 minutes before placing food directly over the Sear Zone burners.

Figure 5: Adjusting the control knob for the Sear Zone.

Figure 6: Food being seared on the grill's cooking grates.
Using the Side Burner
To use the side burner, open its lid. Push and turn the side burner control knob to the HIGH position. If it does not light, turn the knob off, wait 5 minutes, and repeat. Adjust the flame as needed for cooking sauces or side dishes.

Figure 7: The side burner in operation with a pan.
Maintenance and Cleaning
Regular cleaning and maintenance ensure optimal performance and longevity of your grill.
Cooking Grates
After each use, while the grill is still warm, brush the cooking grates with a stainless steel grill brush to remove food residue.
FLAVORIZER Bars
Periodically remove the cooking grates and brush the FLAVORIZER Bars to remove accumulated debris. Scrape off any large deposits with a plastic scraper.
Grease Management System
The grease tray and catch pan should be checked and cleaned regularly. Replace the disposable catch pan liner as needed to prevent grease overflow, which can lead to fires.
Exterior Cleaning
Clean exterior surfaces with a mild soap and water solution. For stainless steel components, use a stainless steel cleaner and polish in the direction of the grain. Avoid abrasive cleaners.

Figure 8: Warming rack in use, indicating areas that require cleaning.
Troubleshooting
This section addresses common issues you might encounter.
| Problem | Possible Cause | Solution |
|---|---|---|
| Burner won't light | No gas flow, clogged burner port, faulty igniter. | Check LP tank connection and fuel level. Clean burner ports. Contact customer support if igniter is faulty. |
| Low flame or uneven heat | Low gas pressure, clogged burner tubes, regulator issue. | Ensure LP tank valve is fully open. Clean burner tubes. Reset regulator by disconnecting and reconnecting. |
| Flare-ups | Excess grease buildup, high heat setting. | Clean FLAVORIZER Bars and grease management system. Reduce heat. Trim excess fat from food. |
Specifications
| Feature | Detail |
|---|---|
| Brand | Weber |
| Model Name | Spirit E-435 |
| Fuel Type | Liquid Propane (LP) Gas |
| Main Burner Count | 4 |
| Heating Power | 19000 British Thermal Units (BTU) |
| Cooking Surface Area | 428 Square Inches |
| Product Dimensions | 26.6"D x 51.8"W x 46.2"H |
| Item Weight | 102.5 Pounds |
| Material | Porcelain Enamel, Metal |
| Assembly Required | Yes |
| UPC | 077924015922 |
Warranty Information
The Weber SPIRIT E-435 Liquid Propane Gas Grill comes with a 10-year limited warranty. This warranty covers specific components and defects in materials and workmanship under normal residential use. For full details regarding coverage, terms, and conditions, please refer to the warranty card included with your product or visit the official Weber website.
Customer Support
For assistance with assembly, operation, parts, or warranty claims, please contact Weber Customer Support. You can find contact information and additional resources on the official Weber website or by visiting the Weber Store on Amazon.


