Introduction
This manual provides detailed instructions for the operation and maintenance of your Bewinner Student Digital Camera. Please read this manual thoroughly before using the camera to ensure proper function and to maximize your user experience.
The Bewinner Student Digital Camera is designed for daily recording, featuring 2.7K FHD video resolution and 48MP image pixels. It includes an 8X digital zoom, autofocus capabilities, and a built-in fill light for enhanced low-light performance. Its compact and lightweight design makes it ideal for portability.
Product Overview
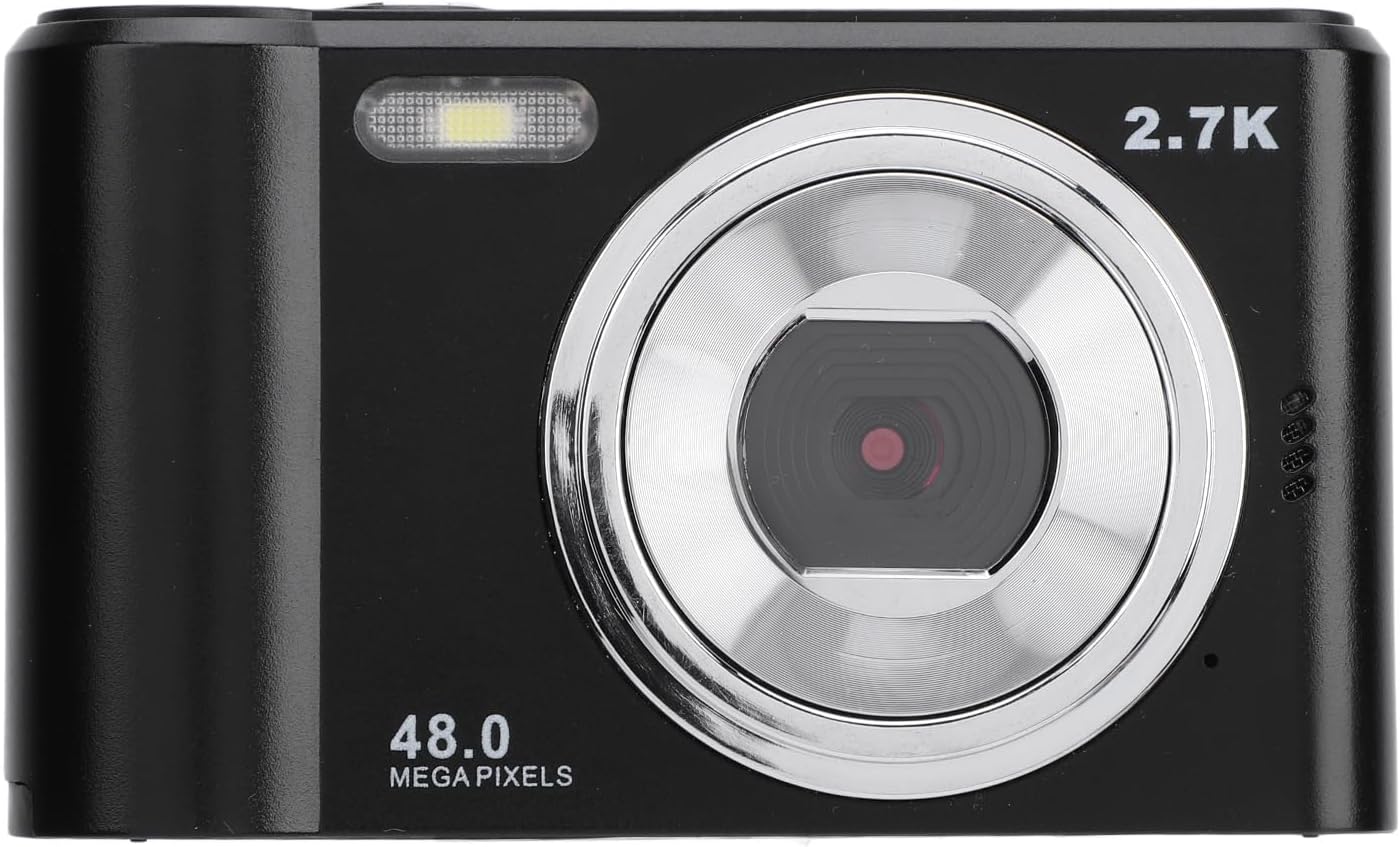
Figure 1: Front view of the camera, showing the lens, flash, and 2.7K 48MP markings.

Figure 2: Back view of the camera, displaying the 2.4-inch HD screen and control buttons.
Camera Components:
- Lens: Main optical component for capturing images and videos.
- Built-in Fill Light: Provides illumination for low-light conditions.
- 2.4-inch HD Display Screen: For viewing live feed, playback, and menu navigation.
- Control Buttons: Including power, shutter, mode, navigation (W/T for zoom, OK), and delete buttons.
- Memory Card Slot: For inserting a small memory card (up to 128GB, not included).
- USB Port: For charging and data transfer.
- Tripod Mount: Located at the bottom for attaching to a tripod.
Setup
1. Inserting the Memory Card:
The camera requires a small memory card (not included) for storing photos and videos. It supports cards up to 128GB.
- Locate the memory card slot on the side or bottom of the camera.
- Gently insert the small memory card into the slot with the gold contacts facing the correct direction (refer to the diagram near the slot).
- Push the card in until it clicks into place. To remove, push it in again until it springs out.

Figure 3: Bottom view of the camera, indicating the memory card slot and tripod mount.
2. Charging the Battery:
The camera has a built-in 700mAh lithium battery. Ensure it is fully charged before first use.
- Connect the provided charging cable to the camera's USB port.
- Connect the other end of the charging cable to a USB power adapter (not included) or a computer's USB port.
- The charging indicator light will illuminate during charging and turn off when fully charged.
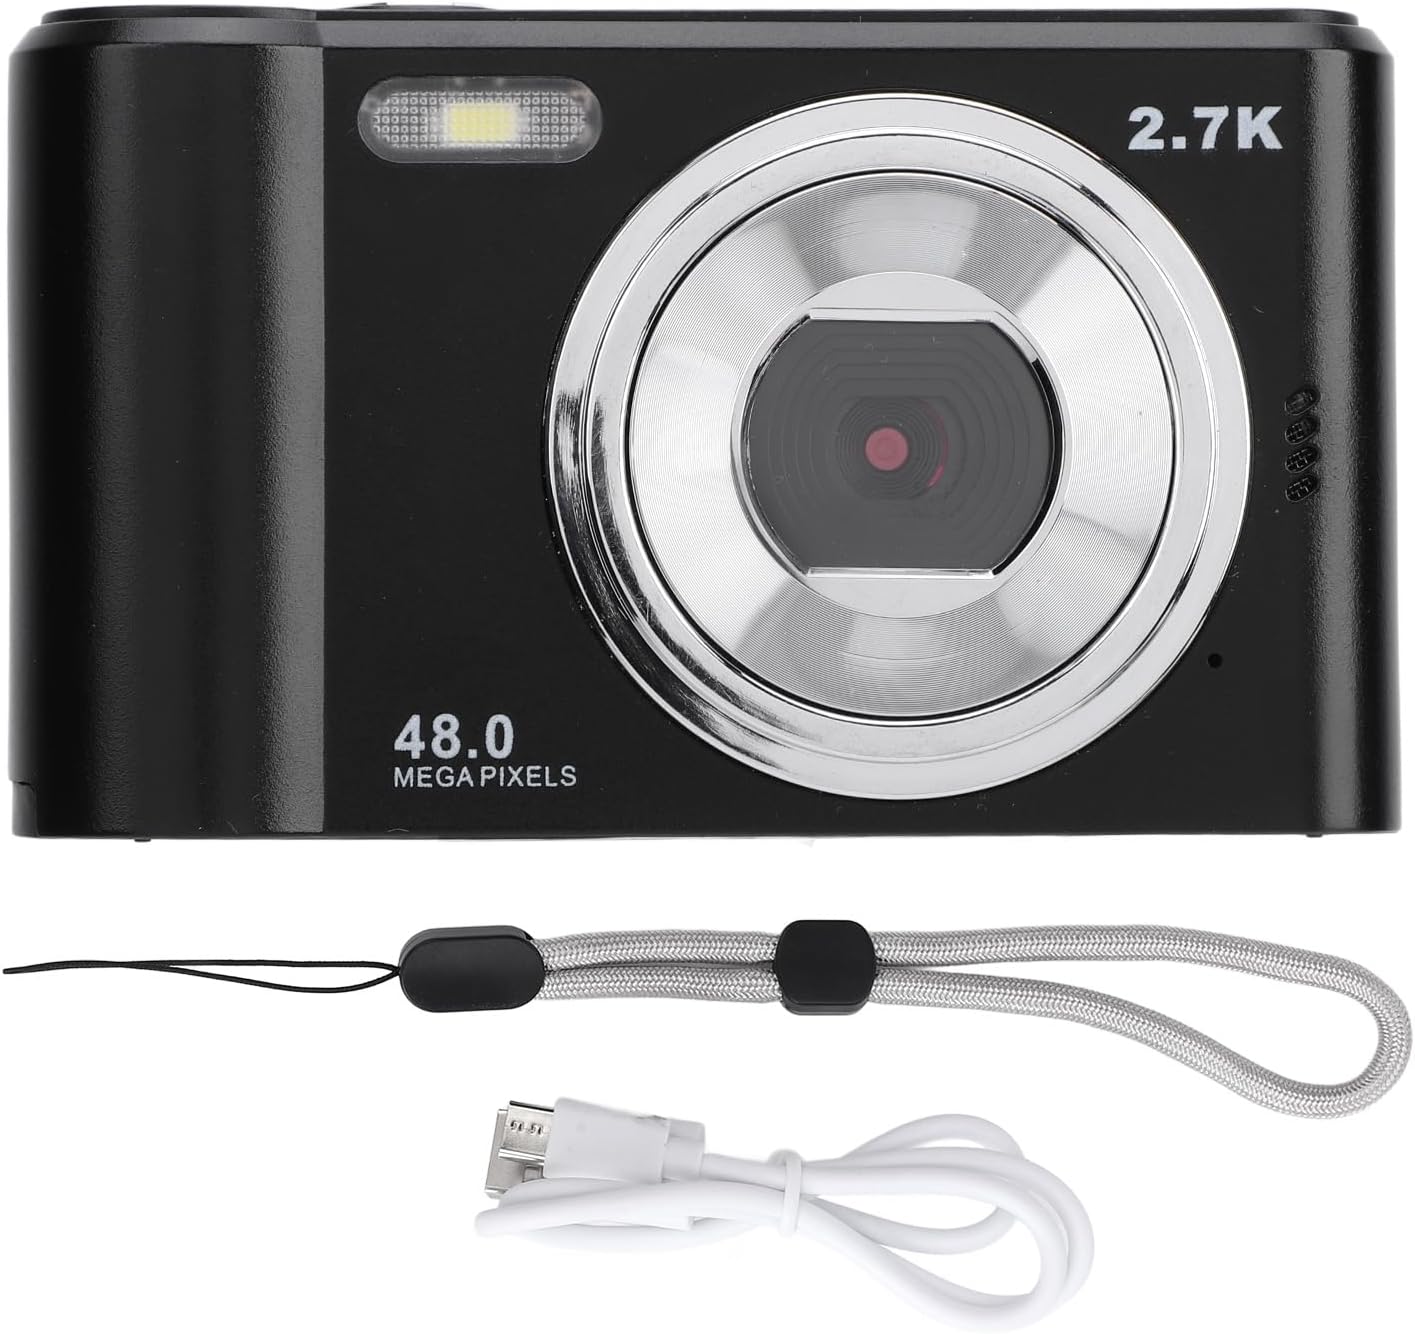
Figure 4: Camera shown with its included charging cable and lanyard.
3. Powering On/Off:
Press and hold the power button (usually located on the top of the camera) for a few seconds to turn the camera on or off. The camera is designed to power on quickly.
Operating Instructions
1. Taking Photos:
The camera captures photos at 48MP resolution.
- Turn on the camera.
- Frame your shot using the 2.4-inch HD display screen.
- The camera features autofocus. A focus frame will appear on the screen to indicate the focus area.
- Press the shutter button (typically on top) to capture the image.
2. Recording Videos:
The camera records videos in 2.7K FHD resolution.
- Switch the camera to video recording mode (if applicable, usually via a mode button).
- Press the record button (often the same as the shutter button, or a dedicated video button) to start recording.
- Press the record button again to stop recording.
3. Using Digital Zoom:
The camera supports 8X digital zoom.
- While in photo or video mode, use the "W" (Wide) and "T" (Telephoto) buttons to zoom out or zoom in, respectively.

Figure 5: Close-up view of the camera's control buttons, highlighting the W and T zoom controls.
4. Using the Fill Light:
The built-in fill light assists in capturing images in dark environments.
- The camera automatically provides colorful images, suggesting the fill light may activate automatically or have a dedicated setting in the menu. Refer to the on-screen menu for specific fill light controls if needed.
5. Playback and Deletion:
- To view captured photos or videos, enter playback mode (usually via a dedicated playback button or menu option).
- Use the navigation buttons to scroll through your media.
- To delete an item, select it and press the delete button (often marked with a trash can icon), then confirm.
Maintenance
- Cleaning the Lens and Screen: Use a soft, lint-free cloth specifically designed for optical surfaces. Do not use abrasive materials or harsh chemicals.
- Storage: When not in use, store the camera in a dry, cool place away from direct sunlight and extreme temperatures.
- Battery Care: Although the battery is built-in, avoid fully discharging it frequently. Charge it regularly, even if not using the camera for extended periods, to maintain battery health.
- Avoid Impact: Protect the camera from drops and impacts, which can damage internal components or the screen.
Troubleshooting
| Problem | Possible Cause | Solution |
|---|---|---|
| Camera does not power on. | Battery is depleted. | Charge the camera battery using the provided cable. |
| Cannot take photos/videos. | Memory card is full or not inserted correctly. | Insert a memory card, or delete existing files to free up space. Ensure the card is inserted correctly. |
| Images are blurry. | Lens is dirty; subject is too close or too far for autofocus; camera shake. | Clean the lens. Ensure subject is within autofocus range. Hold the camera steady. |
| Screen is blank or frozen. | System error. | Try turning the camera off and on again. If unresponsive, allow the battery to drain completely and then recharge. |
Specifications
| Feature | Detail |
|---|---|
| Item Type | Digital Camera |
| Material | ABS |
| Display Screen | 2.4 Inch HD Display |
| Maximum Video Resolution | 2.7K FHD |
| Maximum Photo Pixels | 48MP |
| Digital Zoom | 8X |
| Small Memory Card Support | Maximum 128GB (Not Included) |
| Battery Information | Built-in Lithium Battery, 700mAh |
| Item Weight | 7.8 ounces (approx. 221g) |
| Package Dimensions | 5.12 x 3.54 x 2.36 inches |
| Model Number | Bewinnerngdcgwmy58-11 |
Warranty and Support
For any questions, technical support, or warranty inquiries regarding your Bewinner Student Digital Camera, please contact Bewinner customer service. Refer to the product packaging or the official Bewinner website for the most current contact information.
Note: Specific warranty terms and conditions may vary. Please retain your proof of purchase for warranty claims.


