
1. Introduction
Welcome to the user manual for your new Dardoo F1 6030 Aluminum Racing Frame Simulation Cockpit. This manual provides essential information for the safe assembly, proper operation, and effective maintenance of your racing simulator frame. Please read these instructions carefully before assembly and retain this manual for future reference. This product is designed to enhance your simulation racing experience by providing a stable and adjustable platform for your racing peripherals.
2. Safety Information
- Heavy Item: The package is heavy. Exercise caution when lifting and moving to prevent injury. It is recommended to have two people for assembly.
- Assembly Precautions: Wear appropriate safety gear, such as gloves, during assembly to avoid cuts or pinches. Ensure all bolts are securely tightened to maintain stability.
- Proper Use: This product is designed for simulation racing peripherals. Do not use it for purposes other than its intended design.
- Children and Pets: Keep children and pets away from the assembly area. Small parts can be a choking hazard.
- Stability: Always ensure the cockpit is placed on a flat, stable surface before use.
3. Package Contents
Your Dardoo F1 6030 Aluminum Racing Frame package includes the following components:
- 30x60mm Solid Aluminum Profiles (various lengths)
- Connection Brackets and Fasteners
- Bolts, Nuts, and Washers (various sizes)
- Rubber Foot Pads
- Assembly Tools (e.g., Allen wrenches)
- Instruction Manual
Note: Steering wheel, pedals, handbrake, gear lever, and racing seat are NOT included with this frame and must be purchased separately.
4. Assembly Instructions
Follow these steps to assemble your racing cockpit. Refer to the diagrams for visual guidance.
- Unpack Components: Carefully remove all parts from the packaging and verify against the package contents list.
- Base Frame Assembly: Connect the main horizontal aluminum profiles to form the base of the cockpit. Ensure all connections are secure but do not fully tighten bolts until the entire section is assembled.
- Upright Supports: Attach the vertical aluminum profiles to the base frame. These will support the steering wheel and shifter platforms.
- Steering Wheel Platform: Assemble and attach the steering wheel platform to the upright supports. This platform is designed for adjustability.
- Pedal Platform: Assemble and attach the pedal platform to the front section of the base frame.
- Shifter Platform: Attach the shifter platform to the side uprights. It can be installed on either the left or right side based on user preference. The added support bar enhances stability for stronger force feedback devices.
- Seat Bracket Installation: Install the rear seat bracket. This bracket is adjustable to accommodate various seat sizes. Refer to the 'Seat Installation Section' image for dimensions and potential DIY drilling for custom seats.
- Final Tightening: Once all components are in place and aligned, systematically tighten all bolts securely.
- Attach Rubber Foot Pads: Place the rubber foot pads on the bottom of the frame to prevent slipping and protect your floor.

Figure 4.1: Overview of the Dardoo F1 6030 Aluminum Racing Frame, highlighting its stable 30x60mm tube structure, rubber foot pads for stability, and broad compatibility with racing peripherals. Electronic devices are not included.

Figure 4.2: Detailed view of the seat installation section, showing adjustable dimensions (275-285mm width, 220-480mm length) and bolt specifications (M8 x 20). This section is suitable for mainstream double slide lock seats and supports DIY drilling for custom fitment.
5. Adjustments and Operation
The Dardoo F1 6030 cockpit offers extensive adjustability to suit various body types and preferences, ensuring a comfortable and immersive racing experience.
- Steering Wheel Platform: The height and angle of the steering wheel platform can be adjusted. Loosen the relevant bolts, position the platform as desired, and re-tighten securely. The platform allows for a tilt of approximately ±30 degrees.
- Pedal Platform: Adjust the angle and front-to-rear distance of the pedal platform. This allows for optimal ergonomic positioning of your pedals.
- Shifter Platform: The shifter platform can be installed on either the left or right side of the cockpit. Its position relative to the steering wheel can also be adjusted for comfort.
- Seat Bracket: The rear seat bracket is designed to be adjustable, allowing you to mount various racing seats. Ensure your chosen seat is compatible with the mounting dimensions.
The slide rails and recessed slots provide infinite adjustment possibilities, allowing you to easily achieve the most comfortable driving position.

Figure 5.1: Illustrations demonstrating the full adjustability of the steering wheel platform (height and angle), shifter platform (left/right installation), and pedal platform (height and angle).
6. Device Compatibility and Upgrades
This simulation racing cockpit is designed for broad compatibility with popular racing peripherals:
- Logitech: G29, G920, G923
- Thrustmaster: T500, T818, T80, T128, T300
- Fanatec: CSL-DD, GT-DD-PRO
- Moza: R5, R9, R12, R16
- PXN: V9
The cockpit also supports upgrades, including the installation of a monitor bracket on the front. This allows you to create a full racing simulator setup tailored to your preferences.
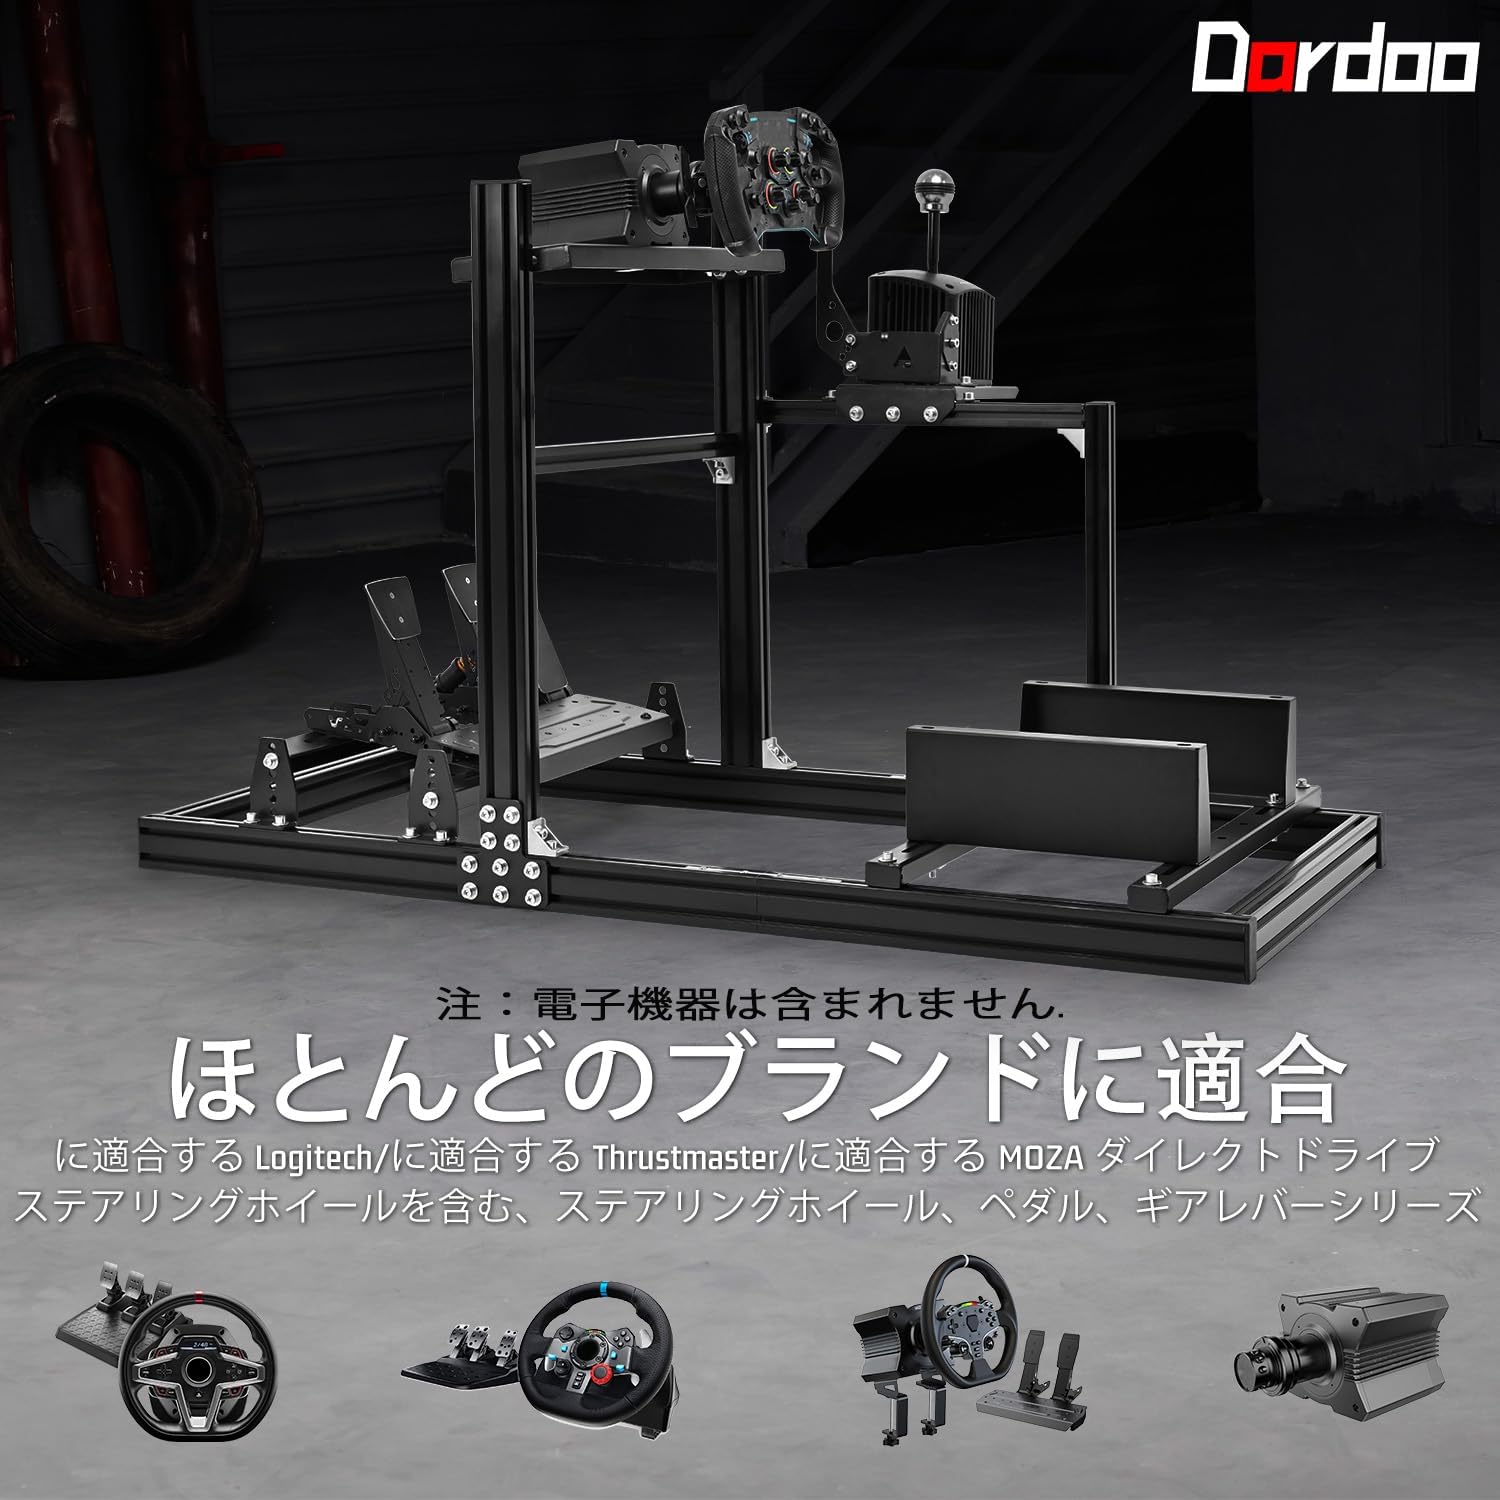
Figure 6.1: Visual representation of the cockpit's compatibility with steering wheels, pedals, and gear levers from major brands like Logitech, Fanatec, Moza, Thrustmaster, and PXN.

Figure 6.2: The cockpit supports additional monitor bracket installation for an enhanced racing setup. Monitor brackets are not included.
7. Maintenance
To ensure the longevity and optimal performance of your Dardoo F1 6030 Racing Frame, follow these maintenance guidelines:
- Regular Cleaning: Wipe down the aluminum profiles and other surfaces with a soft, damp cloth to remove dust and grime. Avoid abrasive cleaners or solvents.
- Check Fasteners: Periodically inspect all bolts, nuts, and connections to ensure they remain tight. Re-tighten any loose fasteners to maintain the cockpit's stability and rigidity.
- Inspect for Damage: Regularly check for any signs of wear, damage, or deformation to the aluminum profiles or connection points. If any damage is found, discontinue use and contact customer support.
- Storage: If storing the cockpit for an extended period, ensure it is clean and dry. Store in a cool, dry place away from direct sunlight and extreme temperatures.
8. Troubleshooting
If you encounter any issues with your Dardoo F1 6030 Racing Frame, refer to the following common problems and solutions:
- Cockpit feels unstable or wobbly:
- Ensure all assembly bolts are fully tightened. Refer back to Section 4: Assembly Instructions.
- Verify that the cockpit is placed on a flat and level surface.
- Check if the rubber foot pads are properly installed and making full contact with the floor.
- Difficulty adjusting platforms (steering wheel, pedals, shifter):
- Ensure the relevant adjustment bolts are sufficiently loosened before attempting to move the platform.
- Check for any obstructions or debris in the slide rails or slots.
- If a component feels stuck, do not force it. Re-check the assembly steps for that specific part.
- Peripherals (steering wheel, pedals, shifter) do not fit:
- Verify that your peripherals are listed as compatible in Section 6: Device Compatibility.
- Check the mounting holes and dimensions of your peripherals against the cockpit's platforms. Some devices may require specific mounting plates (not included).
If you are unable to resolve an issue using these troubleshooting steps, please contact Dardoo customer support for further assistance.
9. Specifications
| Feature | Detail |
|---|---|
| Model | F1 6030 Aluminum Racing Frame |
| Material | 6030 Solid Aluminum Profiles |
| Product Dimensions (L x W x H) | 132 x 79.8 x 78 cm (approx.) |
| Product Weight | 22.5 kg (approx.) |
| Player Height Range | 1.4m - 1.9m (approx.) |
| Frame Weight Limit | 200 kg (approx.) |
| Steering Wheel Platform Adjustability | Height and Angle (±30°) |
| Pedal Platform Adjustability | Angle and Front/Rear Distance |
| Shifter Platform Installation | Left or Right side |
| Seat Bracket Adjustability | Adjustable for various seat sizes (275-285mm width, 220-480mm length) |

Figure 9.1: Key dimensions of the racing simulator cockpit (135cm length, 58cm width, 80cm height) and recommended player height (1.4m-1.9m) and frame weight limit (200kg).
10. Warranty and Support
Dardoo is committed to providing high-quality products. For information regarding warranty coverage, please refer to the product's packaging or the official Dardoo website. If you have any questions, require technical assistance, or need to report a missing or damaged part, please contact Dardoo customer support through the retailer where you purchased the product or visit the official brand store:


