
1. Introduction
This manual provides detailed instructions for the installation and care of your Generic replacement bottom case for CLEVO NP50 series laptops. This product is designed to replace a damaged or worn bottom case, ensuring the structural integrity and protection of your laptop's internal components.
Compatibility: This bottom case is compatible with the following CLEVO models: NP50PN5, NP50PNH, NP50PNJ, NP50PNK, NP50P, NP-S, NP50RNA, NP50RNH. Please verify your laptop model before proceeding with installation.
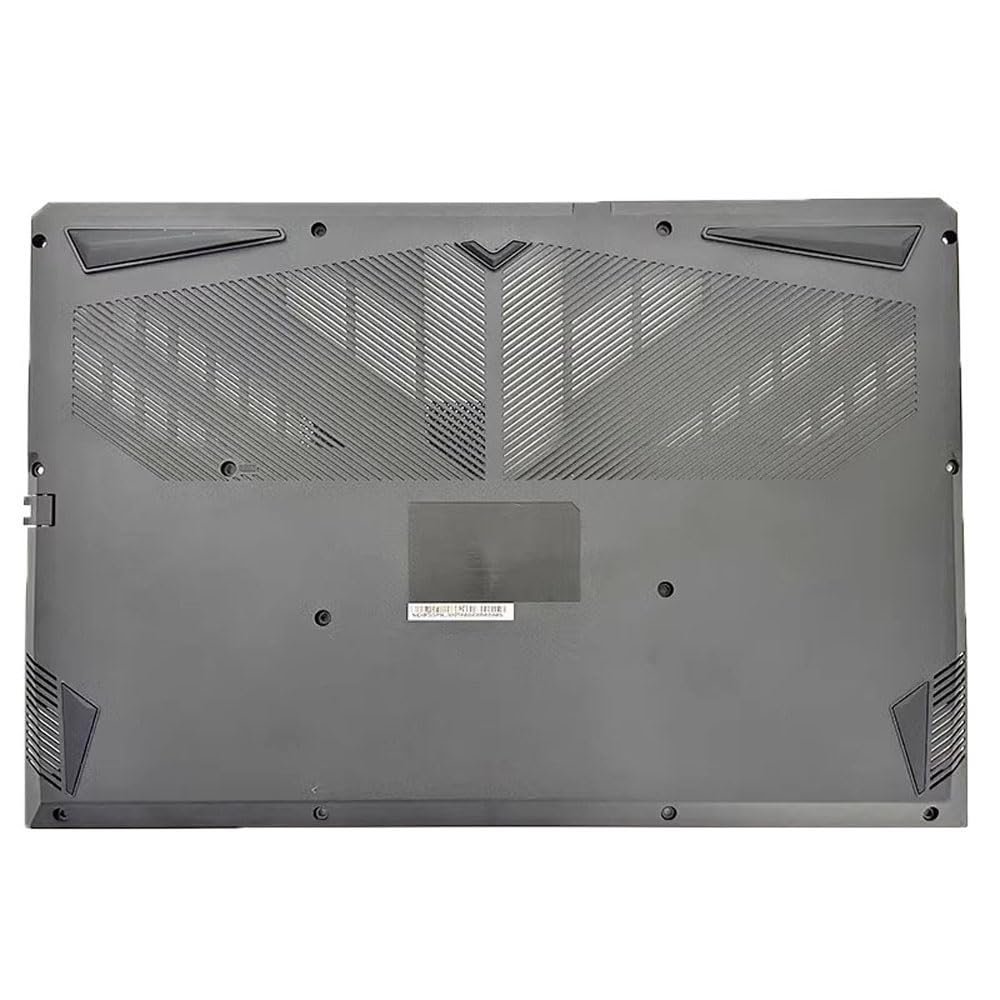
Figure 1: Generic CLEVO NP50 Series Laptop Bottom Case. This image shows the black replacement bottom case, highlighting its form factor and screw placements.
2. Installation Guide
Replacing a laptop bottom case requires careful handling of internal components. If you are not comfortable performing this procedure, it is recommended to seek professional assistance.
2.1 Safety Precautions
- Disconnect Power: Ensure the laptop is completely powered off and unplugged from any power source.
- Remove Battery: If your laptop has a removable battery, remove it before starting. For internal batteries, disconnect the battery connector from the motherboard.
- Static Discharge: Use an anti-static wrist strap or frequently touch a grounded metal object to prevent electrostatic discharge (ESD) damage to sensitive components.
- Organize Screws: Keep track of all screws and their original locations. They often vary in size and length.
- Work in a Clean Area: Ensure your workspace is clean, well-lit, and free of obstructions.
2.2 Tools Required
- Small Phillips head screwdriver (PH00 or PH0)
- Plastic prying tool (spudger)
- Anti-static wrist strap (recommended)
- Small container or magnetic mat for screws
2.3 Disassembly of Old Bottom Case
- Remove all visible screws from the bottom of the laptop. Pay attention to any screws hidden under rubber feet or stickers.
- Carefully use a plastic prying tool to gently separate the old bottom case from the main chassis. Start from a corner and work your way around, being mindful of any clips or latches.
- Once all clips are released, remove the old bottom case.
2.4 Installation of New Bottom Case
- Align the new bottom case with the laptop's chassis. Ensure all ports and openings match correctly.
- Gently press the bottom case into place, starting from one side and working your way around, until all clips snap securely.
- Reinsert all screws into their original positions. Do not overtighten screws, as this can damage the plastic.
- If the battery was disconnected internally, reconnect the battery connector to the motherboard.
- If the battery is external, reinstall the battery.
3. Post-Installation Checks
After installing the new bottom case, perform the following checks to ensure proper functionality:
- Physical Inspection: Ensure the bottom case is securely attached, with no gaps or loose areas.
- Screw Check: Verify that all screws are properly installed and tightened.
- Port Functionality: Connect peripherals to all external ports (USB, HDMI, audio, etc.) to confirm they are accessible and functional.
- Power On: Connect the power adapter and power on the laptop. Ensure it boots up normally.
- Fan Operation: Listen for normal fan operation and check for proper airflow through the vents.
4. Maintenance
To ensure the longevity and appearance of your laptop's bottom case:
- Cleaning: Wipe the surface with a soft, damp cloth. Avoid harsh chemicals or abrasive cleaners.
- Ventilation: Keep the ventilation grilles clear of dust and debris to ensure proper airflow and prevent overheating.
- Handling: Avoid dropping or subjecting the laptop to impacts that could damage the bottom case.
5. Troubleshooting
If you encounter issues after installing the bottom case, consider the following:
| Problem | Possible Cause | Solution |
|---|---|---|
| Bottom case does not close properly. | Misalignment, internal component obstruction, or incorrect screw placement. | Re-open the case, check for any obstructions or misaligned components, and ensure all clips are engaged. Verify correct screw lengths. |
| Laptop does not power on after reassembly. | Battery connector not properly seated, or other internal cables disconnected. | Disconnect power, open the case, and carefully check all internal cable connections, especially the battery and power button cables. |
| Loose screws or rattling sound. | Screws not fully tightened or incorrect screw used. | Identify the loose screw(s) and tighten them appropriately. Ensure the correct screw type is used for each hole. |
6. Specifications
| Feature | Detail |
|---|---|
| Brand | Generic |
| Model Number | NP50 Bottom Case 2 |
| Compatible Models | CLEVO NP50PN5, NP50PNH, NP50PNJ, NP50PNK, NP50P, NP-S, NP50RNA, NP50RNH |
| Product Dimensions (L x W x H) | 30 x 20 x 10 cm |
| Item Weight | 2 Kilograms |
| Color | Black |
7. Warranty and Support
Warranty Period: This product comes with a 3-month warranty from the date of purchase. This warranty covers manufacturing defects. It does not cover damage caused by improper installation, misuse, accidents, or unauthorized modifications.
Customer Support: For technical assistance, warranty claims, or further inquiries, please contact your retailer or the manufacturer's customer service. Please have your purchase receipt and product model information ready.