
Introduction
Thank you for choosing the Cybervelo EK4 Max Electric Bike. This manual provides essential information for the safe assembly, operation, maintenance, and troubleshooting of your new electric bike. Please read this manual thoroughly before your first ride and keep it for future reference.
For your safety, always wear a helmet and appropriate safety gear when riding. Adhere to all local traffic laws and regulations.
Safety Guidelines
- Always wear a helmet and protective gear.
- Perform a pre-ride inspection before each use, checking brakes, tires, and battery.
- Do not ride under the influence of alcohol or drugs.
- Be aware of your surroundings and traffic.
- Do not exceed the maximum load capacity of 330 lbs.
- Ensure all quick releases and fasteners are securely tightened before riding.
Setup and Assembly
Your Cybervelo EK4 Max Electric Bike is delivered approximately 90% pre-assembled. The following steps detail the final assembly process. Refer to the assembly video for visual guidance.
Video: Cybervelo EK4 Max Electric Bike Assembly Guide. This video demonstrates the step-by-step process of unboxing and assembling your electric bike, including handlebar, pedal, fender, and wheel installation.
1. Unboxing and Parts Identification
Carefully remove the bike and all components from the packaging. Lay out all parts and tools provided. The package includes the main bike frame, front wheel, seat post with saddle, pedals, front fender, headlight, charger, and a tool kit.
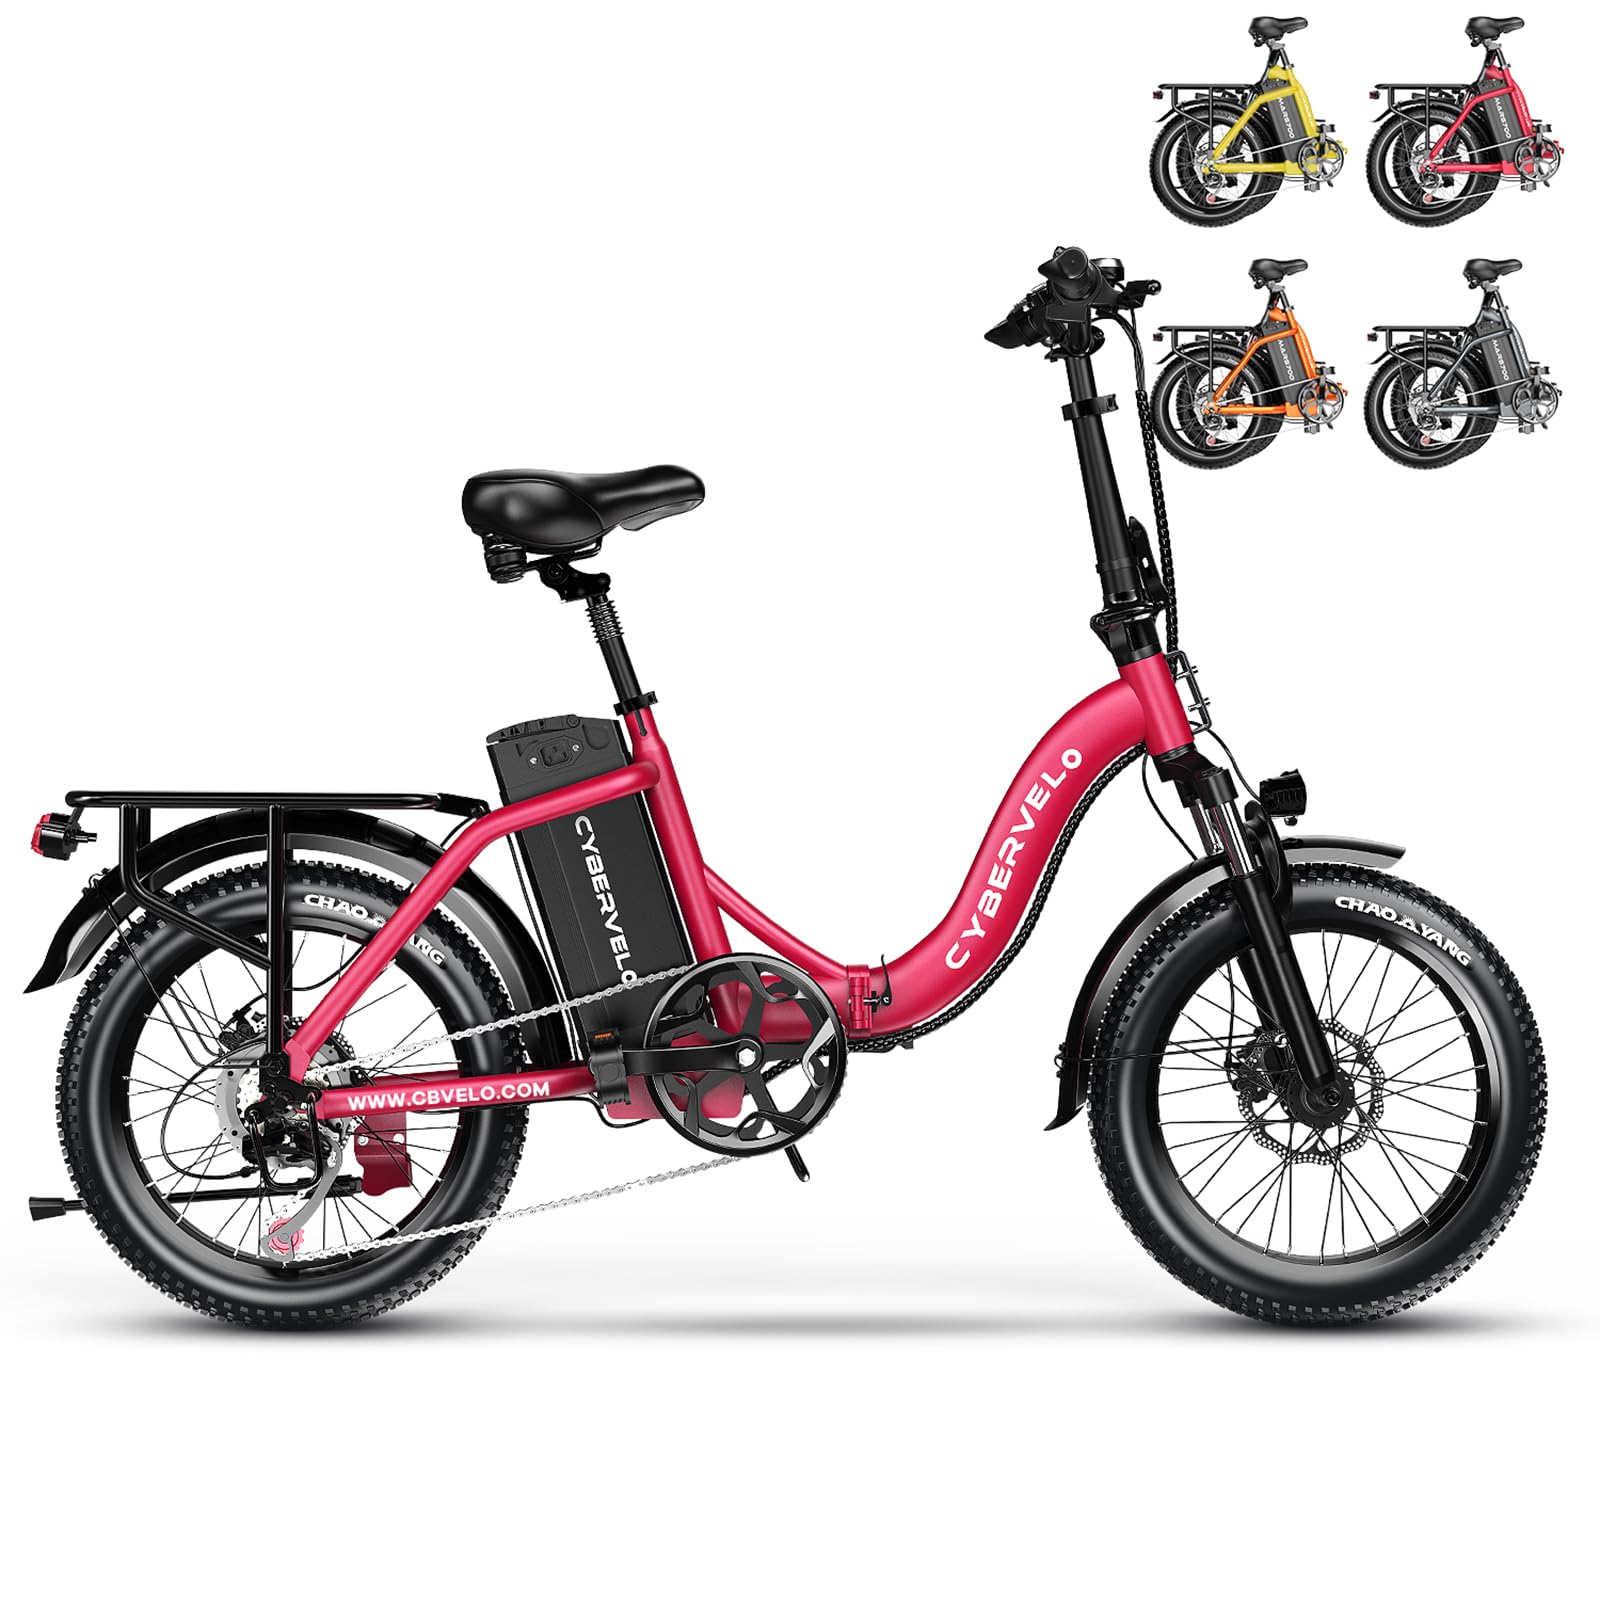
Image: The Cybervelo EK4 Max Electric Bike, fully assembled, showcasing its design and components.
2. Handlebar Installation
- Insert the handlebar stem into the head tube of the bike frame.
- Align the handlebars straight with the front wheel.
- Tighten the stem bolt securely using the provided tools. Ensure the handlebars are firm and do not rotate.
3. Kickstand Attachment
Attach the kickstand to the designated mounting points near the rear wheel. Secure it with the bolts and nuts provided, ensuring it is stable and can support the bike's weight.
4. Pedal Installation
Identify the left (L) and right (R) pedals. The left pedal screws counter-clockwise, and the right pedal screws clockwise. Apply a small amount of grease to the threads before installation. Tighten them firmly with a wrench.
5. Front Fender Installation
Mount the front fender to the front fork using the provided screws and brackets. Ensure it is centered over the wheel and does not interfere with tire rotation.
6. Front Wheel Installation
Carefully lift the front of the bike and align the front wheel with the fork dropouts. Ensure the brake rotor slides correctly into the brake caliper. Secure the wheel with the axle nuts, tightening them evenly on both sides.
7. Headlight Installation and Connection
Attach the headlight to the front fork or handlebar stem using its bracket. Connect the headlight cable to the corresponding port on the bike's wiring harness. Ensure a secure connection.
8. Seat Adjustment
Insert the seat post into the frame's seat tube. Adjust the seat height to a comfortable riding position where your feet can touch the ground when stopped. Secure it with the quick-release lever or bolt.
9. Battery Installation and Initial Charge
Insert the 48V 20.8AH removable battery into its compartment on the frame. Lock it in place with the key. Before your first ride, fully charge the battery using the provided charger. Connect the charger to the battery port and then to a power outlet. The indicator light on the charger will change when fully charged.

Image: Close-up of the 48V 20.8AH removable battery, highlighting its modular design and charging port.
Operating Your Electric Bike
1. Powering On/Off
To power on the bike, insert the key into the battery lock and turn it to the 'ON' position. Then, press and hold the power button on the LCD display. To power off, reverse the process.
2. LCD Display Functions
The smart LCD display shows real-time speed, mileage, battery power, and pedal assist level. Use the buttons on the display to cycle through different information and adjust settings.
3. Pedal Assist Modes
The bike features 5 levels of pedal assist. Select your desired level using the '+' and '-' buttons on the display. Higher levels provide more motor assistance, making pedaling easier. Level 0 offers no electric assist.
4. Throttle Usage
The throttle provides on-demand power without pedaling. Gently twist the throttle grip to engage the motor. Use the throttle for quick acceleration or when you need a boost without pedaling.
5. Gear Shifting
The 7-speed transmission system allows you to adjust your pedaling effort to match terrain and speed. Use the gear shifter on the handlebars to change gears. Shift to lower gears for climbing hills and higher gears for flat terrain or downhill riding.
6. Braking System
The Cybervelo EK4 Max is equipped with front and rear double disc brakes and EABS power-off brake for reliable stopping power. Apply both brakes gently and evenly to slow down or stop. Avoid sudden, hard braking, especially at high speeds.
7. Headlight Operation
Turn on the LED headlight for improved visibility in low-light conditions or at night. The headlight is typically controlled via a button on the LCD display or a separate switch.
Video: Cybervelo EK4 Max Electric Bike in action, demonstrating its performance on various terrains and highlighting features like the powerful motor and suspension. This is a short preview video.
Maintenance
Regular maintenance ensures the longevity and safe operation of your electric bike.
1. Battery Care
- Charge the battery fully after each ride, especially if it's been heavily discharged.
- Avoid completely draining the battery.
- Store the battery in a cool, dry place, away from direct sunlight and extreme temperatures.
- If storing for an extended period, charge the battery to 50-70% every 2-3 months.
2. Tire Pressure
Check tire pressure before each ride. Maintain the recommended pressure (usually indicated on the tire sidewall) for optimal performance, comfort, and puncture resistance. The 20" fat tires are designed for various terrains.

Image: Close-up of the 20-inch fat tires, designed for stability and traction on various terrains including beach, mountain, gravel, and snow.
3. Brake Inspection and Adjustment
Regularly inspect brake pads for wear and replace them when necessary. Ensure brake levers are responsive and provide adequate stopping power. Adjust brake cables if there is too much slack.
4. Chain Lubrication
Keep the chain clean and lubricated to ensure smooth gear changes and prevent rust. Apply bicycle-specific chain lubricant periodically, especially after riding in wet or dusty conditions.
5. General Cleaning
Clean your bike regularly with a damp cloth and mild soap. Avoid using high-pressure washers directly on electrical components or bearings. Dry the bike thoroughly after cleaning.
6. Frame Inspection
Periodically check the carbon steel frame for any signs of damage, cracks, or loose connections. Ensure all bolts and fasteners are tight, especially on the folding mechanism.

Image: The step-thru frame design of the Cybervelo EK4 Max, emphasizing ease of mounting and dismounting.
Troubleshooting
This section addresses common issues you might encounter with your Cybervelo EK4 Max Electric Bike.
1. Bike Not Powering On
- Check Battery: Ensure the battery is fully charged and properly seated in its compartment. Verify the battery key is in the 'ON' position.
- Check Connections: Inspect all electrical connections, especially those to the battery and display, for looseness or damage.
- Display Button: Confirm you are pressing the power button on the LCD display correctly.
2. Motor Not Assisting
- Pedal Assist Level: Ensure the pedal assist level is set to a value greater than 0 on the LCD display.
- Brake Levers: Check if the brake levers are fully released. The motor will cut off if the brake levers are engaged.
- Throttle: If using the throttle, ensure it is functioning correctly and not stuck.
- Motor Connection: Inspect the motor cable connection for any disconnections.
3. Brakes Not Effective
- Brake Pads: Check brake pads for wear. Replace if worn out.
- Brake Cables: Inspect brake cables for fraying or excessive slack. Adjust cable tension as needed.
- Rotor: Ensure the brake rotor is clean and free from oil or grease.
4. Unusual Noises
- Loose Parts: Check for any loose bolts, nuts, or components on the frame, wheels, or handlebars.
- Chain: Lubricate the chain if it's dry or making squeaking noises.
- Brakes: Squealing brakes might indicate dirty pads or rotors, or improper alignment.
If you encounter issues not covered here or require further assistance, please contact Cybervelo customer support.
Specifications
| Feature | Detail |
|---|---|
| Brand | Cybervelo |
| Model Number | EK4MAX7rosepink |
| Motor | 1000W (1500W Peak) High-Speed Brushless Motor |
| Battery | 48V 20.8AH Large Capacity Removable Lithium-Ion Battery |
| Max Range | Up to 80+ Miles (with pedal assist) |
| Max Speed | Up to 25+ MPH (can reach 30-35 MPH depending on conditions) |
| Tires | 20" Fat Tires (Anti-slip and Puncture-proof) |
| Gears | 7-Speed Transmission System |
| Brakes | Front and Rear Double Disc Brakes, EABS Power-off Brake |
| Suspension | High-Strength Shock-Absorbing Front Fork |
| Frame Material | Carbon Steel |
| Load Capacity | 330 lbs |
| Special Features | Foldable Design, Smart LCD Display with Charging Port, LED Headlights |

Image: Detailed view of the front suspension system, designed to absorb shocks for a smoother ride.

Image: The rear rack of the Cybervelo EK4 Max, illustrating its robust design and 330 lbs load capacity.

Image: Composite image showing key features: LED headlights for visibility, an adjustable seat for comfort, a large LCD display for ride data, and explosion-proof fat tires for durability.
Warranty and Support
Warranty Information
Cybervelo provides a one-year warranty for the motor, battery, and controller of your electric bike. This warranty covers manufacturing defects and ensures reliable performance of these key components.
Customer Service
Our dedicated customer support team is available 24/7 to assist you with any questions or concerns regarding your Cybervelo EK4 Max Electric Bike. Please do not hesitate to reach out for technical assistance, troubleshooting, or warranty claims.