
1. Introduction
Thank you for purchasing the AODK L-Shaped Gaming Desk. This desk is designed for both gaming and work, offering a spacious and organized environment. It features integrated power outlets, RGB LED lighting, an adjustable monitor stand, and four storage drawers. This manual provides essential information for assembly, operation, and maintenance to ensure safe and efficient use of your new desk.
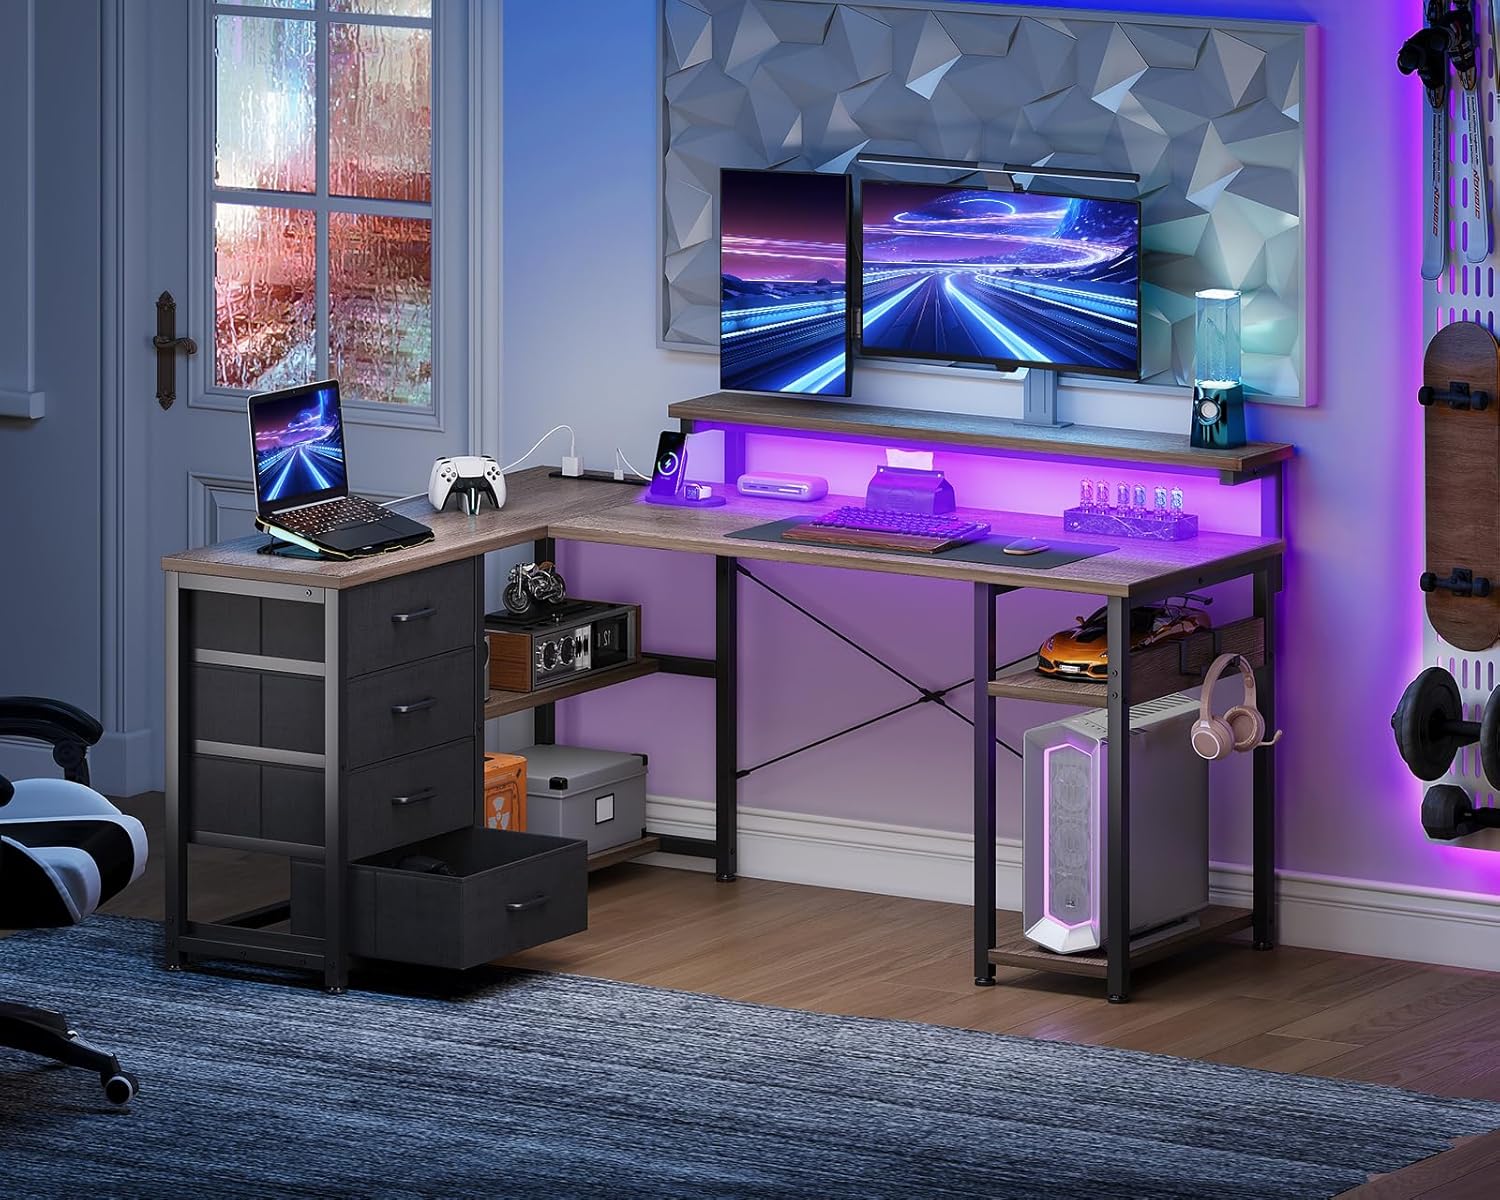
Image 1.1: The AODK L-Shaped Gaming Desk in a complete setup, showcasing its design and features.
2. Safety Information
- Always follow the assembly instructions carefully.
- Do not exceed the maximum load capacity of the tabletop (50 kg).
- Ensure all screws and fasteners are tightened securely before use. Periodically check and re-tighten if necessary.
- Keep liquids away from electrical outlets and electronic devices on the desk.
- Do not stand or sit on the desk.
- Keep small parts away from children during assembly to prevent choking hazards.
- If any parts are missing or damaged, do not proceed with assembly. Contact customer support immediately.
3. Package Contents
Before beginning assembly, verify that all components are present and undamaged. A wrench is included for assembly.
- Desk panels (tabletop, shelves)
- Steel frame components
- 4 Fabric drawers
- Power outlet unit (2 AC outlets, USB ports)
- RGB LED light strip
- Monitor stand components
- Headphone hook
- Assembly hardware (screws, bolts, adjustable feet)
- Wrench
- Instruction manual
4. Setup and Assembly Instructions
Assembly is required for this product. Please follow the detailed steps provided in the included instruction manual. It is recommended to assemble the desk with two people, though it can be done by one person. Ensure you have enough space for assembly.
4.1. General Assembly Tips
- Lay out all parts and hardware before starting.
- Identify each part using the labels or diagrams in the manual.
- Do not overtighten screws during initial assembly; tighten fully once all parts are in place.
- The L-shaped design allows for flexible configuration. The drawer unit can be installed on either the left or right side to suit your preference and room layout.

Image 4.1: Dimensional diagram of the desk, illustrating the reversible configuration of the drawer unit.
4.2. Drawer Assembly
The four fabric drawers are designed for easy assembly and integration into the desk frame. Follow the steps below to assemble each drawer:
- Unfold the fabric drawer body.
- Insert the bottom panel into the drawer.
- Ensure the drawer is fully formed and stable.

Image 4.2: Step-by-step guide for assembling the fabric drawers.
5. Operating Instructions
5.1. Integrated Power Outlet
The desk is equipped with a power outlet unit featuring two AC outlets and two USB ports. This allows for convenient charging of your computer, smartphone, and other electronic devices directly from your workspace.
- Connect the desk's power cord (1.8m) to a wall outlet.
- Plug your devices into the available AC outlets (100-240V/15A) or USB ports (5V-2A).

Image 5.1: The integrated power outlet with AC and USB ports for charging devices.
5.2. RGB LED Lighting
Enhance your gaming or work environment with the built-in RGB LED lights. The lights offer 10 different illumination modes and color adjustment modes.
- Use the included controller to cycle through the 10 lighting modes and adjust colors.
- The memory function will retain your last selected mode when the lights are turned off and on again.

Image 5.2: The RGB LED lighting feature with various color modes.
5.3. Adjustable Monitor Stand
The monitor stand can be adjusted to three different heights (9cm, 12cm, 15cm) to optimize your viewing angle and improve posture, reducing strain on your neck and shoulders.
- Adjust the monitor stand height during assembly or by carefully repositioning the support brackets.
- Choose the height that best suits your eye level for comfortable use.

Image 5.3: The monitor stand with adjustable height settings for ergonomic comfort.
5.4. Storage and Organization
The desk provides ample storage with four fabric drawers and integrated shelves. A headphone hook is also included for convenient storage of your headset.
- Use the four drawers for storing documents, accessories, and other items.
- The open shelves are suitable for books, decorative items, or a PC tower.
- Attach the headphone hook to a convenient location on the desk frame to keep your headphones organized.

Image 5.4: Overview of the desk's storage features, including drawers, shelves, and a headphone hook.
6. Maintenance
To ensure the longevity and appearance of your AODK Gaming Desk, follow these maintenance guidelines:
- Cleaning: Wipe the desk surfaces with a soft, damp cloth. Avoid abrasive cleaners or harsh chemicals that may damage the melamine finish.
- Spills: Immediately wipe up any spills to prevent water damage or staining. The melamine surface is resistant to moisture, but prolonged exposure can cause damage.
- Scratches: While the desk is scratch-resistant, use coasters for drinks and mouse pads for computer peripherals to minimize wear.
- Stability: Periodically check all screws and fasteners to ensure they remain tight. Re-tighten if any looseness is detected to maintain desk stability.
- Electrical Components: Ensure the power outlet unit and LED lights are kept dry and free from dust. Do not attempt to repair electrical components yourself.
7. Troubleshooting
If you encounter any issues with your AODK Gaming Desk, refer to the following common troubleshooting tips:
- Desk is wobbly:
a. Check that all assembly screws are securely tightened.
b. Ensure the adjustable feet on the bottom of the desk legs are properly leveled on an even surface. Adjust them as needed to eliminate wobbling.
c. Verify that the cross-bracing hardware is correctly installed and tightened. - Power outlets or USB ports not working:
a. Confirm that the desk's main power cord is securely plugged into a functional wall outlet.
b. Check if the wall outlet itself is receiving power by testing it with another device.
c. Ensure the power unit is correctly connected within the desk structure. - LED lights not turning on or changing modes:
a. Check the connection of the LED strip to the power source and controller.
b. Ensure the power outlet unit is functional (see above).
c. Try pressing the buttons on the controller firmly. - Drawers do not slide smoothly:
a. Ensure the fabric drawers are correctly assembled and not overloaded.
b. Check that the drawer unit frame is properly aligned and secured within the desk structure. - Missing or damaged parts upon arrival:
a. Do not proceed with assembly.
b. Contact customer support immediately for assistance.
8. Specifications
| Brand | AODK |
| Model Number | 135*110*76 |
| Type | L-Shaped Gaming/Office Desk |
| Color | Gray |
| Overall Dimensions (W x D x H) | Approx. 135 cm x 110 cm x 76 cm |
| Main Body Weight | Approx. 25.3 kg |
| Tabletop Load Capacity | 50 kg |
| Material | High-strength melamine laminated board, Steel frame |
| Drawers | 4 fabric drawers, reversible installation |
| Power Outlet Unit | 2 AC outlets (100-240V/15A), 2 USB ports (5V-2A), 1.8m extension cord |
| Lighting | RGB LED strip with 10 lighting modes and color adjustment, memory function |
| Monitor Stand | 3-stage adjustable height (9cm, 12cm, 15cm) |
| Additional Features | Headphone hook, adjustable feet for stability, cross-bracing for anti-sway |
9. Warranty and Support
9.1. Warranty Information
Specific warranty details are not provided in this manual. Please refer to the product packaging or your purchase receipt for warranty terms and conditions. Typically, products come with a limited warranty covering manufacturing defects.
9.2. Customer Support
If you have any questions, require assistance with assembly, or encounter any product defects, please do not hesitate to contact our customer support team. Contact information can usually be found on the product packaging, the seller's website, or your purchase platform.
When contacting support, please have your product model number (135*110*76) and purchase details ready to facilitate a quicker resolution.

