1. Introduction
The AVerMedia Core Go (Model GC313) is a versatile portable device designed to enhance your digital experience. It functions as a 4-in-1 USB-C hub and a 100W GaN fast charger, offering video output, charging capabilities, and data transfer. This device is compatible with a wide range of electronics, including handheld gaming consoles, laptops, tablets, and smartphones. This manual provides essential information for setup, operation, and maintenance of your Core Go.
2. What's Included
Please verify that all items listed below are present in your package:
- AVerMedia GC313 CORE GO USB-C Fast Charger x1
- USB Type-C to Type-C Braided Cable (2m/6.56ft) x1
- Changeable AC Plug x1
- Quick Start Guide x1

Image 2.1: Contents of the AVerMedia Core Go package, including the main unit, USB-C cable, and examples of compatible devices.
3. Product Overview
The AVerMedia Core Go combines multiple functionalities into a compact design:
- 4-in-1 USB Charging Hub: Provides video output, charging, data transfer, and hardware expansion.
- 4K60Hz HDMI Output: Connects to TVs or external monitors for high-resolution display.
- Expansion Hub: Adds ports for keyboards, headsets, webcams, USB microphones, or mice to handheld consoles, PCs, or laptops.
- 100W GaN USB Fast Charger: Features PD 3.0 and overload protection, capable of charging up to three devices simultaneously.
- Wide Compatibility: Works with devices such as Nintendo Switch 2, ROG Ally, Steam Deck, MacBook Air/Pro, iPads, and iPhones.

Image 3.1: Illustration of the Core Go's hub functionality, detailing connections for video sources (USB-C), display (HDMI), and various peripherals (USB-A, USB-C).
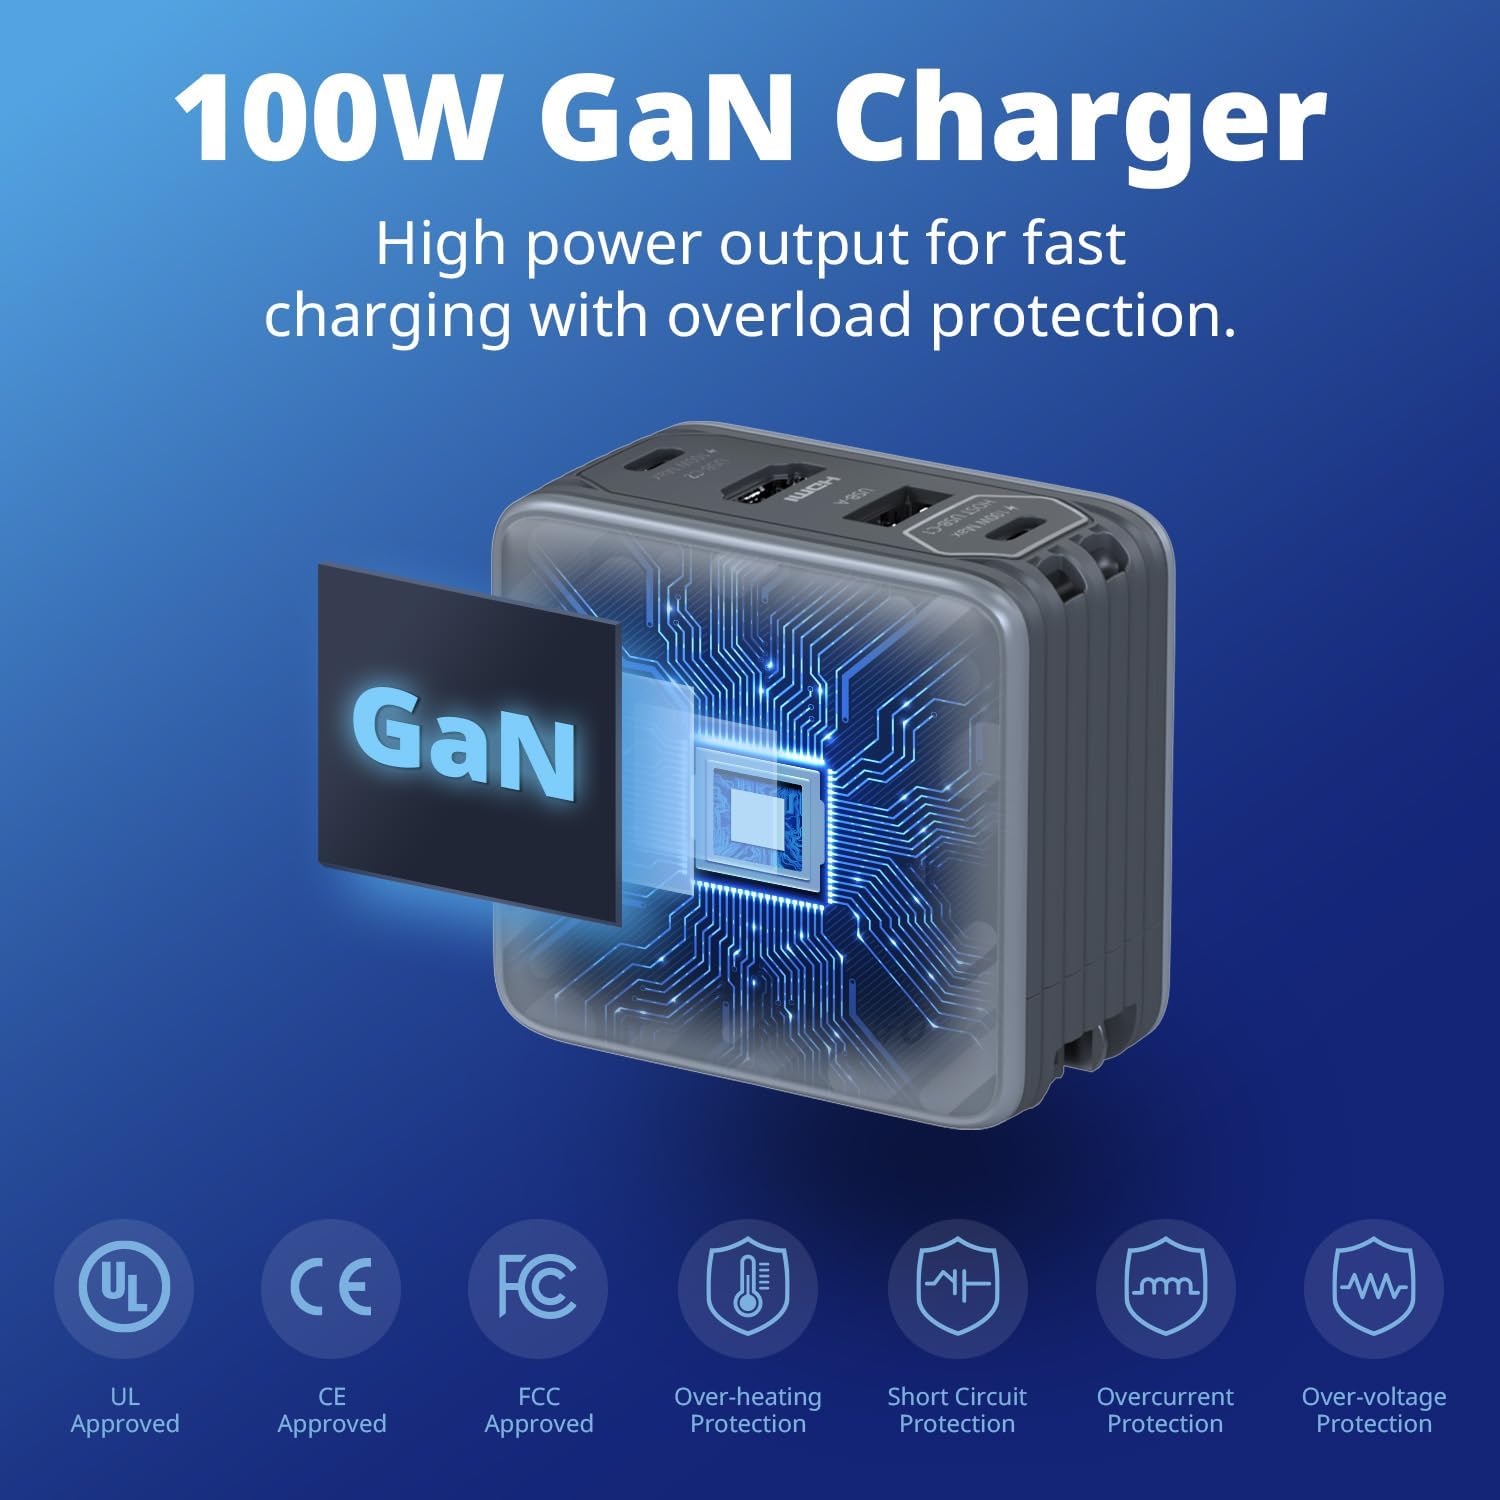
Image 3.2: Visual representation of the 100W GaN charger technology and its integrated safety protections, including over-heating, short circuit, overcurrent, and over-voltage protection.
4. Setup
4.1 Initial Connection
- Attach AC Plug: Select the appropriate changeable AC plug for your region and attach it to the Core Go unit.
- Connect to Power: Plug the Core Go into a wall outlet.
- Connect Host Device: Use the provided USB Type-C to Type-C braided cable to connect your host device (e.g., Nintendo Switch 2, Steam Deck, laptop) to the HOST USB-C1 port on the Core Go.
- Connect Display (Optional): If using for video output, connect an HDMI cable from the Core Go's HDMI port to your TV or monitor.
- Connect Peripherals (Optional): Connect USB-A or additional USB-C devices (e.g., keyboard, mouse, external drive) to the available USB-A and USB-C2 ports.
4.2 Firmware Update for Nintendo Switch 2
For optimal compatibility and full functionality with the Nintendo Switch 2, a firmware update for the AVerMedia Core Go may be required. Please follow these steps:
- Visit the official AVerMedia support website to download the latest firmware for the GC313 Core Go.
- Follow the instructions provided with the firmware download to perform the update. This typically involves connecting the Core Go to a computer.
- Important Note: When connecting the Nintendo Switch 2 to the Core Go for dock mode, ensure the USB-C cable is connected to the bottom (dock port) USB-C connection on the Switch 2. Dock mode may not activate if connected to the top USB-C port.

Image 4.1: The AVerMedia Core Go positioned near a Nintendo Switch 2 console and its official dock, illustrating its compatibility.
5. Operating Instructions
5.1 Video Output (Dock Mode)
To use the Core Go for video output to an external display:
- Ensure the Core Go is properly plugged into a wall outlet.
- Connect your host device (e.g., Nintendo Switch 2, Steam Deck, ROG Ally, laptop) to the HOST USB-C1 port using a compatible USB-C cable that supports 100W PD and data transfer.
- Connect an HDMI cable from the Core Go's HDMI port to your TV or monitor.
- Select the correct HDMI input on your display. The video from your host device should now appear on the external screen.

Image 5.1: Demonstrates the Core Go providing 4K60 HDMI display for both handheld gaming and professional presentations from a laptop.
5.2 Charging Multiple Devices
The Core Go can charge up to three devices simultaneously with intelligent power distribution.
- Single-Port Charging: The HOST USB-C1 port can deliver up to 100W. The USB-C2 port can deliver up to 100W. The USB-A port can deliver up to 5W.
- Two-Port Charging:
- HOST USB-C1 + USB-C2: 45W + 45W
- HOST USB-C1 + USB-A: 100W + 5W
- USB-C2 + USB-A: 100W + 5W
- Three-Port Charging: HOST USB-C1 + USB-C2 + USB-A: 45W + 45W + 5W
Power Delivery (PD 3.0) ensures efficient and safe charging for compatible devices like iPhones, iPads, and laptops.

Image 5.2: Detailed power distribution for single, dual, and triple device charging scenarios with the Core Go.

Image 5.3: The Core Go simultaneously charging a laptop, a tablet, and wireless earbuds, demonstrating its triple-device charging capability.

Image 5.4: Examples of fast charging speeds for various devices, including iPhone 16 Pro Max, iPad Pro 11, and Samsung S24 Ultra, using the Core Go's PD3.0 Quick Charge feature.
5.3 Using as a USB Hub
The USB-A and USB-C2 ports can be used to connect various peripherals to your host device. This functionality operates without requiring electric power for the hub itself, though power is needed for charging connected devices.
- Connect USB-A devices such as keyboards, mice, game controllers, or USB drives.
- Connect USB-C devices to the USB-C2 port for data transfer or charging.
6. Maintenance
- Cleaning: Disconnect the device from power before cleaning. Use a soft, dry cloth to wipe the exterior. Avoid liquid cleaners or abrasive materials.
- Storage: Store the Core Go in a cool, dry place away from direct sunlight and extreme temperatures.
- Handling: Avoid dropping the device or subjecting it to strong impacts.
- Moisture: Keep the device away from water and high humidity.
7. Troubleshooting
7.1 No Video Output to External Display
- Power Connection: Ensure the Core Go is properly plugged into a wall outlet.
- Cable Check: Verify that the USB-C cable connecting the host device to the Core Go supports both 100W Power Delivery and data transfer. Ensure the HDMI cable is securely connected to both the Core Go and the display.
- Display Input: Confirm your TV or monitor is set to the correct HDMI input source.
- Nintendo Switch 2 Specific: If using with Nintendo Switch 2, ensure the USB-C cable is connected to the bottom USB-C port of the console. Also, confirm that the Core Go's firmware is updated to the latest version.
- Host Device Settings: Check your host device's display settings to ensure external display output is enabled.
7.2 Device Not Charging or Slow Charging
- Power Source: Ensure the wall outlet is functional.
- Cable Quality: Use high-quality USB-C cables that support Power Delivery for optimal charging speeds.
- Device Compatibility: Verify that your device supports USB Power Delivery (PD) for fast charging.
- Port Usage: Refer to the "Charging Multiple Devices" section for power distribution when multiple ports are in use. Charging speeds may vary depending on the number of connected devices.
7.3 Connected Peripherals Not Functioning
- Connection: Ensure peripherals are securely plugged into the USB-A or USB-C2 ports.
- Host Device Recognition: Check your host device's settings or device manager to see if the peripheral is recognized.
- Power Requirements: Some high-power peripherals may require external power or may not function optimally if the Core Go is heavily loaded with other devices.
8. Specifications
| Model Number | GC313 |
| Brand | AVerMedia |
| Package Dimensions | 7.52 x 4.69 x 2.87 inches |
| Item Weight | 1.19 pounds |
| Connector Type | USB Type A, USB Type C, HDMI |
| Compatible Devices | Game Consoles (Nintendo Switch, ROG Ally, Steam Deck), Headphones, Laptops, Monitors, Tablets |
| Special Features | Braided Cable, Fast Charging, Multi Device Charging, Short Circuit Protection, Travel-friendly |
| Input Voltage | 240 Volts (AC) |
| Total USB Ports | 3 (2x USB-C, 1x USB-A) |
| Wattage | 100W (Max) |
9. Warranty & Support
For detailed warranty information, please refer to the official AVerMedia website or the warranty card included with your product. AVerMedia provides customer support for product inquiries, technical assistance, and warranty claims.
AVerMedia Support:
- Website: Visit the AVerMedia Support Page for FAQs, driver downloads, firmware updates, and contact information.
- Online Resources: Check for product registration, troubleshooting guides, and community forums.


