
Introduction
This manual provides detailed instructions for the assembly, operation, and maintenance of your Tilta Camera Cage Base Kit (Model ES-T21-A). This kit is specifically designed to enhance the functionality and protection of Blackmagic Pyxis 6K and Pyxis 12K camera bodies, offering a modular and versatile rigging solution.

Image: The Tilta Camera Cage Base Kit fully assembled around a Blackmagic Pyxis 6K camera, showcasing its protective and functional design.
What's in the Box
The Tilta Camera Cage Base Kit (ES-T21-A) includes the following components:
- 1x Top Plate A for Blackmagic PYXIS 6K/12K (21101.00065.00.00)
- 1x Left Side Arm for Blackmagic PYXIS 6K (21101.00066.00.00)
- 1x Right Side Arm for Blackmagic PYXIS 6K (21101.00067.00.00)
- 1x Bottom Plate for Blackmagic PYXIS 6K (21101.00068.00.00)
- 1x Side Plate for Blackmagic PYXIS 6K (12001.00160.00.00)
- 1x Tilta Multi-Functional Mini Tool Kit – Black (TA-MMT-B)
- 1x Manfrotto Quick Release Bottom Plate for Blackmagic PYXIS 6K (32101.00321.00.00)
- 1x Tilta Xeno Top Handle (NATO) – Black (TA-XTH3-B)
- 1x Tilta Xeno Side Handle (NATO) – Black (TA-XSH3-B)
Setup Instructions
Follow these steps to assemble your camera cage and prepare it for use:
- Assemble the Camera Cage:
The cage features a modular design. Attach the Left Side Arm, Right Side Arm, Top Plate, and Bottom Plate to your Blackmagic Pyxis 6K/12K camera body using the included screws and the Tilta Multi-Functional Mini Tool Kit. Ensure all connections are secure. - Attach the Side Plate:
The multi-functional Side Plate can be attached to either the left or right side arm of the cage. This plate supports vertical setups and features an SSD mounting slot. - Mount the Top Handle:
The Tilta Xeno Top Handle (NATO) attaches to the integrated NATO rail on the top plate of the cage. Slide the handle onto the NATO rail and secure it using its locking mechanism. - Mount the Side Handle:
The Tilta Xeno Side Handle (NATO) can be mounted to the NATO rail located on either the left or right side arm of the cage. Slide the handle onto the NATO rail and tighten its locking mechanism. - Attach the Manfrotto Quick Release Bottom Plate:
Secure the Manfrotto Quick Release Bottom Plate to the bottom of the cage. This allows for quick attachment and detachment from compatible Manfrotto tripods or baseplates.

Image: Exploded view illustrating the modular design of the cage, showing the side plate, top plate, left side arm, right side arm, and bottom plate.
Operating Instructions
Horizontal and Vertical Configurations
The cage supports quick transitions between horizontal and vertical shooting setups. The side plate can be used as a bottom plate for vertical configurations, providing sufficient space between rods and the lens for most accessories.
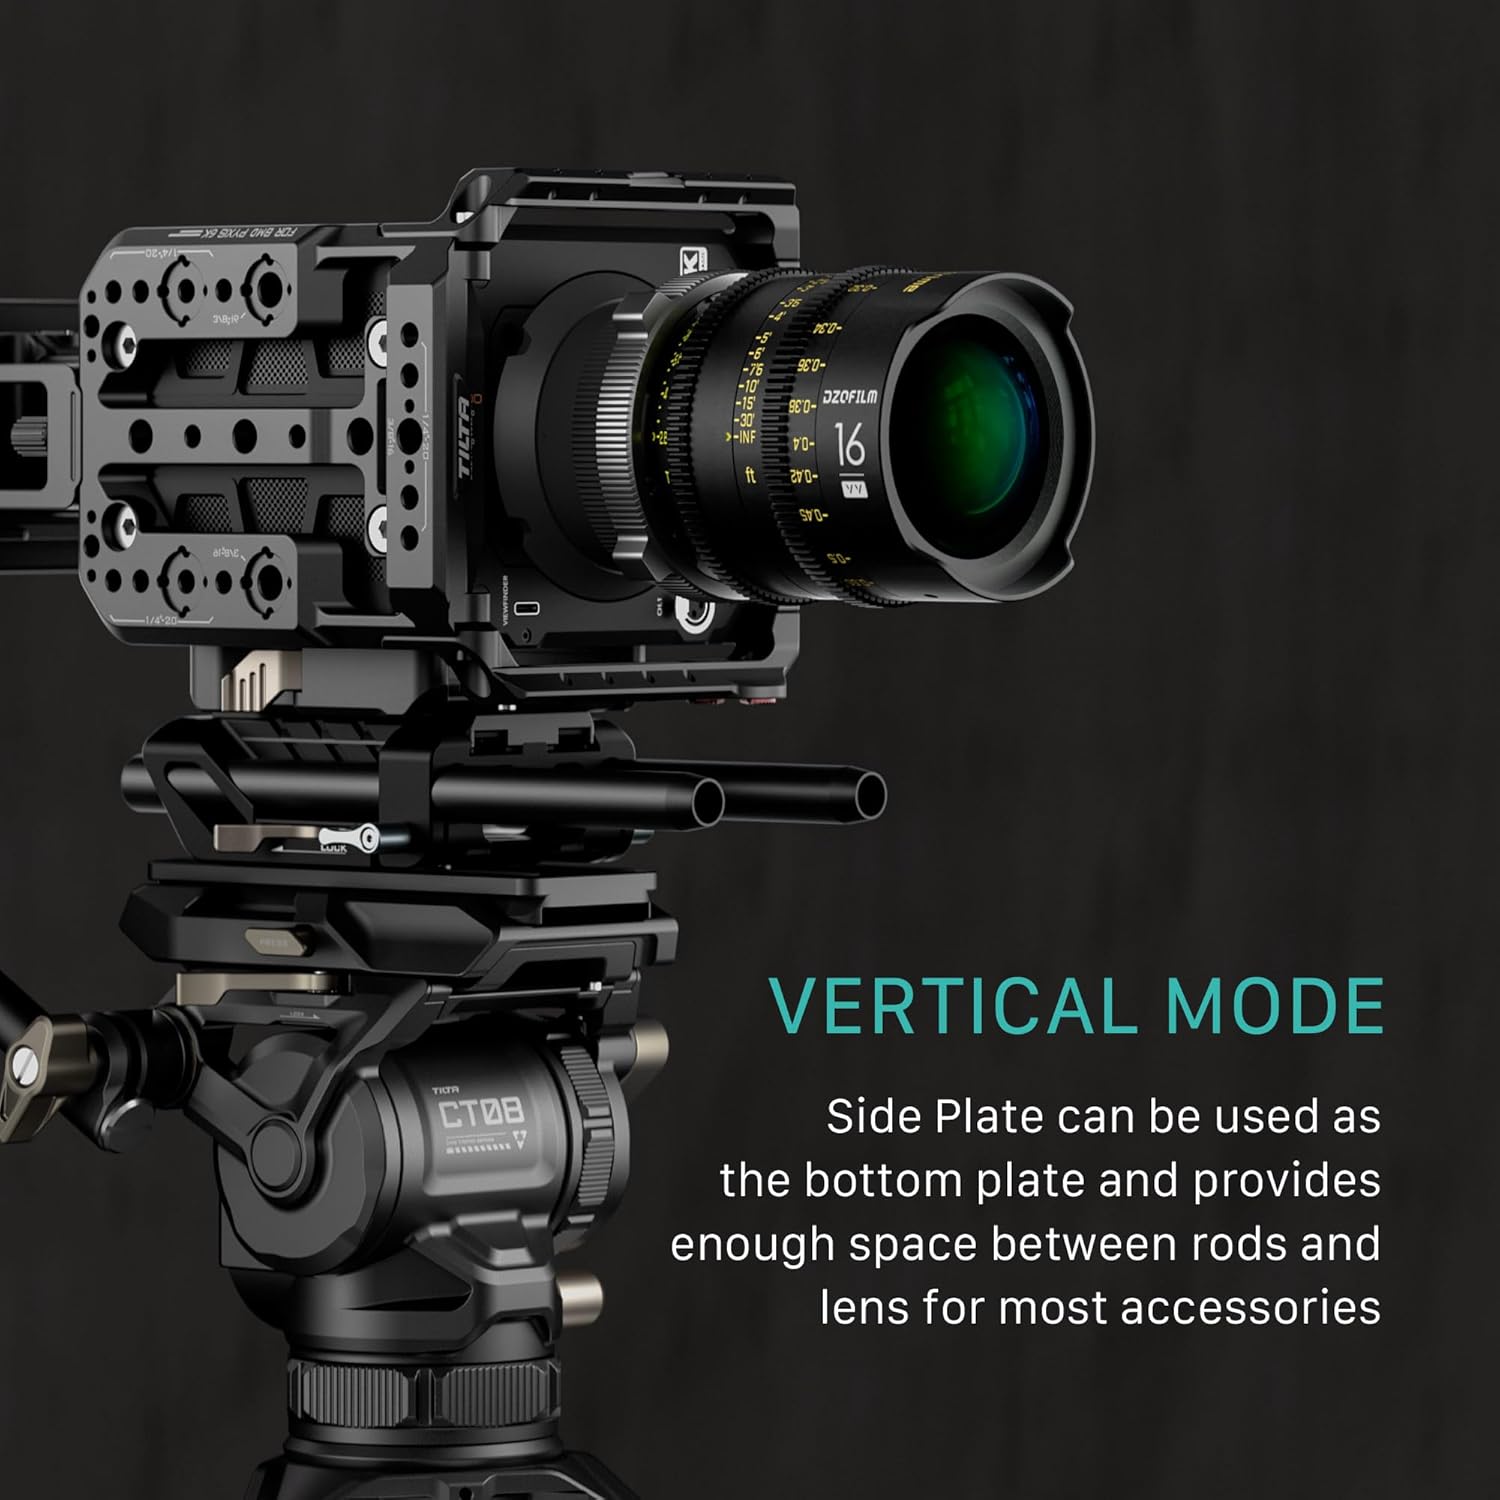
Image: Camera cage in horizontal mode, demonstrating compatibility with LWS 85mm standard accessories like a matte box.
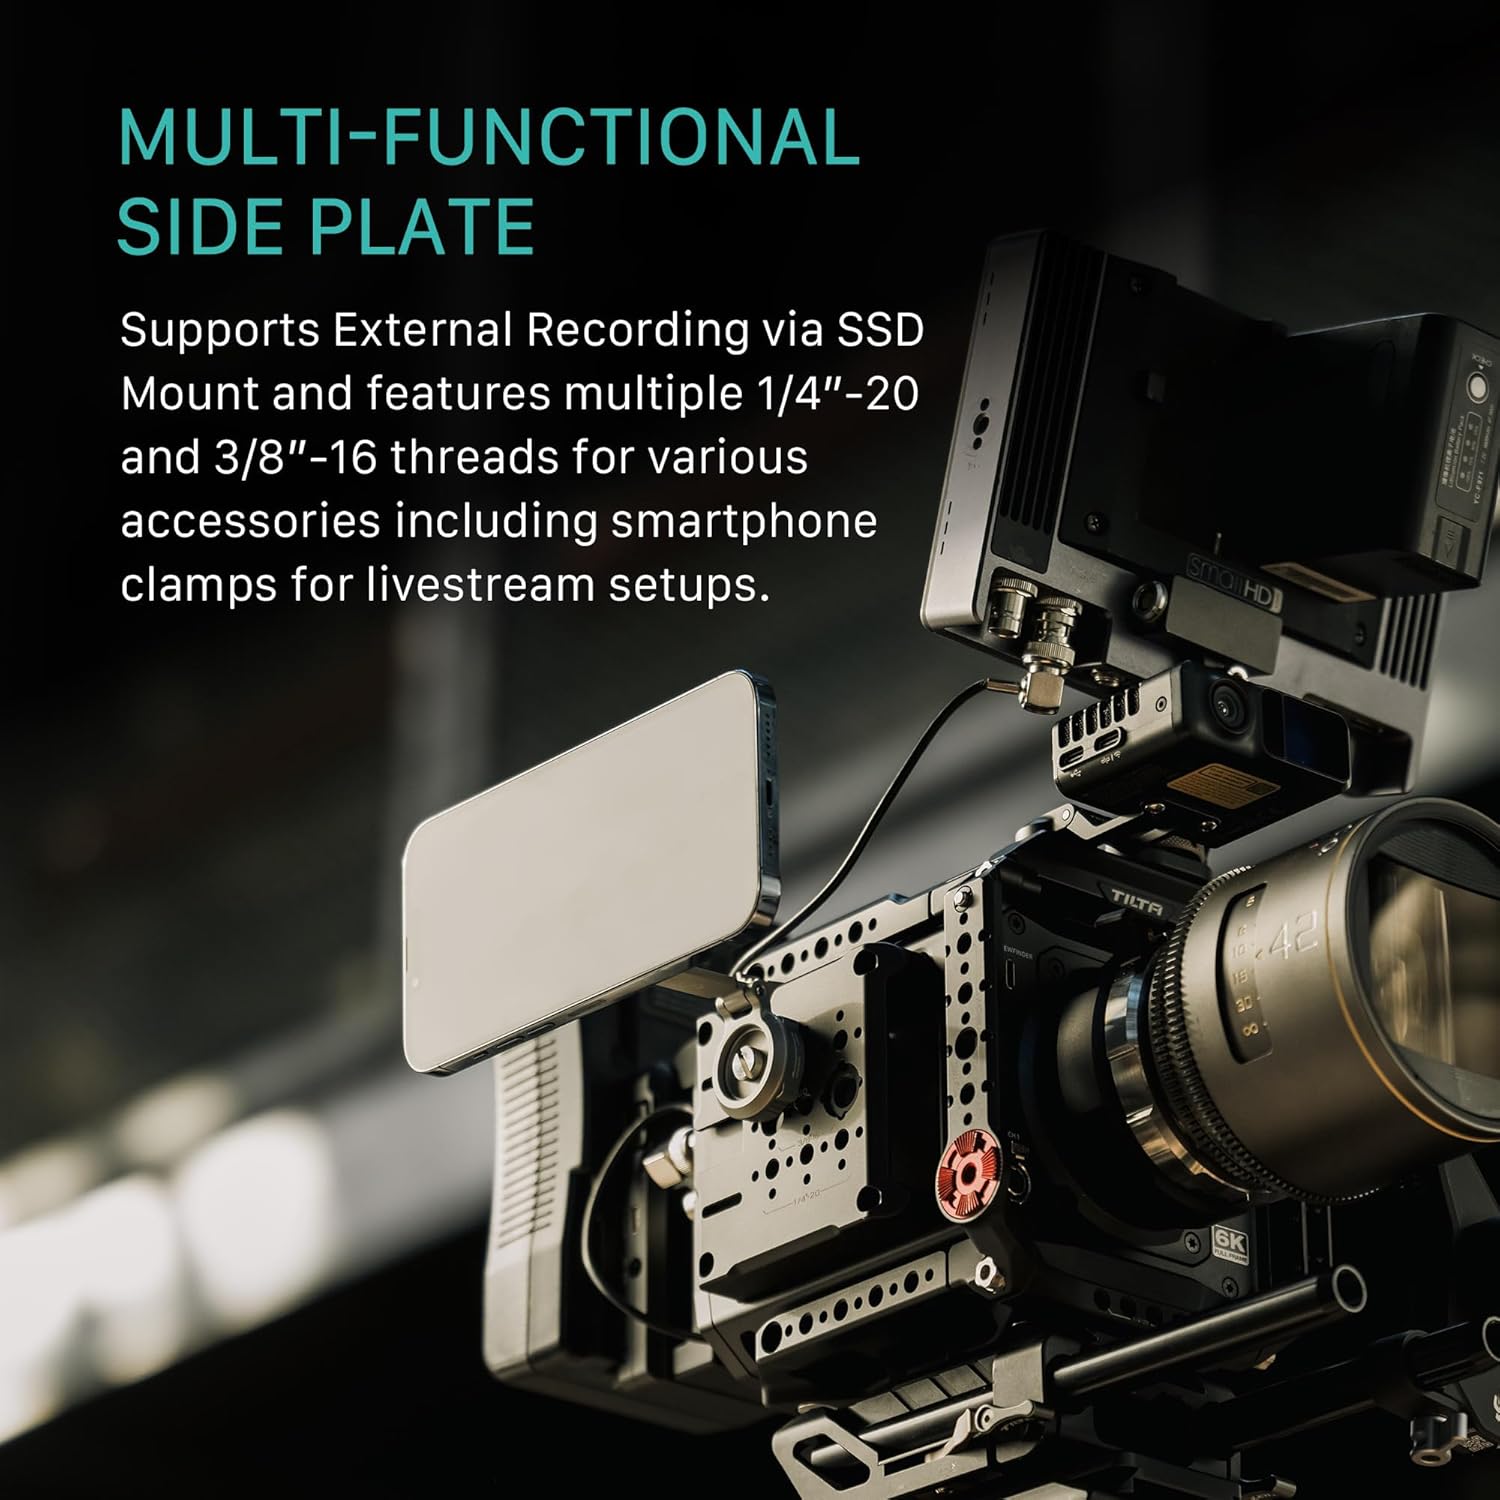
Image: Camera cage configured for vertical shooting, mounted on a tripod, highlighting the side plate's function as a bottom plate.
SSD Mounting
The multi-functional side plate includes a dedicated slot for mounting external SSDs, supporting drives 52-60mm wide and less than 12mm thick. This allows for direct recording to external storage.

Image: Detailed view of the SSD mounting slot on the side plate, showing dimensions for compatible hard drives.
Accessory Expansion
The cage is equipped with various mounting points for a wide range of accessories:
- NATO Rails: Located on the top plate and side arms for quick attachment of handles and other NATO-compatible accessories.
- ARRI Anti-Twist 3/8"-16 Threads: For secure mounting of accessories with anti-twist pins.
- 1/4"-20 and 3/8"-16 Threads: Standard mounting points for various camera accessories.
- Cold Shoe Mounts: For attaching microphones, small lights, or other cold shoe accessories.
- Rosette Mounts: For attaching handles or other accessories requiring a rosette connection.

Image: An annotated diagram of the camera cage, pointing out and labeling the various mounting points such as NATO rails, ARRI anti-twist threads, cold shoe, and rosette.
Official Product Video
Video: An official product video from Tilta demonstrating the features and assembly of the Tilta Camera Cage for Blackmagic PYXIS 6K.
Maintenance
To ensure the longevity and optimal performance of your Tilta Camera Cage Base Kit, follow these maintenance guidelines:
- Cleaning: Use a soft, dry cloth to wipe down the cage components after each use. For stubborn dirt, a slightly damp cloth can be used, followed by immediate drying. Avoid abrasive cleaners or solvents.
- Inspection: Regularly inspect all screws and connections to ensure they remain tight. Re-tighten any loose fasteners using the provided mini tool kit.
- Storage: Store the cage in a dry, dust-free environment when not in use.
Troubleshooting
| Problem | Possible Cause | Solution |
|---|---|---|
| Accessories do not attach securely to NATO rails. | Locking mechanism not fully engaged or misaligned. | Ensure the accessory is correctly aligned with the NATO rail and the locking lever is fully tightened. Verify the accessory is NATO compatible. |
| Cage components feel loose after assembly. | Screws are not sufficiently tightened. | Use the Tilta Multi-Functional Mini Tool Kit to re-tighten all assembly screws. Do not overtighten. |
| SSD does not fit into the side plate slot. | SSD dimensions exceed the supported size. | Ensure your SSD is between 52-60mm wide and less than 12mm thick. Use a compatible SSD. |
Specifications
| Feature | Detail |
|---|---|
| Model Name | ES-T21-A |
| Brand | Tilta |
| Color | Black |
| Compatible Devices | Blackmagic Pyxis 6K, Blackmagic Pyxis 12K, Camera |
| Item Weight | 3.3 pounds |
| Folded Size | 10 inches (L) x 5 inches (W) x 3 inches (H) |
| UPC | 810153172581 |
| Global Trade Identification Number (GTIN) | 00810153172581 |
| Number of Items | 1 |
| Water Resistance Level | Not Water Resistant |
Warranty Information
The Tilta Camera Cage Base Kit ES-T21-A comes with a 2-year warranty from the date of purchase. This warranty covers manufacturing defects and ensures the product is free from defects in material and workmanship under normal use. Please retain your proof of purchase for warranty claims. For specific terms and conditions, refer to the official Tilta warranty policy or contact customer support.
Support
For further assistance, technical support, or inquiries regarding your Tilta Camera Cage Base Kit, please visit the official Tilta website or contact their customer service department. Contact information can typically be found on the Tilta website or product packaging.


