
Introduction
This manual provides detailed instructions for the CUIUIC 18.5-inch Portable Monitor 185DM2. It covers setup, operation, maintenance, troubleshooting, and product specifications to ensure optimal performance and user experience. This monitor features a 1920x1080 Full HD IPS panel with a 120Hz refresh rate, offering vivid and clear visuals for various applications, including gaming and professional use. It supports multiple connections via USB-C and Mini-HDMI, making it compatible with a wide range of devices.

Image: The CUIUIC 18.5-inch Portable Monitor with its magnetic protective cover acting as a stand, showcasing a vibrant display. Key features like 178° viewing angle, 100% sRGB, FHD 1920x1080 resolution, and 120Hz refresh rate are indicated.
Setup
Package Contents
Before starting, ensure all items are present in the package:
- CUIUIC 18.5-inch Portable Monitor
- Magnetic Protective Cover (doubles as a stand)
- Power Adapter
- USB Type-C to Type-C Cable (x2)
- Mini HDMI to HDMI Cable
- User Manual

Image: An illustration showing the CUIUIC 18.5-inch Portable Monitor and its accessories: the monitor itself, a magnetic protective cover, a user manual, a power adapter, two Type-C to Type-C cables, and one Mini HDMI to HDMI cable.
Connecting the Monitor
The monitor offers flexible connectivity options. Please ensure your device's Type-C port supports video output if using a single Type-C cable for both video and power.
Single Cable Connection (USB Type-C)
For devices with a full-function USB Type-C port (supporting Thunderbolt 3/4, DisplayPort Alt Mode, and power delivery), you can connect the monitor using a single USB Type-C to Type-C cable. This cable will transmit both video signal and power to the monitor.
- Connect one end of the USB Type-C to Type-C cable to your device's compatible Type-C port.
- Connect the other end of the cable to one of the monitor's full-function Type-C ports.
- The monitor should automatically detect the signal and power on.

Image: A MacBook connected to the CUIUIC portable monitor using a single USB Type-C cable, illustrating simultaneous video and power transmission.
Two Cable Connection (Mini HDMI + USB-C Power)
If your device does not have a full-function Type-C port, or if you prefer to use HDMI, you will need two cables: one for video and one for power.
- Connect one end of the Mini HDMI to HDMI cable to your device's HDMI output.
- Connect the Mini HDMI end of the cable to the monitor's Mini HDMI port.
- Connect the provided power adapter to a power outlet.
- Connect the USB-C power cable from the adapter to one of the monitor's Type-C ports for power.
- The monitor should power on and display the video signal.

Image: A MacBook connected to the CUIUIC portable monitor using a Mini HDMI cable for video and a USB-C power cable for power, demonstrating a two-cable setup.
Using the Protective Cover as a Stand
The included magnetic protective cover can be folded to create a stable stand for the monitor. This allows for adjustable viewing angles and protects the screen during transport.

Image: The CUIUIC portable monitor positioned on a desk, with its magnetic protective cover folded to form a stable stand, showcasing its versatility.
Operating Instructions
Monitor Ports and Controls
Familiarize yourself with the monitor's ports and control buttons for easy operation.

Image: A detailed diagram illustrating the various ports and control buttons on the CUIUIC portable monitor. These include two full-function USB Type-C ports, a Mini HDMI port, a 3.5mm audio output, and buttons for brightness/volume adjustment, menu access, and signal selection.
- USB Type-C Ports (x2): Full-function ports for video, audio, and power.
- Mini HDMI Port (x1): For video and audio input from HDMI-enabled devices.
- 3.5mm Audio Jack: For connecting headphones or external speakers.
- Power/Menu Button: Press to power on/off, long press to access the OSD menu.
- Brightness/Volume Buttons: Adjust brightness or navigate menu options.
- Signal Selection Button: Switch between input sources.
Display Modes
The monitor supports various display modes to enhance productivity and entertainment.
- Extension Mode: Extends your primary display, providing more screen real estate for multitasking.
- Copy Mode: Duplicates your primary display, useful for presentations or sharing content.
- Vertical Display Mode: Rotates the display 90 degrees for portrait orientation, ideal for coding, document viewing, or social media feeds.

Image: Three scenarios demonstrating the CUIUIC portable monitor's display modes: Extension Mode (extending a laptop screen), Copy Mode (mirroring a laptop screen), and Vertical Display Mode (monitor rotated 90 degrees for portrait view).
On-Screen Display (OSD) Menu
Access the OSD menu to adjust various display settings such as brightness, contrast, color temperature, HDR mode, and input source.
- Long press the Power/Menu button to open the OSD menu.
- Use the Brightness/Volume buttons to navigate through the menu options.
- Press the Power/Menu button again to select an option.
- Use the Brightness/Volume buttons to adjust the selected setting.
- Press the Signal Selection button to exit the menu.
HDR Mode
The monitor supports HDR mode, which enhances contrast and color accuracy for a more immersive viewing experience, especially with compatible content.

Image: A side-by-side comparison of an image displayed in HDR (High Dynamic Range) mode versus SDR (Standard Dynamic Range) mode, demonstrating the enhanced colors and contrast provided by HDR.
Built-in Speakers
The monitor features built-in dual speakers for stereo audio output. You can also connect external headphones or speakers via the 3.5mm audio jack.

Image: An illustration highlighting the built-in dual speakers of the CUIUIC portable monitor, indicating their position and the stereo sound they provide.
Maintenance
Cleaning the Monitor
- Always power off the monitor and disconnect it from the power source before cleaning.
- Use a soft, lint-free cloth slightly dampened with water or a mild, non-abrasive screen cleaner.
- Do not spray cleaner directly onto the screen. Apply it to the cloth first.
- Avoid using harsh chemicals, alcohol, or ammonia-based cleaners, as they can damage the screen surface.
- Gently wipe the screen and casing to remove dust and smudges.
Storage
- When not in use, store the monitor in a cool, dry place.
- Use the magnetic protective cover to shield the screen from dust and scratches.
- Avoid placing heavy objects on the monitor.
Troubleshooting
| Problem | Possible Cause | Solution |
|---|---|---|
| No display/No signal |
|
|
| Screen flickering or unstable image |
|
|
| No sound from speakers/headphones |
|
|
| Settings reset after power off |
|
|
Specifications
| Feature | Detail |
|---|---|
| Brand | CUIUIC |
| Model Number | 185DM2 |
| Screen Size | 18.5 inches |
| Resolution | 1920 x 1080 (Full HD) |
| Aspect Ratio | 16:9 |
| Panel Type | IPS LCD |
| Screen Surface | Non-glare |
| Refresh Rate | 120 Hz |
| Response Time | 2 ms |
| Color | Black |
| Connectivity | 2x Full-function USB Type-C, 1x Mini HDMI, 1x 3.5mm Audio Jack |
| Special Features | HDR Mode, Built-in Speakers, VESA Mount (75x75mm) |
| Origin | China |
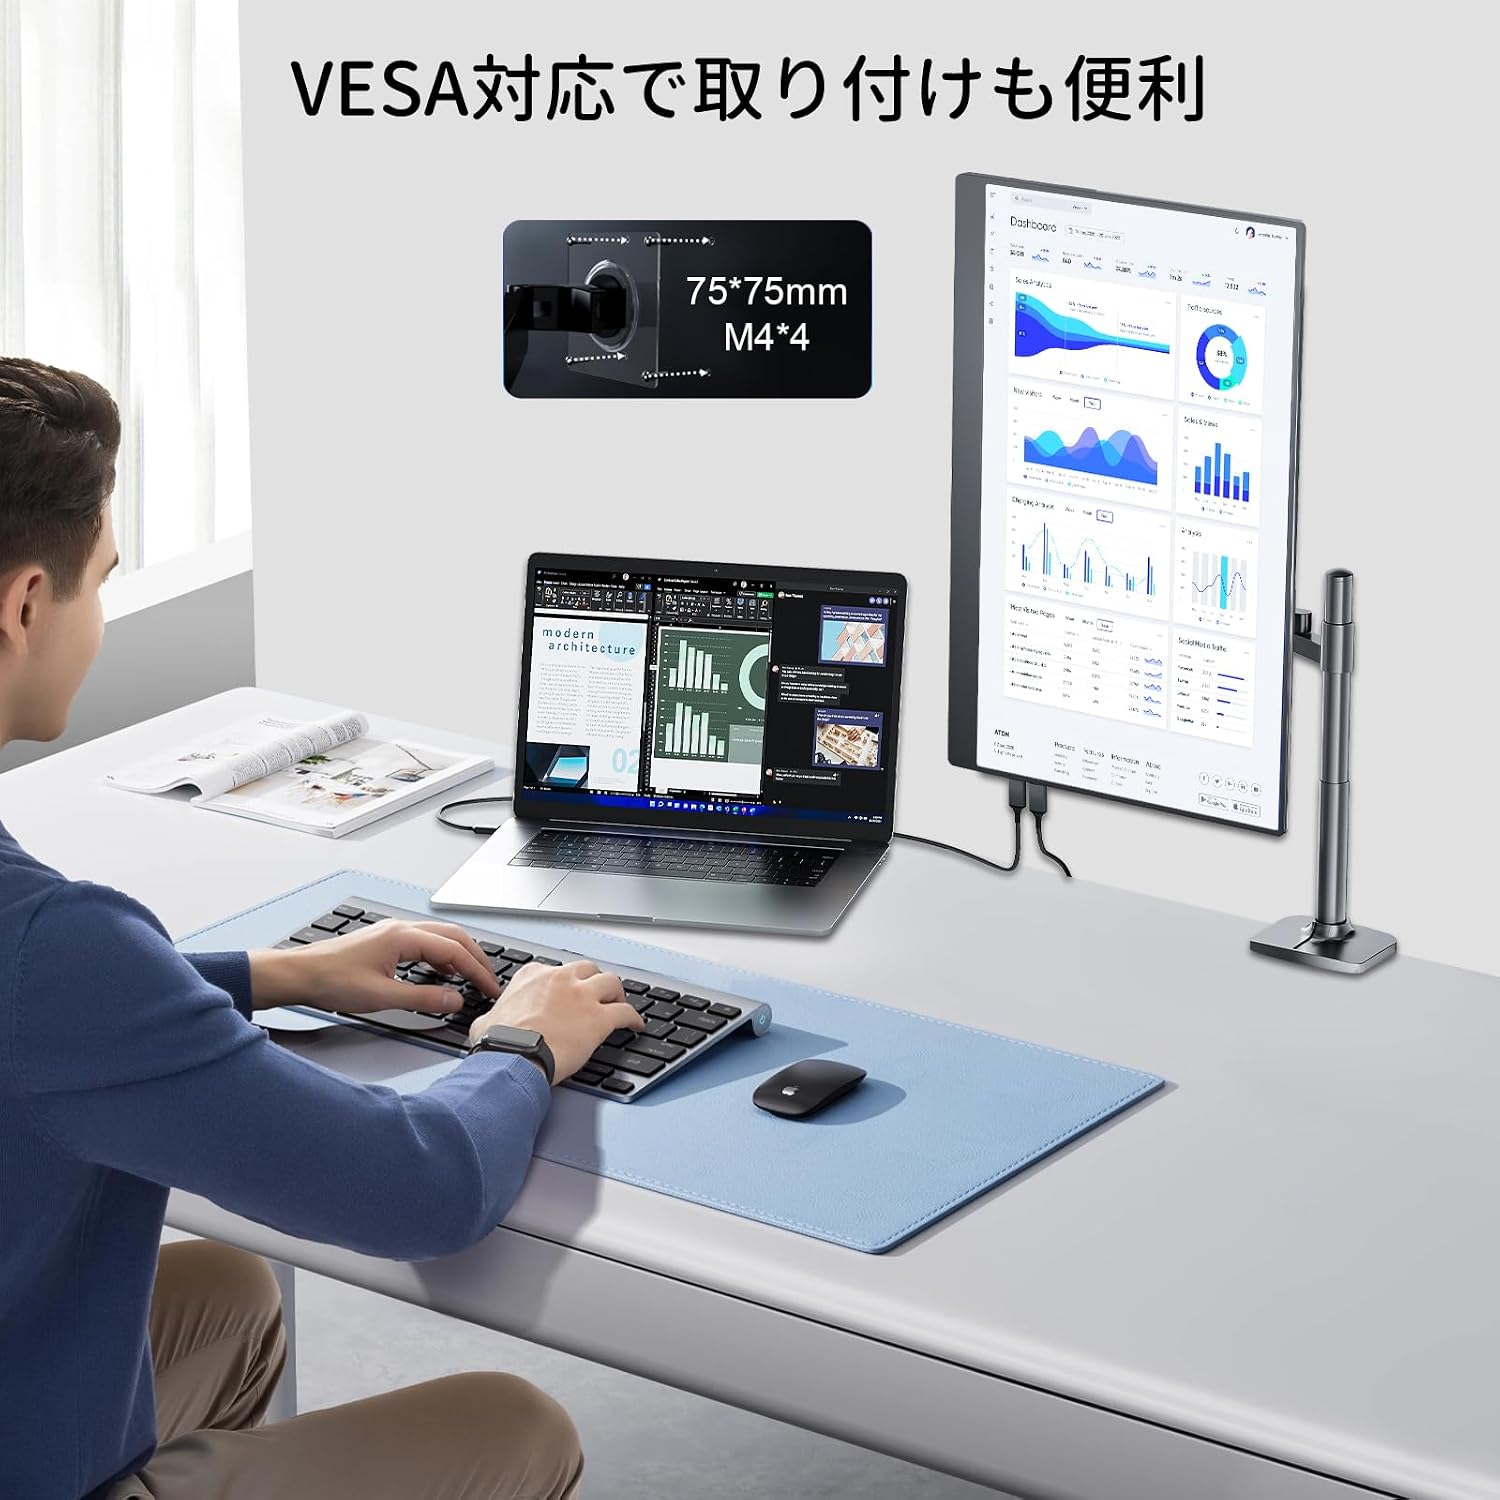
Image: A person working at a desk with a laptop and the CUIUIC portable monitor mounted vertically on a VESA arm, highlighting the monitor's VESA 75x75mm compatibility for flexible mounting options.
Warranty and Support
Quality Assurance
All products undergo 100% inspection before shipment to prevent initial defects. We are committed to providing the highest standard of customer service.
Return Policy
Returns for product-related issues are accepted without question within 30 days from the date of purchase.
1-Year Manufacturer's Warranty
A 1-year warranty is provided from the date of purchase. If any product quality defects occur within this period, we will arrange for a new product replacement or a refund.
Customer Service
For any questions or concerns regarding the product, please feel free to contact our customer support center at any time. We are here to assist you.


