
Eastwood 98274Z
Eastwood HotCoat PCS-250 Powder Coating System User Manual
Model: 98274Z
Introduction
This manual provides essential information for the safe and effective operation, maintenance, and troubleshooting of your Eastwood HotCoat PCS-250 Powder Coating System. Please read this manual thoroughly before operating the equipment.
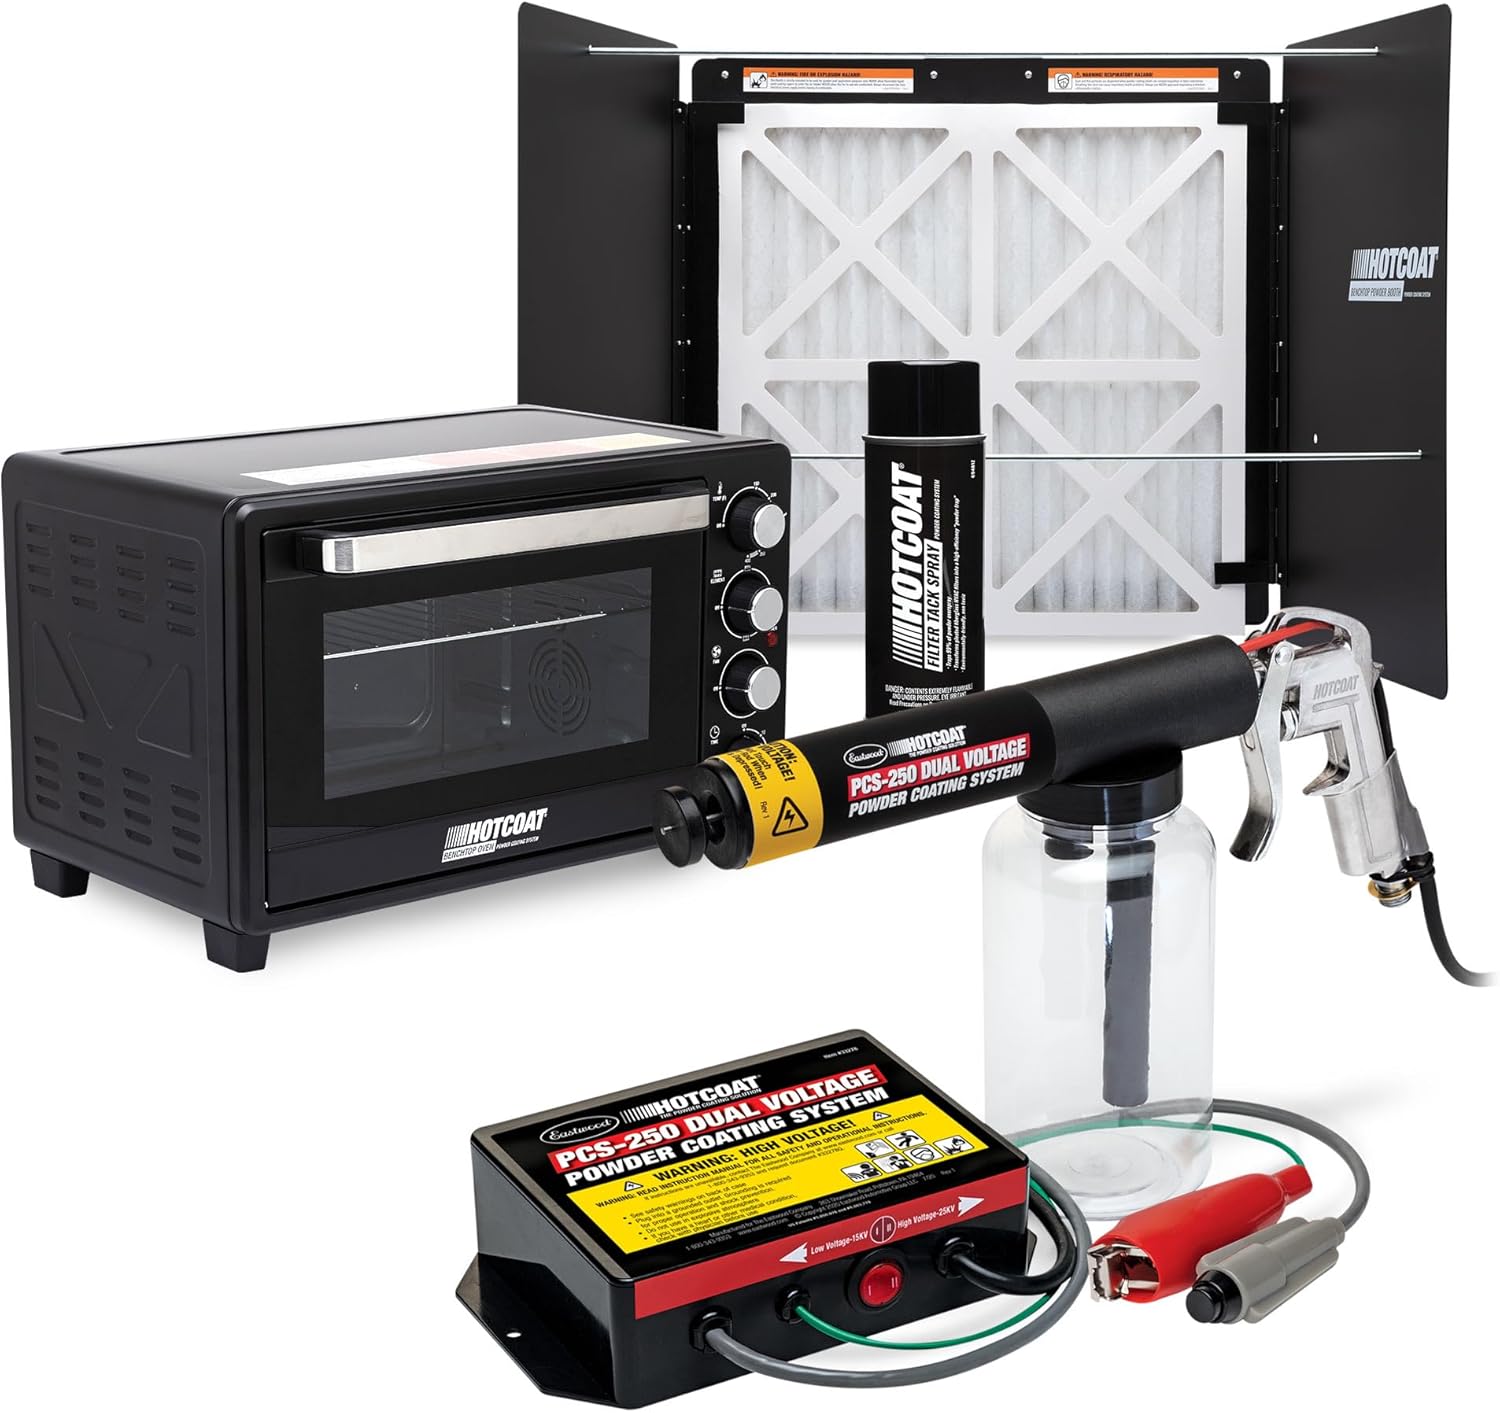
Figure 1: Complete Eastwood HotCoat PCS-250 Powder Coating System Kit.
What's Included
The Eastwood HotCoat PCS-250 Powder Coating Kit includes the following components:
- (1) 33278 Eastwood Hotcoat PCS-250 Dual Voltage Powder Coating System
- (1) 68076 HotCoat BenchTop Powder Coating Oven
- (1) 70016 HotCoat BenchTop Powdercoating Booth
- (1) 72054 HotCoat 20x20x1 Powder Booth Filter
- (1) 69481Z HotCoat Filter Tack Spray
Note: A box fan is not included and is required for the powder coating booth operation.
Setup
1. Workspace Preparation
Ensure your workspace is well-ventilated and free from flammable materials. A clean, dry environment is crucial for optimal powder adhesion and safety.
2. Powder Coating Gun Setup (PCS-250)
- Connect the powder coating gun to the control unit.
- Attach the ground cable to the workpiece or a dedicated ground point.
- Ensure a compressed air source (5-10 PSI) is connected to the gun.
- Fill the powder bottle with your desired powder.

Figure 2: Detailed view of the PCS-250 Powder Coating System components.
3. Benchtop Powder Coating Booth Assembly
- Assemble the booth according to the included instructions.
- Insert the 20x20x1 powder booth filter into the designated slot.
- Apply HotCoat Filter Tack Spray to the filter to enhance powder capture.
- Position a standard 20-inch box fan behind the filter to create airflow, drawing overspray away from the workpiece.

Figure 3: Benchtop Powder Coating Booth with fan installed (fan not included).
4. Benchtop Oven Placement
Place the HotCoat Benchtop Powder Coating Oven on a stable, heat-resistant surface. Ensure adequate clearance around the oven for ventilation.

Figure 4: HotCoat Benchtop Powder Coating Oven.
Operating Instructions
1. Part Preparation
Thoroughly clean and degrease the part to be coated. Any contaminants will affect powder adhesion and finish quality. Ensure the part is completely dry.
2. Powder Application
- Connect the ground cable to the part.
- Select the appropriate voltage setting on the PCS-250 control unit:
- Low (15kv): Ideal for small areas or initial coats.
- High (25kv): Recommended for larger surfaces and multi-coat coverage.
- Hold the gun approximately 6-8 inches from the part and apply powder in even, sweeping motions. Aim for uniform coverage.

Figure 5: Applying powder coating within the booth.

Figure 6: Detailed view of powder application on small components.
3. Curing Process (Benchtop Oven)
- Carefully transfer the powder-coated part to the HotCoat Benchtop Oven.
- Set the oven temperature and time according to the powder manufacturer's specifications.
- Utilize the selectable upper and lower heating elements and air circulation fan for optimum heat distribution and consistent curing.
- Allow the part to cool completely after curing before handling.

Figure 7: Curing a powder-coated part in the oven.
Maintenance
- Powder Gun: After each use, empty any remaining powder from the bottle and clean the gun thoroughly to prevent clogs and ensure consistent performance. Use compressed air to clear internal passages.
- Powder Booth Filter: Regularly inspect and replace the 20x20x1 powder booth filter as needed. A clogged filter reduces airflow and overspray capture efficiency.
- Oven: Keep the interior of the oven clean to prevent contamination of future projects. Wipe down surfaces after they have cooled.
- General: Store all components in a clean, dry environment when not in use.
Troubleshooting
| Problem | Possible Cause | Solution |
|---|---|---|
| Uneven powder flow / Spitting | Clogged gun nozzle or internal passages; insufficient air pressure; moisture in powder. | Clean the gun thoroughly. Check air pressure (5-10 PSI). Ensure powder is dry; store in a sealed container. |
| Poor powder adhesion | Improper grounding; dirty workpiece; incorrect voltage setting. | Verify ground connection. Clean and degrease workpiece thoroughly. Adjust voltage setting (try high 25kv for better coverage). |
| Powder not curing properly | Incorrect oven temperature or time; uneven heat distribution. | Verify oven temperature with an external thermometer. Adjust curing time as per powder manufacturer. Utilize oven's fan and element controls for even heat. |
| Excessive overspray | Fan not operating; clogged booth filter; incorrect gun distance. | Ensure box fan is on and positioned correctly. Replace or clean booth filter. Adjust gun distance to 6-8 inches from workpiece. |
Specifications
| Feature | Detail |
|---|---|
| Product Model Number | 98274Z |
| Powder Coating Gun Voltage Settings | 15,000 Volts (Low), 25,000 Volts (High) |
| Power Source | Standard 120V Household Current |
| Required Air Source | Compressed Air (5-10 PSI) |
| Benchtop Oven Features | Selectable Upper/Lower Heating Elements, Air Circulation Fan |
| Powder Booth Compatibility | Standard 20-inch Box Fan (not included) |
| Item Weight | 46 pounds (total kit) |
Warranty and Support
For warranty information, technical support, or replacement parts, please contact Eastwood Customer Service directly. Refer to your purchase documentation or visit the official Eastwood website for the most current contact details.
Eastwood is committed to customer satisfaction and stands behind its products with a 100% Satisfaction Guarantee since 1978.

Eastwood: Do The Job Right.
Ask a question about this manual
Ask about setup, troubleshooting, compatibility, parts, safety, or missing instructions. Manuals+ will review the question and use this page’s manual context to help answer it.