1. Introduction
The GTMEDIA X1 is a 4K Next-Gen ATSC3.0 TV Converter designed to enhance your television viewing experience. It provides extensive compatibility with ATSC3.0, ATSC1.0 digital terrestrial, and QAM-B (Clear QAM) wired signals. Featuring a powerful processor, ample storage, and advanced connectivity options, the X1 allows for high-quality video streaming, DVR recording, and access to various applications.

Image: The GTMEDIA X1 4K ATSC3.0 TV Converter, a compact black device with a stylized "HDTV" logo on top and "Converter X1" text on the front.
2. Package Contents
Please verify that all items listed below are included in your package. If any items are missing or damaged, please contact customer support.
- 1x GTMEDIA HDTV Converter X1
- 1x IR Remote Control
- 1x Power Adapter
- 1x HD Cable (HDMI)
- 1x User Manual
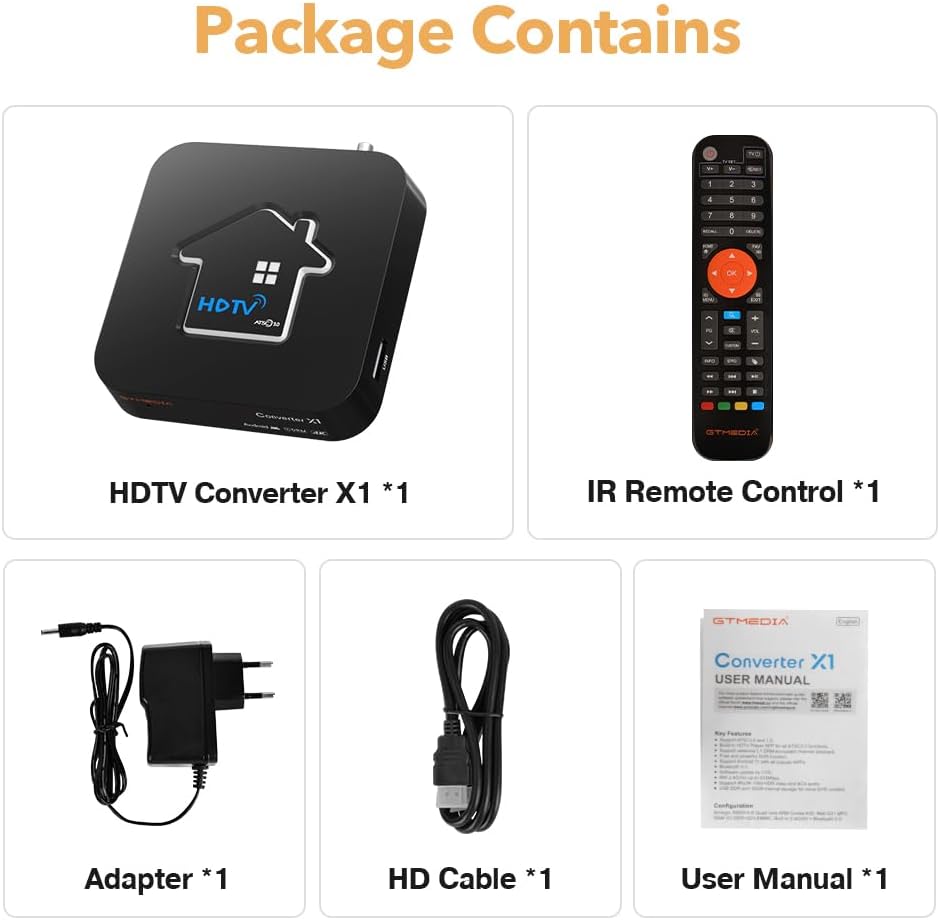
Image: A visual representation of the GTMEDIA X1 package contents, including the converter box, remote control, power adapter, HDMI cable, and user manual.
3. Setup Guide
Follow these steps to set up your GTMEDIA X1 converter:
- Connect Antenna: Connect your digital TV antenna to the ANT IN port on the back of the GTMEDIA X1.
- Connect to TV: Use the provided HD Cable (HDMI) to connect the HD OUT port on the GTMEDIA X1 to an available HDMI input on your television or monitor.
- Connect Power: Plug the power adapter into the DC Power Cable input on the GTMEDIA X1, then plug the adapter into a wall outlet.
- Optional USB Devices: If desired, connect external USB storage devices (for DVR) or other peripherals to the USB port.
- Optional Network Cable: For a wired internet connection, connect an Ethernet cable to the LAN port.
- Power On: Turn on your television and select the correct HDMI input source. The GTMEDIA X1 should power on automatically or can be turned on using the remote control.

Image: A detailed view of the GTMEDIA X1's rear and side interfaces, showing connections for ANT IN, LAN, HD OUT, DC Power, and USB, with labels indicating their functions.
4. Operating Instructions
4.1 Initial Setup and Channel Scan
- Upon first power-on, the system will guide you through initial setup steps, including language selection and network configuration.
- Navigate to the "Channel Scan" or "Auto Tune" option in the settings menu.
- Select the appropriate signal type (ATSC or QAM-B) and initiate the scan. The converter will search for available digital channels.
- Once the scan is complete, you can begin watching live TV.
4.2 DVR Recording
The GTMEDIA X1 supports DVR recording to an external USB storage device (not included).
- Connect a formatted USB drive to the USB port on the converter.
- Access the DVR function through the main menu or by pressing the dedicated DVR button on the remote control.
- You can schedule recordings or record live programs directly. Refer to the on-screen guide for detailed DVR options.

Image: The GTMEDIA X1 converter with a USB drive connected, illustrating its DVR recording capability for capturing television programs.
4.3 Network Connectivity (Wi-Fi & Bluetooth)
- Wi-Fi: Navigate to Network Settings. Select your Wi-Fi network (2.4G or 5G) and enter the password to connect to the internet.
- Bluetooth: In Bluetooth settings, enable Bluetooth and pair with compatible devices such as speakers, headphones, or game controllers.
4.4 Using Applications
The GTMEDIA X1 comes with pre-installed applications and supports additional app installations.
- Access the app launcher from the home screen.
- Popular streaming services like Netflix, YouTube, Prime Video, and Disney+ are supported.
- Ensure a stable internet connection for optimal streaming performance.

Image: A display showing various streaming application logos, including Netflix, YouTube, Prime Video, and Disney+, indicating the GTMEDIA X1's support for these platforms.
5. Key Features
The GTMEDIA X1 offers a range of features designed for a comprehensive media experience:
- Extensive Compatibility: Fully compatible with ATSC3.0/ATSC1.0 digital terrestrial and QAM-B (Clear QAM) wired signals.
- High Performance: Equipped with an Amlogic S905Y4-B quad-core processor.
- Memory & Storage: 2GB RAM and 32GB ROM for smooth operation and ample app/media storage.
- 4K UHD with HDR: Supports hardware UHD H.265/H.264 60fps 10-bit video decoding, delivering stunning 4K resolution with HDR.
- DRM Channel Playback: Supports ATSC 3.0 DRM channel playback, including Widevine DRM L1 certification.
- DVR Recording: External USB DVR support for recording your favorite shows.
- Dual-Band Wi-Fi: Built-in 2.4G/5G Wi-Fi for high-speed internet connectivity.
- Bluetooth 5.0: For easy connection to other Bluetooth-enabled devices.
- Android 11: Runs on Android 11, providing access to a wide range of applications.

Image: An overview graphic highlighting key features of the GTMEDIA X1, including Android 11, DRM, DVR recording, external USB DVR, OTA upgrade, 2GB RAM + 32GB ROM, Bluetooth 5.0, and 2.4G/5G WiFi.
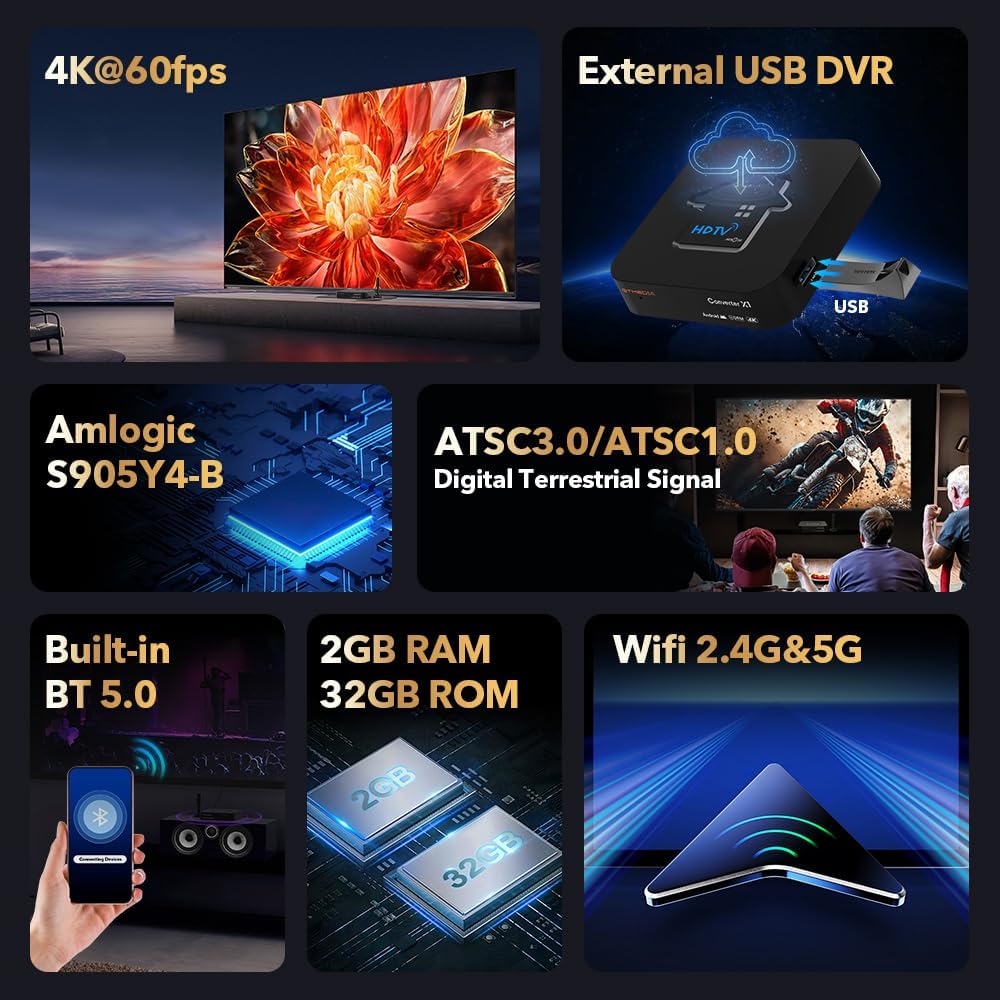
Image: A collage of detailed feature highlights for the GTMEDIA X1, showing 4K@60fps, external USB DVR, Amlogic S905Y4-B processor, ATSC3.0/ATSC1.0 digital terrestrial signal support, Built-in BT 5.0, 2GB RAM 32GB ROM, and Wifi 2.4G&5G.

Image: A scene depicting people watching a high-definition motorcycle race on a large screen, emphasizing the GTMEDIA X1's support for ATSC 3.0 DRM channel playback and 4K Ultra HD resolution.
6. Maintenance
- Cleaning: Use a soft, dry cloth to clean the exterior of the device. Avoid liquid cleaners or abrasive materials.
- Ventilation: Ensure the device is placed in a well-ventilated area to prevent overheating. Do not block ventilation openings.
- Software Updates: Periodically check for firmware updates through the device's settings menu to ensure optimal performance and access to the latest features.
- Power Cycle: If the device becomes unresponsive, disconnect the power adapter, wait 10 seconds, and then reconnect it.
7. Troubleshooting
| Problem | Possible Cause | Solution |
|---|---|---|
| No power | Power adapter not connected or faulty outlet. | Ensure power adapter is securely connected to the device and a working power outlet. |
| No signal/No channels | Antenna not connected, poor antenna reception, or channel scan not performed. | Check antenna connection. Adjust antenna position. Perform a channel scan. |
| No picture/sound on TV | Incorrect HDMI input selected on TV or faulty HDMI cable. | Verify the TV is on the correct HDMI input. Try a different HDMI cable. |
| Wi-Fi connection issues | Incorrect password, router too far, or network interference. | Re-enter Wi-Fi password. Move device closer to router. Restart router. |
| Remote control not working | Dead batteries or obstructed IR sensor. | Replace batteries. Ensure no obstructions between remote and device. |
8. Specifications
| Feature | Detail |
|---|---|
| Model | X1 |
| Compatibility | ATSC3.0, ATSC1.0, QAM-B (Clear QAM) |
| Processor | Amlogic S905Y4-B Quad-Core |
| RAM | 2GB |
| ROM | 32GB |
| Video Decoding | UHD H.265/H.264 60fps 10-bit, 4K HDR |
| Operating System | Android 11 |
| Wi-Fi | Dual-band (2.4G/5G) |
| Bluetooth | Version 5.0 |
| DRM Support | ATSC 3.0 DRM, Widevine DRM L1 |
| DVR | External USB DVR Support |
| Connector Type | HDMI |
| Cable Type | HDMI, RCA |
| Color | Black |
9. Warranty and Support
GTMEDIA products are designed for reliability and performance. For warranty information, technical support, or customer service inquiries, please refer to the contact details provided with your product packaging or visit the official GTMEDIA website.
Please retain your proof of purchase for warranty claims.


