
1. Introduction
This manual provides essential information for the safe and efficient operation of your FLASHFORGE AD5X Multi-Color 3D Printer. Please read this manual thoroughly before using the printer and retain it for future reference. The FLASHFORGE AD5X is designed for multi-color 3D printing with advanced features such as an Intelligent Filament System (IFS), high-speed printing capabilities, and a high-temperature direct extruder.

Figure 1: FLASHFORGE AD5X Multi-Color 3D Printer.
2. Product Features
2.1 Intelligent Filament System (IFS) for 4-Color Printing
The AD5X features an Intelligent Filament System (IFS) that enables printing in up to four colors simultaneously. This system supports various filament combinations and includes automatic filament loading/unloading and an auto-refill function for up to 4kg of filament, reducing manual material changes.

Figure 2: Intelligent Filament System (IFS) overview.
2.2 High-Speed and Stable Printing
The AD5X is engineered for rapid printing with a travel speed of up to 600mm/s and an acceleration of 20m/s². Its CoreXY all-metal design contributes to stable print quality even at high speeds.

Figure 3: High-speed printing capabilities.
2.3 Multi-Filament Compatibility with High-Temperature Extruder
Equipped with a 300°C high-temperature nozzle and a 32mm³/s large-flow hotend, the AD5X supports a wide range of filaments including flexible TPU, carbon fiber reinforced filaments (PLA-CF, PETG-CF), standard PLA, and PETG. This high-temperature capability reduces printing wait times.
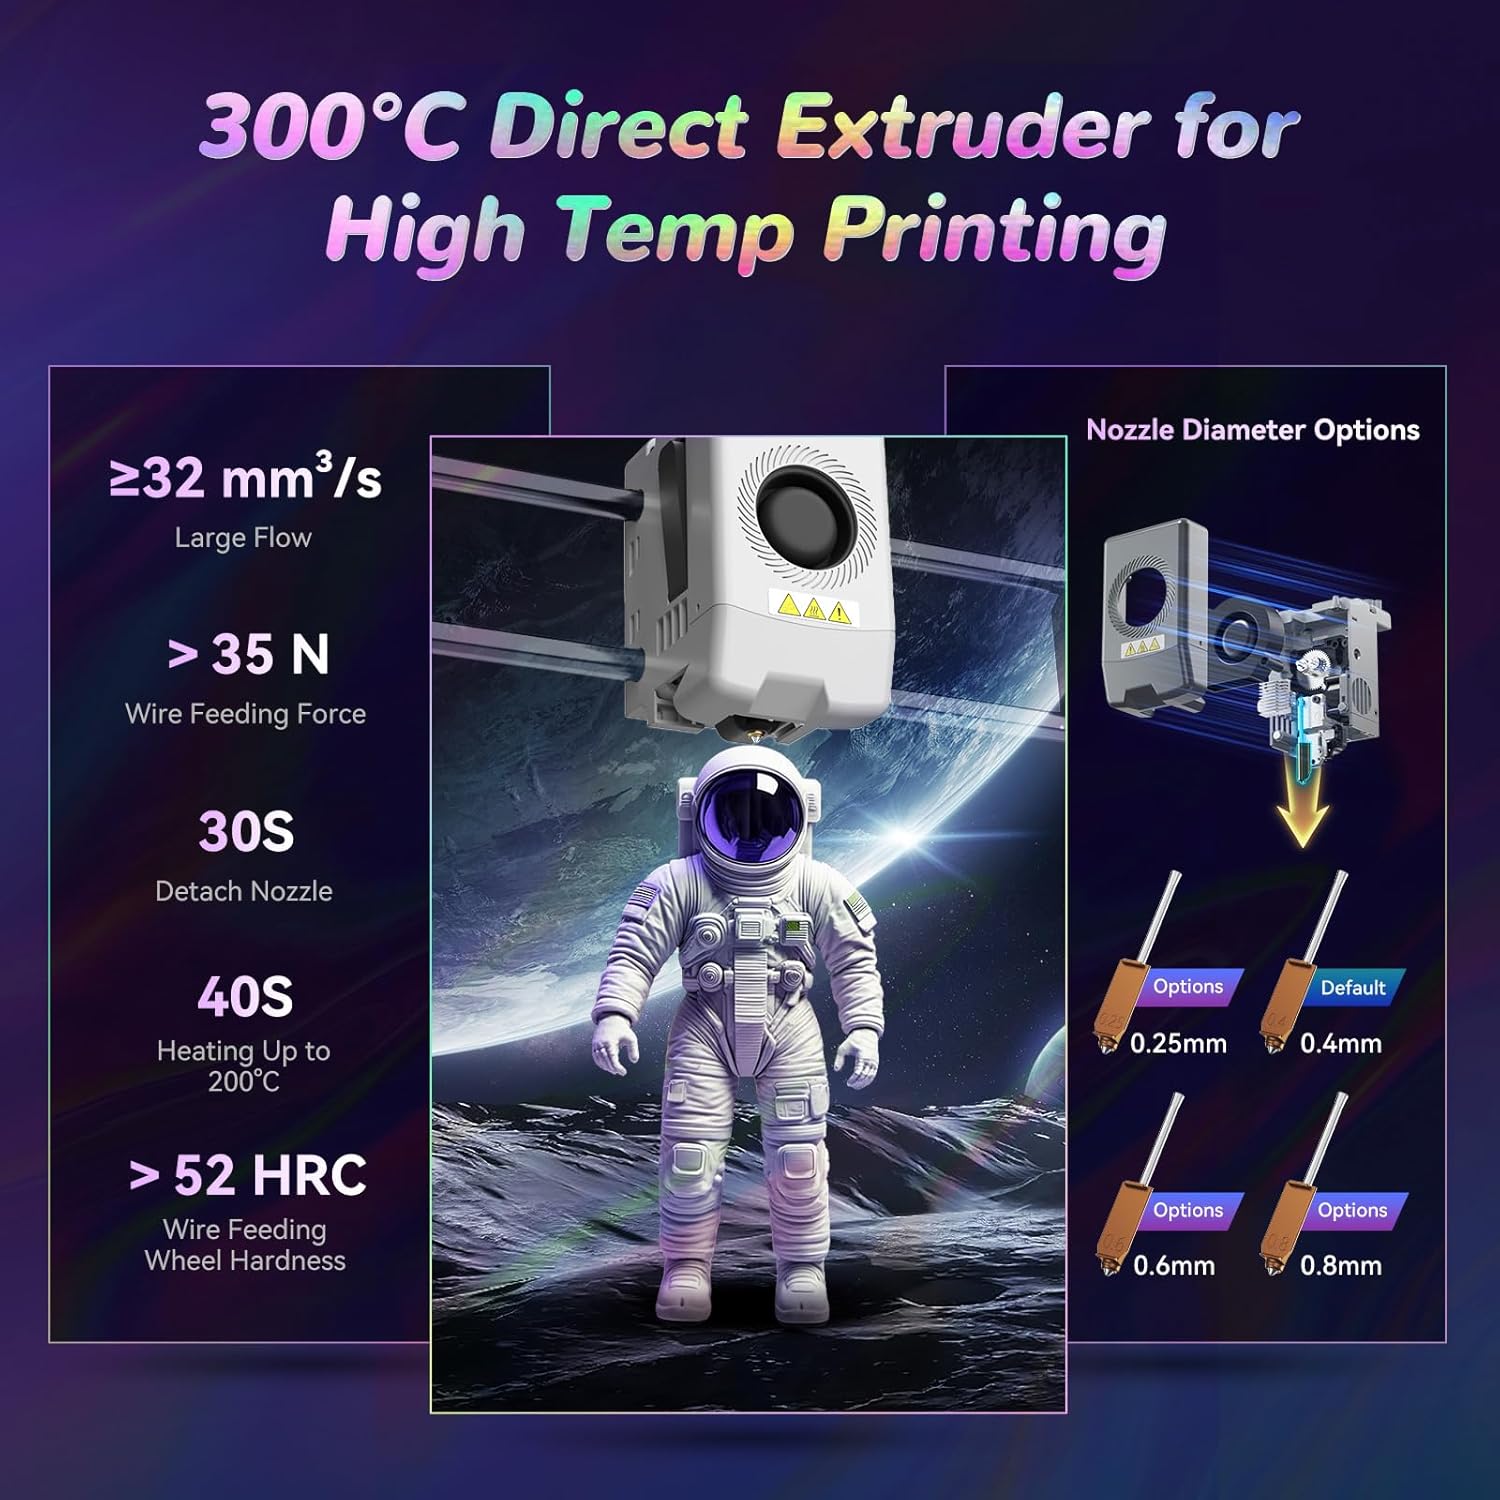
Figure 4: High-temperature direct extruder details.
2.4 Enhanced Printing Functions
- One-Click Auto Leveling: The print bed automatically calibrates before each print, eliminating the need for manual Z-offset adjustments.
- Vibration Compensation: Intelligent detection and adjustment of vibration frequencies prevent ringing issues, ensuring smooth and high-quality prints.
- 4.3-inch Colorful Touchscreen: Provides an intuitive interface for printer control and monitoring.
- Resume Printing: Automatically resumes printing after a power interruption, minimizing material waste.
- Filament Detection: Alerts users to filament run-out or errors, improving print success rates.

Figure 5: Auto-leveling and heated bed.

Figure 6: Overview of smart features.
2.5 Multi-Device Management
Utilizing Flash Maker and Orca-Flashforge software, users can remotely manage multiple printers, monitor print progress in real-time (requires an additional camera kit), adjust parameters, and receive alerts. This system provides flexibility in managing filament colors and types across devices.

Figure 7: Remote management interface.
3. Setup Guide
This section provides a general overview of the setup process. For detailed, step-by-step instructions, please refer to the official PDF user manual linked in the Support section.
- Unboxing: Carefully remove all components from the packaging. Inspect for any damage.
- Assembly: Follow the quick start guide to assemble any detached components, such as the display screen, spool holders, and IFS module.
- Power Connection: Connect the power cable to the printer and a suitable power outlet.
- Filament Loading: Load the desired filaments into the IFS module according to the instructions. The system supports automatic loading.
- Initial Calibration: Power on the printer. The AD5X features one-click auto-leveling, which will calibrate the print bed automatically.
- Software Installation: Install Flash Maker or Orca-Flashforge slicing software on your computer for preparing print files.
4. Operating Instructions
This section outlines the basic steps for operating your 3D printer. For advanced operations and specific settings, consult the comprehensive user manual.
- Prepare 3D Model: Use slicing software (Flash Maker or Orca-Flashforge) to convert your 3D model (.STL, .OBJ, etc.) into a printable G-code file. Configure print settings such as layer height, infill, and support structures. Ensure filament types and colors in the software match those loaded in the printer.
- Transfer G-code: Transfer the G-code file to the printer via USB, Wi-Fi, or Ethernet.
- Select Print Job: On the printer's 4.3-inch touchscreen, select the desired G-code file.
- Start Printing: Initiate the print job. The printer will perform auto-leveling and begin heating the nozzle and print bed.
- Monitor Progress: Monitor the printing process. For remote monitoring, an optional camera kit can be integrated with Flash Maker or Orca-Flashforge.
- Remove Print: Once printing is complete and the print bed has cooled, carefully remove the printed object.
5. Maintenance
Regular maintenance ensures optimal performance and extends the lifespan of your FLASHFORGE AD5X 3D Printer.
- Clean Print Bed: After each print, clean the PEI steel sheet build plate to ensure good adhesion for subsequent prints. Use isopropyl alcohol for best results.
- Nozzle Inspection: Periodically inspect the nozzle for wear or clogs. Replace the nozzle if necessary. The direct extruder allows for quick nozzle detachment (approx. 30 seconds).
- Lubricate Moving Parts: Apply grease to the guide rails and lead screws as recommended in the full user manual to ensure smooth movement.
- Clear Filament Path: Ensure the filament path from the spool to the extruder is clear and free of obstructions or tangles.
- Firmware Updates: Check the official FLASHFORGE website for any available firmware updates to ensure your printer has the latest features and improvements.
6. Troubleshooting
This section addresses common issues you might encounter. For more comprehensive troubleshooting, refer to the detailed user manual.
| Problem | Possible Cause | Solution |
|---|---|---|
| First layer not adhering | Dirty print bed, incorrect bed temperature, Z-offset too high. | Clean the print bed with isopropyl alcohol. Ensure correct bed temperature for the filament type. Re-run auto-leveling. |
| Filament not extruding | Clogged nozzle, tangled filament, incorrect temperature. | Clear the nozzle. Check filament path for tangles. Verify extruder temperature settings. |
| Poor print quality (layer shifts, ringing) | Loose belts, excessive vibration, incorrect print speed. | Check belt tension. Ensure printer is on a stable surface. Enable vibration compensation in settings. Reduce print speed. |
| Multi-color print errors | Inconsistent color/filament settings between slicer and printer. | Verify that the color zones and filament types set in the slicing software are consistent with the physical setup in the IFS module. |
7. Specifications
| Feature | Detail |
|---|---|
| Device Name | AD5X |
| Extruder Quantity | 1 (with IFS for multi-color) |
| Printing Precision | ±0.1mm (tested on 100mm cubes) |
| Positioning Accuracy | X/Y-axis: 0.0125mm, Z-axis: 0.0025mm |
| Layer Thickness | 0.1-0.4mm |
| Build Volume | 220x220x220mm |
| Nozzle Diameter | 0.4mm (default), 0.25/0.6/0.8mm (optional) |
| Printing Speed | 10-300mm/s |
| Max Acceleration | 20000mm/s² |
| Max Travel Speed | 600mm/s |
| Max Extruder Temp | 300°C |
| Power Supply | Input: AC 100-120V/200-240V, 50/60Hz, 650W |
| Device Dimensions | 363mm (D) x 363mm (W) x 413mm (H) (448mm with IFS) |
| Net Weight | 11.4kg (approx. 25.1 lbs) |
| Connectivity | USB/Wi-Fi/Ethernet |
| Operating Temp | 15-30°C |
| Compatible Operating System | Windows 7/8/10/11; Mac OS: support version 10.9 or later |
| Slicing Software | Orca-Flashforge/Orca Slicer |
| Max Bed Temp | 110°C |
| Leveling Method | One-click auto leveling |
| Filament Run-out Reminder | Supported |
| Power Loss Recovery | Supported |
| Smart Touch Screen | 4.3-inch |
| Build Plate | PEI steel sheet |
8. What's in the Box
The FLASHFORGE AD5X package includes the following items:
- FLASHFORGE AD5X 3D Printer (x1)
- HS PLA Filament (10g x 4 colors)
- Power Cable (x1)
- IFS Connection Cable (x1)
- 4-in-1 Guide Tube (x1)
- Display Screen (x1)
- Spool Holder (x4)
- Mounting Plate (x1)
- IFS Module (x1)
- Screw M3*6 (x4)
- Cable Clip (x1)
- Grease (x1)
- Screwdriver (x1)
- Allen Wrench Kits (x1)
- Diagonal Pliers (x1)
- Quick Start Guide (x1)
9. Warranty and Support
For detailed warranty information, technical support, and a comprehensive user manual, please refer to the official FLASHFORGE website or the PDF user manual provided with your product. You can also access the PDF user manual here.
For customer service inquiries, please contact FLASHFORGE support directly through their official channels.
10. Important Safety Information
- Always operate the printer in a well-ventilated area.
- Keep hands clear of moving parts during operation.
- Do not touch the hot nozzle or heated bed during or immediately after printing. Allow components to cool down.
- Ensure the printer is placed on a stable, level surface.
- Use only recommended filaments and power adapters.
- Keep the printer away from flammable materials and moisture.
- Supervise children and pets when the printer is in operation.
- Disconnect power before performing any maintenance or cleaning.


