
Introduction
The MiBOXER TRI-C1 AC Triac Dimmer is engineered to provide versatile and reliable control over dimmable AC lighting systems. It integrates both RF wireless technology and traditional push-button operation, offering flexible control options for various lighting environments.

Figure 1: Front view of the MiBOXER TRI-C1 Dimmer, showing input/output terminals and branding.
Key Features
- Triac Dimming Technology: Designed for dimmable AC lighting systems, providing smooth and flicker-free dimming performance.
- RF Wireless Control: Operates with MiBOXER 2.4GHz remotes, enabling convenient wireless dimming from up to 30 meters away.
- Push-Button Operation: Retains traditional push-button control, allowing local dimming without requiring a remote.
- Wide Compatibility: Works with a variety of dimmable AC lighting fixtures, including LED, halogen, and incandescent bulbs.
- Smooth Dimming Range: Offers precise control of brightness from 0% to 100%.
- Memory Function: Recalls the last lighting setting when powered on.
- Energy Efficient: Optimized for low power consumption.
- Easy Installation: Simplified wiring for quick setup.
Product Overview
The TRI-C1 dimmer features a compact design for easy integration. Below are detailed views of the device and its dimensions.

Figure 2: Angled view of the TRI-C1 Dimmer, highlighting input and output terminals.

Figure 3: Dimensions of the TRI-C1 Dimmer (49mm x 49mm x 25mm).

Figure 4: Packaging dimensions of the TRI-C1 Dimmer (52mm x 52mm x 29mm).
Setup and Installation
Proper installation is crucial for the safe and effective operation of the TRI-C1 dimmer. Always ensure power is disconnected before beginning installation.
Wiring Diagram

Figure 5: Connection diagram for the TRI-C1 Dimmer with a push switch and a dimmable LED light. Input terminals are L (Live) and N (Neutral), output terminals are L1 (Load) and N (Neutral).
Connection Steps:
- Ensure the main power supply is turned off at the circuit breaker.
- Connect the AC input (Live and Neutral) to the "INPUT" terminals (L and N) on the dimmer.
- Connect the dimmable light fixture to the "OUTPUT" terminals (L1 and N) on the dimmer.
- For push-button control, connect the push switch to the S1 and S2 terminals. S1 and S2 are for push dimming functionality.
- Ensure all connections are secure and insulated.
Installation
The TRI-C1 dimmer is designed to fit into standard bottom boxes with a depth exceeding 50mm.
Figure 6: Installation diagram showing the dimmer fitting into a standard electrical box. Ensure the box depth is over 50mm.
After wiring, carefully place the dimmer into the electrical box, ensuring no wires are pinched. Secure the dimmer and install the cover plate.
Operating Instructions
Push Dimmable Control
The TRI-C1 supports stepless dimming via a connected push switch, ensuring no screen flickering.

Figure 7: Illustration of push switch operation for dimming.
- One Click: Short press the push switch to turn lights on/off.
- Long Press: Press and hold the push switch to increase or decrease brightness. Release and press again to change dimming direction.
RF Remote Control
The dimmer can be controlled wirelessly using a MiBOXER 2.4G remote control (sold separately). The control distance is up to 30 meters.
- Refer to your MiBOXER 2.4G remote control's manual for pairing instructions.
- Once paired, you can adjust brightness, turn lights on/off, and potentially set scenes depending on the remote model.
Breaker Mode
In Breaker Mode, the dimmer functions solely as an on/off switch and cannot dim the light. This mode is activated by specific settings or wiring configurations.

Figure 8: Illustration of the dimmer operating in Breaker Mode (On/Off functionality only).
Smartphone App and Third-Party Voice Control
For smartphone app control and integration with third-party voice assistants (like Amazon Alexa or Google Assistant), a MiBOXER 2.4GHz gateway is required (sold separately).
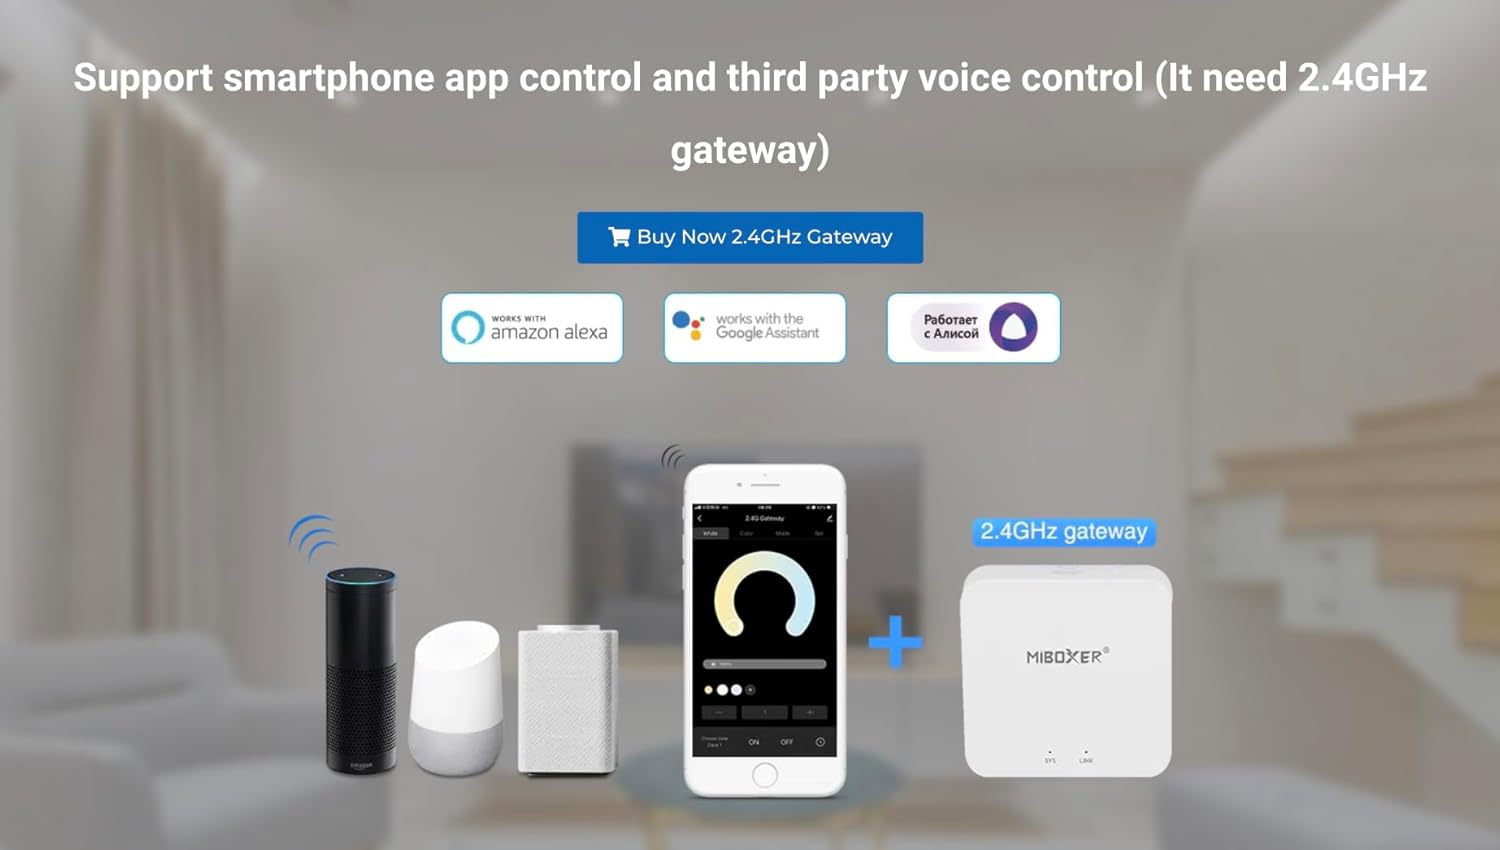
Figure 9: Diagram showing the TRI-C1 dimmer integrated with a 2.4GHz gateway for smartphone app and voice control.
Once the gateway is set up and connected to your home network, you can add the TRI-C1 dimmer to the MiBOXER app and link it to your preferred voice assistant for smart home integration.
Safety and Protection Features
The TRI-C1 dimmer incorporates features to ensure safe and reliable operation.

Figure 10: Visual representation of Trailing Edge (ELV) phase-cut technology and Overheat/Load Protection.
- Trailing Edge (ELV) Phase-Cut Technology: This technology ensures smooth and stable dimming performance, especially with LED loads, by cutting the trailing edge of the AC waveform.
- Overheat / Load Protection: The dimmer is equipped with internal mechanisms to detect and protect against overheating and excessive load conditions, enhancing safety and product longevity.
Maintenance
The MiBOXER TRI-C1 dimmer requires minimal maintenance. To ensure optimal performance and longevity:
- Keep the device clean and free from dust. Use a soft, dry cloth for cleaning.
- Do not use abrasive cleaners or solvents.
- Ensure proper ventilation around the installed dimmer to prevent heat buildup.
- Avoid exposing the device to excessive moisture or extreme temperatures.
Troubleshooting
If you encounter issues with your TRI-C1 dimmer, refer to the following common troubleshooting steps:
- Light not turning on/off: Check all wiring connections to ensure they are secure. Verify that the main power supply is active.
- Light not dimming: Ensure the connected light fixture is dimmable. Check if the dimmer is in "Breaker Mode" (on/off only). Verify proper connection of the push switch or successful pairing with the RF remote.
- Flickering lights: This may indicate an incompatible bulb or an overloaded circuit. Ensure your bulbs are compatible with Triac dimmers and that the total wattage does not exceed the dimmer's maximum load capacity.
- Remote control not working: Check the remote's battery. Re-pair the remote with the dimmer according to the remote's instructions. Ensure you are within the 30-meter control range.
- Overheating: If the dimmer feels excessively hot, immediately disconnect power. Check for overloaded circuits or insufficient ventilation.
If problems persist, contact MiBOXER customer support for further assistance.
Specifications
| Feature | Detail |
|---|---|
| Model Number | TRI-C1 |
| Input Voltage | AC100-240V 50/60Hz |
| Output | AC100-240V 1.36A (Max) |
| Max Load | 150W @110V; 300W @220V |
| Working Temperature | -10~40°C |
| Control Method | RF 2.4G, Push Dim |
| RF Control Distance | 30m |
| Dimensions (L x W x H) | 49mm x 49mm x 25mm (approx. 1.93 x 1.93 x 0.98 inches) |
| Item Weight | 2.29 ounces |
| Manufacturer | Miboxer |
| Date First Available | November 22, 2024 |
What's in the Box
The product package typically includes:
- 1 x MiBOXER TRI-C1 AC Triac RF+Push Dimmer
Note: Remote controls, gateways, and light fixtures are sold separately.
Warranty and Support
MiBOXER products are designed for reliability and performance. For information regarding product warranty, please refer to the specific warranty terms provided at the time of purchase or contact your retailer.
For technical support, troubleshooting assistance, or general inquiries, please visit the official MiBOXER store or contact their customer service department.
MiBOXER Store: https://www.amazon.com/stores/shopnowwithMiBOXER/page/0E0B0084-8D1C-47CE-90EC-8C251EF3DDF2


