
1. Product Overview
This manual provides detailed instructions for the installation, operation, and maintenance of your new GYVCBREU Car Radio Stereo. This replacement head unit features a 12.1-inch touchscreen, Android 12 operating system, 8-core CPU, 4GB RAM, and 32GB ROM, designed specifically for Infiniti Q50, Q50S, Q60, and Q60S models from 2013 to 2022. It integrates advanced features such as Apple CarPlay, Android Auto, GPS navigation, Bluetooth 5.0, and multimedia playback capabilities.

Figure 1.1: The 12.1-inch GYVCBREU Car Radio Stereo seamlessly integrated into the Infiniti Q50 dashboard, showcasing its intuitive touchscreen interface.
Key Features:
- 12.1-inch HD IPS Touch Screen: Offers a clear and responsive display with 1920x1080 resolution for enhanced visual experience.
- Android 12 Operating System: Provides a fluid and responsive user experience with an 8-core CPU, 4GB RAM, and 32GB ROM.
- Wireless & Wired Apple CarPlay / Android Auto: Seamless smartphone integration for navigation, communication, and entertainment via voice control (Siri/Google Assistant).
- Built-in GPS Navigation: Supports online and offline maps (Apple Maps, Google, Waze) with strong satellite reception.
- Bluetooth 5.0: Enables hands-free calling, phonebook download, and wireless music streaming.
- Multimedia Playback: Supports various audio and video formats, FM/AM radio, and DSP for customizable sound effects.
- Vehicle Integration: Compatible with original steering wheel controls and supports backup camera input.
- Network Connectivity: Supports 4G network and Wi-Fi for online browsing and app downloads.
2. Installation Guide
Proper installation is crucial for the optimal performance and longevity of your car radio stereo. It is recommended that installation be performed by a qualified professional. Ensure the vehicle's power is disconnected before beginning the installation process.
2.1 Pre-Installation Checklist
- Verify package contents against the packing list.
- Ensure the vehicle model and year match the product's compatibility (Infiniti Q50 Q50S Q60 Q60S 2013-2022).
- Gather necessary tools (e.g., trim removal tools, screwdrivers, wire strippers, electrical tape).
- Disconnect the vehicle's negative battery terminal to prevent electrical shorts.

Figure 2.1: Visual comparison of the vehicle's dashboard before and after the installation of the GYVCBREU Car Radio Stereo.
2.2 General Installation Steps
- Carefully remove the original car radio and trim panels using appropriate trim removal tools.
- Disconnect all wiring harnesses and antenna cables from the original unit.
- Connect the provided wiring harnesses from the new unit to the vehicle's existing wiring. Ensure all connections are secure.
- If installing a backup camera, route the camera cable from the rear of the vehicle to the head unit and connect it to the designated input.
- Carefully mount the new head unit into the dashboard opening.
- Reinstall all trim panels and secure them properly.
2.3 Post-Installation Checks
- Reconnect the vehicle's negative battery terminal.
- Turn on the vehicle's ignition and power on the new head unit.
- Test all functions: radio, Bluetooth, navigation, touchscreen responsiveness, steering wheel controls, and backup camera (if installed).
- Adjust audio settings and display preferences as desired.
3. Operating Instructions
This section details the primary functions and operations of your GYVCBREU Car Radio Stereo.
3.1 Basic Operation
- Power On/Off: The unit typically powers on with the vehicle's ignition. A long press on the power button (if available) may turn it off or put it into standby.
- Volume Control: Adjust volume using the physical buttons on the unit or the integrated steering wheel controls.
- Home Button: Press the 'HOME' button to return to the main application screen.
3.2 Touchscreen Interface
The 12.1-inch IPS touchscreen provides intuitive control. Swipe left/right to navigate between app pages, tap icons to open applications, and use pinch-to-zoom gestures in maps or other compatible apps.
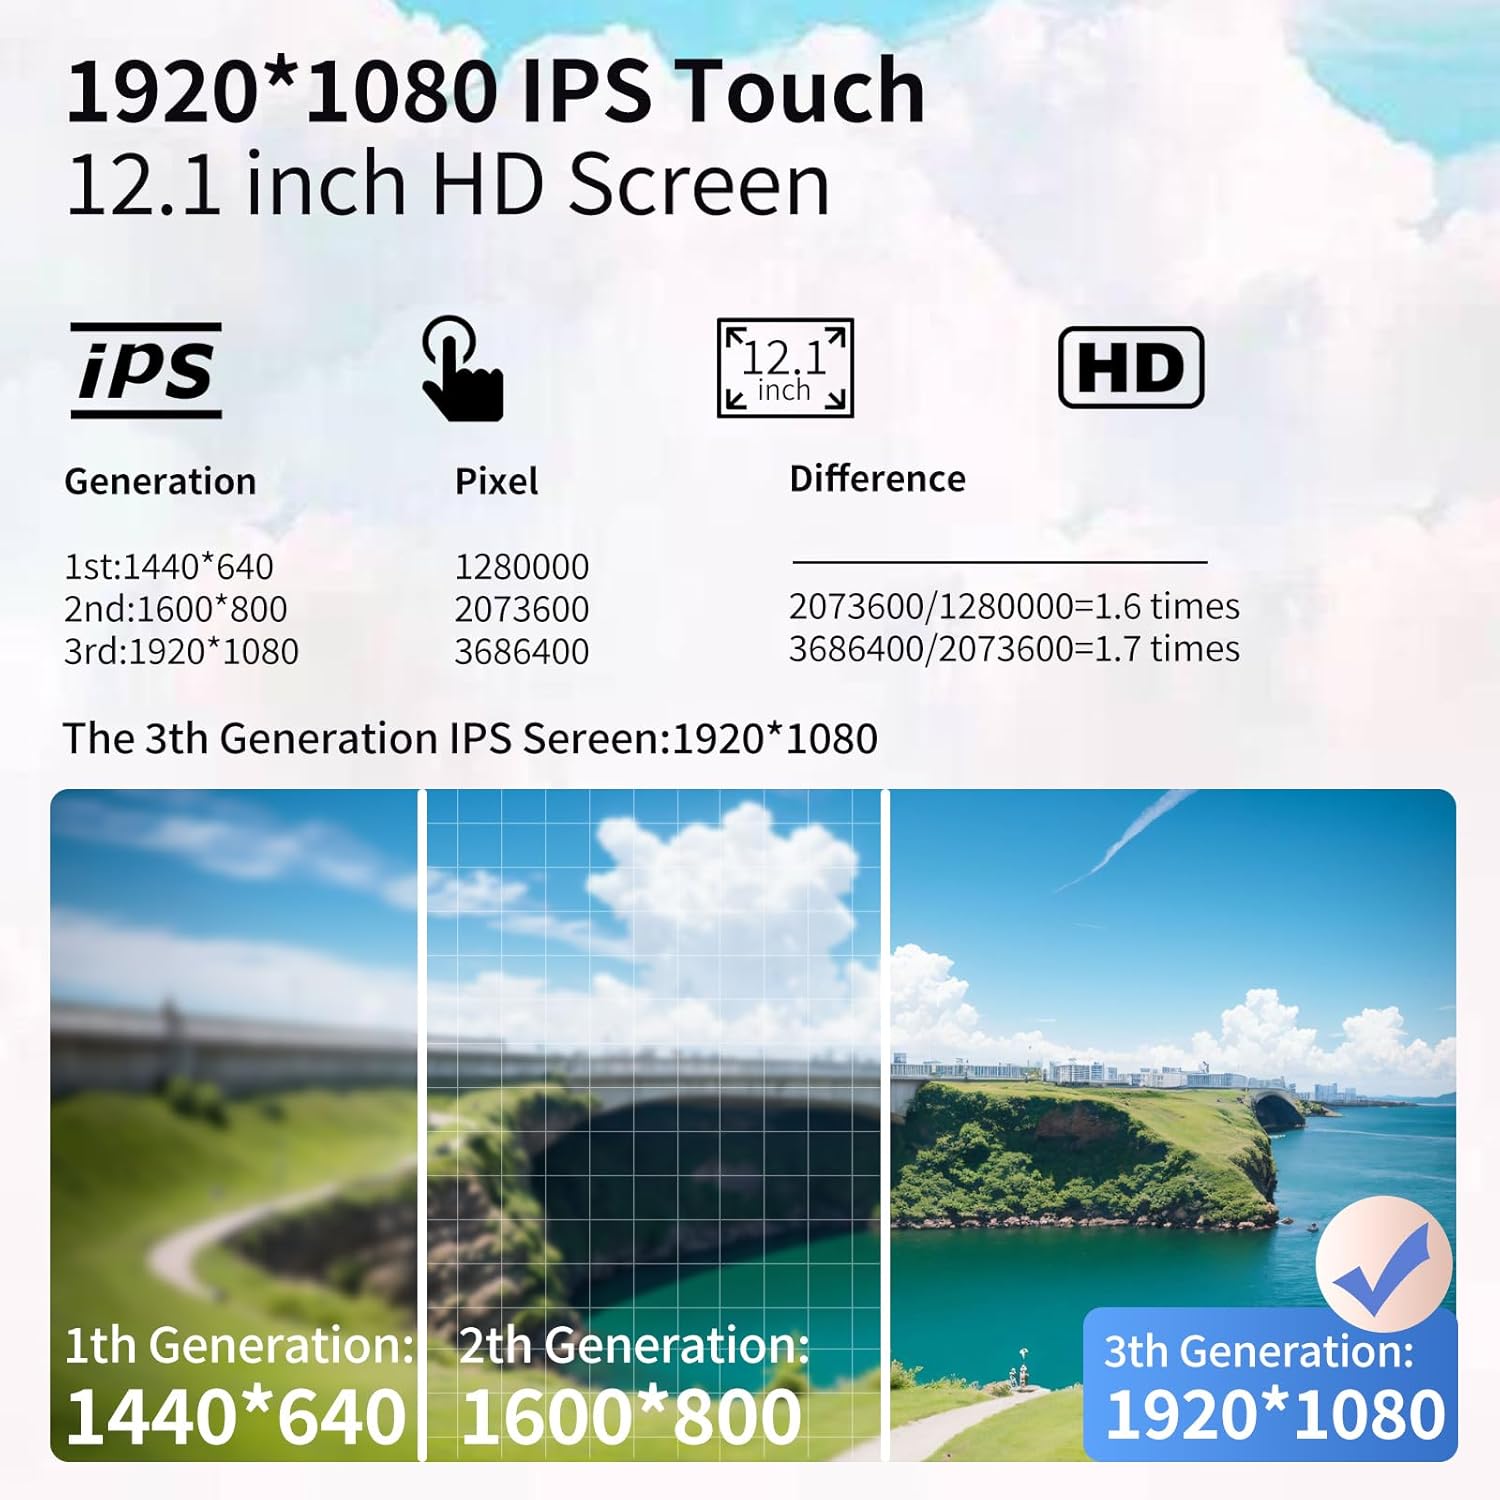
Figure 3.1: The 12.1-inch HD IPS Touch Screen offers superior clarity and responsiveness.
3.3 Apple CarPlay & Android Auto
Connect your smartphone via USB or wirelessly (Bluetooth for initial setup, then Wi-Fi for data) to access Apple CarPlay or Android Auto. This allows for voice-controlled navigation, messaging, music, and more, keeping your focus on the road.
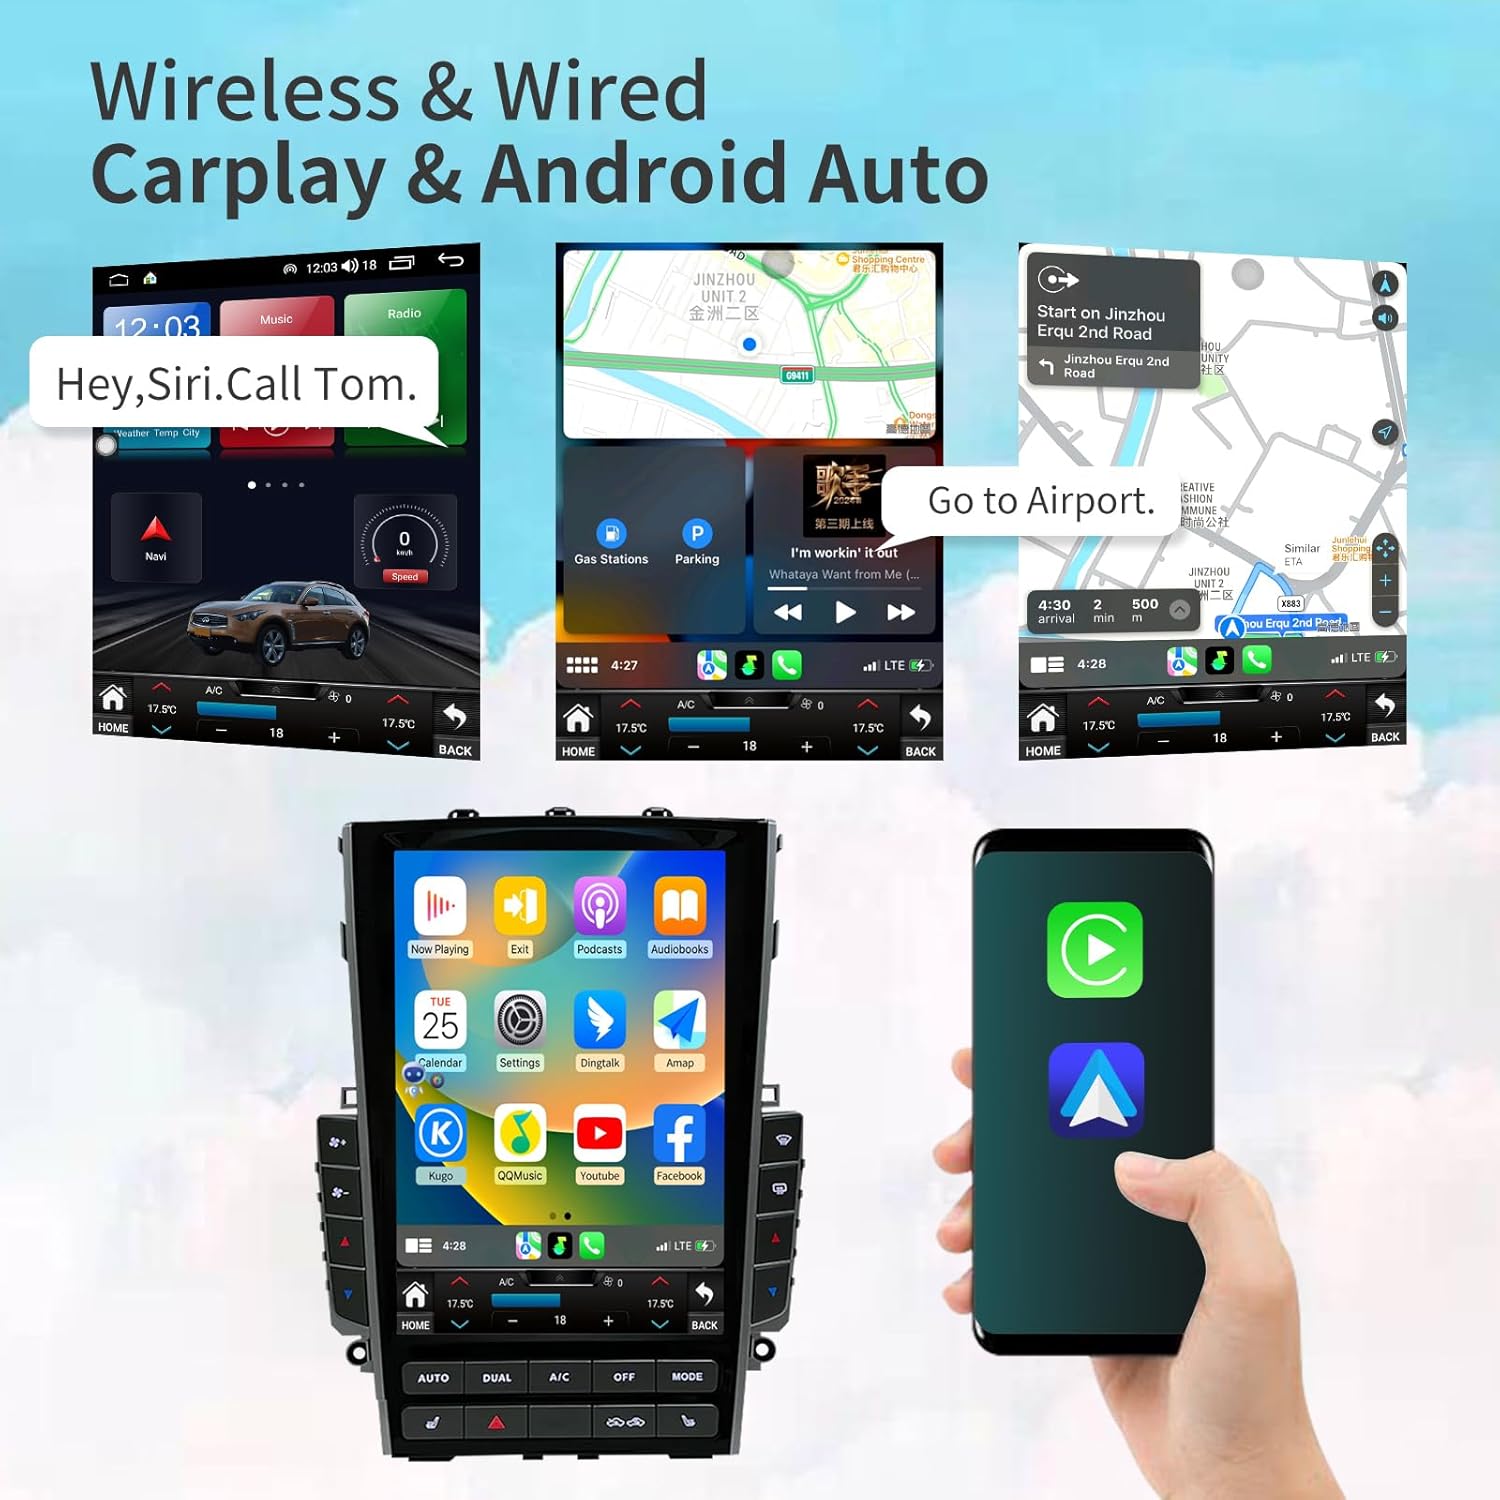
Figure 3.2: Wireless and wired Apple CarPlay and Android Auto integration.
Video 3.1: Demonstration of the Car Radio Stereo's features, including CarPlay, Wi-Fi, Music, Bluetooth, DSP, Radio, Video, Chrome, and Split-Screen functionality.
3.4 Navigation System
The unit comes with a built-in GPS module supporting GPS + GLONASS for precise positioning. You can use pre-installed offline maps or download online navigation apps like Apple Maps, Google Maps, or Waze via Wi-Fi or 4G connectivity.
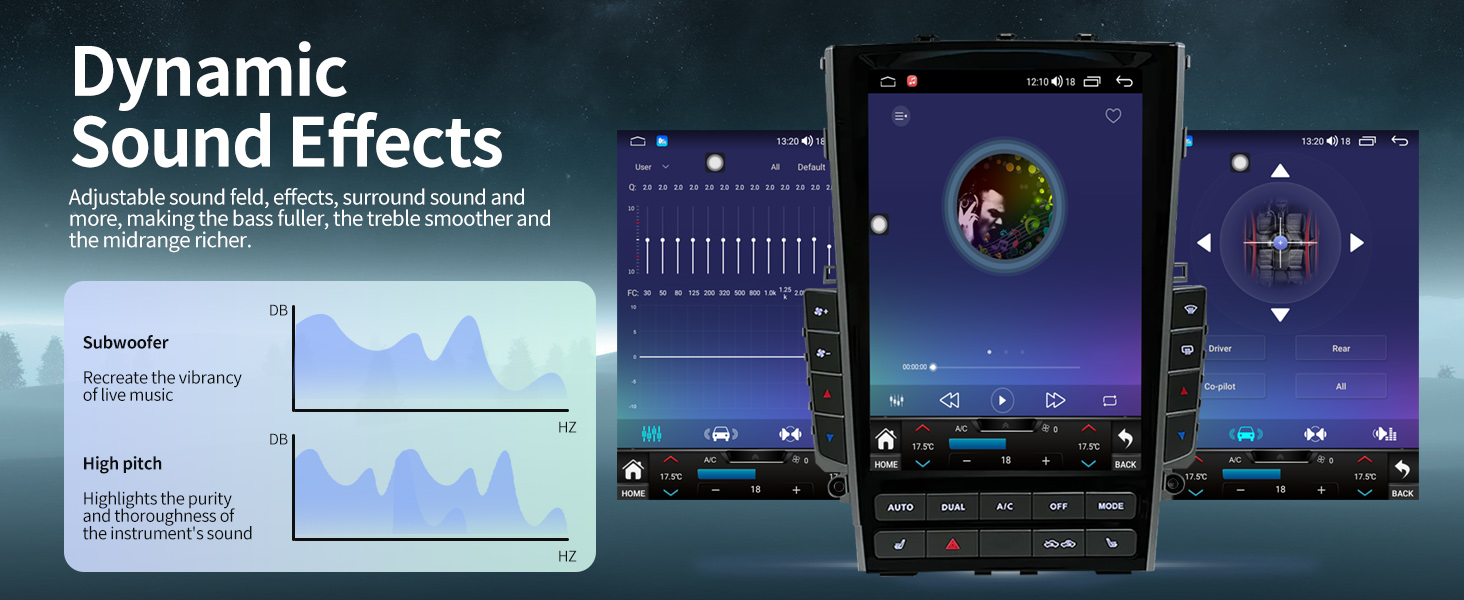
Figure 3.3: Online and offline navigation capabilities with support for popular map applications.
3.5 Bluetooth Pairing
To pair a Bluetooth device:
- Go to the 'Bluetooth' application on the head unit.
- Ensure Bluetooth is enabled on your smartphone and set to discoverable mode.
- Select your device from the list of available devices on the head unit's screen.
- Confirm the pairing code on both devices.
Once paired, you can make hands-free calls and stream audio from your device.

Figure 3.4: Voice control and Bluetooth 5.0 for hands-free communication and music.
3.6 Radio Operation
Access the 'Radio' application to tune into FM or AM stations. You can manually tune, scan for stations, or save your favorite frequencies for quick access. The unit supports RDS (Radio Data System) where available.

Figure 3.5: FM/AM radio interface with sound customization options.
3.7 Media Playback
Use the 'Music Player' or 'Video Player' applications to play media from connected USB devices or internal storage. The unit supports various audio and video formats. The Digital Sound Processor (DSP) allows for fine-tuning of audio output, including equalizer settings and bass enhancement.
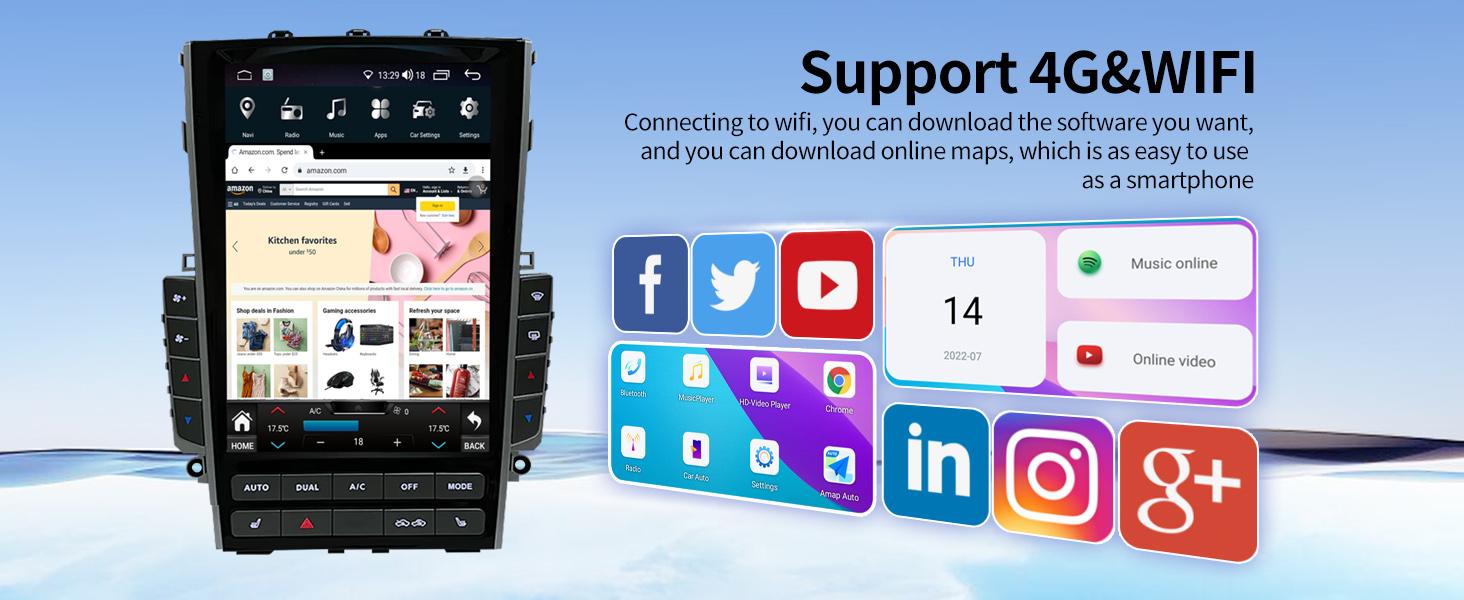
Figure 3.6: Dynamic sound effects and audio customization options.
3.8 Steering Wheel Control Setup
The unit supports learning original steering wheel button functions. Navigate to the 'Control' or 'Steering Wheel Control' settings within the system. Follow the on-screen prompts to assign functions to your vehicle's steering wheel buttons for convenient control.

Figure 3.7: Steering wheel control integration for safe operation.
3.9 AC Control Integration
The unit integrates with the vehicle's original AC control system. You can adjust temperature, fan speed, and air distribution directly from the touchscreen interface. Ensure proper calibration during installation for accurate temperature readings.
4. Maintenance and Care
To ensure the longevity and optimal performance of your car radio stereo, follow these maintenance guidelines:
- Screen Cleaning: Use a soft, lint-free cloth specifically designed for electronic screens. Avoid abrasive materials or harsh chemical cleaners. Gently wipe the screen to remove dust and fingerprints.
- Software Updates: Periodically check for software updates provided by the manufacturer. Updates can improve performance, add new features, and fix bugs. Follow the instructions carefully when performing updates.
- General Care: Avoid exposing the unit to extreme temperatures, direct sunlight for prolonged periods, or excessive moisture. Do not attempt to disassemble the unit or perform repairs yourself, as this will void the warranty.
5. Troubleshooting
If you encounter issues with your car radio stereo, refer to the following common troubleshooting steps. If the problem persists, contact customer support.
| Problem | Possible Cause | Solution |
|---|---|---|
| Unit does not power on | Loose power connection, blown fuse, vehicle ignition issue. | Check wiring connections. Inspect vehicle fuses. Ensure vehicle ignition is on. |
| No sound output | Volume too low, mute activated, speaker wiring issue, incorrect audio settings. | Increase volume. Check mute status. Verify speaker connections. Adjust DSP/audio settings. |
| GPS signal lost or inaccurate | Poor satellite reception, antenna obstruction, software issue. | Ensure vehicle is in an open area. Check GPS antenna connection. Restart the unit. |
| Bluetooth not connecting | Device not discoverable, incorrect pairing, interference. | Ensure Bluetooth is enabled on both devices. Delete previous pairings and re-pair. Move closer to the unit. |
| Steering wheel controls not working | Incorrect wiring, uncalibrated controls, compatibility issue. | Verify wiring. Re-calibrate controls in settings. Consult support for compatibility. |
| AC controls not functioning correctly | Installation error, software glitch, compatibility issue. | Check installation connections. Restart the unit. Contact support for specific vehicle compatibility. |
6. Specifications
- Display Size: 12.1 Inches
- Resolution: 1920 x 1080
- Operating System: Android 12
- CPU: 8 Core Processor
- RAM: 4GB
- ROM: 32GB
- Connectivity: Bluetooth 5.0, Wi-Fi, USB, 4G (SIM card not included)
- Navigation: Built-in GPS + GLONASS, supports Apple Maps, Google, Waze
- Audio Output Mode: Stereo
- Special Features: Touchscreen, Bluetooth, CarPlay, Android Auto, DSP, Steering Wheel Control, Backup Camera Support
- Item Weight: Approximately 8 pounds
- Package Dimensions: 16 x 13 x 7 inches
7. Warranty and Support
This product comes with a standard manufacturer's warranty. For specific warranty terms and conditions, please refer to the warranty card included in your product packaging or contact the seller directly.
Customer Support:
For any questions regarding compatibility, installation, operation, or troubleshooting, please contact our dedicated customer service team. You can typically find contact information on the product packaging or through the seller's storefront on the platform where you purchased the product. Provide your product model and a detailed description of your inquiry for prompt assistance.