
TP-Link Archer BE700
TP-Link Archer BE700 WiFi 7 Tri-Band Router User Manual
Model: Archer BE700
1. Introduction
This manual provides comprehensive instructions for setting up, operating, maintaining, and troubleshooting your TP-Link Archer BE700 WiFi 7 Tri-Band Router. The Archer BE700 is designed to deliver an exceptional Wi-Fi experience with its advanced Wi-Fi 7 capabilities, including high speeds, low latency, and extensive coverage, making it ideal for demanding network environments.

Image: Front view of the TP-Link Archer BE700 router, showcasing its sleek black design with a vertical array of LED indicators.
2. Key Features
- Latest Wi-Fi 7 Standard: Supports the cutting-edge Wi-Fi 7 (802.11be) standard for unparalleled speed and efficiency.
- BE15000 Tri-Band Speeds: Delivers combined speeds of up to 11,528Mbps (6GHz), 2,882Mbps (5GHz), and 688Mbps (2.4GHz).
- 10G Multi-Gigabit Ports: Equipped with one 10G WAN port, one 2.5G LAN port, three 1G LAN ports, and one USB 3.0 port for versatile high-speed wired connections.
- Multi-Link Operation (MLO): Enables simultaneous utilization of multiple Wi-Fi bands (2.4GHz/5GHz/6GHz) for enhanced throughput and reduced latency, offering up to 3 times faster communication than Wi-Fi 6/6E routers.
- 6 Internal Antennas: Features six optimally positioned internal antennas for wide-range, high-speed communication and improved signal reach.
- Beamforming Technology: Detects connected devices and concentrates Wi-Fi signals towards them for stronger, more reliable connections, even in areas with weak signals.
- 4K-QAM: Increases data density for higher efficiency in data transmission.
- Powerful Quad-Core CPU: Ensures smooth performance and efficient handling of high-throughput tasks with minimal lag.
- EasyMesh Compatibility: Seamlessly integrates with EasyMesh-compatible devices to build a unified Mesh Wi-Fi network for whole-home coverage.
- HomeShield Security: Provides comprehensive network protection, including network scanning, parental controls, and QoS (Quality of Service) for a secure and optimized network environment.
- WPA3 Encryption: Supports the latest WPA3 encryption for enhanced network security.
- Easy Setup via App: Simple and intuitive setup and management through the dedicated smartphone app.

Image: An overview of the Archer BE700's features, highlighting its tri-band Wi-Fi 7 speeds (6GHz, 5GHz, 2.4GHz), 10G multi-gigabit ports, 6 internal antennas, private IoT network, HomeShield security, VPN support, and easy setup via app.

Image: Detailed breakdown of the Archer BE700's Wi-Fi 7 speeds across its 2.4GHz, 5GHz, and 6GHz bands, emphasizing the maximum 15Gbps total throughput.
3. Setup Guide
3.1 Hardware Connection
- Power Off: Disconnect the power from your modem and router (if applicable).
- Connect WAN Port: Connect the Ethernet cable from your modem's LAN port to the 10G WAN port (blue) on your Archer BE700 router.
- Connect LAN Devices (Optional): Connect your wired devices (e.g., PC, gaming console) to the 1G LAN ports (yellow) or the 2.5G LAN port (orange) on the router using Ethernet cables.
- Power On: Power on your modem first, then power on your Archer BE700 router. Wait for the LED indicators to stabilize.

Image: Rear view of the Archer BE700, showing its various ports: three 1Gbps LAN ports, one 2.5Gbps LAN port, one 10Gbps WAN port, and a USB 3.0 port, along with power and reset buttons.

Image: A detailed diagram illustrating the various ports on the Archer BE700, including 1Gbps LAN, 2.5Gbps LAN, 10Gbps WAN, and USB 3.0, with labels indicating their functions.
3.2 App Setup (Recommended)
- Download App: Download the TP-Link Tether app from the App Store (iOS) or Google Play (Android).
- Connect to Default Wi-Fi: Connect your smartphone or tablet to the default Wi-Fi network name (SSID) printed on the label at the bottom of the router.
- Launch App: Open the Tether app and follow the on-screen instructions to set up your router. This includes creating a TP-Link ID, setting up your new Wi-Fi name and password, and configuring internet settings.
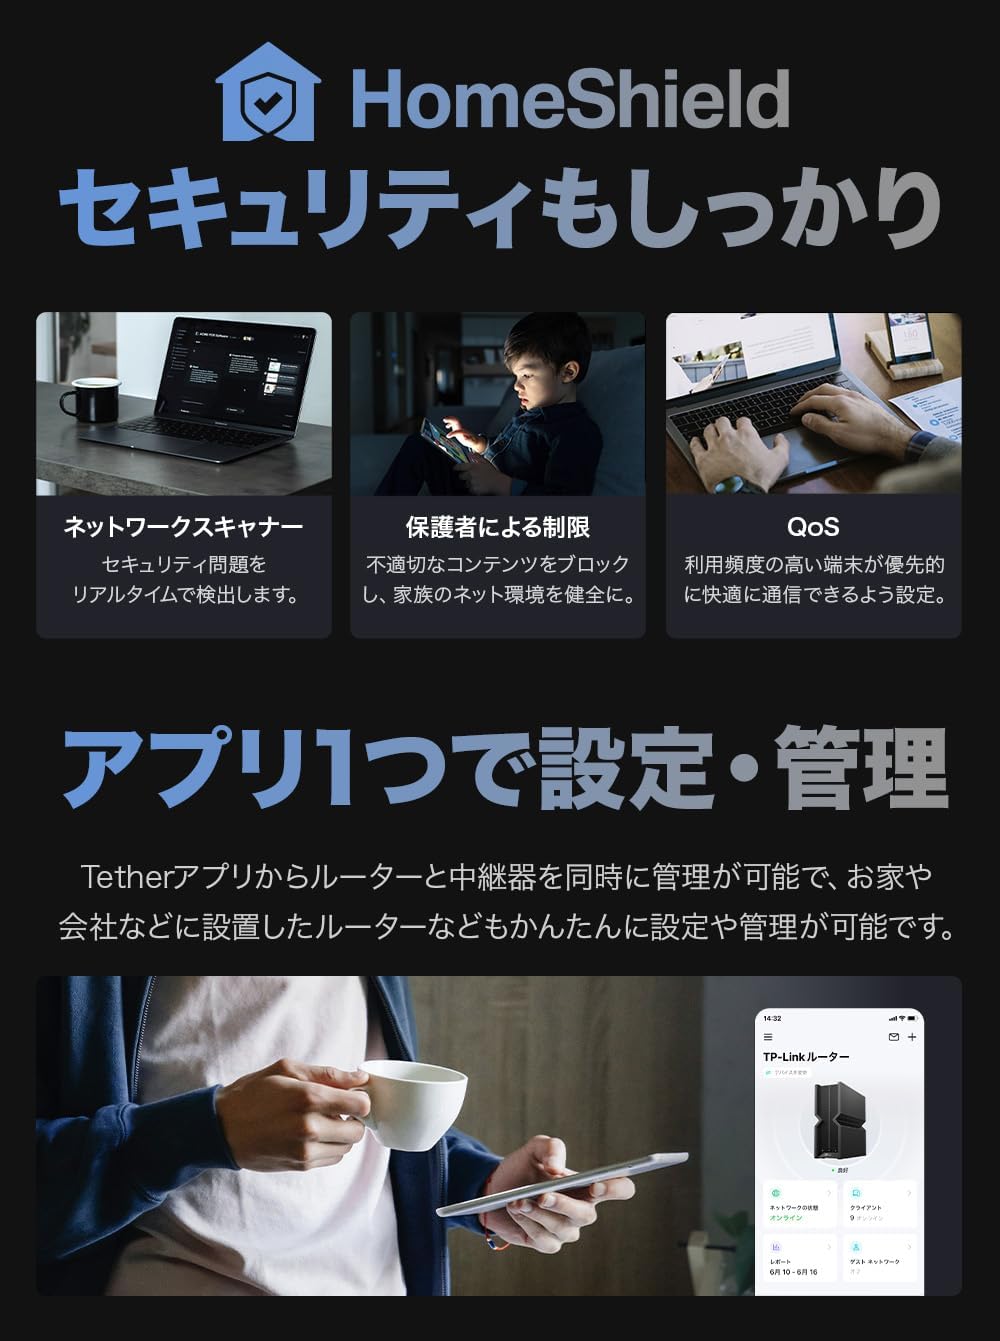
Image: A user interacting with the TP-Link Tether app on a smartphone, demonstrating the ease of setup and management for the router.

Image: A visual representation of managing the TP-Link router through the smartphone app, showing various settings and network status.
4. Operating Instructions
4.1 Basic Operation
- Connecting Devices: Connect your wireless devices (smartphones, laptops, smart TVs) to the Wi-Fi network using the SSID and password you set during setup.
- LED Indicators: The front LEDs indicate the router's status. Refer to the router's quick installation guide for a detailed explanation of each LED's meaning.
4.2 Advanced Features
- Multi-Link Operation (MLO): The Archer BE700 leverages MLO to combine bandwidth across multiple bands (2.4GHz, 5GHz, 6GHz) for compatible Wi-Fi 7 devices, providing higher speeds and lower latency. This feature is enabled by default for optimal performance.
- EasyMesh: If you have other EasyMesh-compatible TP-Link devices, you can expand your Wi-Fi coverage by adding them to your Archer BE700 network. Use the Tether app to add new EasyMesh nodes and create a seamless whole-home mesh system.
- HomeShield: Access HomeShield features via the Tether app or web interface. This includes:
- Network Scanner: Real-time detection of security issues.
- Parental Controls: Block inappropriate content and manage internet access for family members.
- Quality of Service (QoS): Prioritize devices or activities for optimal performance (e.g., gaming, streaming).
- VPN Server/Client: Configure VPN settings through the router's web interface to create a secure connection to your home network or connect to a VPN service.

Image: A diagram illustrating Multi-Link Operation (MLO) where the router combines 2.4GHz, 5GHz, and 6GHz bands to provide a single, high-speed, low-latency connection to a Wi-Fi 7 device.

Image: A visual representation of an EasyMesh network, showing the Archer BE700 extending Wi-Fi coverage throughout a home with additional mesh nodes.

Image: An illustration depicting the HomeShield security features, including network protection for various smart home devices connected to the router.

Image: A diagram showing the VPN functionality of the router, allowing secure connections for devices to the internet or a private network.
5. Maintenance
5.1 Firmware Updates
Regularly check for and install firmware updates to ensure optimal performance, security, and access to new features. You can do this via the Tether app or the router's web management interface.
- Via Tether App: Open the Tether app, go to Tools > System > Firmware Update.
- Via Web Interface: Open a web browser, type
tplinkwifi.netor the router's IP address (e.g.,192.168.0.1) into the address bar, log in, and navigate to System Tools > Firmware Upgrade.
5.2 Cleaning
To maintain proper airflow and prevent overheating, periodically clean the router's vents and exterior with a soft, dry cloth. Do not use liquid cleaners or abrasive materials.
6. Troubleshooting
- No Internet Connection:
- Check all cable connections (WAN, LAN) to ensure they are secure.
- Restart your modem and router.
- Verify your internet service provider (ISP) settings in the router's web interface.
- Slow Wi-Fi Speed:
- Ensure your devices are connected to the appropriate Wi-Fi band (6GHz for highest speeds, if supported).
- Reduce interference by moving the router away from other electronic devices.
- Check for firmware updates.
- Utilize QoS settings to prioritize critical devices or applications.
- Frequent Disconnections:
- Ensure the router is placed in a central location, free from obstructions.
- Check for conflicting IP addresses on your network.
- Specific to iPhone 16 Series: Some users have reported instability when MLO (Multi-Link Operation) is enabled with iPhone 16 series devices, leading to network drops. If you experience this, try disabling the MLO function in the router's advanced Wi-Fi settings via the web interface or Tether app. While MLO is a key Wi-Fi 7 feature, disabling it may resolve compatibility issues with certain devices without significantly impacting overall speed for non-MLO devices.
- Cannot Access Router Settings:
- Ensure your device is connected to the router's Wi-Fi or via an Ethernet cable.
- Try accessing
tplinkwifi.netor the router's default IP address (e.g.,192.168.0.1or192.168.1.1). - Clear your browser's cache or try a different browser.
7. Specifications
| Attribute | Value |
|---|---|
| Brand | TP-Link |
| Model Number | Archer BE700 |
| Wireless Standard | 802.11be (Wi-Fi 7), 802.11ax (Wi-Fi 6/6E), 802.11ac, 802.11n, 802.11a |
| Frequency Band | Tri-Band (2.4GHz, 5GHz, 6GHz) |
| Max Wi-Fi Speed (Combined) | BE15000 (11,528Mbps @ 6GHz + 2,882Mbps @ 5GHz + 688Mbps @ 2.4GHz) |
| Ethernet Ports | 1x 10G WAN, 1x 2.5G LAN, 3x 1G LAN |
| USB Ports | 1x USB 3.0 |
| Antennas | 6 Internal Antennas |
| Dimensions (L x W x H) | 28.1 x 24.4 x 14.9 cm |
| Item Weight | 2.14 kg |
| Security | WPA3, HomeShield |
| Features | MLO, 4K-QAM, EasyMesh, VPN Server/Client, QoS, Parental Controls, Beamforming |
8. Warranty and Support
TP-Link products typically come with a limited warranty. Please refer to the warranty card included with your product or visit the official TP-Link website for detailed warranty information specific to your region.
For technical support, firmware updates, FAQs, and other resources, please visit the TP-Link support website:
You can also contact TP-Link customer service directly for assistance with setup, troubleshooting, or product inquiries.
Ask a question about this manual
Ask about setup, troubleshooting, compatibility, parts, safety, or missing instructions. Manuals+ will review the question and use this page’s manual context to help answer it.