
Surtime 48in-white 48IN
Surtime 48-inch Ceiling Fan with Light User Manual
Model: 48in-white 48IN | Brand: Surtime
1. Introduction
This manual provides detailed instructions for the installation, operation, and maintenance of your Surtime 48-inch Low Profile Ceiling Fan with Light. This fan features remote and APP control, flush mount design, a DC reversible motor, and dimmable LED lighting. It is suitable for use in bedrooms, living rooms, and covered indoor/outdoor patio areas.
Important Safety Information
- Always disconnect power at the circuit breaker before installation or servicing.
- Ensure all electrical connections comply with local codes and ordinances.
- Mount the fan to a ceiling joist or a suitable support structure capable of supporting the fan's weight.
- Do not bend the blade holders during installation or cleaning.
- This fan is not waterproof and should not be exposed to direct water spray.
2. Included Components
Verify that all components are present before beginning installation:
- 48-inch Ceiling Fan Unit
- Light Kit
- Remote Control
- Power Cord
- Instruction Manual

Image: Overview of the Surtime 48-inch ceiling fan, showing the main unit with light kit attached.
3. Setup and Installation
The Surtime 48-inch ceiling fan features an innovative snap-in blade design, simplifying the installation process significantly. No complex assembly of individual blades is required.
Installation Steps:
- Power Disconnection: Before starting, ensure the power supply to the installation area is turned off at the main circuit breaker.
- Mounting Bracket Installation: Securely attach the mounting bracket to a ceiling joist or a suitable electrical junction box rated for fan support. Use appropriate hardware (not always included, check local codes).
- Wiring: Connect the fan's electrical wires to your household wiring according to the provided wiring diagram in the included instruction manual. Ensure all connections are secure and insulated.
- Fan Body Attachment: Lift the fan body and attach it to the installed mounting bracket. The flush mount design ensures a sleek, low-profile appearance.
- Blade Installation: The wing-shaped blades are designed for easy, tool-free snap-in installation. Align each blade with its corresponding slot on the motor housing and push firmly until it clicks into place.
- Light Kit Attachment: Connect the light kit wiring to the fan's light wiring. Secure the light kit to the fan body.
- Power Restoration: Once all connections are secure and the fan is fully assembled, restore power at the circuit breaker.

Image: The Surtime 48-inch ceiling fan installed, demonstrating its low-profile design and integration with remote and app control.
4. Operating Instructions
Your Surtime ceiling fan can be controlled via the included remote control or a dedicated mobile application.
4.1 Remote Control and APP Functions
- Power On/Off: Use the dedicated power button to turn the fan and light on or off.
- Fan Speed Adjustment: Select from 6 different wind speeds to suit your comfort level.
- Light Control: Turn the light on/off, adjust brightness from 10% to 100%, and change color temperature.
- Timer Function: Set the fan to automatically turn off after 2 or 4 hours.
- Forward/Reverse Rotation: Switch between summer (downdraft) and winter (updraft) modes.
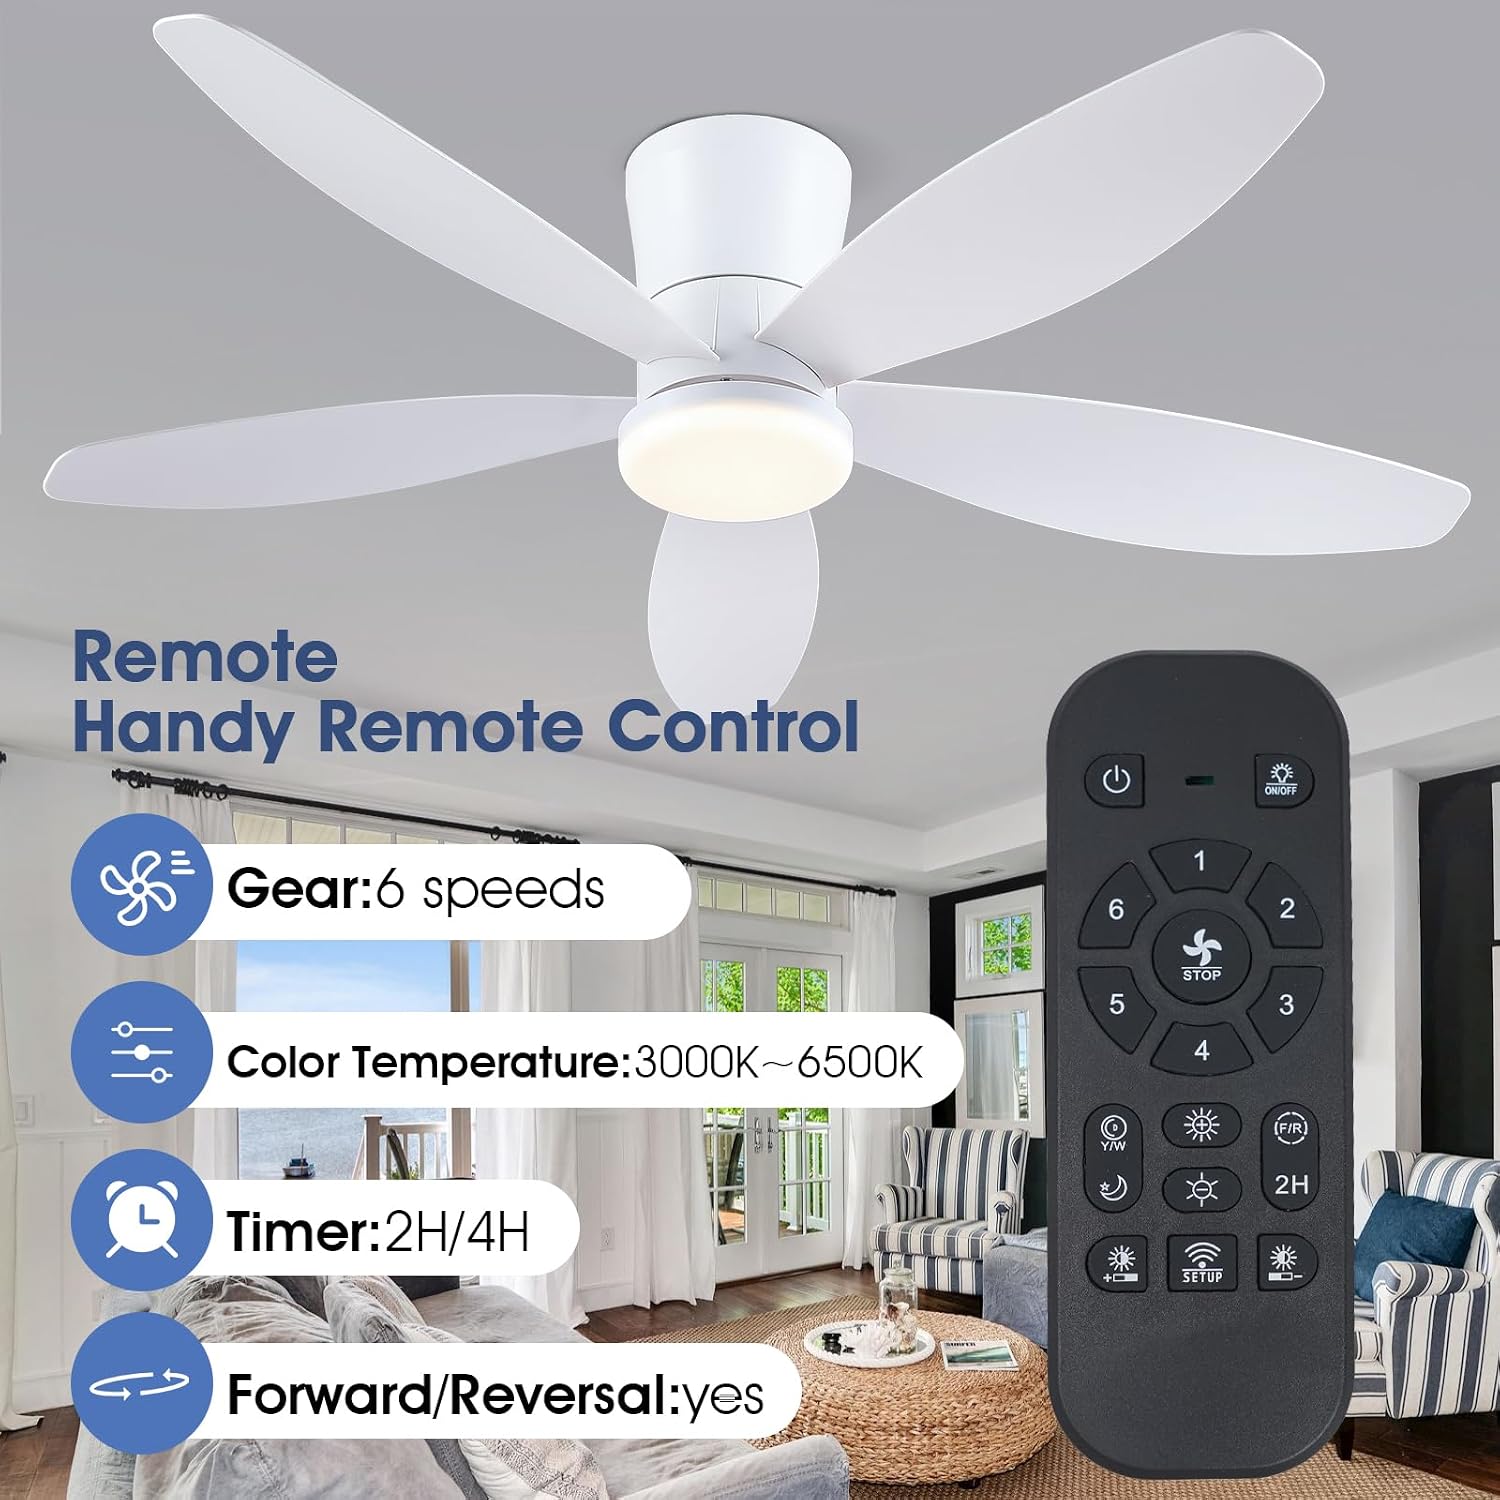
Image: The remote control unit, highlighting its various functions including 6-speed control, light color temperature adjustment (3000K-6500K), 2H/4H timer, and forward/reverse steering.
4.2 Dimmable LED Lighting
The integrated LED lighting system offers three color temperature options and adjustable brightness:
- 3000K: Warm Light
- 4500K: Natural Light
- 6000K: White Light
Brightness can be adjusted from 10% to 100% to create the perfect ambiance for any environment.

Image: Visual representation of the three available light color temperatures: Warm Light (3000K), Natural Light (4500K), and White Light (6000K).
4.3 Reversible DC Motor
The fan's DC reversible motor allows for year-round use:
- Summer Season (Downdraft Mode): The fan blades rotate counter-clockwise, creating a direct breeze that makes you feel cooler.
- Winter Season (Updraft Mode): The fan blades rotate clockwise, circulating warm air trapped near the ceiling downwards, helping to warm the room.

Image: Illustration of the reversible motor function, depicting airflow patterns for cooling in summer and circulating warm air in winter.
4.4 Smart Memory Function
The fan's smart memory function saves your last used brightness and color temperature settings. To ensure the settings are saved, turn off the light for at least 10 seconds. Turning the light on within 10 seconds may result in a change of color temperature.
4.5 Fan Speed Settings
The 6-speed adjustable fan allows you to select the ideal airflow for various scenarios:
- Gear 1-2: Comfortable Wind - Ideal for gentle air circulation.
- Gear 3-4: Natural Wind - Provides a moderate breeze.
- Gear 5-6: Strong Wind - Delivers powerful airflow for maximum cooling.

Image: Visual guide to the 6 adjustable fan speeds, categorized into Comfortable, Natural, and Strong wind settings.
5. Maintenance
Regular maintenance ensures optimal performance and longevity of your ceiling fan.
- Cleaning: To clean the fan, wipe the blades and motor housing with a soft, damp cloth. Do not use abrasive cleaners or solvents, as these may damage the finish or electrical components. Ensure power is off before cleaning.
- Blade Balance: Periodically check that all blades are securely attached and balanced to prevent wobbling.
- Light Kit: The LED light kit is replaceable. Refer to the specifications for details on compatible replacement parts if needed.
6. Troubleshooting
If you encounter issues with your ceiling fan, refer to the following common problems and solutions:
| Problem | Possible Cause | Solution |
|---|---|---|
| Fan does not start | No power; Loose wiring; Remote control battery low. | Check circuit breaker; Verify all wire connections; Replace remote control batteries. |
| Light does not work | Loose light kit wiring; LED module failure. | Check light kit connections; Contact customer support for LED module replacement. |
| Fan wobbles | Loose blades; Improper mounting. | Ensure all blades are securely snapped in; Verify mounting bracket is firmly attached to the ceiling. |
| Remote control not responding | Battery low/dead; Remote not paired. | Replace batteries; Refer to the remote control pairing instructions in the full manual. |
7. Product Specifications
| Feature | Detail |
|---|---|
| Brand | Surtime |
| Model | 48in-white 48IN |
| Colour | 48in-white |
| Material | Acrylic |
| Style | Modern |
| Product Dimensions | 122L x 122W x 30H Centimetres |
| Voltage | 90-265V |
| Wattage | 36W (Light) |
| Light Color Temperature | 3000K-6500K (Adjustable) |
| Fan Speeds | 6 Speeds |
| Motor Type | DC Reversible Motor |
| Installation Type | Flush Mount |
| Indoor/Outdoor Usage | Indoor, Covered Outdoor (Not waterproof) |
| Batteries Required | Yes (for remote control) |

Image: Detailed product dimensions and key electrical specifications for the 48-inch ceiling fan.
8. Warranty and Support
Surtime provides a worry-free 1-year warranty on quality-related issues for this product. This warranty covers defects in materials and workmanship under normal use.
If you encounter any problems or have questions regarding your Surtime ceiling fan, please do not hesitate to contact our customer support team. For assistance, please refer to the contact information provided in your purchase documentation or visit the official Surtime brand store on Amazon:
Related documents48in-white 48IN


Ask a question about this manual
Ask about setup, troubleshooting, compatibility, parts, safety, or missing instructions. Manuals+ will review the question and use this page’s manual context to help answer it.