
Smart Tech 24HN01V3CA
Smart Tech 24HN01V3CA 24-inch HD LED Smart TV User Manual
Model: 24HN01V3CA
1. Introduction
Thank you for choosing the Smart Tech 24HN01V3CA 24-inch HD LED Smart TV. This compact television is designed to provide high-definition entertainment with integrated smart features, making it ideal for various living spaces. Its practical design and advanced connectivity options ensure a versatile viewing experience.
This manual provides essential information for setting up, operating, and maintaining your new television. Please read it thoroughly before use and keep it for future reference.
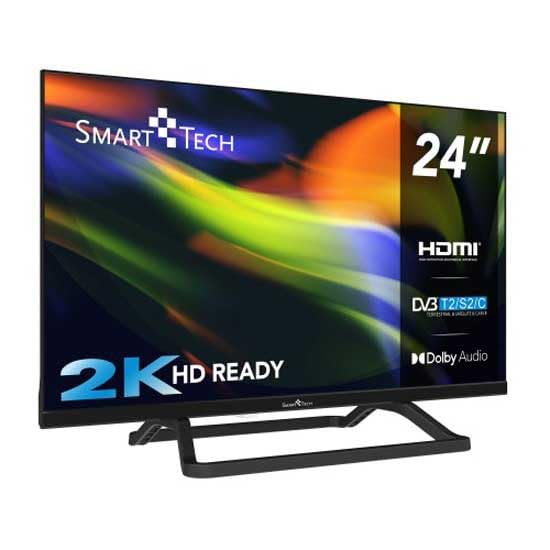
Image 1.1: Front view of the Smart Tech 24-inch HD LED Smart TV with its stand. This image shows the television's display and the included base.
2. Package Contents
Please check that all the following items are included in your package:
- Smart Tech 24-inch HD LED Smart TV (Model: 24HN01V3CA)
- TV Stand
- Remote Control
- User Manual (this document)
- Power Cable
If any items are missing or damaged, please contact your retailer or Smart Tech customer support.
3. Important Safety Information
To ensure safe operation and prevent damage, please observe the following safety precautions:
- Power Source: Connect the TV only to an AC power outlet of the specified voltage.
- Ventilation: Ensure adequate ventilation around the TV. Do not block ventilation openings.
- Water and Moisture: Do not expose the TV to rain, moisture, or excessive humidity.
- Heat Sources: Keep the TV away from heat sources such as radiators, heat registers, stoves, or other appliances that produce heat.
- Cleaning: Unplug the TV before cleaning. Use a soft, dry cloth. Do not use liquid cleaners or aerosol cleaners.
- Placement: Place the TV on a stable, level surface. Avoid placing it in direct sunlight or near strong magnetic fields.
- Children: Supervise children to ensure they do not climb on the TV or stand.
- Servicing: Do not attempt to service this product yourself. Refer all servicing to qualified service personnel.
4. Setup
4.1 Attaching the Stand
If you are not wall-mounting your TV, you will need to attach the included stand.
- Carefully place the TV face-down on a soft, clean surface to prevent screen damage.
- Align the stand with the mounting holes on the bottom of the TV.
- Secure the stand using the provided screws. Ensure the stand is firmly attached.
4.2 Wall Mounting (Optional)
This TV supports VESA standard wall mounts. The VESA mounting pattern for this model is 75 x 75 mm. Please use a compatible wall mount kit (sold separately) and follow the instructions provided with the wall mount.
Warning: Wall mounting should be performed by qualified personnel to prevent injury or damage.
4.3 Connecting External Devices
Your Smart Tech TV offers various ports for connecting external devices such as Blu-ray players, game consoles, sound systems, and USB storage devices.
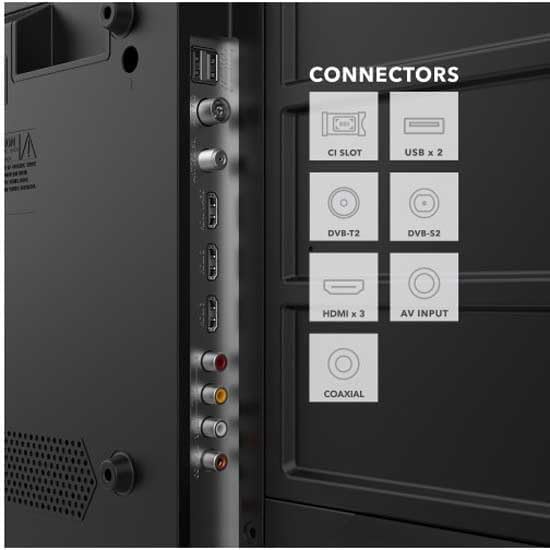
Image 4.1: Detailed view of the Smart Tech TV's rear panel connectors. This image highlights the HDMI, USB, CI Slot, DVB-T2, DVB-S2, AV Input, and Coaxial ports.
- HDMI Ports (x3): Connect high-definition devices like Blu-ray players, game consoles, or set-top boxes.
- USB Port (x1): Connect USB storage devices for media playback or software updates.
- DVB-T2/S2/C: Connect an antenna for terrestrial digital TV or a satellite dish for satellite TV.
- AV Input: Connect older devices using composite video and stereo audio cables.
- CI Slot: For inserting a Conditional Access Module (CAM) for encrypted channels.
- Coaxial: For connecting to an external audio system.
4.4 Power Connection
After all connections are made, plug the power cable into the TV's power input and then into a wall outlet.
4.5 Initial Setup
Upon first power-on, the TV will guide you through an initial setup wizard. This typically includes:
- Language selection
- Country/Region selection
- Network connection (Wi-Fi setup for Smart TV features)
- Channel scanning (for DVB-T2/S2/C)
- Time zone settings
5. Operating Your TV
5.1 Remote Control Overview
The included remote control allows you to access all TV functions. Insert two AAA batteries (not included) into the remote control, observing the correct polarity.
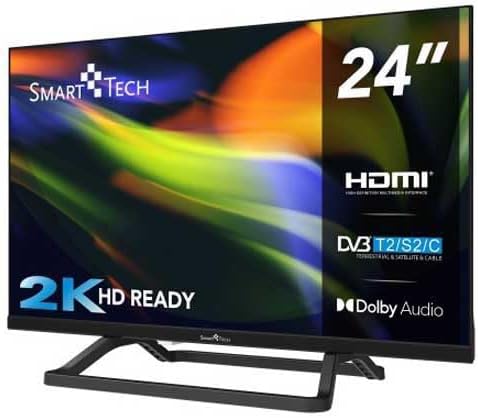
Image 5.1: The Smart Tech TV remote control. This image displays the layout of buttons for power, channel, volume, navigation, and smart TV functions.
- Power Button: Turns the TV on or off.
- Number Buttons: Select channels directly.
- Volume Up/Down: Adjust the sound level.
- Channel Up/Down: Change channels sequentially.
- Navigation Buttons (Up/Down/Left/Right/OK): Navigate menus and confirm selections.
- Source Button: Select input sources (HDMI, AV, DVB).
- Smart TV Buttons: Quick access to popular apps like Netflix, YouTube, Amazon Prime (if available on your model).
- Menu Button: Access the main settings menu.
- Exit Button: Exit current menu or application.
5.2 Basic Functions
- Turning On/Off: Press the Power button on the remote or on the TV.
- Changing Channels: Use the CH+/- buttons or number buttons.
- Adjusting Volume: Use the VOL+/- buttons.
- Selecting Input Source: Press the Source button and select the desired input (e.g., HDMI 1, USB).
5.3 Smart TV Features
Your Smart Tech TV comes with integrated Smart TV capabilities, allowing you to access a world of online content. Ensure your TV is connected to the internet via Wi-Fi during the initial setup.
- Accessing Apps: Use the dedicated Smart TV buttons on your remote or navigate to the 'Smart' or 'Apps' section in the main menu.
- Streaming Services: Enjoy popular streaming platforms like Netflix, YouTube, and Amazon Prime (subscription may be required).
- Web Browser: Browse the internet directly from your TV.
6. Maintenance
6.1 Cleaning the TV
Always unplug the TV from the power outlet before cleaning.
- Screen: Gently wipe the screen with a soft, lint-free cloth. For stubborn marks, slightly dampen the cloth with water or a specialized screen cleaner (ensure it's suitable for LED screens) and wipe gently. Do not apply pressure.
- Cabinet: Wipe the TV cabinet with a soft, dry cloth. Do not use abrasive cleaners, waxes, or solvents as they can damage the finish.
6.2 Software Updates
Your TV may receive software updates to improve performance and add new features. Ensure your TV is connected to the internet to receive automatic updates, or check for updates manually through the TV's settings menu.
7. Troubleshooting
Before contacting customer support, please refer to the following common issues and solutions:
| Problem | Possible Cause / Solution |
|---|---|
| No power | Check if the power cable is securely plugged into the TV and the wall outlet. Ensure the wall outlet is working. |
| No picture, but sound is present | Ensure the correct input source is selected. Check cable connections to external devices. |
| No sound, but picture is present | Check the volume level and ensure the TV is not muted. Check audio cable connections if using external speakers. |
| Remote control not working | Check and replace batteries. Ensure there are no obstructions between the remote and the TV's IR sensor. |
| Cannot connect to Wi-Fi | Ensure your Wi-Fi router is on and within range. Re-enter the Wi-Fi password. Try restarting the TV and router. |
8. Specifications
| Feature | Detail |
|---|---|
| Brand | Smart Tech |
| Model Number | 24HN01V3CA |
| Screen Size | 24 inches |
| Display Technology | LED |
| Resolution | 768p (1366 x 768 pixels) |
| Refresh Rate | 120 Hz |
| Special Feature | Smart TV Capabilities |
| Connectivity Technology | HDMI, USB, Wireless (Wi-Fi) |
| Internet Applications | Netflix, YouTube, Amazon Prime |
| Total HDMI Ports | 3 |
| Total USB Ports | 1 |
| Standard VESA Mount | 75 x 75 mm |
| Product Dimensions (D x W x H) | 6 x 53.5 x 31.8 cm |
| Item Weight | 2.45 Kilograms |
| Audio Channels | 5.1 Surround Sound |
9. Warranty and Support
9.1 Limited Warranty
This Smart Tech 24HN01V3CA TV comes with a limited warranty. Please refer to the warranty card included in your package or visit the official Smart Tech website for detailed terms and conditions regarding warranty coverage, duration, and limitations.
9.2 Customer Support
If you encounter any issues that cannot be resolved using the troubleshooting guide, or if you require further assistance, please contact Smart Tech customer support. Contact information can typically be found on the official Smart Tech website or on your warranty documentation.
When contacting support, please have your TV model number (24HN01V3CA) and serial number ready.
Related documents24HN01V3CA


Ask a question about this manual
Ask about setup, troubleshooting, compatibility, parts, safety, or missing instructions. Manuals+ will review the question and use this page’s manual context to help answer it.