
Introduction
This instruction manual provides detailed guidance for the installation, operation, and maintenance of your CHICIRIS RV Water Heater Bypass Kit. This kit is designed to facilitate the winterization process of your RV's water heater, protecting it from freezing temperatures and reducing the need for antifreeze in the water heater tank itself. Please read this manual thoroughly before installation and use to ensure proper function and longevity of the product.
Package Contents
Verify that all components listed below are present in your package:
- 2 x Brass Tee Valves (1/2 Inch NPT male threads)
- 1 x Flexible Hose (approximately 30.5 cm / 12 inches in length, with female connectors)
- 2 x Double Female Connectors (1/2 Inch NPT)
- 1 x Sealing Tape (PTFE tape)
- 1 x User Manual (this document)

Image: All components of the CHICIRIS RV Water Heater Bypass Kit, including two brass tee valves, a flexible hose, two female connectors, and sealing tape.
Specifications
- Item Type: RV Water Heater Bypass Kit
- Product Material: Brass, Polyvinyl Chloride (PVC)
- Hose Length: Approximately 30.5 cm / 12 inches
- Thread Size: 1/2 Inch NPT (National Pipe Taper)
- Valve Type: Brass Tee Valves with intuitive handle
- Color: Black (handles), Brass (valves)
- Product Dimensions: Approximately 6.3 x 5.12 x 1.57 inches (overall kit packaging)
- Item Weight: Approximately 15.8 ounces
Safety Information
Always observe the following safety precautions during installation and operation:
- Ensure the RV's water system is depressurized and the water heater is drained before beginning installation.
- Turn off all power to the water heater (both electric and gas) before working on the system.
- Wear appropriate personal protective equipment, such as gloves and eye protection.
- Do not overtighten connections, as this can damage threads.
- Check for leaks after installation and before fully pressurizing the system.
Setup and Installation
This kit is designed to be installed on RV water heaters that do not already have a bypass system. The typical installation involves creating a bypass loop around the water heater.
- Prepare the Water Heater: Ensure the RV's water system is completely drained and depressurized. Turn off the water heater's power supply (electric and gas).
- Locate Water Heater Lines: Identify the hot water outlet line (usually at the top) and the cold water inlet line (usually at the bottom) of your RV water heater.
- Disconnect Existing Lines: Carefully disconnect the hot and cold water lines from the water heater. Be prepared for residual water.
- Install Tee Valves:
- Apply sealing tape (PTFE tape) to the male threads of the brass tee valves.
- Connect one tee valve to the hot water outlet of the water heater. The straight-through port of the tee valve should align with the direction of water flow from the heater.
- Connect the second tee valve to the cold water inlet of the water heater. The straight-through port of this tee valve should align with the direction of water flow into the heater.

Image: A close-up view of one of the brass tee valves, showing the male NPT threads and the black handle for operation.
- Connect Bypass Hose:
- Attach the flexible hose to the side ports of the two installed tee valves. This creates the bypass loop.
- If your existing lines are female, use the provided double female connectors to adapt the tee valves to your system. Apply sealing tape to all male threads before connecting.

Image: The flexible hose connected to two tee valves, demonstrating the bypass configuration. Also visible are the female connectors and sealing tape.
- Reconnect Main Lines: Reconnect the original hot and cold water lines to the straight-through ports of the tee valves.
- Check for Leaks: Slowly turn on the RV's water supply and inspect all connections for leaks. Tighten any leaking connections as necessary.
Operating Instructions
The brass tee valves feature an intuitive handle with triangular markings to indicate the flow direction. The handle's position determines whether water flows through the water heater or bypasses it.
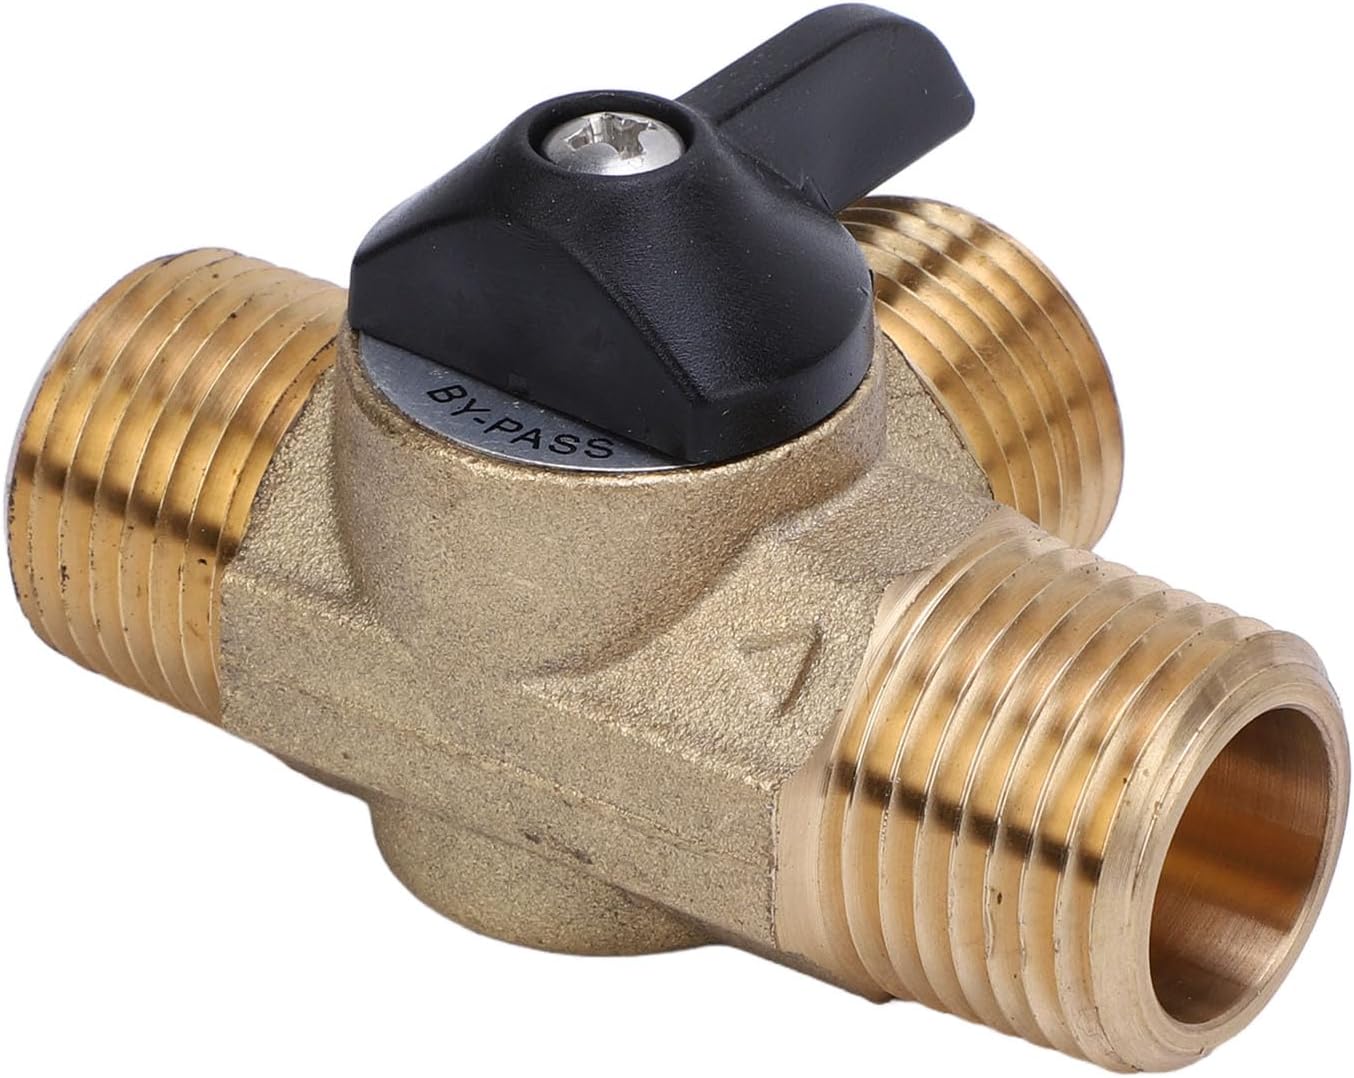
Image: A close-up of a tee valve, highlighting the "BY-PASS" label and the handle's position for directing water flow.
For Normal Operation (Water Heater In-Line):
- Ensure the handles on both tee valves are positioned to allow water to flow through the water heater and block the bypass line. This typically means the handle is aligned with the main water lines.
- Fill the water heater tank before turning on any heating elements.
For Winterization (Water Heater Bypassed):
- Drain the water heater tank completely.
- Position the handles on both tee valves to allow water to flow through the bypass hose and block the water heater inlet/outlet. This typically means the handle is perpendicular to the main water lines, directing flow through the side port.
- Once bypassed, you can introduce RV antifreeze into your plumbing system without filling the water heater tank, saving antifreeze.
Maintenance
The CHICIRIS RV Water Heater Bypass Kit is designed for durability with robust brass valves. Minimal maintenance is required:
- Regular Inspection: Periodically check all connections for signs of leaks or corrosion, especially before and after winterization.
- Valve Operation: Ensure the valve handles turn smoothly. If stiff, a small amount of silicone-based lubricant can be applied to the handle mechanism (avoid petroleum-based lubricants).
- Storage: When not in use for extended periods, ensure the system is drained and the valves are in the desired position (bypassed for winter, or open for normal use if the RV is stored in a heated environment).
Troubleshooting
- Leakage at Connections:
- Ensure sealing tape (PTFE tape) was applied correctly and sufficiently to all male threads.
- Check that connections are tightened securely, but do not overtighten.
- Inspect O-rings or gaskets within female connectors for damage or improper seating.
- Water Not Flowing Correctly:
- Verify that the valve handles are in the correct position for the desired operation (normal flow or bypass).
- Ensure the RV's main water supply is turned on and the system is pressurized.
- Stiff Valve Handles:
- Over time, mineral deposits or lack of use can cause stiffness. Operate the handle back and forth several times.
- If persistent, a small amount of silicone-based lubricant can be applied to the handle's pivot point.
Warranty Information
Specific warranty details for the CHICIRIS RV Water Heater Bypass Kit are typically provided at the point of purchase or on the product packaging. Please refer to your purchase documentation for information regarding warranty coverage, duration, and claims procedures. Generally, products are warranted against defects in materials and workmanship under normal use.
Support
For technical assistance, questions regarding installation, or to report a defective product, please contact CHICIRIS customer support through the retailer where the product was purchased or visit the official CHICIRIS brand store online. Please have your product model number (CHICIRIS0qw3hur1ad) and purchase date available when contacting support.
You can visit the CHICIRIS store at: CHICIRIS Store