
FIREBAT AK2 PLUS
User Manual: FIREBAT Mini PC AK2 PLUS
Model: AK2 PLUS | Brand: FIREBAT
1. Introduction
Thank you for choosing the FIREBAT Mini PC AK2 PLUS. This manual provides essential information for setting up, operating, maintaining, and troubleshooting your new mini PC. Please read this manual thoroughly before use to ensure optimal performance and longevity of your device.
2. Package Contents
Carefully unpack your FIREBAT Mini PC and verify that all items listed below are included:
- 1 x FIREBAT AK2 N150 Mini PC
- 1 x 12V/2.5A US Adapter
- 1 x VESA Mount
- 1 x HDMI Cable
- 1 x User Manual (this document)

Image: Contents of the FIREBAT Mini PC AK2 PLUS package, including the mini PC, power adapter, VESA mount, HDMI cable, and user manual.
3. Product Overview
The FIREBAT Mini PC AK2 PLUS is a compact and powerful desktop computer designed for various applications, from office work to home entertainment. It features an Intel 13th Gen N150 processor, ample storage, and versatile connectivity options.
3.1 Key Features
- Processor: Intel 13th Gen Twin Lake N150 (4 cores/4 threads, up to 3.6GHz)
- Memory: 16GB DDR4 RAM
- Storage: 512GB M.2 2280 SSD (expandable up to 4TB with 2.5" SSD/HDD)
- Graphics: Intel UHD Graphics (1000MHz, 4K support)
- Display: Supports dual HDMI output for simultaneous 4K display
- Connectivity: Dual-band Wi-Fi, Bluetooth 4.2, Gigabit Ethernet
- Ports: Multiple USB 2.0 and USB 3.0 ports, HDMI, LAN
- Cooling: Ultra-quiet fans with intelligent cooling technology

Image: Front and rear view of the FIREBAT Mini PC AK2 PLUS, highlighting its compact design and various ports.
3.2 Ports and Interfaces
Familiarize yourself with the available ports on your Mini PC:
- Front Panel: Power Button, USB 3.2 Type-A ports
- Rear Panel: DC Power Input, 2 x HDMI 2.0 Type-A ports, LAN RJ45 port, USB 2.0 Type-A ports

Image: Detailed diagram of the FIREBAT Mini PC AK2 PLUS interfaces, showing the location of USB, HDMI, LAN, and power ports.
3.3 Internal Components and Expansion
The Mini PC comes with pre-installed RAM and SSD. You can expand the storage capacity:
- RAM: DDR4 SO-DIMM
- SSD: M.2 2280 SATA SSD
- Expansion: Supports adding a 2.5" SSD/HDD (not included) for additional storage up to 2TB.

Image: Illustration of the M.2 2280 SSD and SO-DIMM DDR4 memory modules used in the Mini PC.
4. Setup Guide
Follow these steps to set up your FIREBAT Mini PC:
4.1 Connecting Peripherals
- Connect Display: Use the provided HDMI cable to connect the Mini PC to your monitor or TV. The Mini PC supports dual display output via its two HDMI ports.
- Connect Keyboard and Mouse: Plug your USB keyboard and mouse into the available USB ports on the Mini PC.
- Connect Network (Optional): For a wired connection, connect an Ethernet cable from your router/modem to the LAN RJ45 port on the Mini PC. For wireless, ensure your Wi-Fi network is available.
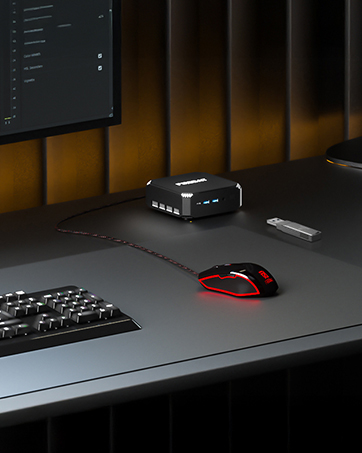
Image: The Mini PC connected to a monitor, keyboard, and mouse on a desk, illustrating a typical setup.
4.2 Powering On
- Connect Power Adapter: Plug the 12V/2.5A US Adapter into the DC power input port on the Mini PC, then plug the adapter into a power outlet.
- Power On: Press the power button located on the front of the Mini PC. The power indicator light will illuminate.

Image: The Mini PC connected to its power adapter, demonstrating the correct power connection.

Image: Close-up of the Mini PC's power button, indicating its location for powering on the device.
4.3 VESA Mount Installation (Optional)
The included VESA mount allows you to attach the Mini PC to the back of a compatible monitor or to a wall, saving desk space.
- Attach the VESA bracket to the back of your monitor or desired surface using appropriate screws.
- Slide the Mini PC onto the VESA bracket until it clicks securely into place.

Image: The Mini PC shown with its VESA mount, demonstrating how it can be attached to the back of a monitor for a space-saving setup.
5. Operating Instructions
5.1 Initial Boot and Operating System Setup
Upon first power-on, the Mini PC may guide you through the initial setup of its default operating system. Follow the on-screen prompts to configure language, region, network, and user accounts.
5.2 Dual Display Setup
To utilize the dual display feature:
- Connect two monitors to the two HDMI ports on the rear of the Mini PC.
- Once both monitors are connected and powered on, the operating system should automatically detect them.
- Adjust display settings (e.g., extend, duplicate, resolution) through your operating system's display configuration panel.

Image: The Mini PC connected to two monitors via HDMI, demonstrating its dual display capability for enhanced productivity.
5.3 Network Connectivity
The Mini PC supports both wired and wireless network connections:
- Wired (Ethernet): Connect an Ethernet cable to the RJ45 port. The connection will be established automatically.
- Wireless (Wi-Fi): Access your operating system's network settings, select your Wi-Fi network, and enter the password to connect.
- Bluetooth: Enable Bluetooth in your operating system settings to pair with compatible devices like headphones, keyboards, or mice.
6. Maintenance
Proper maintenance ensures the longevity and optimal performance of your Mini PC.
6.1 Cleaning
- Regularly clean the exterior of the Mini PC with a soft, dry cloth.
- Use compressed air to gently clear dust from the ventilation openings to maintain proper airflow and cooling.
- Do not use liquid cleaners or sprays directly on the device.

Image: An illustration showing the internal cooling fan of the Mini PC, emphasizing the importance of keeping ventilation clear for efficient heat dissipation.
6.2 Storage and Environment
- Store the Mini PC in a cool, dry place away from direct sunlight and extreme temperatures.
- Avoid placing the device in dusty environments or near sources of moisture.
- Ensure adequate ventilation around the Mini PC during operation.
7. Troubleshooting
If you encounter issues with your FIREBAT Mini PC, refer to the following common problems and solutions:
| Problem | Possible Cause | Solution |
|---|---|---|
| No power/Does not turn on | Power adapter not connected or faulty; Power outlet issue. | Ensure power adapter is securely connected to both the Mini PC and a working power outlet. Try a different outlet. |
| No display on monitor | HDMI cable loose or faulty; Monitor input not selected correctly; Monitor not powered on. | Check HDMI cable connections. Ensure monitor is powered on and set to the correct input source (HDMI). Try a different HDMI cable or monitor. |
| No internet connection (Wi-Fi) | Incorrect Wi-Fi password; Router issue; Wi-Fi adapter disabled. | Verify Wi-Fi password. Restart your router. Check operating system settings to ensure Wi-Fi is enabled. |
| No internet connection (Wired) | Ethernet cable loose or faulty; Router issue; Network adapter disabled. | Check Ethernet cable connections. Restart your router. Check operating system settings to ensure the wired network adapter is enabled. |
| System is slow or unresponsive | Too many applications running; Low disk space; Overheating. | Close unnecessary applications. Free up disk space. Ensure proper ventilation and clean dust from vents. Restart the Mini PC. |
If the problem persists after trying these solutions, please contact FIREBAT customer support.
8. Specifications
Detailed technical specifications for the FIREBAT Mini PC AK2 PLUS:
| Feature | Specification |
|---|---|
| Model Number | AK2 PLUS |
| Processor | Intel 13th Gen Twin Lake N150 (4 Cores, 4 Threads, up to 3.6 GHz) |
| RAM | 16GB DDR4 SDRAM |
| Storage | 512GB M.2 2280 SSD (eSATA interface) |
| Graphics Coprocessor | Intel UHD Graphics (Integrated, 1000MHz) |
| Max Screen Resolution | 4096 x 2160 Pixels (4K) |
| Wireless Connectivity | 802.11a/b/g/n/ac (Dual-band Wi-Fi), Bluetooth 4.2 |
| USB Ports | 2 x USB 2.0, 2 x USB 3.0 |
| Video Output | 2 x HDMI |
| LAN Port | RJ45 Gigabit Ethernet |
| Operating System | Default (Pre-installed) |
| Item Weight | 12.8 ounces (approx. 0.36 kg) |
| Product Dimensions | 5.5 x 5.5 x 1.9 inches (approx. 14 x 14 x 4.8 cm) |
| Color | Gray |
9. Warranty and Support
FIREBAT is committed to providing quality products and excellent customer service. Your Mini PC comes with a standard warranty. For specific warranty terms and conditions, please refer to the documentation included with your purchase or visit the official FIREBAT website.
9.1 Customer Support
If you require technical assistance, have questions about your product, or need to claim warranty service, please contact FIREBAT customer support:
- Email: support@firebatpc.com
- Website: www.firebatpc.com
Please provide your product model (AK2 PLUS) and a detailed description of the issue when contacting support to facilitate a quicker resolution.
Related documentsAK2 PLUS


Ask a question about this manual
Ask about setup, troubleshooting, compatibility, parts, safety, or missing instructions. Manuals+ will review the question and use this page’s manual context to help answer it.