VILTROX DC-X3+Rig Cage
VILTROX DC-X3 Touchscreen Camera Monitor Kit User Manual
Model: DC-X3+Rig Cage
1. Introduction
This manual provides detailed instructions for the VILTROX DC-X3 Touchscreen Camera Monitor Kit with Rig Cage. This professional field monitor is designed to enhance your videography and cinematography workflow with its ultra-bright display, advanced monitoring tools, and robust protection.

Figure 1.1: VILTROX DC-X3 Camera Monitor with Rig Cage.
2. Product Overview
2.1 Key Features
- Robust Protection: Sturdy metal cage safeguards the 6-inch monitor against accidental bumps and scratches.
- Multiple Attachment Points: Features standard screw holes for third-party accessories like microphones, LED lights, and battery plates.
- Secure Connections: Reinforces structural integrity and ensures secure cable fastening, preventing disconnections.
- All-in-One Professional Solution: Integrates ultra-bright display, professional monitoring tools, customizable color grading, and extensive connectivity.
- Cost and Time Savings: Eliminates the need for additional protective gear, simplifying setup.
- 2000 nits Ultra-Bright Display: 6-inch Full HD 1920x1080 IPS monitor for clarity and brightness in any light.
- Professional Monitoring Tools: Includes waveform monitor, vectorscope, focus peaking, grid overlay, and overexposure warnings.
- 3D LUT Support: Import 3D LUTs via USB for precise color correction and creative style application.
- Intelligent Thermal Management: Strategically placed ventilation ports and active cooling system for long-term stability.
- Anamorphic Lens Correction: Supports various de-squeeze ratios (1.00X/1.33X/1.50X/1.60X/1.80/2.00X).
- 160° Ultra-wide Viewing Angle: Ensures consistent image quality from various perspectives.
2.2 Components and Ports
Familiarize yourself with the various components and ports of the VILTROX DC-X3 monitor.
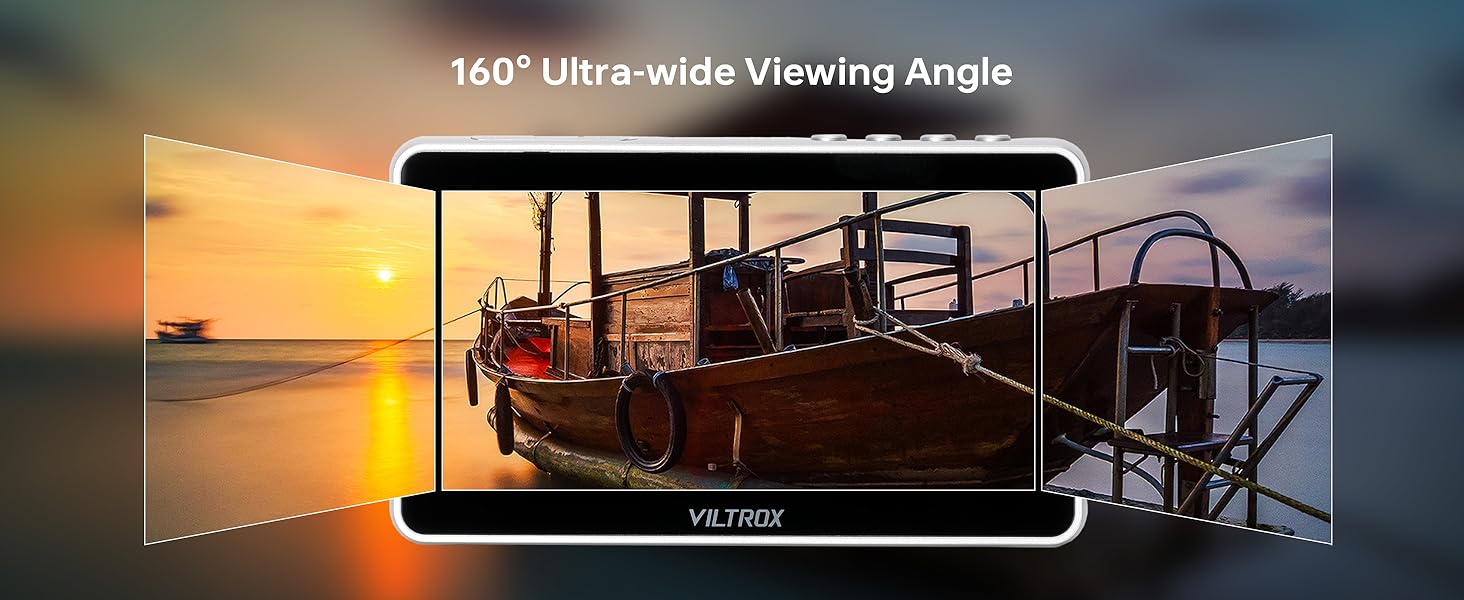
Figure 2.1: Front, Back, and Side Views of the DC-X3 Monitor with labeled ports and buttons.
- Back/Menu Button
- Shortcut Key
- Display Screen
- Fan Exhaust Vent
- Indicator Light
- Power Button
- HDMI Input
- HDMI Output
- Headphone Jack
- Cooling Air Intake
- 1/4 Screw Hole
- DC Port
- Type-C Port
- Cooling Air Intake
- USB Interface
- Battery Release Button
- Battery Slot
- SDI Output
- SDI Input
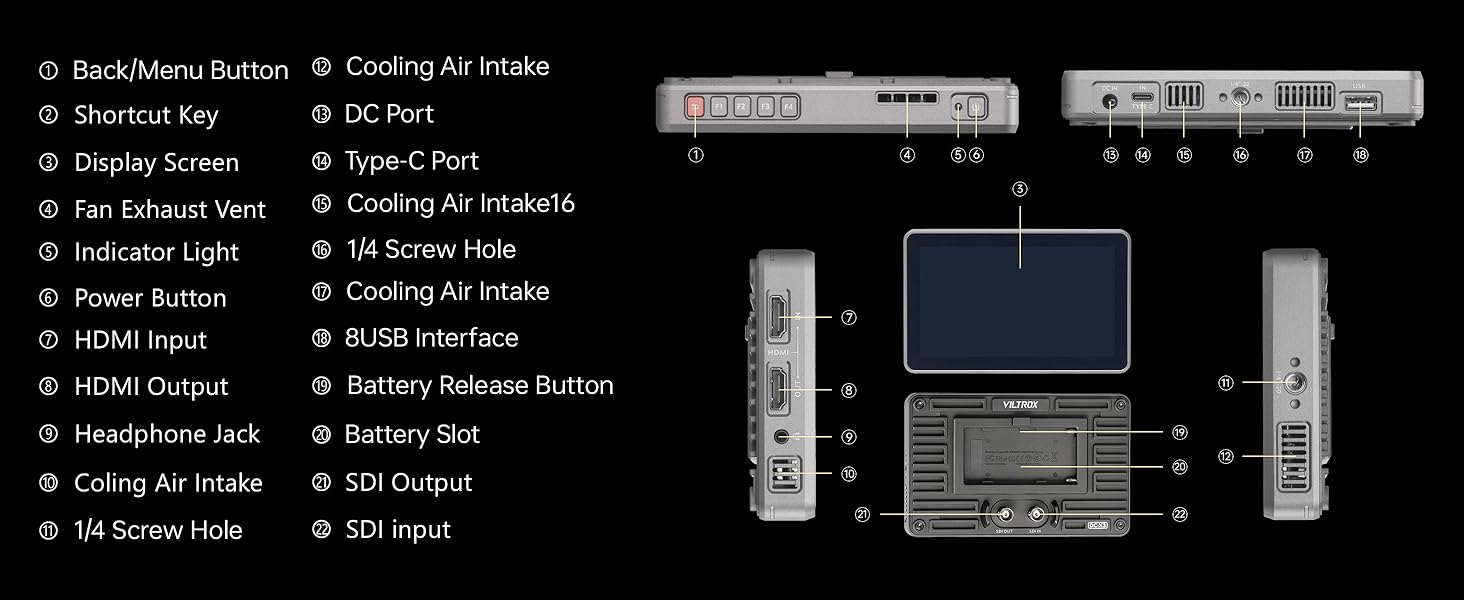
Figure 2.2: Angled views of the DC-X3 Monitor highlighting various ports and features.
3. Setup
3.1 Attaching the Rig Cage
The monitor comes pre-assembled with the rig cage for immediate use. Ensure all screws are securely tightened before mounting.
3.2 Powering the Monitor
Insert the included NP-F550 battery into the battery slot on the back of the monitor. Alternatively, connect the DC power adapter to the DC Port (12) for continuous power.
3.3 Connecting to a Camera
Connect your camera to the monitor using either the HDMI Input (7) or SDI Input (19) ports. Use the appropriate cable (Mini HDMI or HDMI cable included) for your camera's output.

Figure 3.1: DC-X3 Monitor showing HDMI and SDI input/output ports connected to a camera setup.
3.4 Attaching the Sunshade Hood
The sunshade hood can be easily attached to the monitor to reduce glare and improve visibility in bright outdoor conditions.

Figure 3.2: DC-X3 Monitor with sunshade hood in use, providing improved visibility outdoors.
4. Operating Instructions
4.1 Basic Operation
Press the Power Button (6) to turn the monitor on or off. Use the Back/Menu Button (1) and Shortcut Keys (2) to navigate the menu and access various settings.
4.2 Adjusting Brightness
The monitor features a 2000 nits ultra-bright display, ideal for outdoor use. Adjust the backlight setting via the menu to suit your environment.
Video 4.1: Demonstration of the VILTROX DC-X3 monitor's brightness and outdoor visibility, showing adjustment of backlight settings.
4.3 Professional Monitoring Tools
The monitor includes a suite of professional tools accessible through the touchscreen interface:
- Waveform: Displays the luminance and chrominance levels of your video signal.
- Vectorscope: Shows the color information of your video signal.
- Histogram: Illustrates the tonal distribution of your image.
- Focus Peaking: Highlights in-focus areas for precise focusing.
- Grid Overlay: Various grid options for composition.
- Overexposure Warnings: Alerts you to overexposed areas.

Figure 4.1: DC-X3 Monitor showcasing various professional monitoring tools on its display.
4.4 3D LUT Support
Import 3D Look-Up Tables (LUTs) via a USB flash drive connected to the USB Interface (15) for real-time color grading and previewing. This allows for precise color correction and creative style application directly on set.

Figure 4.2: Visual comparison demonstrating the effect of applying a 3D LUT for color correction on the DC-X3 Monitor.
4.5 Anamorphic Lens Correction
The monitor supports de-squeezing for anamorphic lenses with ratios of 1.00X, 1.33X, 1.50X, 1.60X, 1.80X, and 2.00X. This feature allows you to view correctly proportioned images when shooting with anamorphic lenses.

Figure 4.3: Illustration of anamorphic lens correction on the DC-X3 Monitor, showing a de-squeezed image.
5. Maintenance
5.1 Cleaning the Monitor
Use a soft, lint-free cloth to clean the screen and body of the monitor. For stubborn smudges, a screen cleaning solution designed for electronics can be used sparingly. Avoid abrasive materials or harsh chemicals.
5.2 Thermal Management
The VILTROX DC-X3 features intelligent thermal management with cooling air intakes (10, 14) and a fan exhaust vent (4). Ensure these vents are not obstructed during operation to maintain optimal performance and prevent overheating.

Figure 5.1: Internal view of the DC-X3 Monitor highlighting its intelligent thermal management system.
5.3 Battery Care
When not in use for extended periods, remove the battery from the monitor. Store batteries in a cool, dry place. Follow manufacturer guidelines for battery charging and disposal.
6. Troubleshooting
| Problem | Possible Cause | Solution |
|---|---|---|
| Monitor does not power on. | Low or depleted battery; power cable not connected properly. | Charge or replace the battery. Ensure DC power cable is securely connected. |
| No video signal. | Incorrect input selected; loose HDMI/SDI cable; camera output settings. | Verify correct input source (HDMI/SDI) is selected on the monitor. Check cable connections. Ensure camera video output settings match monitor's capabilities. |
| Screen is too dim/bright. | Brightness/backlight settings are incorrect. | Adjust the backlight and brightness settings in the monitor's menu. |
| SDI IN port not working. | Faulty cable; incompatible signal; internal issue. | Try a different SDI cable. Ensure the input signal is compatible with the monitor's SDI specifications. If the issue persists, contact customer support. |
| Monitor overheating. | Obstructed ventilation; prolonged use in high temperatures. | Ensure cooling vents are clear. Operate in a well-ventilated area. Allow the monitor to cool down if it becomes excessively hot. |
7. Specifications
| Feature | Detail |
|---|---|
| Product Dimensions | 6.1 x 1.18 x 3.85 inches |
| Item Weight | 3.1 pounds |
| Item Model Number | FS-JYC-03459-2 |
| Batteries | 1 Lithium Ion batteries required (included) |
| Standing Screen Display Size | 6 Inches |
| Aspect Ratio | 16:9 |
| Voltage | 12 Volts (DC) |
| Brand | VILTROX |
| Resolution | FHD 1080p Ultra Wide + |
| Screen Surface Description | Glossy |
8. What's in the Box
The VILTROX DC-X3 Touchscreen Camera Monitor Kit includes the following items:
- DC-X3 Camera Monitor (with Rig Cage pre-attached)
- Sunshade Hood
- NP-F550 Battery
- NP-F550 Battery Cable
- Mini HDMI Cable
- HDMI Cable
- HD Screen Protector
- Standard Shoe Adapter

Figure 8.1: All items included in the VILTROX DC-X3 Camera Monitor Kit package.
9. Warranty and Support
9.1 Warranty Information
VILTROX products are covered by a standard manufacturer's warranty. Please refer to the warranty card included in your package for specific terms and conditions. Keep your purchase receipt as proof of purchase for warranty claims.
9.2 Customer Support
For technical assistance, troubleshooting, or warranty inquiries, please contact VILTROX customer support. Contact information can typically be found on the official VILTROX website or on the product packaging.
Visit the official VILTROX Store for more information: VILTROX Official Store
Related Documents - DC-X3+Rig Cage
 |
Viltrox DC-X3 Camera Accessory User Manual Official user manual for the Viltrox DC-X3 camera accessory, providing comprehensive instructions, specifications, features, and troubleshooting guidance for optimal use. |
 |
Viltrox DC-X3 6-Inch Professional Camera Monitor User Manual This manual provides comprehensive instructions for the Viltrox DC-X3, a 6-inch professional camera monitor. It covers features like 3D LUT, audio monitoring, gyroscope function, brightness histogram, false color, focus assist, and more. Learn about component identification, battery installation, signal connections, touchscreen operation, menu functions, troubleshooting, available signal formats, product specifications, and firmware updates. |
 |
Viltrox DC-A1 7-Inch Professional Photography Monitor User Manual This manual provides detailed instructions for the Viltrox DC-A1, a 7-inch professional photography monitor. It covers setup, features, operation, troubleshooting, and specifications for optimal use in photography and videography. |
 |
Viltrox DC-550 PRO 5.5-inch HD Portable Touchscreen Monitor User Manual This user manual provides detailed instructions for the Viltrox DC-550 PRO, a 5.5-inch HD portable touchscreen monitor. Learn about its features, setup, operation, menu functions, troubleshooting, and specifications. |
 |
Viltrox DC-X2 LED Light Manual and Specifications Official manual and specifications for the Viltrox DC-X2 LED light, detailing features, operation, and technical details for photographers and videographers. |
 |
Viltrox DC-X2 6-inch Professional Photography Monitor User Manual This user manual provides detailed instructions for the Viltrox DC-X2, a 6-inch professional photography monitor. It covers features such as 3D LUT, audio columns, gyroscope function, brightness histogram, false color, focus assist, and more. Learn about installation, operation, troubleshooting, and specifications. |
Ask a question about this manual
Ask about setup, troubleshooting, compatibility, parts, safety, or missing instructions. Manuals+ will review the question and use this page’s manual context to help answer it.