
1. Introduction
This manual provides detailed instructions for the safe and effective operation of your HAWK'S WORK 3 Channel RC Plane F4U Corsair (Model: EXA762). Please read this manual thoroughly before operating the aircraft to ensure proper setup, flight, and maintenance. This remote control aircraft is designed for beginners and features a 6-axis gyro stabilization system for ease of flight.

Image: The HAWK'S WORK F4U Corsair RC Plane, showcasing the aircraft, remote control, batteries, USB charger, and spare propellers.
2. Safety Guidelines
Adhering to these safety guidelines is crucial for preventing injury and damage to the aircraft.
- Flight Environment: Always fly in open, clear areas away from people, buildings, trees, and power lines. Avoid flying near airports or restricted airspace.
- Weather Conditions: Do not fly in strong winds, rain, or any adverse weather conditions. The lightweight EPP foam construction is susceptible to wind.
- Battery Safety: Use only the provided batteries and charger. Do not overcharge or short-circuit batteries. Disconnect batteries when not in use and store them in a cool, dry place.
- Propeller Safety: Keep fingers, hair, and loose clothing away from rotating propellers. Always disconnect the battery before handling the propellers or performing maintenance.
- Adult Supervision: For users under 14 years of age, adult supervision is recommended during assembly, charging, and flight.
- Pre-Flight Check: Before each flight, ensure all parts are securely attached, batteries are charged, and the remote control is properly paired.
3. Box Contents
Verify that all components are present in the packaging:
- HAWK'S WORK F4U Corsair RC Plane (1)
- 2.4GHz Remote Control (1)
- Rechargeable Lithium Metal Batteries (2)
- USB Charging Cable (1)
- Spare Propellers (set)
- Landing Gear Wheels (set)
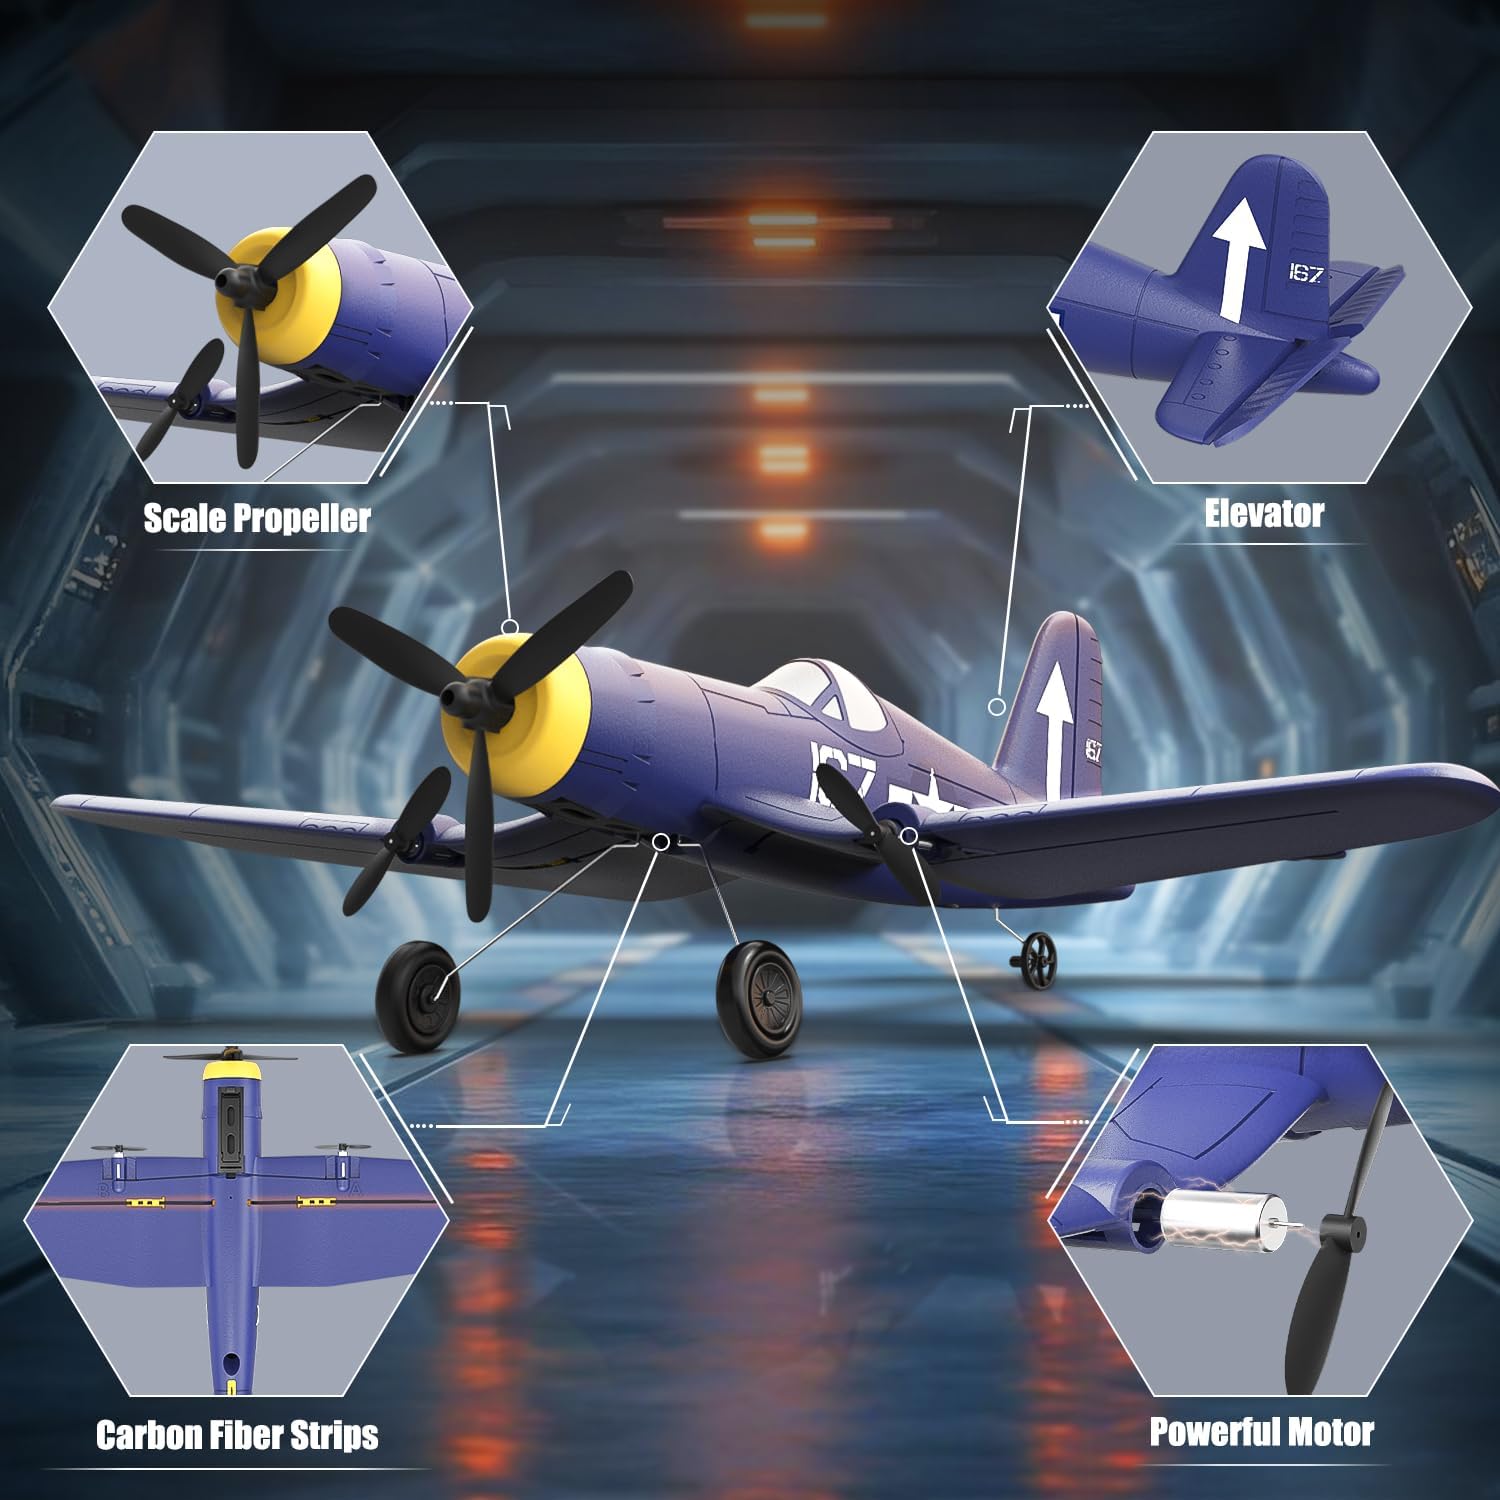
Image: Visual representation of the product's box contents, including the F4U Corsair plane, remote control, two batteries, USB charger, and spare propellers and landing gear.
4. Product Features
The HAWK'S WORK F4U Corsair RC Plane is engineered with several key features to enhance your flying experience:
- 6-Axis Gyro Stabilization: Provides excellent flight stability, making it easy for beginners to control.
- Durable EPP Construction: Made from lightweight and resilient EPP foam, designed to withstand minor impacts and crashes.
- Dual Powerful Motors: Equipped with two 716 brushed motors for strong thrust and reliable performance.
- Two Take-Off Modes: Supports both hand-throw and ground taxiing take-off for versatile operation.
- Long Flight Time: Comes with two rechargeable batteries, offering up to 40 minutes of combined flight time.
- Scale Design: Features a realistic F4U Corsair warbird design with attention to detail, including scale propellers and functional elevator.
- Carbon Fiber Strips: Integrated carbon fiber strips enhance the airframe's structural integrity and durability.

Image: A breakdown of the F4U Corsair RC plane's key components, including the scale propeller, elevator, internal carbon fiber strips for reinforcement, and the powerful motor system.
5. Setup Guide
5.1. Assembly
- Attach Landing Gear: Carefully insert the landing gear wheels into the designated slots on the underside of the aircraft. Ensure they are securely fitted.
- Propeller Check: Verify that the propellers are securely attached to the motors. Spare propellers are provided in case of damage.
5.2. Battery Charging & Installation
- Charge Aircraft Batteries: Connect the provided USB charging cable to the aircraft battery. Plug the USB end into a standard USB power adapter (not included). The indicator light on the charger will show charging status (e.g., red for charging, green for fully charged). Charging typically takes 60-90 minutes.
- Install Aircraft Battery: Once fully charged, carefully connect one of the rechargeable batteries to the aircraft's battery connector. Secure the battery within its compartment.
- Install Remote Control Batteries: Open the battery compartment on the back of the remote control. Insert 4 AA batteries (not included), ensuring correct polarity. Close the compartment.
5.3. Pairing the Remote Control
- Ensure the aircraft battery is connected and the aircraft is placed on a flat, stable surface.
- Turn on the remote control using the power switch. The indicator light on the remote will flash.
- Move the throttle stick (left stick) all the way up, then all the way down. The remote control will emit a beep, and the indicator light will become solid, indicating successful pairing.
- If pairing fails, turn off both the aircraft and remote, then repeat the steps.

Image: Detailed diagram of the 2.4GHz remote control, highlighting the functions of the throttle, elevator, steering, and their respective trim controls, along with the power switch and LED indicator.
6. Operating Instructions
6.1. Pre-Flight Checks
- Confirm all batteries are fully charged and installed.
- Ensure the remote control is paired with the aircraft.
- Check that all control surfaces (elevator, rudder) move freely and correctly in response to remote inputs.
- Select a safe, open flying area free from obstacles and people.
6.2. Take-Off Procedures
The F4U Corsair offers two take-off modes:
- Hand Throw Take-Off: Hold the aircraft firmly with one hand, slightly angled upwards. With the throttle at about 70-80%, gently throw the plane forward into the wind. Immediately use the remote to gain altitude and control.
- Taxiing Take-Off: Place the aircraft on a smooth, flat surface (like a runway). Gradually increase the throttle. As the plane gains speed, gently pull back on the elevator stick to lift off.
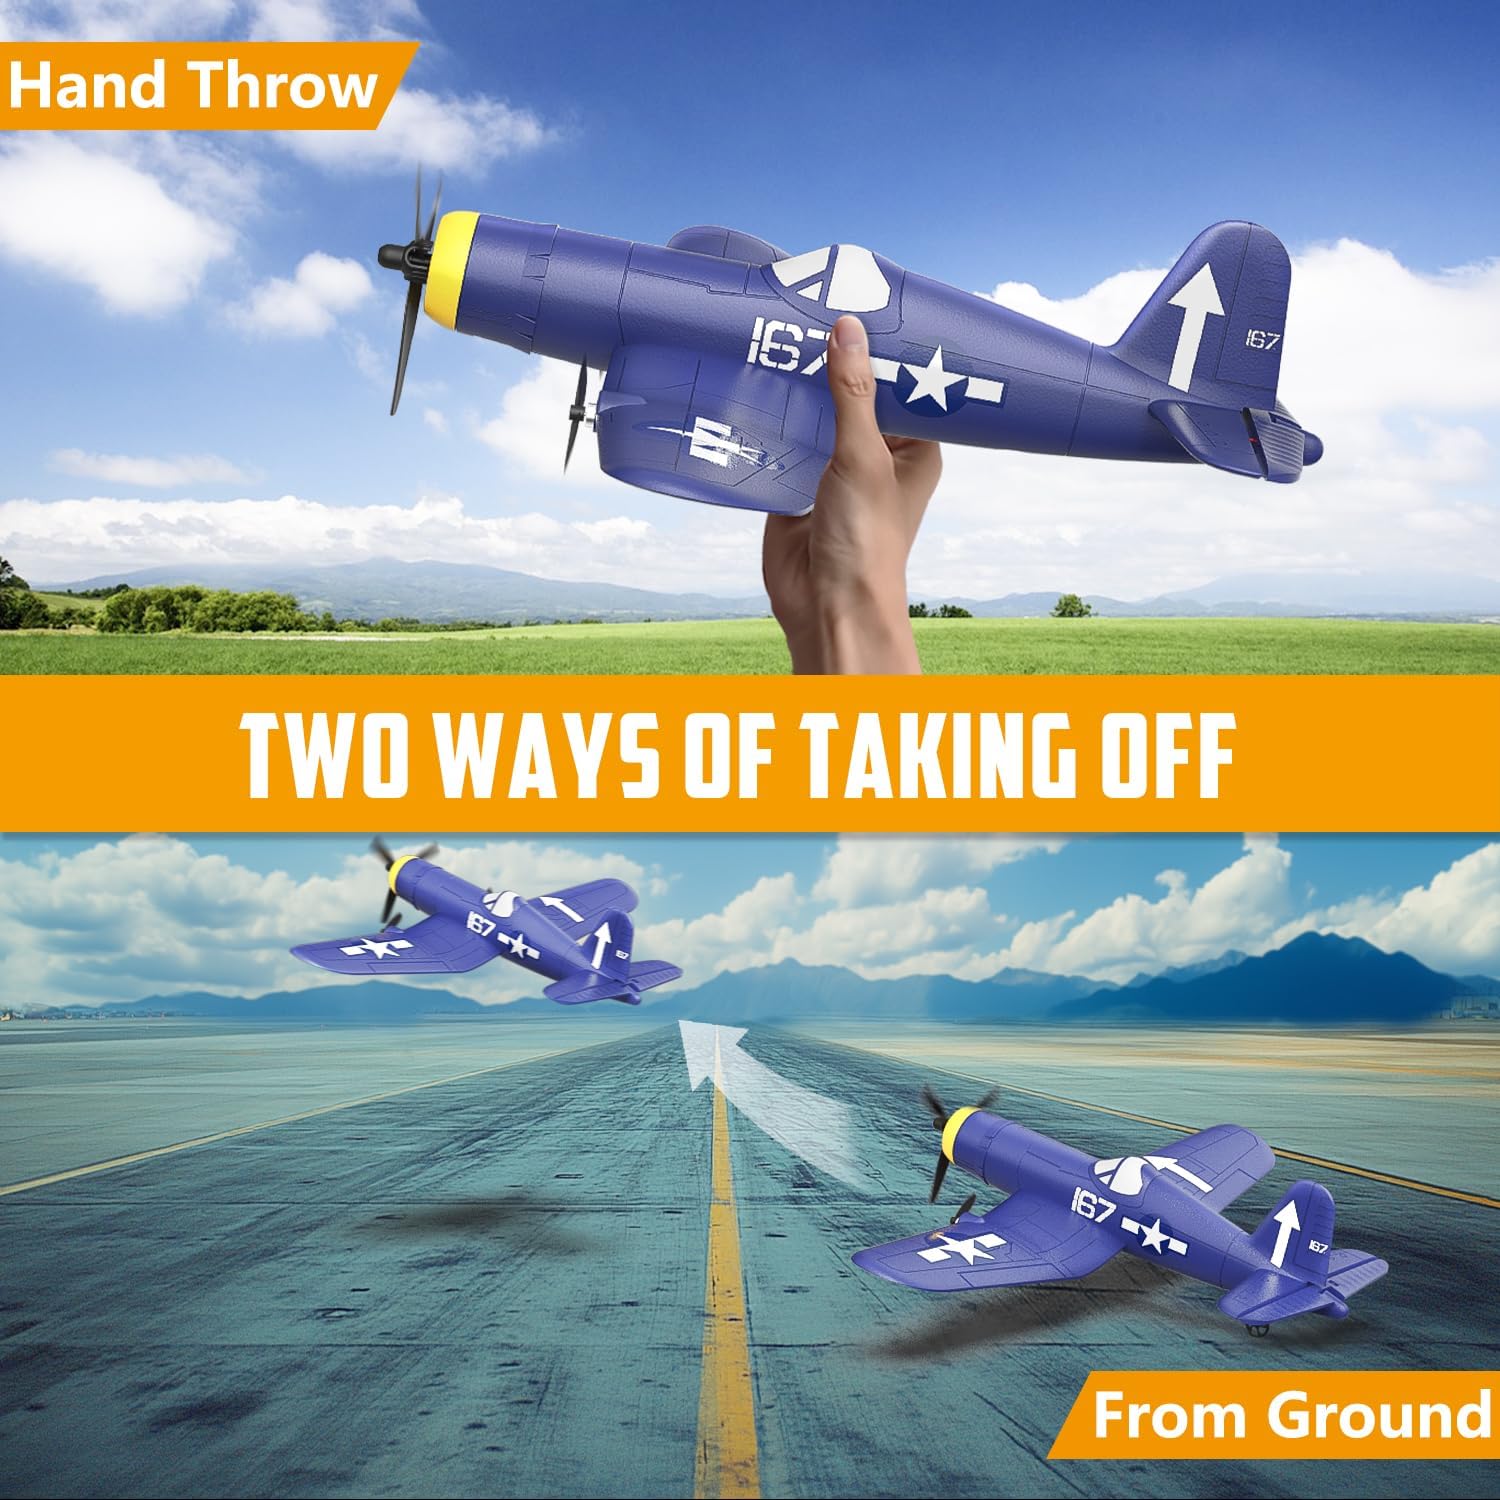
Image: Illustration of the two take-off methods: hand throw, where the plane is launched by hand, and taxiing take-off, where the plane takes off from the ground like a traditional aircraft.
6.3. Flight Controls
Familiarize yourself with the remote control functions:
- Throttle (Left Stick Up/Down): Controls the speed of the propellers, thus controlling altitude and forward thrust.
- Steering (Right Stick Left/Right): Controls the direction of the aircraft by adjusting the rudder.
- Elevator (Right Stick Up/Down): Controls the pitch of the aircraft (nose up/down), affecting ascent and descent.
- Trimmers: Small buttons or sliders near the main sticks used to fine-tune the aircraft's flight path if it drifts without input. Adjust until the plane flies straight and level.
6.4. 6-Axis Gyro Stabilization
The built-in 6-axis gyro stabilization system automatically corrects the aircraft's attitude, making it easier for beginners to maintain stable flight. This system helps to counteract external forces like wind and provides a smoother flying experience.

Image: Visual explanation of the 6-axis gyro stabilization system, showing how it helps the RC plane maintain stability during flight by automatically correcting its orientation.
6.5. Landing Procedures
- Approach the landing area slowly, reducing throttle.
- Aim to land into the wind for better control and a slower descent.
- Gently pull back on the elevator stick to flare the aircraft just before touchdown, reducing impact.
- Once on the ground, reduce throttle completely and allow the plane to roll to a stop.
7. Maintenance
- Cleaning: After each flight, wipe down the aircraft with a soft, dry cloth to remove dirt or debris. Avoid using harsh chemicals.
- Propeller Replacement: If a propeller is damaged, carefully remove it and replace it with a spare, ensuring it is securely fitted.
- Battery Care: Do not leave batteries fully charged or fully discharged for extended periods. For long-term storage, charge batteries to approximately 50%.
- Storage: Store the aircraft and remote control in a cool, dry place, away from direct sunlight and extreme temperatures.
8. Troubleshooting
| Problem | Possible Cause | Solution |
|---|---|---|
| Aircraft does not respond to remote. | Not paired, low battery (aircraft or remote), interference. | Re-pair the remote and aircraft. Check and charge/replace batteries. Move to an area with less interference. |
| Aircraft flies erratically or drifts. | Trimmers need adjustment, strong wind, damaged propeller. | Adjust trimmers. Fly in calmer conditions. Check and replace damaged propellers. |
| Short flight time. | Battery not fully charged, old battery. | Ensure battery is fully charged before flight. Consider replacing old batteries. |
| Aircraft does not take off. | Insufficient throttle, incorrect take-off technique, damaged motor/propeller. | Increase throttle. Review take-off procedures. Check motors and propellers for damage. |
If you encounter issues not listed here, please refer to the Warranty & Support section for contact information.
9. Specifications
- Model: EXA762 (F4U Corsair)
- Channels: 3-Channel
- Stabilization: 6-axis Gyro Stabilizer
- Material: Durable EPP Foam
- Motors: 2 x 716 Brushed Motors
- Remote Control Frequency: 2.4GHz
- Remote Control Distance: Up to 120 meters
- Aircraft Battery: 2 x Lithium Metal batteries (included), 400mAh/3.7V (1.48Wh)
- Flight Time: Approximately 20 minutes per battery (40 minutes total with 2 batteries)
- Remote Control Battery: 4 x AA batteries (not included)
- Product Dimensions: 15.75 x 11.73 x 4.72 inches
- Item Weight: 2.05 ounces
- Recommended Age: 8 years and up

Image: Illustration highlighting the dual 716 brushed motors, emphasizing the strong power system of the aircraft.

Image: Graphic indicating the extended flight time of up to 40 minutes, achieved by utilizing the two included high-capacity batteries.
10. Warranty & Support
HAWK'S WORK stands behind the quality of its products.
- Aircraft Warranty: A 1-year warranty is provided for the aircraft against manufacturing defects.
- Battery Warranty: A 3-month warranty is provided for the batteries.
- Technical Support: For any non-human related problems or technical assistance, please contact HAWK'S WORK customer support.
Contact Information:
- Amazon Message: You can contact us directly through the Amazon messaging system via your order details.
- Support Email: Please refer to the product packaging or the physical manual included with your product for the specific support email address.
We are committed to resolving almost all issues you may encounter.