
1. Introduction
This manual provides essential instructions for the safe and effective operation of your HAWK'S WORK 3 Channel RC Plane Spitfire Fighter. Please read this manual thoroughly before first use to ensure proper setup, flight, and maintenance. This remote control aircraft is designed for ease of use, featuring a 6-axis gyro stabilization system suitable for beginners.
2. Safety Guidelines
Always prioritize safety when operating the RC plane. Failure to follow these guidelines may result in injury or damage to the product.
- Flight Environment: Fly in open, clear areas away from people, animals, buildings, and power lines. Avoid flying in strong winds or adverse weather conditions.
- Age Recommendation: This product is recommended for users 8 years and up. Adult supervision is advised for younger users.
- Battery Safety: Use only the provided batteries and charger. Do not overcharge or short-circuit batteries. Discontinue use if batteries show signs of damage or swelling.
- Propeller Safety: Keep hands, face, and loose clothing away from rotating propellers. Ensure the plane is powered off when not in use or during handling.
- Pre-Flight Check: Always perform a pre-flight check to ensure all components are securely attached and functioning correctly.
3. Box Contents
Verify that all items listed below are included in your package:

Figure 3.1: Included components in the product box.
- HAWK'S WORK Spitfire Fighter RC Plane
- 2.4GHz Remote Control Transmitter
- 2 x Lithium Metal Batteries (400mAh/3.7V)
- USB Charging Cable
- Spare Propellers
- Landing Gear Set
4. Assembly
The HAWK'S WORK Spitfire Fighter RC Plane comes largely pre-assembled. Only a few simple steps are required before your first flight.
- Attach Landing Gear: Carefully insert the landing gear into the designated slots on the underside of the fuselage. Ensure they are securely fitted.
- Install Battery: Open the battery compartment on the underside of the plane. Connect one of the fully charged batteries to the aircraft's power connector and place it inside the compartment. Close the compartment cover.
- Remote Control Batteries: Insert 4 AA batteries (not included) into the remote control transmitter, observing correct polarity.

Figure 4.1: The aircraft features carbon fiber strips for enhanced structural integrity and flight stability.
5. Charging the Battery
The aircraft uses Lithium Metal batteries. Proper charging ensures optimal performance and battery longevity.
- Connect the USB charging cable to a USB power source (e.g., computer USB port, USB wall adapter).
- Connect the battery to the charging cable. The indicator light on the USB cable will show the charging status (e.g., red for charging, off or green for fully charged).
- Charging typically takes approximately 60-90 minutes per battery. Do not leave batteries unattended while charging.
- Once fully charged, disconnect the battery from the charger.

Figure 5.1: The plane is constructed from durable EPP foam and features dual motors for power.
6. Remote Control Overview
Familiarize yourself with the remote control functions before attempting to fly.

Figure 6.1: Layout of the 2.4GHz remote control transmitter.
- Throttle (Left Stick): Controls engine speed and altitude. Push up to increase power, pull down to decrease.
- Steering (Right Stick, Left/Right): Controls the plane's direction (yaw).
- Elevator (Right Stick, Up/Down): Controls the plane's pitch (nose up/down). Push up to descend, pull down to ascend.
- Trimmers: Used to fine-tune the controls if the plane drifts without input.
- Power Switch: Turns the remote control on/off.
7. Operating Instructions
7.1. Pre-Flight Checklist
- Ensure aircraft battery is fully charged and securely installed.
- Ensure remote control has fresh batteries.
- Check for any visible damage to the plane (wings, propellers, fuselage).
- Find a suitable, open flying area.
7.2. Binding the Remote Control
- Turn on the remote control.
- Connect the battery to the aircraft. The aircraft's LED will flash.
- Wait for the aircraft's LED to stop flashing and remain solid, indicating a successful bind.
7.3. Take-off Modes
The plane supports two take-off methods:
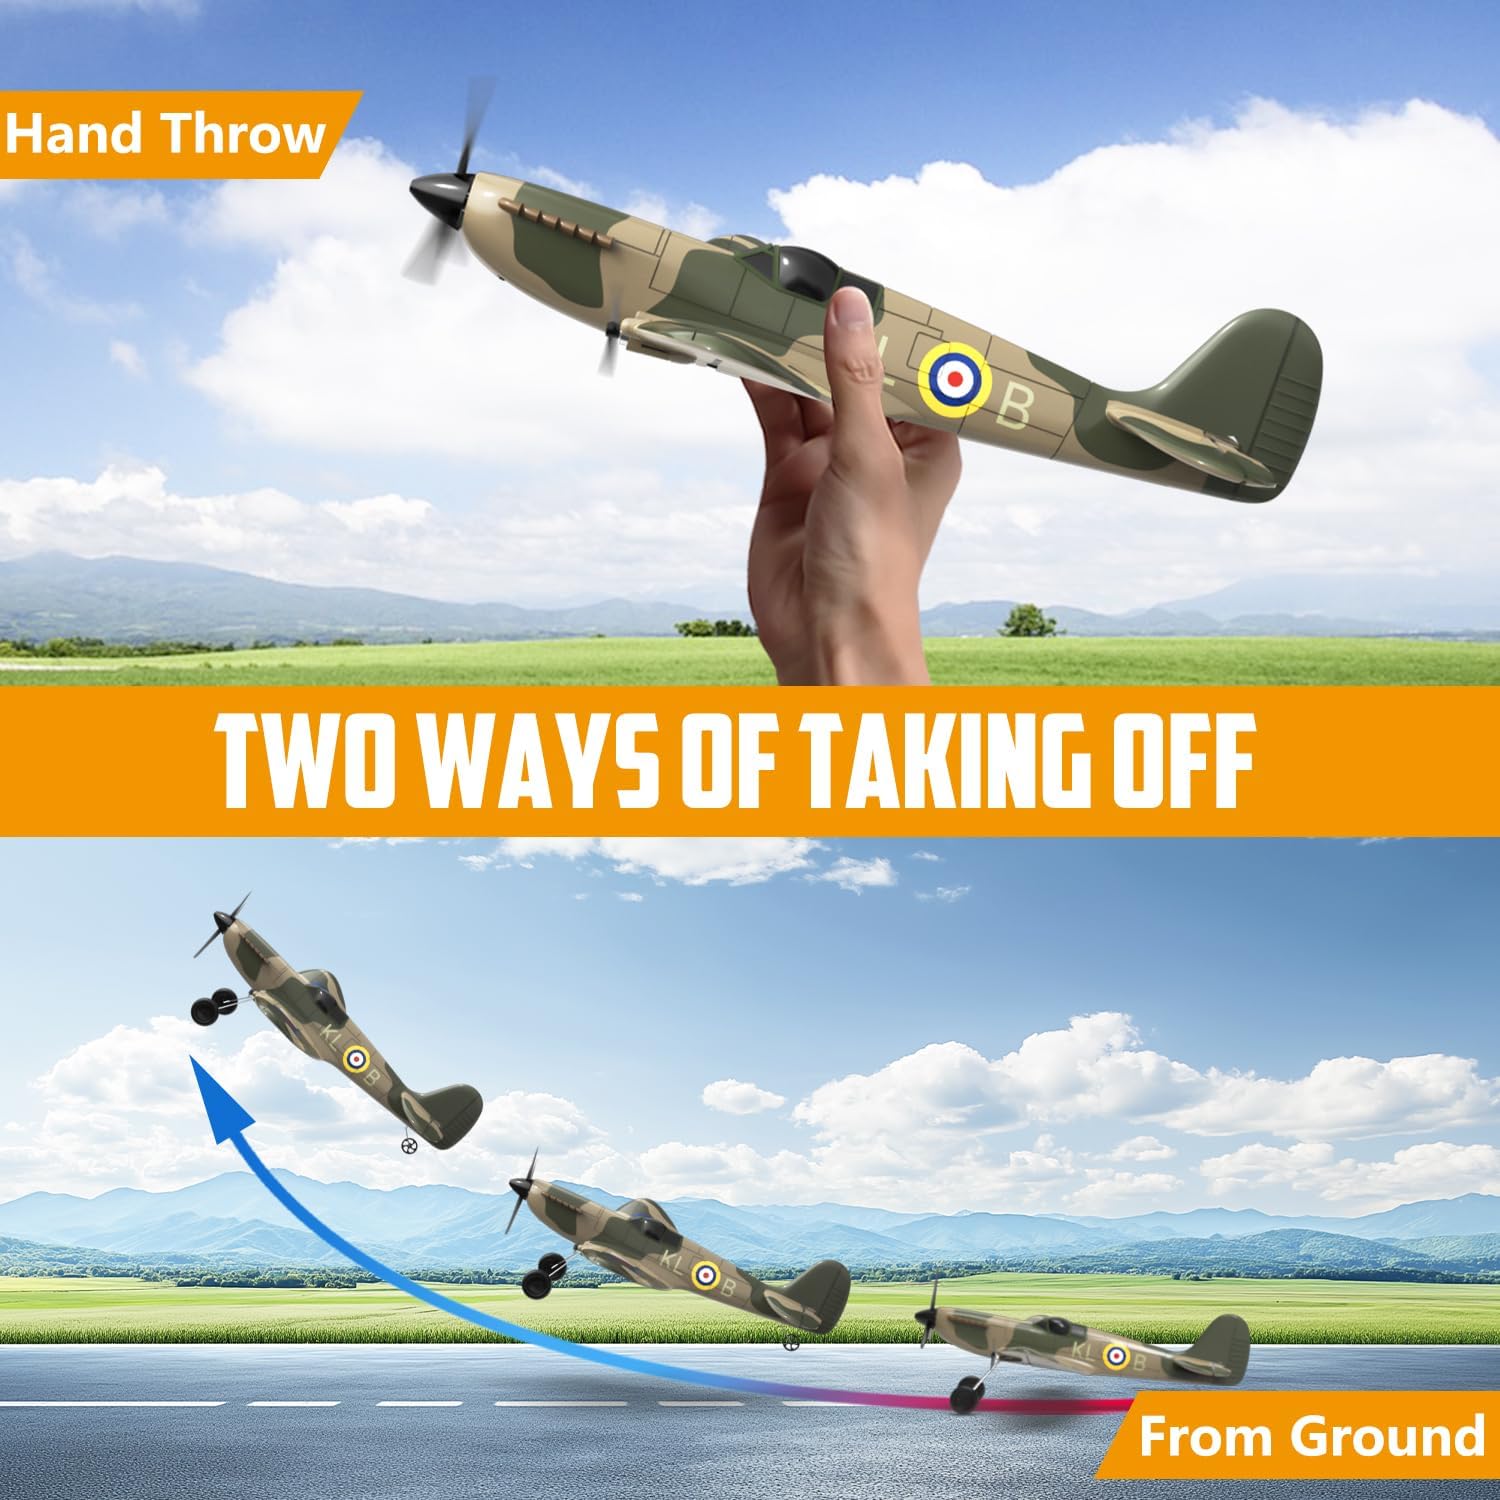
Figure 7.1: Two methods for launching the RC plane.
- Hand Throw: Hold the plane firmly, apply full throttle, and gently toss it forward into the wind.
- Taxiing Take-off: Place the plane on a smooth, flat surface. Apply full throttle, and the plane will accelerate and take off.
7.4. Flight Controls and 6-Axis Gyro Stabilization
The integrated 6-axis gyro stabilization system assists in maintaining stable flight, making it easier for beginners to control the aircraft.

Figure 7.2: The 6-axis gyroscope provides flight stability.
- Use the Throttle to control speed and altitude.
- Use the Steering (right stick left/right) to turn the plane.
- Use the Elevator (right stick up/down) to control ascent and descent.
- The 6-axis gyro automatically corrects for minor disturbances, helping the plane maintain a level flight path.
7.5. Landing
To land, reduce throttle gradually and gently guide the plane towards a clear, open landing area. Maintain a slight nose-up attitude to slow descent and touch down smoothly.
Video 7.1: Official product video demonstrating the HAWK'S WORK 3 Channel RC Plane Spitfire Fighter in flight.
8. Maintenance
Regular maintenance ensures the longevity and performance of your RC plane.
- Cleaning: After each flight, wipe down the plane with a soft, dry cloth to remove dirt or debris.
- Propeller Check: Inspect propellers for any cracks or damage. Replace damaged propellers immediately using the provided spares.
- Storage: Store the plane and batteries in a cool, dry place away from direct sunlight and extreme temperatures. Remove batteries from the plane and remote control during long-term storage.
- Battery Care: Do not fully discharge batteries. Charge them before storage if they will not be used for an extended period.
9. Troubleshooting
Refer to this section for common issues and their solutions.
| Problem | Possible Cause | Solution |
|---|---|---|
| Plane does not respond to remote. | Low battery in plane or remote; Not bound correctly; Out of range. | Charge plane battery, replace remote batteries; Re-bind remote and plane; Fly within 120m range. |
| Plane flies erratically or drifts. | Trimmers need adjustment; Strong wind; Damaged propeller. | Adjust trimmers on remote; Fly in calm conditions; Replace propeller. |
| Short flight time. | Battery not fully charged; Old battery; Aggressive flying. | Ensure full charge; Consider replacing old batteries; Fly more conservatively. |
10. Specifications
- Model Number: EXA762
- Product Dimensions: 15.75 x 11.73 x 4.72 inches
- Item Weight: 2.08 ounces
- Control Channels: 3 Channel
- Stabilization: 6-axis Gyro Stabilizer
- Battery: 2 x Lithium Metal batteries (400mAh/3.7V)
- Flight Time: Approximately 20 minutes per battery (40 minutes total with 2 batteries)
- Remote Control Frequency: 2.4GHz
- Recommended Age: 8 years and up
- Material: Durable EPP Foam
11. Warranty and Support
HAWK'S WORK offers the following warranty and support:
- Aircraft Warranty: 1 year
- Battery Warranty: 3 months
- Support: For non-human related problems, please contact us via Amazon message or the support email provided in the manual. We are committed to resolving almost all issues you may encounter.
