1. Introduction
This manual provides detailed instructions for the installation, operation, and maintenance of your ZLPOWER 10000W Solar Hybrid Inverter. This low-frequency, split-phase pure sine wave inverter is designed for off-grid applications, converting 48V DC to settable 110/240V AC. It features a built-in dual MPPT solar charger controller and is compatible with various battery types. Please read this manual thoroughly before installation and use to ensure safe and efficient operation.

Image 1.1: The ZLPOWER 10000W Solar Hybrid Inverter, showcasing its application in a renewable energy system with solar panels and a wind turbine.
2. Safety Instructions
- Professional Installation: Installation should only be performed by qualified personnel.
- Power Disconnection: Always ensure the inverter and battery power are completely powered off before performing any wiring or maintenance to prevent electric shock.
- Correct Polarity: Carefully connect battery positive to positive and negative to negative terminals. Reversing polarity can cause severe damage to the inverter and batteries.
- Grounding: Ensure the inverter is properly grounded to prevent electrical hazards.
- Ventilation: Maintain adequate ventilation around the inverter to prevent overheating. Do not block vents or fans.
- Circuit Breakers: Install appropriate circuit breakers on both AC and DC lines to protect against overcurrent.
- Battery Compatibility: Use only compatible battery types (AGM, GEL, lead acid, lithium-ion, LiFePO4) and ensure the battery capacity is sufficient (recommended >200AH for gel/deep cycle).
3. Product Overview
3.1 Key Features
- 10000W pure sine wave output, 30000W peak power.
- Low frequency hybrid inverter with transformer.
- 48V DC input to settable 110/240V AC output (50/60 Hz).
- Built-in dual 80A MPPT solar charge controllers (2 x 80A/4500W).
- Maximum charging current of 200A, selectable between 0%-100%.
- Compatible with AGM, GEL, lead acid, lithium-ion, and LiFePO4 batteries.
- Intelligent remote control with Automatic Generator Start (AGS) function.
- Multiple protection systems: Over/low voltage, overtemperature, overload, short circuit.
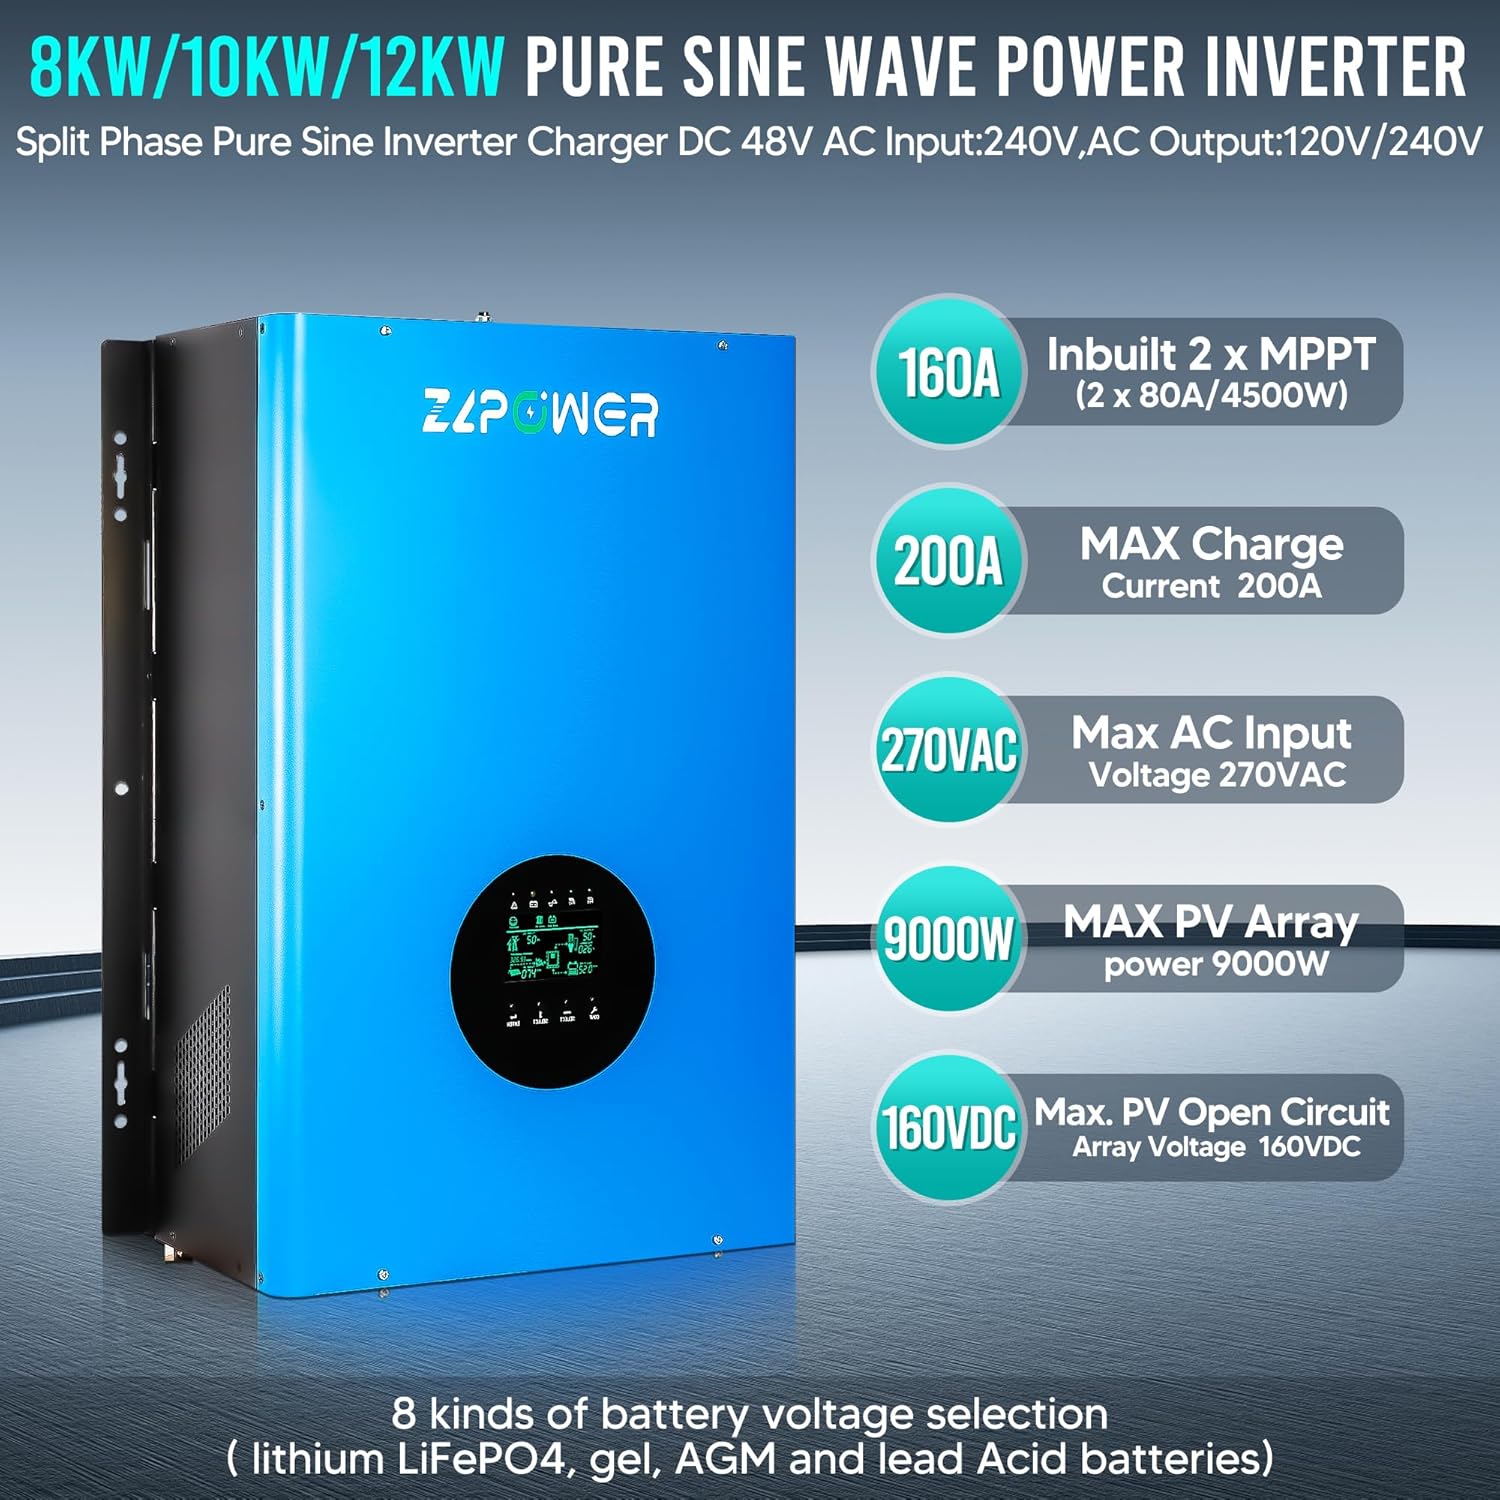
Image 3.1: Visual representation of the inverter's key specifications and capabilities, including MPPT charge current, maximum AC input voltage, and supported battery types.
3.2 Protection Systems
The ZLPOWER inverter is equipped with multiple intelligent protection systems to ensure safe and reliable operation, certified to UL 1741 standards. These include:
- Short Circuit Protection
- Over-Temperature Protection
- Low Voltage Protection
- Over-Voltage Protection
- Over-Load Protection

Image 3.2: An illustration highlighting the six smart protection features integrated into the inverter, ensuring system safety and longevity.
3.3 Typical Application
This hybrid inverter is suitable for various applications, including residential, office, commercial, and industrial use. It can provide backup power for critical household loads during outages and helps reduce electricity bills by utilizing solar power.

Image 3.3: A diagram illustrating a typical setup for the GSLL series hybrid inverter, showing how it integrates with solar panels, an AC generator, a battery bank, and various electric loads.
3.4 Battery Compatibility
The inverter supports a wide range of battery types. For gel or deep cycle batteries, avoid using ordinary lead-acid batteries in solar energy systems as this may damage the battery. Ensure the battery is wired to match the DC input voltage. It is recommended to use a battery capacity of more than 200AH.

Image 3.4: An image demonstrating the inverter's compatibility with various battery chemistries, including LiFePO4, Flooded, AGM, Sealed Lead Acid, GEL, and Lithium-Ion.
3.5 Dimensions

Image 3.5: The physical dimensions of the 10KW solar inverter (24.68in H x 16.38in W x 8.03in D) and its net weight (137.78 lbs), along with visual examples of its diverse applications.
4. Setup
4.1 Unboxing the Inverter
Before proceeding with installation, carefully unbox the inverter and inspect it for any signs of damage. Ensure all components are present as per the packing list.
Video 4.1: This video demonstrates the unboxing process of the ZLPOWER inverter, showing how to safely remove it from its packaging and prepare it for installation.
4.2 Wiring Terminals Overview
Familiarize yourself with the wiring terminals on the inverter. Proper connection is crucial for safety and performance.

Image 4.2: A detailed diagram labeling all wiring terminals and ports on the inverter, including battery connections, AC input/output, communication ports, and fan locations.
4.3 Wiring Instructions
Follow these steps for safe and correct wiring:
- Battery Connection: Connect the battery to the inverter's battery terminal. Ensure the positive terminal is connected to the positive and the negative to the negative.
- Grounding: Connect the ground wire to the designated ground terminal on the inverter.
- AC Input: Connect the AC power cable to the AC input terminal of the inverter. Ensure the connection is secure and the wiring is correct, paying attention to live and neutral wire connections.
- AC Output: Connect the AC power cable to the AC output terminal of the inverter. Ensure the connection is stable and the cable is securely fixed, confirming live and neutral wire connections.
- Communication Cables: Connect one end of the communication cable to the inverter's communication port (RS485 or CAN) and the other end to the lithium battery's communication port. Ensure secure connections and matching polarity.
- Breaker Installation: For safety, install a breaker on the positive line of the battery connection to prevent overcurrent.
Video 4.3: This video provides a step-by-step guide on how to wire the ZLPOWER inverter, covering battery, ground, AC input, AC output, and communication connections.
5. Operating Instructions
5.1 Powering On and Initial Check
After completing all wiring and verifying connections, turn on the battery power switch, then the circuit breaker, and finally the inverter power switch. The LCD screen will illuminate, displaying system status.
5.2 LCD Display Overview
The LCD screen provides real-time information about the inverter's operation, including AC input, AC output, battery status, and solar energy input. A green light indicates normal operation, while an amber light typically signifies battery operation (off-grid mode).
Video 5.1: This video explains the various indicators and readings on the inverter's LCD display, demonstrating how to interpret system status, including power flow from solar, battery, and grid, as well as load output.
5.3 Mode Switching
The inverter can seamlessly switch between line mode (grid power) and battery mode (off-grid). When grid power is lost, the inverter will automatically switch to battery power with minimal interruption. When grid power is restored, it will switch back to line mode and resume charging the batteries.
6. Maintenance
- Regular Inspection: Periodically inspect all wiring connections for tightness and signs of wear or corrosion.
- Cleaning: Keep the inverter's vents and fans clear of dust and debris to ensure proper airflow and prevent overheating. Use a soft, dry cloth for cleaning.
- Battery Health: Monitor battery voltage and charge status regularly. Follow battery manufacturer guidelines for maintenance.
- Environmental Conditions: Ensure the inverter is operated within its specified environmental conditions (temperature, humidity) to maximize its lifespan.
7. Troubleshooting
If you encounter issues with your ZLPOWER inverter, refer to the following common troubleshooting tips:
| Problem | Possible Cause | Solution |
|---|---|---|
| Inverter not powering on | Loose battery connections, discharged battery, tripped breaker, inverter switch off. | Check battery connections, ensure battery is charged, reset breakers, turn on inverter switch. |
| No AC output | Overload, short circuit, output AC switch off, internal fault. | Reduce load, check for short circuits, turn on output AC switch, contact support if fault persists. |
| Batteries not charging | Solar panels not connected, insufficient solar input, AC input issue, MPPT fault. | Verify solar panel connections, check solar input conditions, ensure AC input is present, contact support. |
| Error code on LCD | Specific system fault. | Refer to the full product manual for specific error code definitions and solutions. |
For complex issues or persistent problems, please contact ZLPOWER customer support.
8. Specifications
- Model Name: GS-10KW-III
- Wattage: 10000 watts
- Peak Power: 30000 watts
- Power Source: Solar and Battery Powered
- DC Input Voltage: 48V DC
- AC Output Voltage: 110/240V AC (Settable)
- AC Output Frequency: 50 or 60 Hz (Settable)
- MPPT Charge Controller: Built-in 2 x 80A (4500W each)
- Maximum Charging Current: 200A (selectable 0%-100%)
- Recommended Use: Home
- Manufacturer: RDY
9. Warranty and Support
ZLPOWER stands behind its products with a 12-month warranty guarantee. We also provide lifetime technical support to assist you with any questions or issues regarding installation, usage, or performance. If you require assistance, please do not hesitate to contact our customer support team. We are committed to ensuring your ZLPOWER product works properly and will address all quality-related issues, including providing replacement services if necessary.
For further assistance, please visit the RDYMONKEY Store.


