
Ollygrin AEK-US-EM1502-V03
Ollygrin Espresso Machine with Steam Milk Frother
Model: AEK-US-EM1502-V03
Introduction
Thank you for choosing the Ollygrin Espresso Machine with Steam Milk Frother. This manual provides essential information for the safe and efficient operation, maintenance, and troubleshooting of your new appliance. Please read it thoroughly before first use and keep it for future reference.
Important Safety Instructions
- Read all instructions before using the appliance.
- Do not touch hot surfaces. Use handles or knobs.
- To protect against fire, electric shock, and injury to persons, do not immerse cord, plugs, or appliance in water or other liquid.
- Close supervision is necessary when any appliance is used by or near children.
- Unplug from outlet when not in use and before cleaning. Allow to cool before putting on or taking off parts, and before cleaning the appliance.
- Do not operate any appliance with a damaged cord or plug or after the appliance malfunctions, or has been damaged in any manner.
- The use of accessory attachments not recommended by the appliance manufacturer may result in fire, electric shock, or injury to persons.
- Do not use outdoors.
- Do not let cord hang over edge of table or counter, or touch hot surfaces.
- Do not place on or near a hot gas or electric burner, or in a heated oven.
- Always attach plug to appliance first, then plug cord into the wall outlet. To disconnect, turn any control to "off", then remove plug from wall outlet.
- Do not use appliance for other than intended use.
- Use extreme caution when disposing of hot steam.
Parts Identification
Familiarize yourself with the components of your espresso machine:
- Control Panel (Power, Single Shot, Double Shot, Steam)
- Steam Wand / Milk Frother
- Portafilter
- Drip Tray (Detachable)
- Water Tank (Removable)
- Cup Warming Plate
- Brew Head
- Steam Control Knob
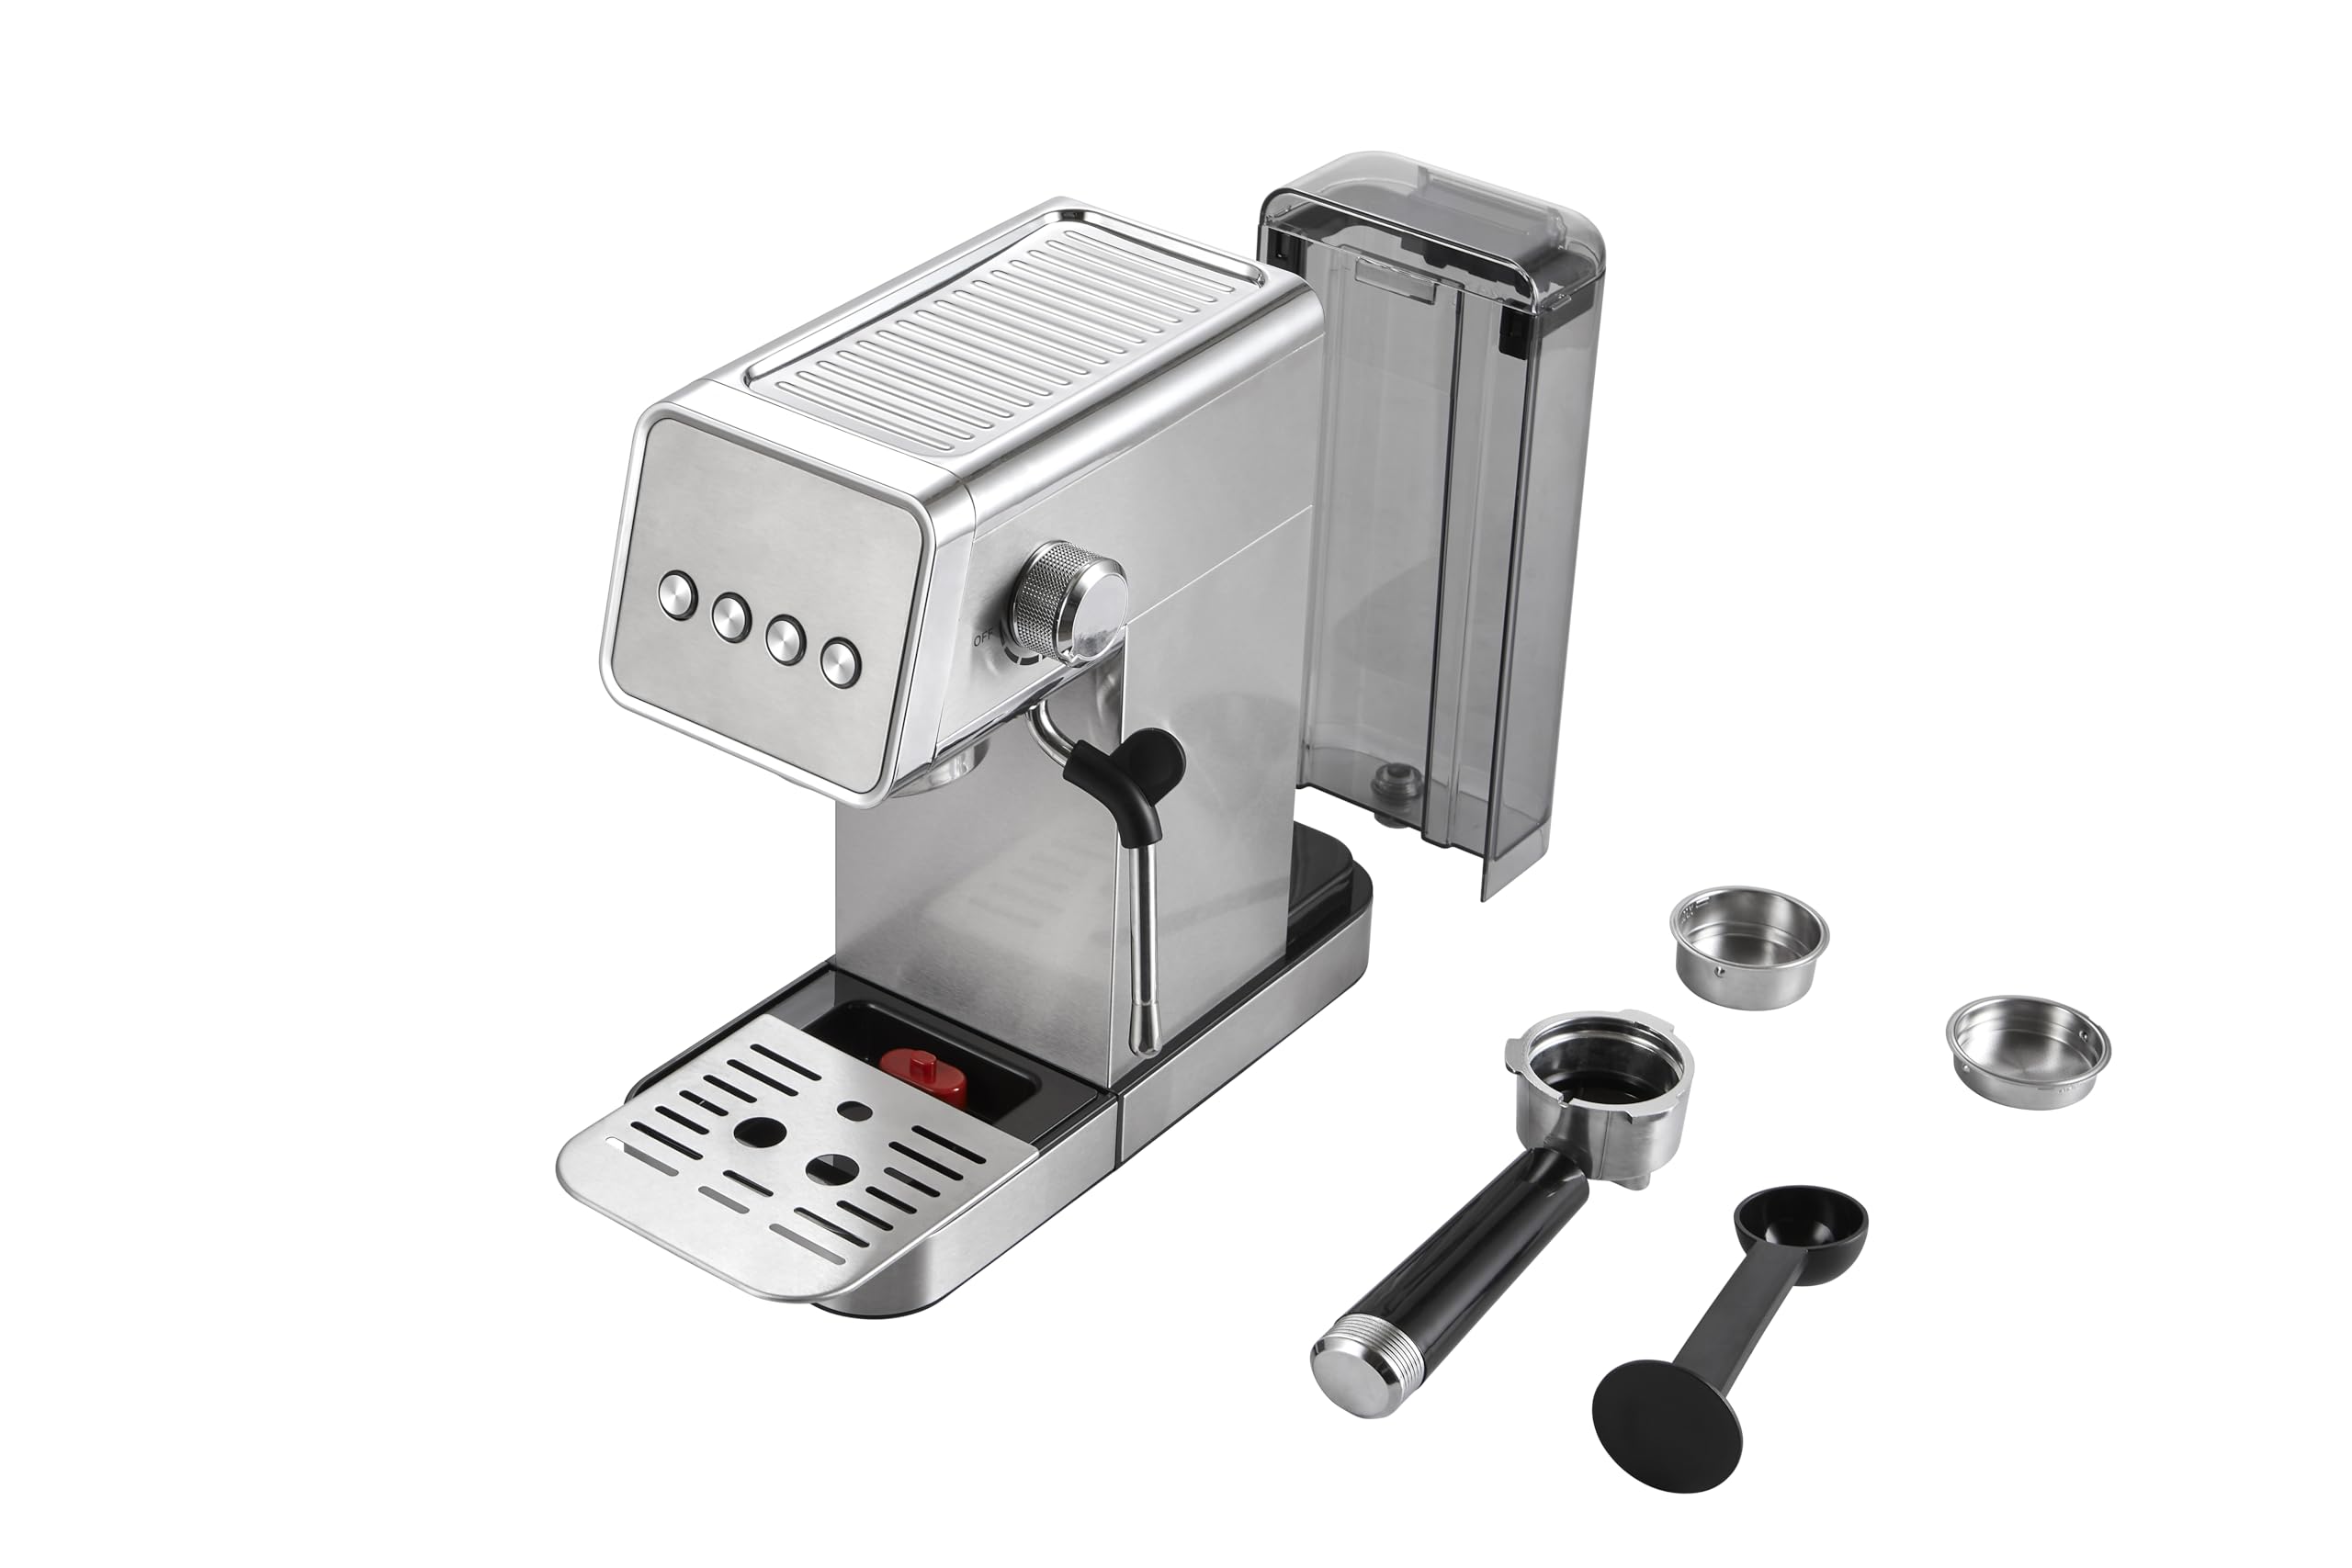
Figure 1: Overview of the Ollygrin Espresso Machine.

Figure 2: Detachable Drip Tray and Removable Water Tank for easy cleaning and refilling.
Setup
- Unpacking: Carefully remove all packaging materials and ensure all parts are present.
- Placement: Place the machine on a stable, level, heat-resistant surface, away from water sources and heat.
- Clean the Water Tank: Wash the removable water tank with mild soap and water, then rinse thoroughly.
- Fill the Water Tank: Fill the water tank with fresh, cold water up to the MAX line. Place it back securely.
- Initial Rinse:
- Plug in the machine. The power button will illuminate.
- Place a cup under the brew head.
- Press the single shot button. Water will dispense. Repeat this process 2-3 times to prime the pump and clean internal components.
- Turn the steam control knob to release steam for a few seconds to clear the steam wand.
Operating Instructions
Making Espresso
- Prepare the Portafilter: Insert the desired filter basket (single or double shot) into the portafilter.
- Add Ground Coffee: Fill the filter basket with finely ground espresso coffee. Do not overfill.
- Tamp the Coffee: Use a tamper to press the coffee grounds firmly and evenly.
- Attach Portafilter: Align the portafilter with the brew head and twist it firmly to the right until it locks into place.
- Place Cup: Place your espresso cup(s) on the drip tray under the portafilter spouts.
- Brew Espresso: Press the single shot or double shot button. The machine will automatically brew the espresso and stop.

Figure 3: Brewing espresso shots.
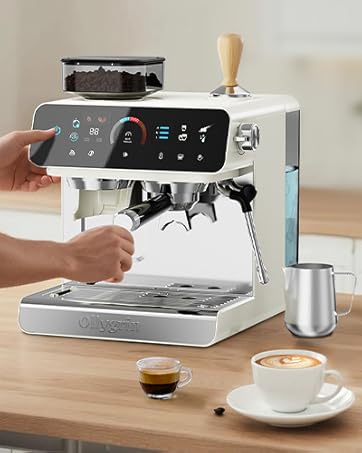
Figure 4: A freshly brewed espresso shot with rich crema.
Frothing Milk with the Steam Wand
- Prepare Milk: Fill a stainless steel frothing pitcher with cold milk (dairy or non-dairy) to just below the spout.
- Activate Steam: Press the steam button on the control panel. The light will blink as the machine heats up, then become solid when ready.
- Purge Steam Wand: Position the steam wand over the drip tray and turn the steam control knob to release any condensed water. Close the knob once steam is consistent.
- Froth Milk: Immerse the steam wand tip just below the surface of the milk. Turn the steam control knob fully open.
- For frothy milk (cappuccino), keep the tip near the surface to incorporate air.
- For steamed milk (latte), immerse the tip deeper to heat the milk without adding too much air.
- Monitor Temperature: Continue frothing until the milk reaches your desired temperature (around 140-150°F or 60-65°C). The pitcher will be hot to the touch.
- Stop Steaming: Turn the steam control knob to the OFF position, then remove the pitcher.
- Clean Steam Wand: Immediately wipe the steam wand with a damp cloth to prevent milk residue from drying. Purge the wand again briefly to clear any internal milk.

Figure 5: Proper technique for milk frothing with the steam wand.

Figure 6: Example of latte art created with frothed milk.
Maintenance
Daily Cleaning
- Portafilter and Filter Baskets: After each use, remove the portafilter, discard spent coffee grounds, and rinse the portafilter and filter basket under hot water.
- Steam Wand: Always wipe the steam wand immediately after frothing milk. Purge steam briefly to clear any internal residue.
- Drip Tray: Empty and rinse the drip tray daily or when the indicator shows it's full.
- Exterior: Wipe the exterior of the machine with a soft, damp cloth. Do not use abrasive cleaners or scourers.
Descaling
Descaling is essential to remove mineral buildup and maintain optimal machine performance. The frequency depends on water hardness and usage, but generally every 2-3 months.
- Prepare Descaling Solution: Mix a descaling solution (e.g., citric acid or commercial descaler) with water according to the product instructions.
- Fill Water Tank: Pour the descaling solution into the water tank.
- Run Solution: Place a large container under the brew head and steam wand. Run half of the solution through the brew head by pressing the double shot button. Then, turn the steam control knob to release the remaining solution through the steam wand.
- Rinse: After the descaling solution has run through, rinse the water tank thoroughly and fill it with fresh water. Repeat step 3 with fresh water to rinse the machine.
Troubleshooting
| Problem | Possible Cause | Solution |
|---|---|---|
| No water dispenses. | Water tank empty, pump not primed, blockage. | Refill water tank. Perform initial rinse/prime. Check for blockages. |
| Espresso brews too slowly or not at all. | Coffee grounds too fine, too much coffee, coffee tamped too hard, brew head clogged. | Use coarser grind. Reduce coffee amount. Tamp lighter. Clean brew head. |
| Espresso brews too quickly or is watery. | Coffee grounds too coarse, too little coffee, coffee tamped too lightly. | Use finer grind. Increase coffee amount. Tamp firmer. |
| Steam wand not producing steam. | Not heated to steam temperature, wand clogged. | Wait for steam indicator light to be solid. Clean steam wand. |
| Machine leaks water. | Water tank not seated correctly, drip tray full, seal issue. | Ensure water tank is properly seated. Empty drip tray. Contact support if seals are damaged. |
Specifications
- Brand: Ollygrin
- Model Name: AEK-US-EM1502-V03
- Product Dimensions: 11.78"D x 5.16"W x 11.93"H
- Item Weight: 7.66 pounds
- Coffee Maker Type: Espresso Machine
- Special Feature: Milk Frother
- Operation Mode: Manual
- Coffee Input Type: Ground Coffee
- Capacity: 2 Cups
- Included Components: Filter, Milk Frother

Figure 7: Illustration of the 20 Bar professional pump ensuring high-pressure extraction.
Warranty and Support
For warranty information or technical support, please refer to the warranty card included with your product or visit the official Ollygrin website. Keep your purchase receipt as proof of purchase.
Contact Information: Please refer to the contact details provided in your product packaging or on the manufacturer's official website for the most up-to-date support information.
Ask a question about this manual
Ask about setup, troubleshooting, compatibility, parts, safety, or missing instructions. Manuals+ will review the question and use this page’s manual context to help answer it.