
Introduction
Thank you for choosing the POOEKEN WiFi Automatic Pet Feeder. This device is designed to simplify your pet's feeding routine, ensuring they receive timely and measured meals, whether you are at home or away. With its smart features and user-friendly design, you can maintain your pet's healthy eating habits with ease and peace of mind.
Product Overview
The POOEKEN Automatic Pet Feeder is a smart device that dispenses dry pet food according to a customizable schedule. It features a large capacity food container, a dispensing mechanism, and a control panel, all managed via a mobile application. The feeder is designed for reliability and ease of use.

Image: The POOEKEN WiFi Automatic Pet Feeder, showing its main unit, food bowl, and a smartphone displaying the control app interface.
Setup Guide
1. Unpacking and Assembly
Carefully remove all components from the packaging. The feeder consists of a base unit, a food storage container, a lid, and a food bowl. Assemble the food storage container onto the base unit, ensuring it is securely seated. Place the food bowl in front of the dispenser outlet.

Image: The feeder's detachable components, including the base, food container, and food bowl, illustrating its easy assembly and cleaning.
2. Power Connection
Connect the feeder to a power source using the provided 5V power adapter. For backup power during outages, you can insert 3 D-size batteries (not included) into the battery compartment at the bottom of the unit. The feeder will automatically switch to battery power if the main power is interrupted.

Image: Illustration of the feeder's dual power supply options: a 5V power adapter and a compartment for 3 D-size batteries, ensuring operation during blackouts.
3. Wi-Fi Connection
Download the POOEKEN app from your mobile app store. Create an account and follow the in-app instructions to connect the feeder to your 2.4G Wi-Fi network. Ensure your phone is connected to the same 2.4G Wi-Fi network during the setup process for a stable connection. The app provides a direct connection for improved rapidity and stability.

Image: A smartphone screen showing the WiFi direct connection feature, highlighting improved speed and stability with the updated app and network chip.
Operating Instructions
1. Filling the Feeder
Open the lid of the food storage container. Pour dry pet food into the container. The feeder has a 4L capacity, which can sustain small to medium-sized pets for several days. Close the lid securely to maintain food freshness.

Image: The feeder's 4L large capacity food container, capable of holding approximately 16.9 cups of dry pet food, suitable for extended periods without refilling.
2. Using the Mobile Application
The mobile app allows you to create a personalized feeding plan. You can schedule up to 10 individual meals per day, with a maximum of 12 portions per meal. Adjust the precise feeding times and portion sizes to meet your pet's nutritional needs. The app also provides remote control, allowing you to dispense food anytime, anywhere, as long as the feeder is connected to Wi-Fi.
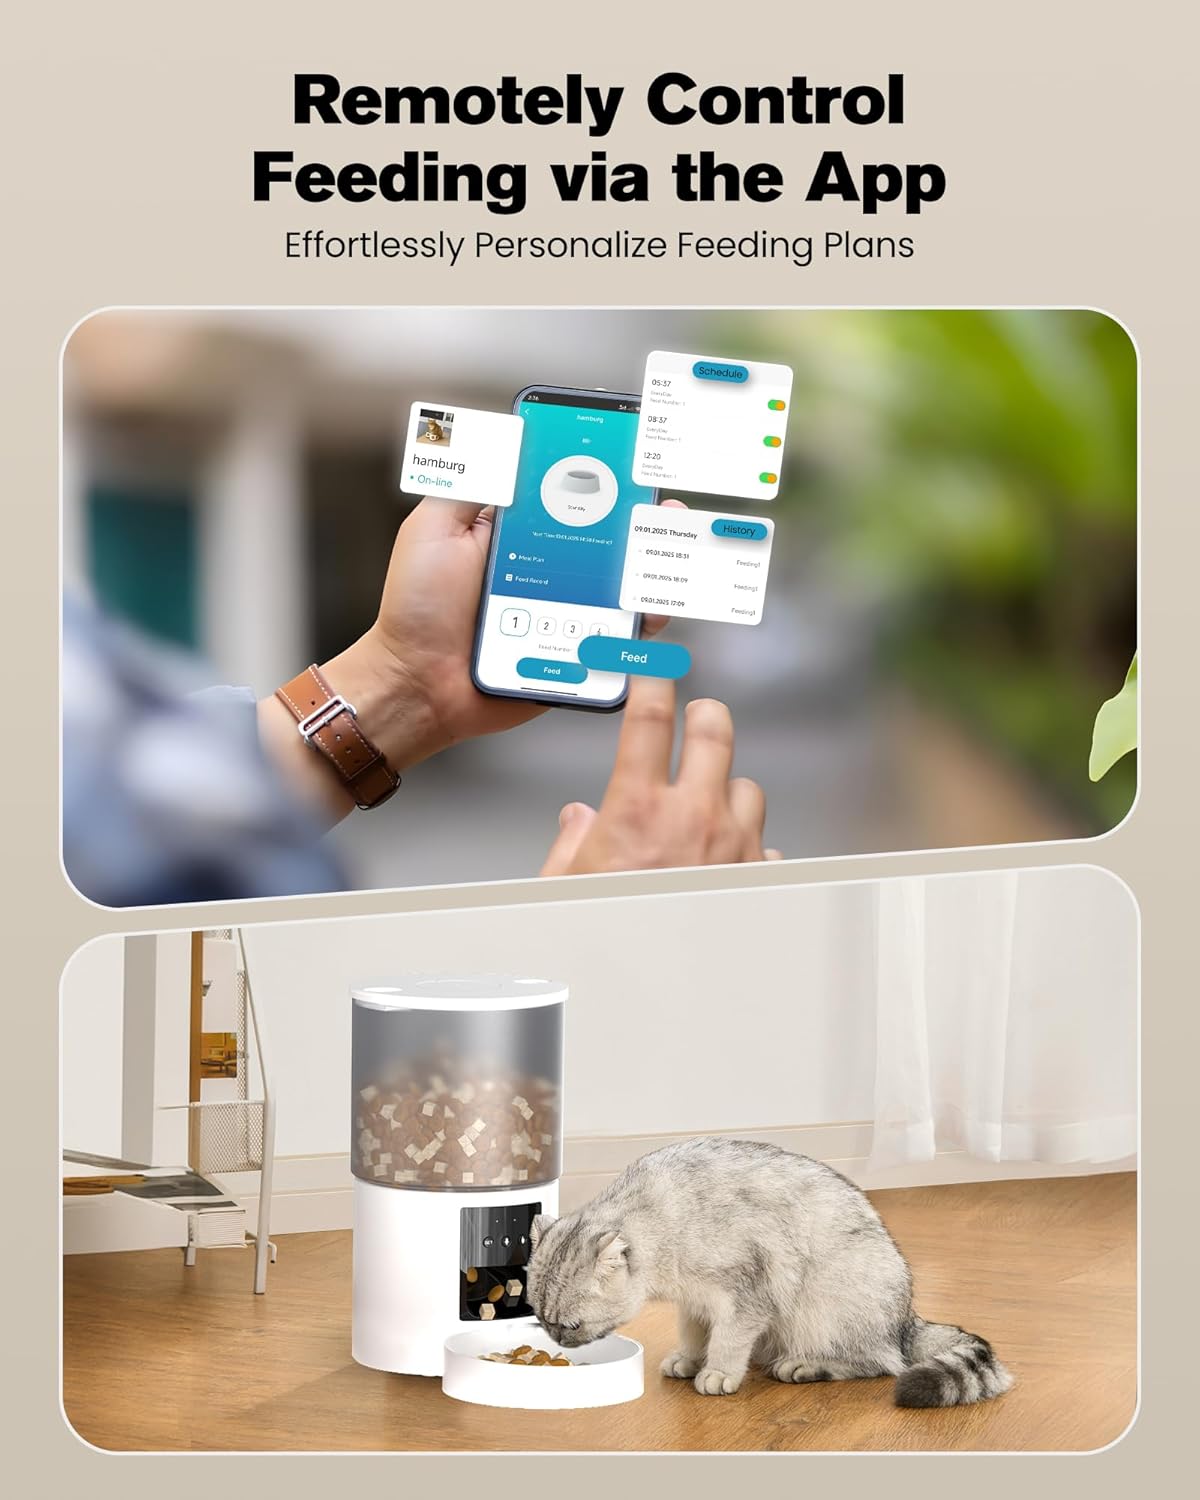
Image: A smartphone displaying the feeder's app interface, demonstrating how users can effortlessly personalize and control feeding plans remotely.
3. Voice Recording Function
Record a 10-second voice message through the app. This message will play automatically at each scheduled feeding time, calling your pet to their meal. This feature can help comfort your pet and create a stronger bond, especially when you are not physically present.

Image: A cat approaching the feeder as a voice message plays, illustrating the 10-second recording feature designed to call pets for their meals.
4. Manual Feeding
In addition to scheduled feedings, you can manually dispense food by pressing the designated button on the feeder's control panel or through the mobile app. This is useful for providing extra portions or immediate feeding.
5. Dual-Locking Mechanism
The feeder is equipped with a dual-locking mechanism, including a one-touch lock button, to prevent accidental activation or pets from accessing the food container directly. This ensures food security and prevents overeating.

Image: A cat attempting to open the feeder, demonstrating the dual-locking mechanism that prevents pets from stealing food or accidentally activating the dispenser.
Maintenance
1. Cleaning Instructions
To ensure hygiene and proper functioning, regularly clean the feeder. The food storage container and food bowl are detachable and can be washed with mild soap and water. Important: Do not immerse the base unit in water. Wipe the base unit with a damp cloth only. Ensure all parts are completely dry before reassembling.
Image: The feeder's detachable components, including the food container and bowl, highlighting parts that can be cleaned separately from the main base unit.
2. Desiccant Replacement
The feeder includes a desiccant to absorb moisture and keep the food fresh and crispy. Replace the desiccant periodically (e.g., every 1-2 months) to maintain its effectiveness. The desiccant is typically located in a compartment within the lid.
Troubleshooting
- Feeder not dispensing or jammed: First, check if there is too much food in the bowl or if the food outlet is blocked. Clean the spout and channels if necessary. Ensure only dry food is used, as semi-wet or wet food can cause blockages.
- Connectivity issues: Ensure the feeder is within range of your 2.4G Wi-Fi router. Restart the feeder and your router. Re-attempt the Wi-Fi connection process through the app.
- Power interruption: If the feeder stops working due to a power outage, ensure D-size batteries are installed for backup. The feeder will automatically switch to battery power.
- Food not fresh: Ensure the food container lid is tightly sealed and the desiccant is active. Replace the desiccant if it has reached its saturation point.

Image: A cutaway view of the feeder's internal mechanism, highlighting the 45-degree steep slope design for anti-clogging, ensuring smooth food dispensing.
Specifications
| Feature | Detail |
|---|---|
| Brand | POOEKEN |
| Model Number | A90 |
| Product Dimensions (L x W x H) | 12 x 12 x 12 cm; 500 grams |
| Capacity | 4 Liters |
| Material | Acrylonitrile Butadiene Styrene |
| Color | White |
| Recommended Species | Pet, Cat, Small Dog |
| Age Range (Description) | All Life Stages |
| Special Features | Feeding Plan, Feeding Schedule, Automatic Cat Feeder |
| Specific Uses | Indoor |
| Batteries Required | No (for primary operation, but optional for backup) |
| Batteries Included | No |
| Care Instructions | Base cannot be soaked in water for cleaning; wipe with a towel. |
| Included Components | Lid, Automatic Cat Feeder |
Warranty and Support
Specific warranty information for the POOEKEN WiFi Automatic Pet Feeder is not provided in the product details. For any product support, technical assistance, or warranty inquiries, please contact the manufacturer directly through their official website or the contact information provided with your purchase. Always refer to the manufacturer's guidelines for the most accurate and up-to-date information.
