
KONSIVY OPZM-10
KONSIVY 4K 10X Optical Zoom Video Camera Camcorder User Manual
Model: OPZM-10
Introduction
Thank you for choosing the KONSIVY 4K 10X Optical Zoom Video Camera Camcorder. This manual provides detailed instructions on how to set up, operate, and maintain your new camcorder. Please read this manual thoroughly before using the device to ensure proper operation and to maximize its performance. Keep this manual for future reference.
What's in the Box
Carefully unpack your camcorder and check that all the following items are included:
- 1 x KONSIVY Camcorder
- 2 x Rechargeable Batteries
- 1 x Remote Controller
- 1 x USB Cable
- 1 x HD Cable (HDMI)
- 1 x 32GB SD Card

Image: The KONSIVY camcorder shown with its included accessories: two batteries, a 32GB SD card, and a remote control.
Product Overview
The KONSIVY 4K 10X Optical Zoom Video Camera Camcorder is a versatile digital video camera designed for capturing high-quality videos and photos. It features a 3.0-inch IPS touch screen, 10X optical zoom, 12X digital zoom, and supports 4K UHD video recording and 30MP still image capture. With built-in Wi-Fi and a 2.4G remote control, it offers flexible operation and easy content sharing.
Setup
1. Battery Installation
- Open the battery compartment cover located at the bottom of the camcorder.
- Insert one of the included C batteries, ensuring the correct polarity (+/-) aligns with the markings inside the compartment.
- Close the battery compartment cover securely.
2. SD Card Installation
- Locate the SD card slot, typically on the side or bottom of the camcorder.
- Insert the included 32GB SD card (or another compatible SD card, up to 256GB, Class 10 or higher recommended) into the slot until it clicks into place. Ensure the card is inserted in the correct orientation.
- To remove, gently push the card inward until it clicks, then release, and it will eject.
3. Charging the Battery
Before first use, fully charge the battery. Connect the camcorder to a power source using the provided USB cable. The charging indicator light will illuminate during charging and turn off when fully charged.
4. Initial Power On
Press and hold the Power button (usually located near the display or on top) for a few seconds until the screen illuminates. Follow any on-screen prompts for initial setup, such as setting the date and time.
Operating Instructions
Basic Functions
- Power On/Off: Press and hold the POWER button.
- Recording Video: In video mode, press the REC/STOP button to start recording. Press again to stop. The camcorder captures stunning 4K UHD videos.
- Taking Photos: Switch to photo mode (if applicable, via a mode button or screen icon). Press the PHOTO button to capture 30MP still images.
- Playback: Enter playback mode to review your recorded videos and photos. Use the navigation buttons or touch screen to browse.

Image: Demonstrates the camcorder's capability to record 4K/30FPS video and capture 30MP photos, showcasing vibrant colors and sharp details.
Advanced Features
- Zoom Function: The camcorder features a 10x optical zoom for clear magnification of distant subjects without loss of quality, and a 12x digital zoom for further enlargement. Use the zoom lever/buttons to adjust.
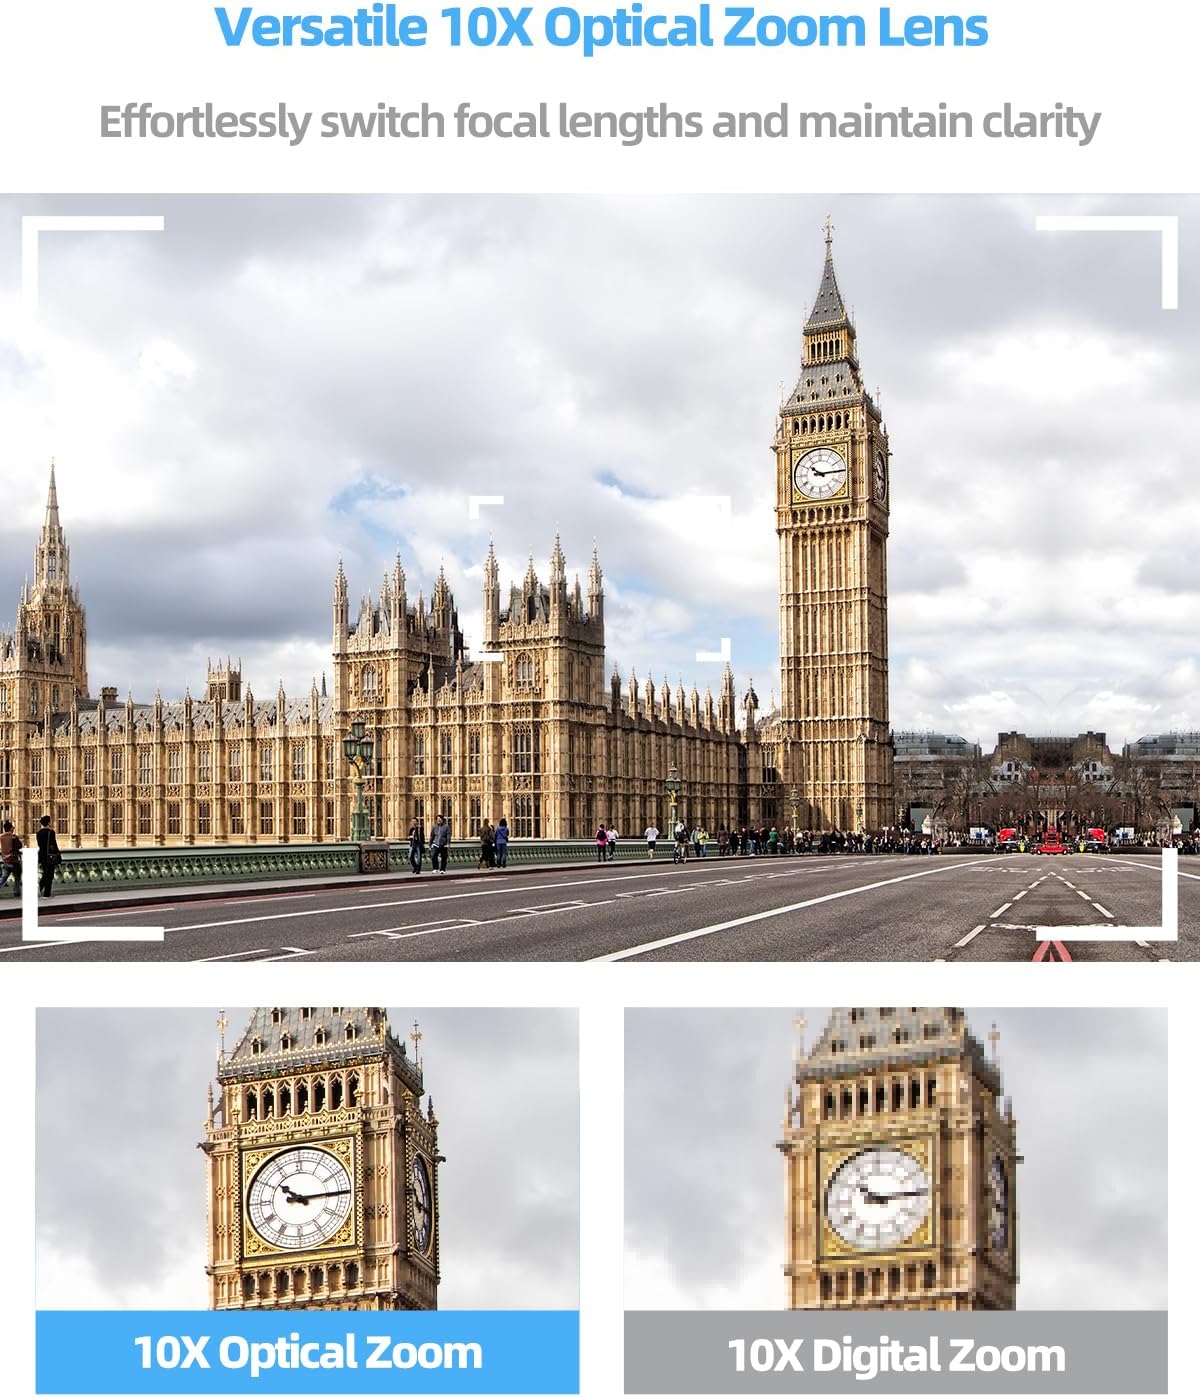
Image: Illustrates the difference between 10X optical zoom, which maintains clarity, and 10X digital zoom, which can result in pixelation at higher magnifications.
- Autofocus & Macro Shooting: The quick autofocus system ensures sharp and clear images for both close-ups and distant shots. Half-press the PHOTO button to engage autofocus before fully pressing to capture.

Image: Shows the camcorder's ability to auto-focus on a small subject like a ladybug, demonstrating its macro shooting capabilities.
- 3.0" IPS Touch Screen Operation: Navigate menus, adjust settings, and review content directly on the responsive touch screen. The screen can also flip 270 degrees for various shooting angles and self-recording.
- Wi-Fi Connectivity & App Control: Connect the camcorder to your smartphone via Wi-Fi using the dedicated app. This allows for remote control of recording, viewing live footage, and transferring files to your device.
- 2.4G Remote Control: Use the included 2.4G wireless remote control for convenient operation from up to 32 feet away, ideal for group shots or stable recording.

Image: Illustrates the camcorder's features including viewing content on a smartphone app, 360-degree remote control functionality, and the 270-degree rotatable touchscreen.
- Live Streaming: Connect the camcorder to a computer via USB to use it as a webcam for live streaming on platforms like Facebook and YouTube.
- Pause Function: Pause and resume recording within the same video file, useful for editing on the fly.
- Slow-motion & Time-lapse: Explore creative shooting modes like slow-motion for dramatic effects and time-lapse for condensing long events into short videos.

Image: Shows examples of the camcorder's pause function, slow-motion video capture, and time-lapse photography capabilities.
- Continuous Shooting: Capture a rapid sequence of photos.
- Anti-shake: Digital image stabilization helps reduce blur caused by camera movement.
- Self-timer: Set a delay before taking a photo, allowing you to be in the shot.
- Face Detection: Automatically detects and optimizes focus and exposure for faces in the frame.

Image: Depicts the camcorder's continuous shooting mode, anti-shake function, self-timer options, and face detection capability.
- Webcam Function: Connect to a computer via USB to use the camcorder as a high-quality webcam.
- HD Output: Connect the camcorder to an HDTV or monitor using the included HDMI cable to view your content on a larger screen.
- Recording While Charging: The camcorder supports recording video even while connected to a power source, ensuring uninterrupted shooting for longer events.

Image: Shows the camcorder being used as a webcam, connected for HD output to a television, and recording while plugged in for charging.
Maintenance
Cleaning
- Lens: Use a soft, lint-free cloth specifically designed for camera lenses. Gently wipe the lens in a circular motion. Avoid using harsh chemicals or abrasive materials.
- Screen: Wipe the touch screen with a soft, dry microfiber cloth. For stubborn smudges, slightly dampen the cloth with water or a screen cleaner.
- Body: Use a soft, dry cloth to wipe the camcorder body. Do not use solvents or alcohol.
Battery Care
- Store batteries in a cool, dry place when not in use.
- Avoid fully discharging batteries frequently to prolong their lifespan.
- If storing for extended periods, charge batteries to about 50% capacity.
Storage
When not in use, store the camcorder in a dry, dust-free environment, away from extreme temperatures and direct sunlight. Consider using a protective case to prevent scratches and impacts.
Troubleshooting
| Problem | Possible Cause | Solution |
|---|---|---|
| Camcorder does not power on. | Battery is dead or incorrectly inserted. | Ensure battery is fully charged and inserted with correct polarity. Try the second battery. |
| Cannot record video/take photos. | SD card is full, locked, or not inserted. | Check SD card status. Ensure it's unlocked, has sufficient space, and is properly inserted. Format the card if necessary (this will erase all data). |
| Image/Video quality is poor. | Lens is dirty; lighting conditions are poor; incorrect settings. | Clean the lens. Ensure adequate lighting. Check resolution settings (e.g., 4K for video, 30MP for photos). |
| Wi-Fi connection fails. | Incorrect password; camcorder too far from device; app issue. | Ensure correct Wi-Fi password. Move closer to the camcorder. Restart the camcorder and your smart device. Reinstall the app if needed. |
| Remote control not working. | Remote battery is dead; line of sight blocked. | Replace the remote control battery. Ensure no obstructions between the remote and the camcorder's IR receiver. |
Specifications
| Brand | KONSIVY |
| Model Number | OPZM-10 |
| Item Weight | 1.46 pounds |
| Product Dimensions | 4.96 x 2.24 x 2.28 inches |
| Batteries | 1 C batteries required (included) |
| Color | Black |
| Special Features | Face Detection, Optical Zoom, Slow Motion, Time Lapse, Touchscreen |
| Photo Sensor Technology | CMOS |
| Video Capture Resolution | 1080p, 4K |
| Maximum Focal Length | 49.5 Millimeters |
| Maximum Aperture | 3.1 f |
| Flash Memory Type | SD (Supports up to 256GB) |
| Video Capture Format | MP4 |
| Screen Size | 3 Inches (IPS Touch Screen) |
| Connectivity Technology | HDMI, USB, Wi-Fi |
Warranty and Support
KONSIVY products are designed for reliability and performance. For specific warranty details, please refer to the warranty card included with your product or visit the official KONSIVY website. If you encounter any issues or have questions not covered in this manual, please contact KONSIVY customer support through the contact information provided on their official website or through your purchase platform.
Please note that unauthorized repairs or modifications may void your warranty.
Ask a question about this manual
Ask about setup, troubleshooting, compatibility, parts, safety, or missing instructions. Manuals+ will review the question and use this page’s manual context to help answer it.