
1. Introduction
Welcome to the Rollei Compactline Pocket Digital Camera user manual. This guide provides essential information for setting up, operating, maintaining, and troubleshooting your new digital camera. Please read this manual carefully before using the camera to ensure optimal performance and longevity.
The Rollei Compactline Pocket is a compact and lightweight digital camera designed for ease of use, making it suitable for beginners, children, and teenagers. It features a 50-megapixel sensor for high-resolution photos and records videos in 2.7K quality. Its 16x digital zoom allows for flexible framing, and its webcam functionality enhances versatility.
2. Package Contents
Verify that all items listed below are included in your camera package:
- Rollei Compactline Pocket Digital Camera
- Rechargeable Lithium-ion Battery
- Wrist Strap
- USB-C Cable
- Protective Pouch
- Instruction Manual (this document)

Image 2.1: Contents of the Rollei Compactline Pocket package, including the camera, battery, wrist strap, USB-C cable, and protective pouch.
3. Camera Overview
3.1 Front View

Image 3.1: Front view of the Rollei Compactline Pocket digital camera, showing the lens, flash, and Rollei branding.
The front of the camera features the lens, which is capable of 16x digital zoom, and an integrated flash for low-light conditions.
3.2 Rear View and Controls

Image 3.2: Rear view of the Rollei Compactline Pocket digital camera, displaying the 2.4-inch IPS screen and control buttons.
The rear of the camera houses the 2.4-inch IPS display and various control buttons:
- W/T Button: Controls the digital zoom (Wide/Telephoto).
- OK Button: Confirms selections and acts as a shutter button in some modes.
- Directional Buttons: Navigate menus and settings.
- DISP Button: Changes display information.
- Menu Button: Accesses the camera's main menu.
3.3 Top and Side Views
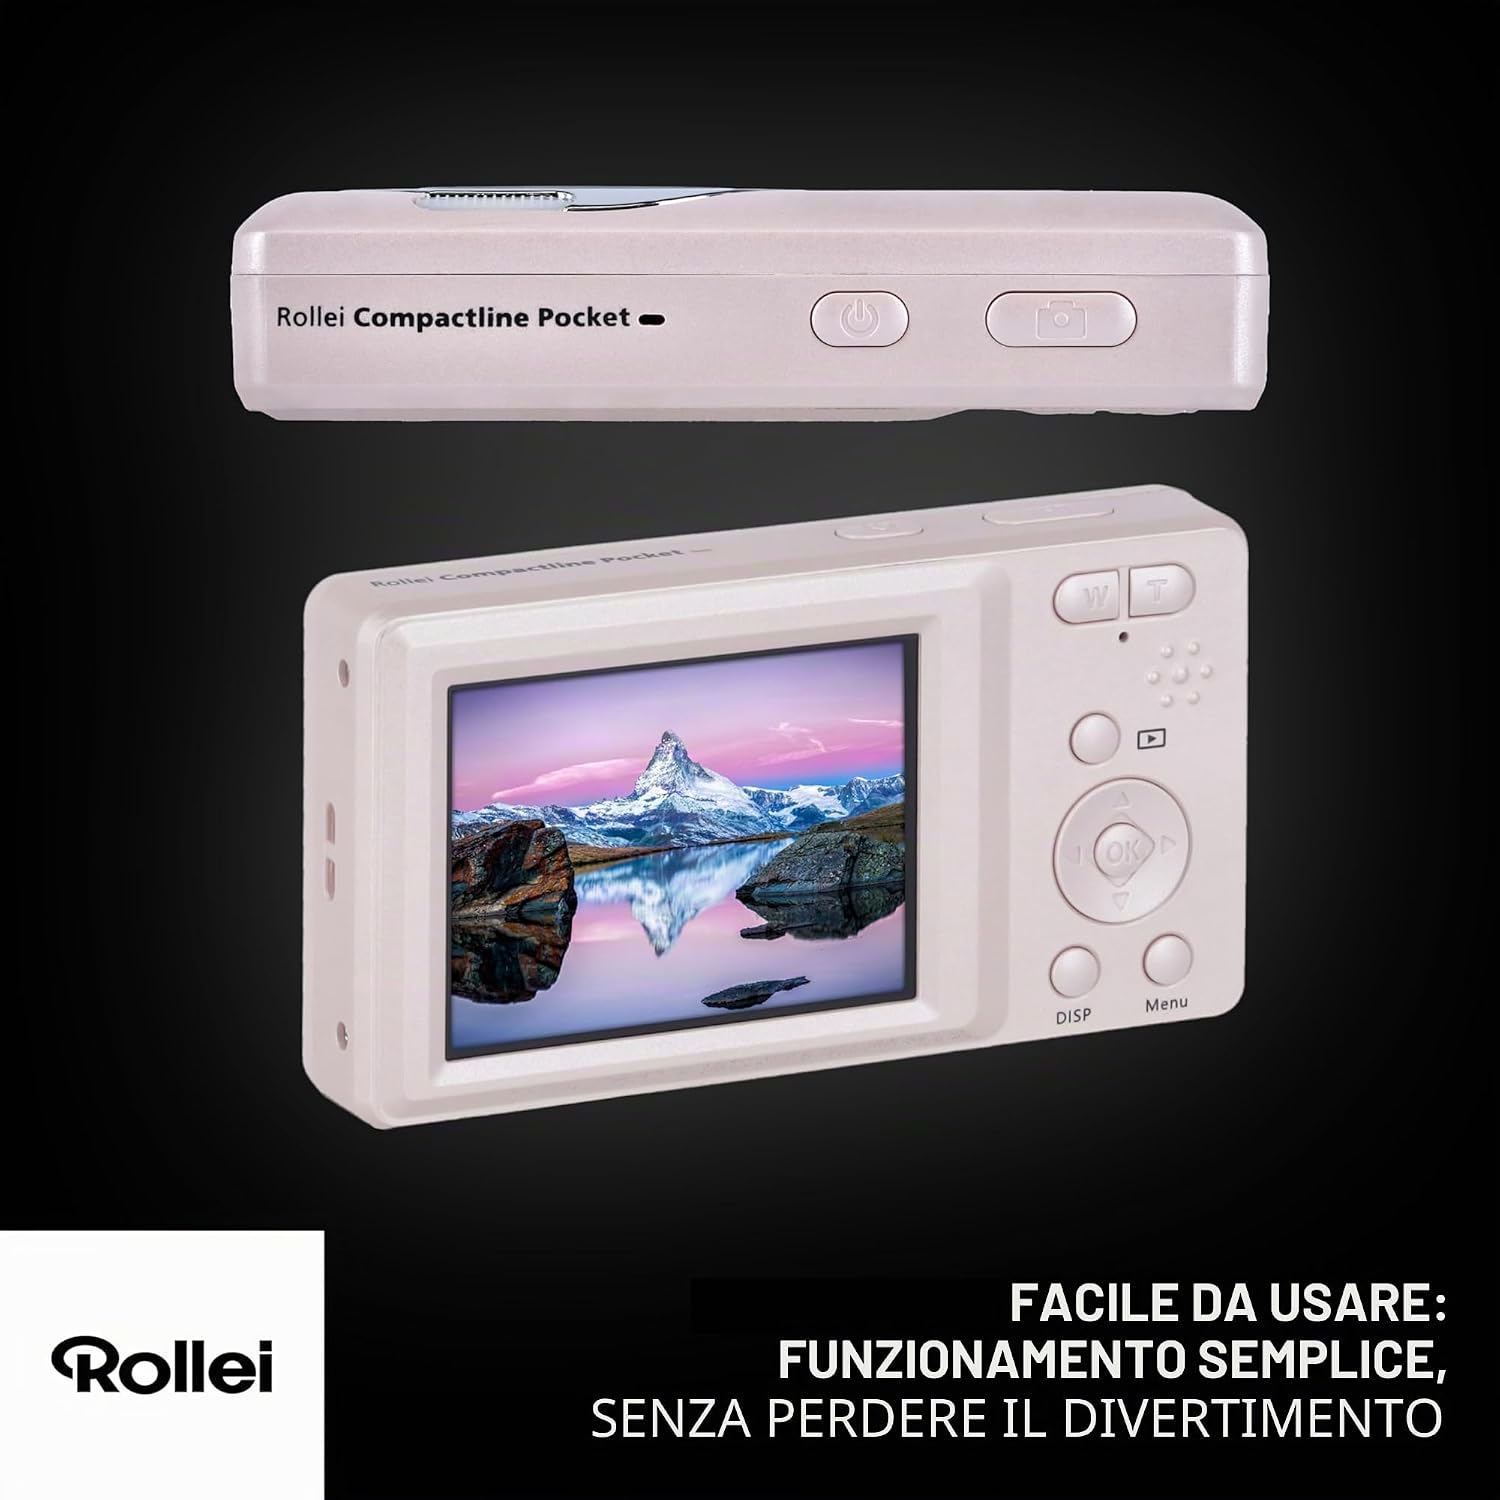
Image 3.3: Top and back view of the Rollei Compactline Pocket digital camera, showing the power button, shutter button, and USB-C port.
The top of the camera typically includes the power button and the main shutter button. The side of the camera features the USB-C port for charging and data transfer, and a slot for the wrist strap.
4. Setup
4.1 Inserting the Battery
- Locate the battery compartment cover on the bottom or side of the camera.
- Slide the latch to open the cover.
- Insert the provided Lithium-ion battery, ensuring the correct orientation according to the polarity indicators (+/-).
- Close the battery compartment cover until it clicks securely into place.
4.2 Inserting an SD Card
The camera requires an SD card (not included) to store photos and videos.
- Locate the SD card slot, usually near the battery compartment.
- Insert the SD card with the metal contacts facing the front of the camera until it clicks into place.
- To remove, press the card gently until it springs out.
4.3 Charging the Battery
- Connect the small end of the USB-C cable to the camera's USB-C port.
- Connect the larger end of the USB-C cable to a USB power adapter (not included) or a computer's USB port.
- The charging indicator light will illuminate. It will turn off or change color when charging is complete.
4.4 Attaching the Wrist Strap
Thread the wrist strap through the designated loop on the side of the camera to prevent accidental drops.
5. Operating the Camera
5.1 Powering On/Off
Press and hold the Power button (usually on the top of the camera) for a few seconds to turn the camera on or off.
5.2 Taking Photos
- Turn on the camera.
- Frame your shot using the 2.4-inch display.
- Use the W/T buttons to adjust the 16x digital zoom.
- Press the Shutter button (or OK button) halfway to focus, then press fully to capture the image.

Image 5.1: A user holding the camera, demonstrating its compact size and the effect of its 16x digital zoom on distant subjects.
5.3 Recording Videos
- Turn on the camera.
- Switch to video recording mode (refer to the on-screen menu if necessary).
- Press the Shutter button (or OK button) to start recording.
- Press the Shutter button again to stop recording.

Image 5.2: The camera positioned to capture a scene, illustrating its use for recording videos in various settings.
5.4 Webcam Functionality
The camera can be used as a webcam for video calls or live streaming.
- Connect the camera to your computer using the USB-C cable.
- On the camera screen, select "PC Camera" mode when prompted.
- Your computer should recognize the camera as a webcam. Select it in your video conferencing or streaming software.
5.5 Transferring Files
To transfer photos and videos to your computer:
- Connect the camera to your computer using the USB-C cable.
- On the camera screen, select "MSDC" (Mass Storage Device Class) mode when prompted.
- The camera's SD card will appear as a removable drive on your computer.
- Copy the desired files to your computer.
5.6 Playback Mode
To view captured photos and videos:
- Turn on the camera.
- Press the Playback button (often indicated by a triangle icon) to enter playback mode.
- Use the directional buttons to navigate through your media.
- Press the OK button to view a photo or play a video.
6. Maintenance
6.1 Cleaning the Camera
- Use a soft, dry cloth to clean the camera body.
- For the lens and screen, use a specialized lens cleaning cloth and solution to avoid scratches.
- Do not use harsh chemicals or abrasive materials.
6.2 Battery Care
- Charge the battery fully before first use.
- Avoid exposing the battery to extreme temperatures.
- If the camera will not be used for an extended period, remove the battery and store it in a cool, dry place.
6.3 Storage
- Store the camera in its protective pouch when not in use.
- Keep the camera in a dry environment, away from dust and direct sunlight.
7. Troubleshooting
| Problem | Possible Cause | Solution |
|---|---|---|
| Camera does not turn on. | Battery is depleted or incorrectly inserted. | Charge the battery. Ensure the battery is inserted with correct polarity. |
| Cannot take photos/record videos. | SD card is full, locked, or not inserted. | Insert an SD card. Check if the SD card is locked (slide switch on card). Delete unnecessary files or use a new card. |
| Images are blurry. | Camera shake, dirty lens, or incorrect focus. | Hold the camera steady. Clean the lens. Ensure the camera has focused before fully pressing the shutter. |
| Computer does not recognize camera. | Incorrect USB mode selected or faulty cable. | Ensure "MSDC" or "PC Camera" mode is selected on the camera. Try a different USB port or cable. |
| Flash not working. | Flash is disabled or battery is low. | Check flash settings in the menu. Charge the battery. |
8. Specifications
| Feature | Detail |
|---|---|
| Model Name | Compactline Pocket |
| Model Number | 10860 |
| Image Resolution | Up to 50 MP |
| Video Resolution | 2.7K (2160p) |
| Digital Zoom | 16x |
| Optical Zoom | 1x |
| Display | 2.4-inch IPS Display |
| Sensor Technology | CMOS |
| Image Stabilization | Optical |
| File Formats | JPEG (photos), MP4 (videos) |
| Storage Media | SD Card (not included) |
| Connectivity | USB-C |
| Battery Type | Lithium-ion |
| Dimensions (DxWxH) | 11P x 9l x 7H cm |
| Weight | 100 Grams |
| Special Features | 16x Digital Zoom, 2.7K Video, Webcam Function, Face/Smile Recognition, Anti-shake, Integrated Flash |
9. Warranty and Support
9.1 Manufacturer's Warranty
The Rollei Compactline Pocket Digital Camera comes with a 2-year manufacturer's warranty. This warranty covers defects in materials and workmanship under normal use. Please retain your proof of purchase for warranty claims.
9.2 Customer Support
For technical assistance, troubleshooting beyond this manual, or warranty inquiries, please visit the official Rollei website or contact their customer service department. Contact information can typically be found on the Rollei website or on the product packaging.
