
1. Introduction
This manual provides essential information for the proper installation, operation, and maintenance of your SITERWELL Hardwired Smoke Detector Carbon Monoxide Detector. This device is designed to provide early warning of smoke and carbon monoxide presence, enhancing the safety of your home. Please read this manual thoroughly before installation and keep it for future reference.

Image 1.1: Front view of the SITERWELL Hardwired Smoke and Carbon Monoxide Detector, showing the test/silence button and wiring.
2. Safety Information
Important Safety Instructions:
- This device must be installed by a qualified electrician in accordance with all local electrical codes.
- Do not paint the detector. Paint can clog the sensing chambers and prevent the alarm from operating correctly.
- Do not install in areas with high humidity, extreme temperatures, or excessive dust.
- Test the alarm weekly to ensure proper operation.
- In case of an alarm, evacuate the premises immediately and call emergency services.
This detector meets UL STD 217 & 2034 and is certified to CAN/ULC STD S531-19 & CSA STD 6.19-17, ensuring high accuracy and reliability.

Image 2.1: The SITERWELL detector installed on a ceiling, highlighting its compliance with UL standards.
3. Product Features
- 10-Year Battery Backup: Features a built-in 10-year battery, providing continuous protection during power outages without the need for battery replacements for a decade.
- Accurate Alarming: Utilizes photoelectric and electrochemical sensors for precise smoke and carbon monoxide detection.
- Reduced Nuisance Alarms: Dual-wave detection technology is sensitive to slow smoldering fires while minimizing false alarms from cooking.
- Hardwired Interconnected System: Can link up to 18 units. When one alarm is triggered, all interconnected alarms will sound, ensuring whole-home coverage.
- Bilingual Voice Alerts: Provides clear voice alerts in both English ("Fire!", "Warning! Carbon Monoxide") and French ("Incendie!", "Attention! Monoxyde de Carbone").
- Self-Check Function: Automatically checks circuit, electronics, and battery status every 80 seconds.
- 85dB Loud Sound: Ensures the alarm is clearly audible throughout the home.
- One-Click Silence: Allows for temporary silencing of nuisance alarms for 10 hours.

Image 3.1: An internal view of the SITERWELL detector highlighting its 10-year built-in battery.
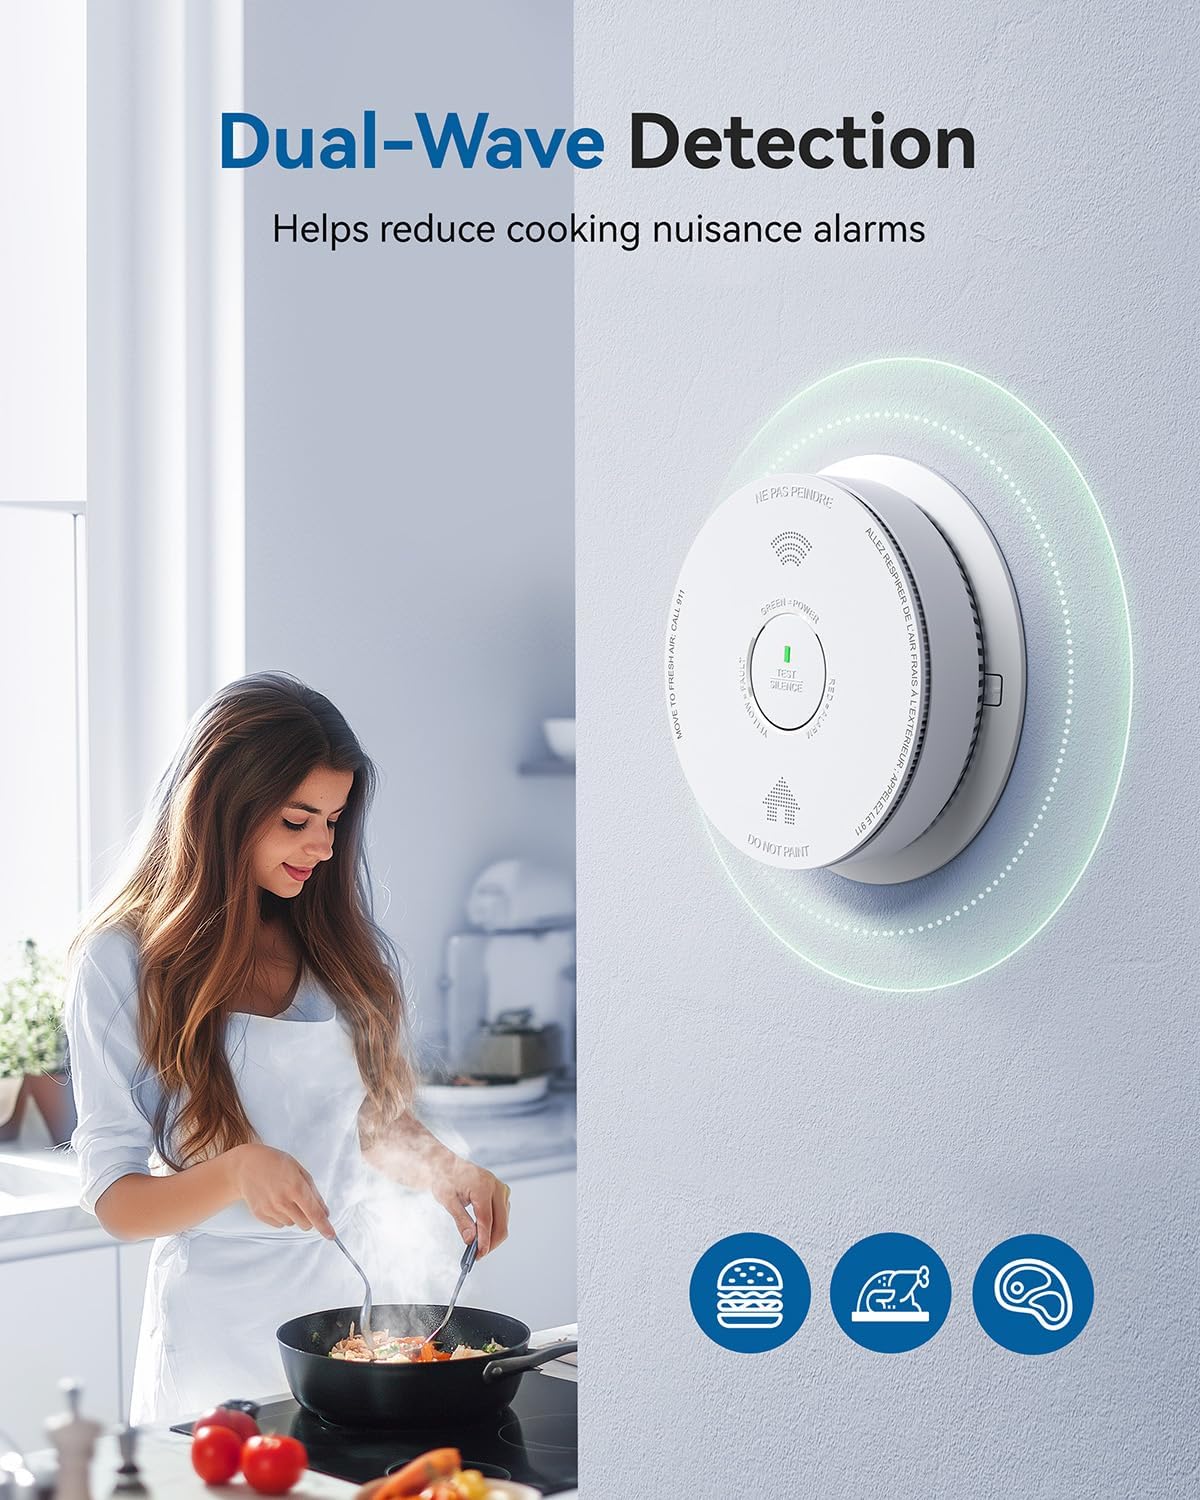
Image 3.2: A person cooking with the SITERWELL detector on the wall, illustrating its dual-wave detection to reduce nuisance alarms.

Image 3.3: Illustration of multiple interconnected SITERWELL alarms in different rooms, showing how they all sound when one is triggered.

Image 3.4: A visual representation of the bilingual voice alerts (English and French) provided by the SITERWELL detector.
4. Package Contents
Your SITERWELL Hardwired Smoke Detector Carbon Monoxide Detector package should include:
- SITERWELL Hardwired Smoke Detector Carbon Monoxide Detector (Model GS886F-H02)
- Mounting Bracket
- Mounting Screws and Wall Anchors
- Wiring Harness
- User Manual (this document)
5. Setup and Installation
Before Installation:
- Turn off power to the circuit where the detector will be installed at the main fuse or circuit breaker box.
- Ensure the installation location complies with local codes and recommended placement guidelines (e.g., on the ceiling or high on a wall, away from corners, vents, and direct sunlight).
Installation Steps:
- Mounting Bracket Installation: Secure the mounting bracket to the ceiling or wall using the provided screws and wall anchors. Ensure the bracket is firmly attached.
- Wiring Connection: Connect the detector's wiring harness to your household electrical wiring (120V AC). Typically, this involves connecting the black wire to hot, white to neutral, and red to the interconnect wire (if applicable). Ensure all connections are secure with wire nuts.
- Attach Detector: Align the detector with the mounting bracket and rotate it clockwise until it clicks securely into place. The included wall plate fits most smoke detectors on the market, simplifying the process.
- Restore Power: Turn the power back on at the main fuse or circuit breaker box.
- Test the Detector: Press and hold the Test/Silence button on the detector for a few seconds until the alarm sounds. This confirms proper operation.

Image 5.1: Diagram showing the easy installation process of the SITERWELL detector, including wiring and mounting.
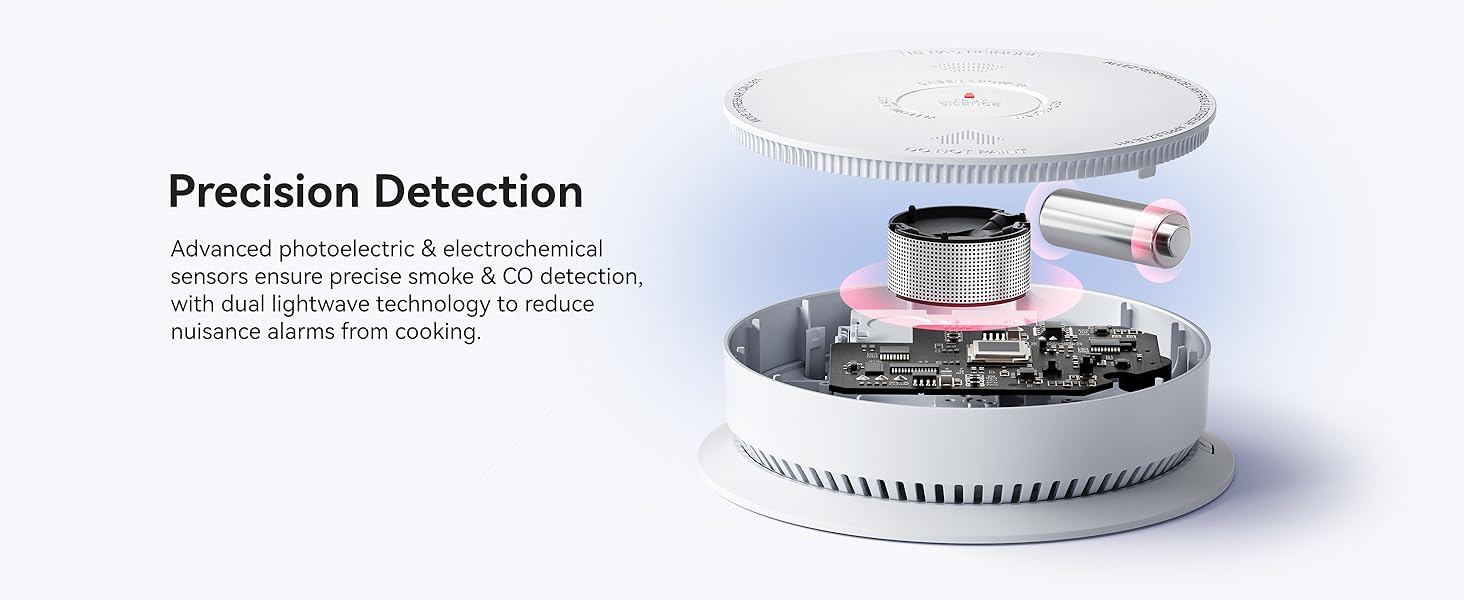
Image 5.2: Guidelines for optimal placement of smoke and carbon monoxide detectors on ceilings and walls, indicating best and acceptable areas.
6. Operating Instructions
Understanding the Indicator Lights:
- Green Light: Indicates normal operation and power.
- Yellow Light: Indicates a fault or low battery.
- Red Light: Indicates an alarm condition (smoke or carbon monoxide detected).
Testing the Detector:
Press and hold the Test/Silence button on the front of the detector. The alarm will sound, and the red light will flash. Release the button to stop the test. Test your detector weekly.
Silencing a Nuisance Alarm:
If a non-emergency alarm occurs (e.g., from cooking smoke), press the Test/Silence button. This will silence the alarm for approximately 10 hours. The detector will automatically reset after the silence period or if the smoke/CO clears.
Voice Alerts:
The detector provides clear voice alerts to indicate the type of hazard:
- Smoke Alarm: "Fire!" (English) / "Incendie!" (French)
- Carbon Monoxide Alarm: "Warning! Carbon Monoxide" (English) / "Attention! Monoxyde de Carbone" (French)

Image 6.1: Visual guide to the SITERWELL detector's indicator lights (Green for Power, Yellow for Fault, Red for Alarm) and its 85dB loud sound output.
7. Maintenance
Cleaning Your Detector:
Clean your smoke/CO detector at least once a month to remove dust and debris. Use a soft brush attachment on your vacuum cleaner to gently vacuum the vents and openings. Do not use cleaning solvents or sprays directly on the detector.
Battery Information:
This SITERWELL detector features a built-in 10-year lithium battery. This battery is designed to last the entire lifespan of the alarm and is not replaceable. When the battery is low, the yellow light will indicate a fault, and the unit will chirp. At this point, the entire unit should be replaced.
End of Life:
The detector has a lifespan of 10 years. After 10 years from the date of manufacture, the unit will indicate its end-of-life, and the entire unit should be replaced.
8. Troubleshooting
| Problem | Possible Cause | Solution |
|---|---|---|
| Detector chirps periodically (yellow light) | Low battery or fault condition. | The built-in battery is nearing its end of life or there is an internal fault. Replace the entire detector unit. |
| Alarm sounds without apparent smoke/CO | Nuisance alarm (e.g., cooking smoke, steam), dust buildup, or detector malfunction. | Press the Test/Silence button. Ventilate the area. Clean the detector as per maintenance instructions. If false alarms persist, consider relocation or replacement. |
| Detector does not respond to test button | No power, faulty unit, or end of life. | Check power supply (circuit breaker). Ensure the detector is properly seated on its mounting bracket. If issues persist, replace the unit. |
| Interconnected alarms do not all sound | Wiring issue with interconnect wire, or one or more units are faulty. | Verify interconnect wiring connections. Test each unit individually. Replace any faulty units. |
9. Specifications
| Attribute | Detail |
|---|---|
| Model Number | GS886F-H02 |
| Power Source | AC 120V with 10-year sealed lithium battery backup |
| Sensor Type | Photoelectric (Smoke), Electrochemical (Carbon Monoxide) |
| Alarm Loudness | 85 dB at 10 feet (3 meters) |
| Interconnection | Up to 18 compatible SITERWELL units |
| Operating Temperature | 40°F (4.4°C) to 100°F (37.8°C) |
| Operating Humidity | 10% to 95% RH (non-condensing) |
| Dimensions | 6.1 inches (155mm) diameter x 1.65 inches (41.8mm) depth |
| Weight | 14.4 ounces |
| Certifications | Conf. to UL STD 217 & 2034, Cert. to CAN/ULC STD S531-19 & CSA STD 6.19-17 |
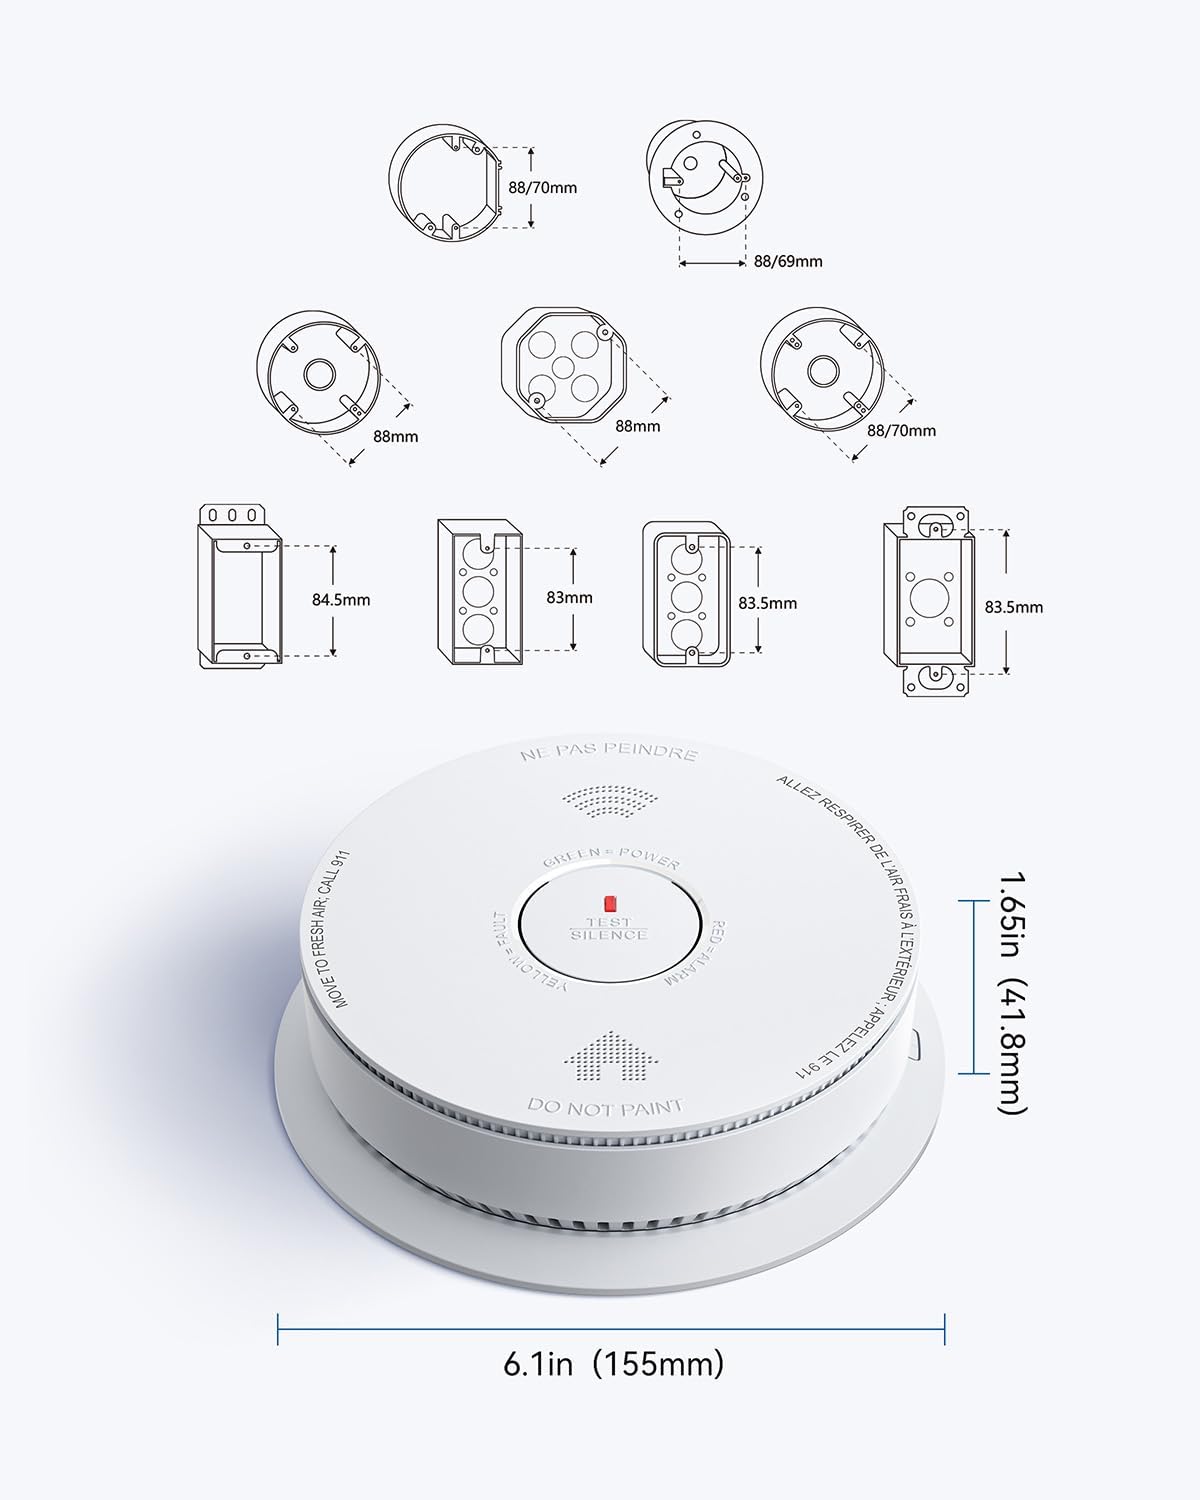
Image 9.1: Diagram showing the dimensions of the SITERWELL detector and its comparison to a smartphone.
10. Warranty and Support
For warranty information and technical support, please refer to the documentation included with your purchase or contact SITERWELL customer service directly. Contact details are typically available on the product packaging or the official SITERWELL website.


