
1. Introduction
Thank you for choosing the SENIX 40V 17" Electric Lawn Mower. This manual provides essential information for the safe and efficient operation, maintenance, and storage of your new lawn mower. Please read this manual thoroughly before first use and keep it for future reference.
Product Overview
The SENIX LPPX2-M5 is a battery-powered cordless lawnmower designed for small to medium-sized yards. It features a 17-inch cutting width and a 2-in-1 mowing function, allowing for both mulching and bagging of grass clippings. The mower is equipped with a brushless motor for efficient performance and includes two 20V lithium-ion batteries and a charger.

Figure 1: SENIX 40V 17" Electric Lawn Mower with included batteries and charger.
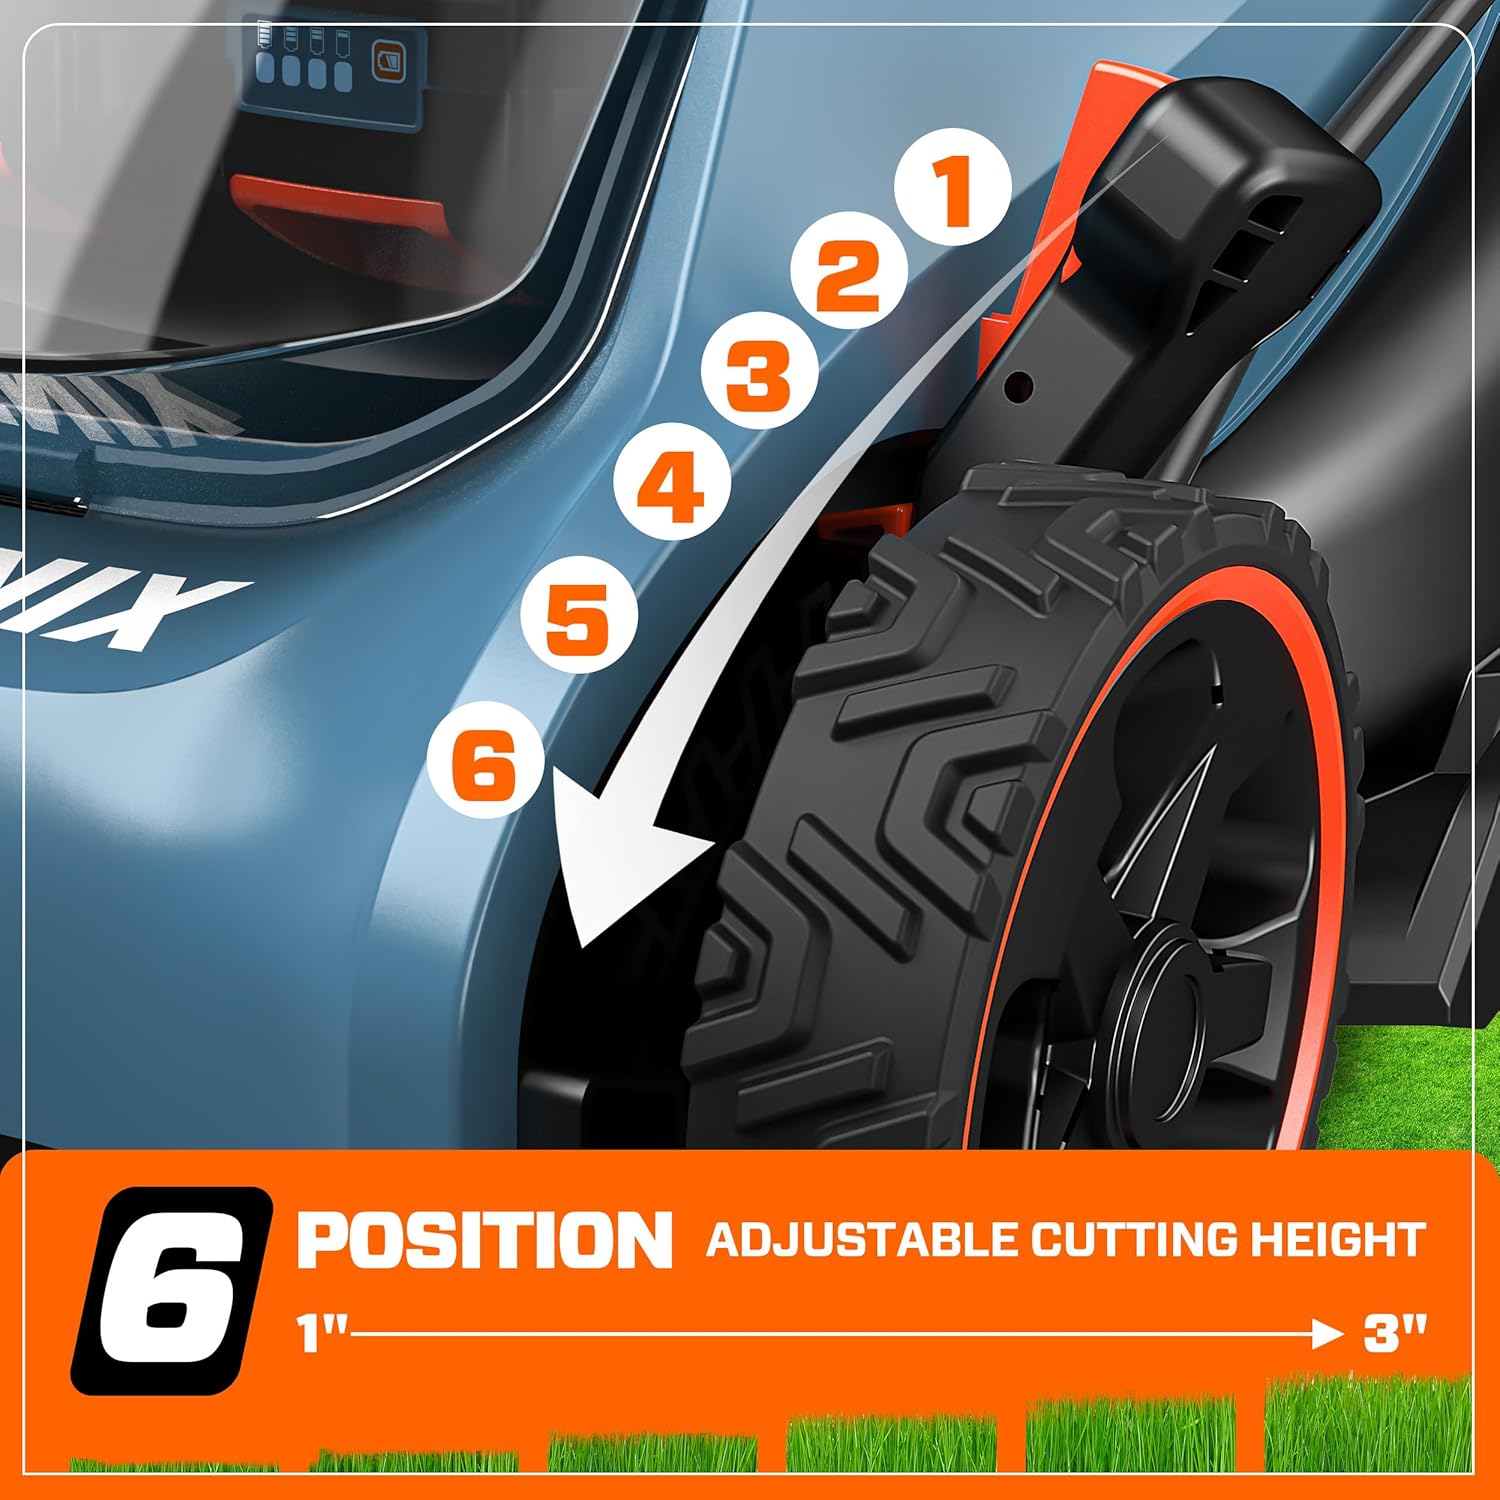
Figure 2: Key features including 2-in-1 function, adjustable knob, 17-inch cutting blade, 40V brushless motor, and 6-position height adjustment.
2. Safety Information
Always prioritize safety when operating power equipment. Failure to follow these instructions may result in serious injury or property damage.
- Read the Manual: Understand all instructions and warnings before use.
- Wear Appropriate Attire: Always wear safety glasses, long pants, and sturdy footwear. Avoid loose clothing that could get caught in moving parts.
- Clear the Area: Before mowing, remove all objects such as rocks, sticks, wires, and toys from the lawn.
- Keep Bystanders Away: Ensure children, pets, and other people are at a safe distance from the mowing area.
- Inspect Before Use: Check the mower for any damage, loose parts, or worn blades before each operation.
- Battery Safety: Use only the specified batteries and charger. Do not expose batteries to water or extreme temperatures.
- Slope Operation: Exercise extreme caution when mowing on slopes. Mow across the face of slopes, never up and down.
- Avoid Wet Grass: Do not mow in wet conditions, as this can cause slipping and reduce cutting efficiency.
- Disconnect Power: Always remove the battery pack before cleaning, servicing, or when the mower is unattended.
3. Setup
Package Contents
Verify that all items are present in the package:
- SENIX 40V 17" Electric Push Mower
- 2 x 20V Lithium-ion Batteries (5.0Ah)
- Lithium-ion Battery Charger
- 13-gallon Bagger
- Instruction Manual
Battery Installation
The mower operates using two 20V lithium-ion batteries. Ensure both batteries are fully charged before installation.
- Locate the battery compartment on top of the mower.
- Open the battery compartment cover.
- Insert each 20V battery into its respective slot until it clicks securely into place.
- Close the battery compartment cover.

Figure 3: Proper insertion of 2x20V batteries into the mower's battery compartment.
Handle Assembly
The mower's handles are designed to fold for compact storage and transport. For initial setup or re-assembly:
- Unfold the lower handle section and secure it using the quick-release clamps or knobs on the sides.
- Extend the upper handle section and align the holes.
- Secure the upper handle using the provided hardware (knobs and bolts). Ensure all connections are tight before operation.
Bagger / Mulching Setup
The mower offers 2-in-1 functionality for mulching or bagging grass clippings.
- For Bagging: Lift the rear discharge flap and hook the grass bag onto the mower's rear discharge opening. Ensure it is securely attached. The 13-gallon bagger is designed for easy debris collection.
- For Mulching: Remove the grass bag. The mower will automatically mulch clippings and return nutrients to your lawn.

Figure 4: The 13-gallon (50L) grass bag reduces the frequency of emptying.
4. Operating Instructions
Starting the Mower
The SENIX mower features a convenient push-button start and a safety trigger system.
- Ensure batteries are installed and fully charged.
- Press and hold the safety start button (usually a red button on the handle).
- While holding the safety button, pull the ON/OFF trigger lever towards the handle. The mower will start.
- Release the safety start button once the mower is running.

Figure 5: Handle controls for safety start and on/off trigger.
ECO Mode and Battery Status
The mower includes an ECO mode to maximize battery life and an on-board battery charge indicator.
- ECO Mode: Press the 'ECO' button on the mower's top panel to activate a power-saving mode, ideal for lighter cutting conditions or extending runtime.
- Battery Status Indicator: Check the LED lights next to the battery slots to monitor the remaining charge.

Figure 6: ECO mode button and battery status indicators for efficient operation.
Height Adjustment
The mower features a 6-position single lever height adjustment, allowing cutting heights from 1" to 3".
- Ensure the mower is turned off and the battery is removed before adjusting the height.
- Locate the single lever height adjustment mechanism, typically near one of the front wheels.
- Pull the lever outwards and move it to the desired cutting height position (1-6).
- Ensure the lever locks securely into place before resuming operation.

Figure 7: The 6-position height adjustment allows cutting from 1" to 3".
Mowing Tips
- For best results, mow when the grass is dry.
- Avoid cutting more than one-third of the grass blade length at a time.
- Overlap cutting swaths slightly to ensure even coverage.
- The rubber treads on the wheels provide improved traction, especially on uneven terrain.

Figure 8: The 17-inch cutting blade provides efficient mowing.
Official Product Video
Video 1: SENIX Lawn Mower Show. This video demonstrates key features including ECO mode, battery status, starting procedure, rubber tread traction, single point height adjustment, 2-in-1 mowing (mulching/bagging), and folding handles for storage.
5. Maintenance
Regular maintenance ensures the longevity and optimal performance of your SENIX lawn mower.
- Battery Charging: Always use the included lithium-ion battery charger. Charge batteries in a well-ventilated area. Do not overcharge.
- Blade Care: Periodically inspect the cutting blade for sharpness and damage. A dull blade can tear grass, leading to an unhealthy lawn. Replace damaged blades immediately.
- Cleaning: After each use, disconnect the battery and clean the underside of the mower deck to remove grass clippings and debris. Clean the grass bag as needed.
- General Inspection: Check all nuts, bolts, and screws for tightness. Ensure all safety features are functioning correctly.
6. Storage
Proper storage helps protect your mower and extends its lifespan.
- Clean Before Storage: Ensure the mower is clean and dry before storing.
- Remove Batteries: Always remove the batteries from the mower before storing for extended periods. Store batteries in a cool, dry place.
- Folding Handles: The folding handles make storage and transport a breeze. Loosen the handle knobs and fold the handle down for compact storage.
- Storage Location: Store the mower in a dry, secure location, away from direct sunlight and extreme temperatures.

Figure 9: The mower's folding handles allow for easy vertical storage, saving space.
7. Troubleshooting
This section addresses common issues you might encounter with your lawn mower.
| Problem | Possible Cause | Solution |
|---|---|---|
| Mower does not start | Batteries not fully charged or improperly inserted. Safety key/lever not engaged. | Ensure batteries are fully charged and correctly seated. Engage the safety start button and pull the trigger lever simultaneously. |
| Reduced runtime or power | Batteries not fully charged. Mowing tall or wet grass. Blade is dull or damaged. | Fully charge batteries. Avoid mowing excessively tall or wet grass. Sharpen or replace the blade. |
| Uneven cutting | Cutting height set too low. Dull or bent blade. Uneven terrain. | Adjust cutting height. Inspect and replace blade if necessary. Mow at a consistent pace. |
| Excessive vibration | Bent or unbalanced blade. Loose components. | Inspect blade for damage; replace if bent. Check all fasteners for tightness. |
| Grass not bagging effectively | Grass bag full. Discharge chute clogged. Wet grass. | Empty grass bag. Clear any blockages from the discharge chute. Mow when grass is dry. |
8. Specifications
| Feature | Specification |
|---|---|
| Brand | SENIX |
| Model Number | LPPX2-M5 |
| Power Source | Battery Powered (2x20V Lithium-ion) |
| Cutting Width | 17 Inches |
| Cutting Height Adjustment | 6 Positions (1" to 3" range) |
| Mowing Function | 2-in-1 (Mulching & Bagging) |
| Bagger Capacity | 13 Gallons (50L) |
| Motor Type | Brushless |
| Approximate Runtime | Up to 45 minutes (with included dual batteries) |
| Item Weight | 36 Pounds |
| Product Dimensions | 51"D x 16.5"W x 38"H |
| UPC | 843212101772 |
9. Warranty and Support
SENIX stands behind the quality of its products.
- The SENIX 2X2 electric push mower is covered by a 5-year limited warranty.
- The included batteries are covered by a 3-year warranty.
For warranty claims, technical support, or replacement parts, please contact SENIX customer support. Keep your proof of purchase for warranty validation.


