
Introduction
Thank you for choosing the ToughTested ROC 5 Solar Power Bank. This rugged and reliable power bank is designed for outdoor and demanding environments, offering multiple charging options including MagSafe compatible wireless charging, USB-C Power Delivery, Quick Charge 3.0, and an emergency solar panel. This manual provides essential information for the safe and efficient use of your device.

Image: The ToughTested ROC 5 Solar Power Bank, a compact black and orange device with a solar panel, is shown attached magnetically to the back of a smartphone, illustrating its wireless charging capability. A hand holds the phone and power bank.
Product Overview
Key Features
- 5000mAh Battery Capacity: Provides multiple charges for smartphones and other devices.
- MagSafe & Qi-Compatible Wireless Charging: Supports MagSafe for compatible iPhones and universal Qi for other wireless charging devices.
- USB-C PD 20W & Quick Charge 3.0: Offers fast wired charging for various devices.
- Solar Charging Panel: Designed for emergency recharging in remote locations.
- IP54 Weatherproof Design: Resistant to dust and splashing water.
- Integrated LED Flashlight: Multi-mode flashlight for illumination.
Components
- Solar Charging Panel
- Wireless Charging Pad (Magnetic)
- USB-C Input/Output Port
- USB-A Output Port
- LED Battery Indicator Lights
- Power Button
- LED Flashlight

Image: A graphic showcasing the ToughTested ROC 5 Solar Power Bank with icons and text emphasizing its solar charging capability, IP54 waterproof design, and MagSafe compatibility. The power bank is depicted in an outdoor setting.
Setup
Initial Charging of the Power Bank
Before first use, fully charge your ROC 5 Power Bank using the USB-C port. Connect the included USB-A to USB-C cable to a compatible USB wall adapter (not included) and the USB-C port on the power bank. The LED indicator lights will illuminate to show charging progress and battery level. A full charge is indicated when all LED lights are solid.

Image: A visual representation of the ToughTested ROC 5 Power Bank simultaneously charging a smartwatch via USB-C, a smartphone via USB-A, and another smartphone wirelessly. This illustrates its multi-device charging capabilities.
Operating Instructions
Wired Charging
- Connect your device's charging cable to either the USB-C (input/output) or USB-A (output) port on the power bank.
- Connect the other end of the cable to your device.
- Press the power button on the power bank to initiate charging. The LED indicators will show the remaining battery level.
Wireless Charging (MagSafe & Qi Compatible)
- Ensure your device is wireless charging compatible (Qi-enabled or MagSafe compatible). For MagSafe, ensure your iPhone (17/16/15/14/13 series) has an official MagSafe case or no case for optimal magnetic alignment.
- Align your device with the wireless charging pad on the power bank. For MagSafe, the magnets will assist in proper alignment.
- Press the power button on the power bank to activate wireless charging. Your device should indicate that it is charging.
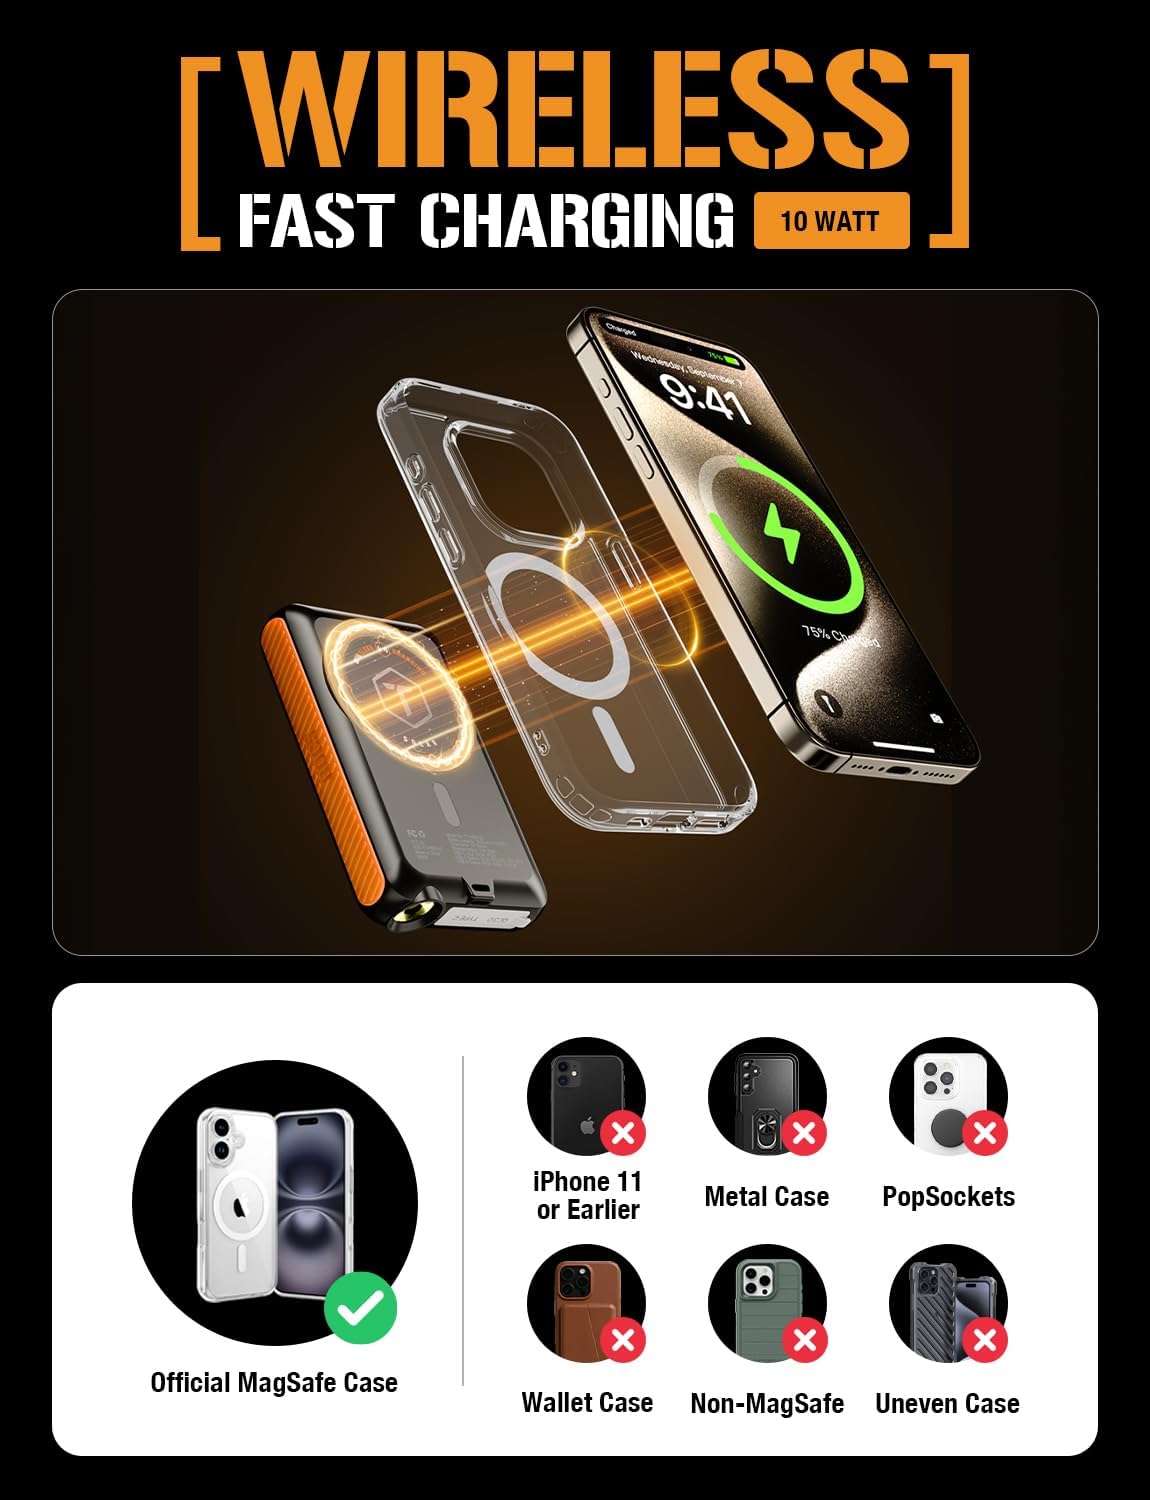
Image: A diagram showing the ToughTested ROC 5 Power Bank wirelessly charging an iPhone. It highlights the magnetic alignment for MagSafe compatibility and lists incompatible scenarios like metal cases or PopSockets.
Solar Charging
The integrated solar panel is designed for emergency power replenishment and trickle charging in direct sunlight. It is not intended as a primary charging method due to its limited output (up to 100mA per hour). For daily use, recharge the power bank via its USB-C port.
- Place the solar panel directly facing strong sunlight.
- The LED indicators may show a slow charge, or the charge rate may be too low to register on the indicators if sunlight is not optimal.

Image: The ToughTested ROC 5 Solar Power Bank is shown attached to the side of a camouflage backpack, positioned to receive direct sunlight in a desert landscape, illustrating its use as an emergency solar reserve.
LED Flashlight
To activate the multi-mode LED flashlight:
- Turn On/Off: Double-press the power button.
- Cycle Modes: Once the flashlight is on, single-press the power button to cycle through modes (e.g., constant light, strobe, SOS).
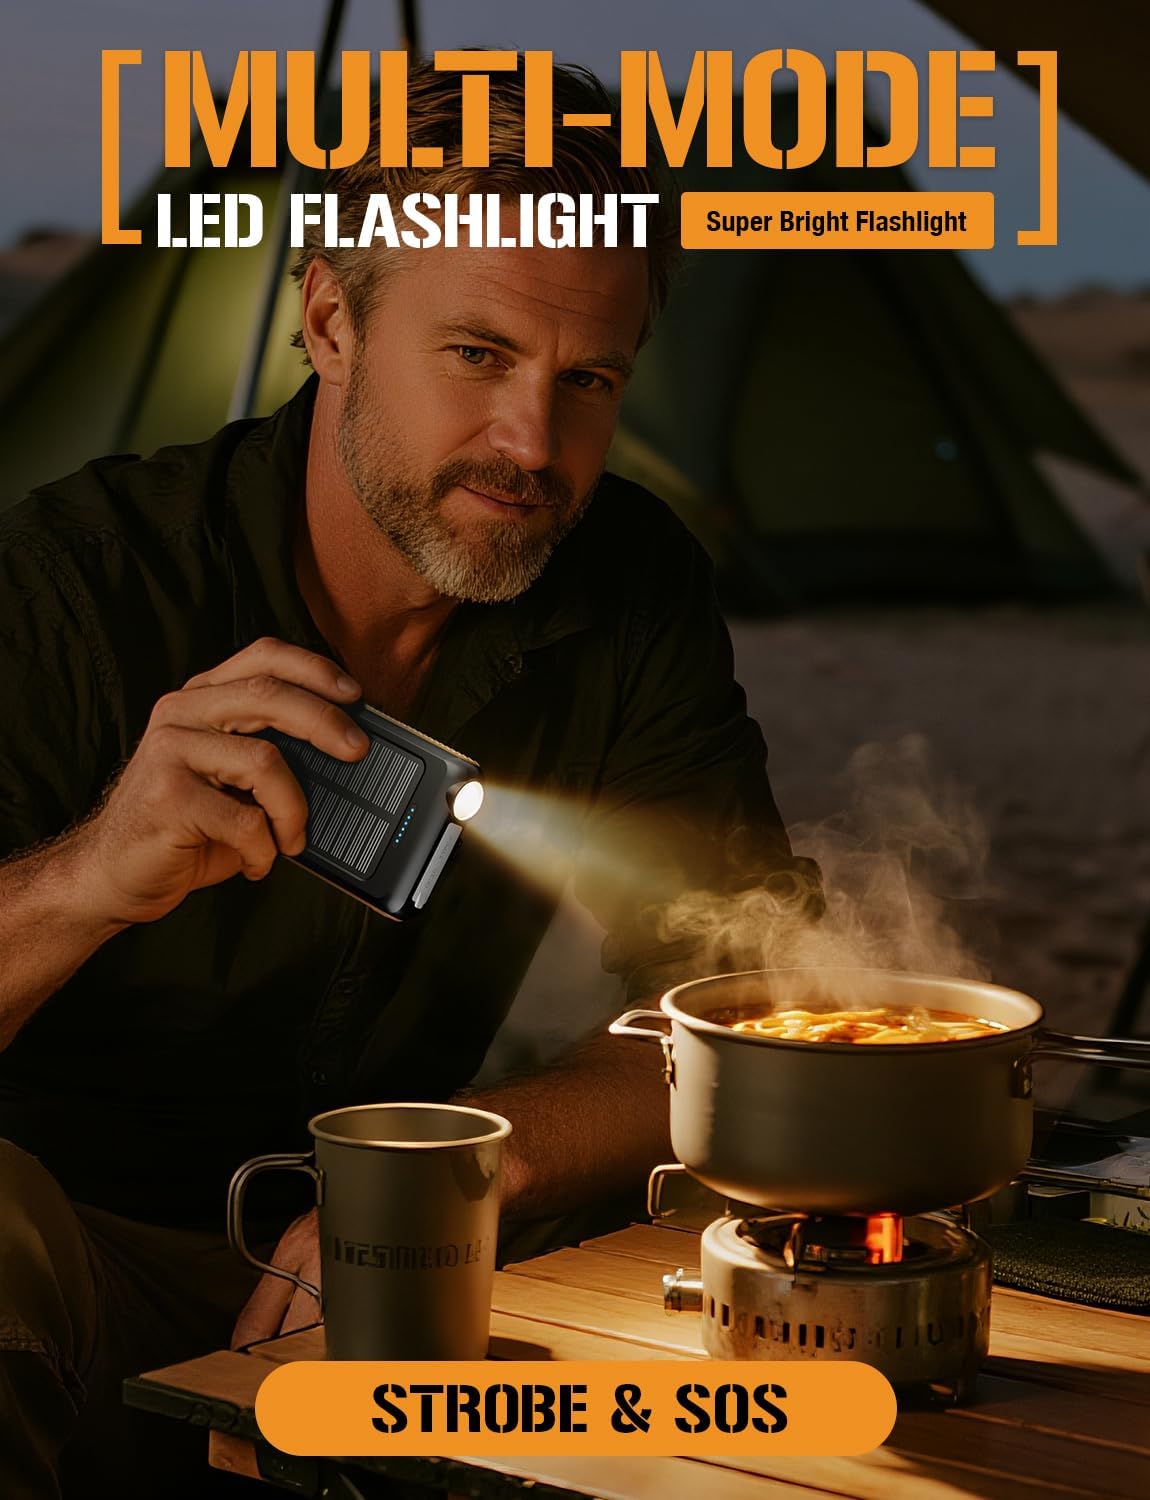
Image: A man is shown holding the ToughTested ROC 5 Power Bank, using its integrated LED flashlight to illuminate a cooking pot over a portable stove in a low-light outdoor setting, demonstrating its utility as a multi-mode flashlight.
Maintenance
- Cleaning: Wipe the power bank with a dry, soft cloth. Avoid using harsh chemicals or abrasive materials.
- Storage: Store the power bank in a cool, dry place away from direct sunlight and extreme temperatures. For long-term storage, ensure the battery is charged to approximately 50-75% to preserve battery health.
- Battery Care: To maximize battery lifespan, avoid fully discharging the power bank frequently. Recharge it regularly, even if not in active use.
Troubleshooting
- Power Bank Not Charging: Ensure the USB-C cable is securely connected to both the power bank and a working power source. Try a different cable or wall adapter.
- Device Not Charging (Wired): Verify the cable connection to both the power bank and your device. Ensure the power bank has sufficient charge and the power button has been pressed.
- Device Not Charging (Wireless): Check for proper alignment of your device on the wireless charging pad. Remove any thick cases or metallic objects that may interfere with wireless charging. Ensure the power bank has sufficient charge and the power button has been pressed.
- Slow Solar Charging: Solar charging is supplementary. Ensure the panel is in direct, strong sunlight. Cloud cover or indirect light will significantly reduce charging efficiency.
- Flashlight Not Working: Double-press the power button to turn the flashlight on or off. Ensure the power bank has sufficient charge.
Specifications
| Model Number | TT-PBW-5C |
| Battery Capacity | 5000 mAh |
| Product Dimensions | 5.6 x 2.8 x 0.6 inches |
| Item Weight | 7.8 ounces |
| Connector Type | USB Type A, USB Type C |
| Wireless Charging Output | MagSafe Compatible, Qi Compatible |
| USB-C Output | PD 20W |
| USB-A Output | QC 3.0 |
| Solar Charging Input | Up to 100mA (Emergency Reserve) |
| Weather Resistance | IP54 (Dust and Splash Resistant) |
Safety Information
- Do not expose the power bank to fire, water, or extreme temperatures.
- Do not disassemble, puncture, or modify the device.
- Keep out of reach of children.
- Avoid dropping or subjecting the power bank to severe impacts.
- If the power bank swells, overheats, or emits an unusual odor, discontinue use immediately.
- Dispose of the product responsibly according to local regulations.
Warranty and Support
The ToughTested ROC 5 Solar Power Bank comes with a 5-Year Warranty, reflecting our commitment to quality and durability. For warranty claims, technical support, or further assistance, please visit the official ToughTested website or contact customer service through your retailer.

Image: The ToughTested ROC 5 Power Bank, its user guide, a USB cable, and a prominent '5 Year ToughCare' warranty badge are displayed together in a rugged outdoor environment, emphasizing the product's durability and extended support.


