
DOKIO DSP200M
DOKIO 200 Watt Solar Panel User Manual
Brand: DOKIO | Model: DSP200M
1. Product Overview
The DOKIO 200 Watt Solar Panel is a high-efficiency monocrystalline solar module designed for a wide range of off-grid applications. Its robust construction and advanced cell technology ensure reliable power generation in various environments, from RVs and boats to remote cabins and residential rooftops.
Key Features
- Wide Range of Uses: Suitable for trailers, RVs, boats, cabins, tents, cars, trucks, yachts, and rooftops, providing clean energy for diverse needs.
- High Efficiency: Features 10-BB solar panel cell design with excellent Class A cells, achieving a conversion rate of up to 22%.
- Improved Design: Utilizes half-cell technology to reduce power loss, lower module temperature, and minimize shading effects on performance.
- Long-Life Solar Module: Constructed with a corrosion-resistant aluminum frame, capable of withstanding strong winds (2400 Pa) and heavy snow loads (5400 Pa).
- Durable and Waterproof: Equipped with IP67 junction box and IP67 MC4 connectors for excellent waterproof features, ensuring outdoor reliability.
- Easy to Install: Pre-drilled holes on the back of the panel facilitate quick mounting and securing.

Figure 1.1: Front and back view of the DOKIO 200 Watt Solar Panel, showing the solar cells and the junction box with MC4 connectors.

Figure 1.2: Detailed features of the solar panel, including bypass diodes, corrosion-resistant aluminum frame, IP67 MC4 output cable, and 8 mounting holes.
2. Setup and Installation
Proper installation is crucial for optimal performance and longevity of your DOKIO solar panel. Follow these guidelines for a safe and effective setup.
2.1 Components
Your DOKIO 200 Watt Solar Panel package includes:
- 1 x DOKIO 200 Watt Monocrystalline Solar Panel
- Integrated MC4 Output Cables
- Corrosion-resistant Aluminum Frame with pre-drilled mounting holes
Additional components required for a complete solar system (not included):
- Charge Controller (PWM or MPPT recommended)
- Battery Bank (e.g., deep cycle lead-acid, LiFePO4)
- Power Inverter (if AC power is needed)
- Mounting Hardware (brackets, bolts, etc., suitable for your application)
- Appropriate Wiring and Fuses
2.2 Installation Steps
- Choose a Location: Select a location that receives maximum direct sunlight throughout the day, free from shading. Consider the angle and orientation for optimal solar exposure.
- Mount the Panel: Use appropriate mounting hardware to securely fasten the solar panel to your desired surface (e.g., RV roof, boat deck, ground mount). The panel's aluminum frame features pre-drilled holes for easy attachment. Ensure the mounting is stable and can withstand environmental conditions.
- Connect to Charge Controller: Connect the MC4 output cables from the solar panel to the solar input terminals of your charge controller. Ensure correct polarity (positive to positive, negative to negative).
- Connect Charge Controller to Battery: Connect the battery output terminals of the charge controller to your battery bank. Again, observe correct polarity.
- Connect Inverter (Optional): If using an inverter, connect it to your battery bank. Refer to your inverter's manual for specific wiring instructions.
- Verify Connections: Double-check all connections for tightness and correct polarity before activating the system.
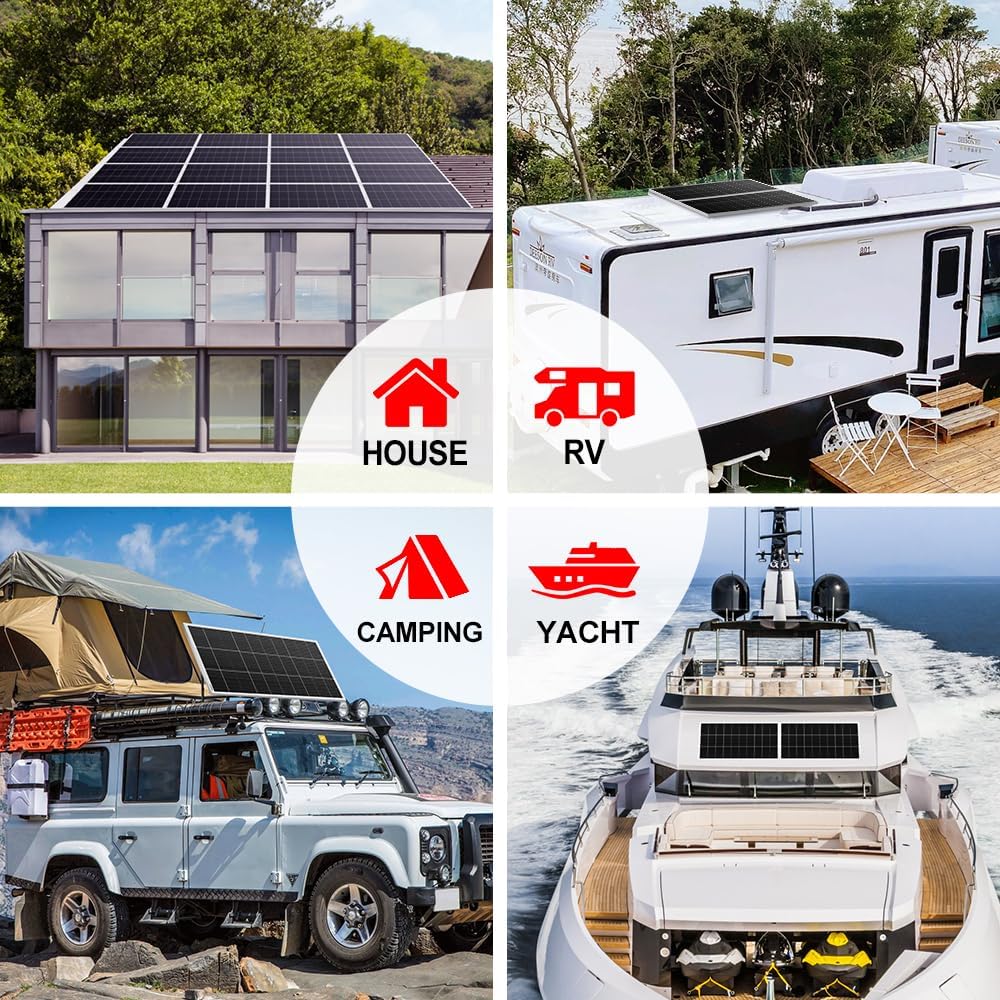
Figure 2.1: Basic wiring diagram showing the connection flow from solar panel to charge controller, battery, and power inverter.

Figure 2.2: Diagrams illustrating how to connect multiple solar panels in series for higher voltage or in parallel for higher current.

Figure 2.3: Illustration of the easy setup process, highlighting the pre-drilled holes for quick mounting.
3. Operation
Once installed, your DOKIO solar panel will begin converting sunlight into electricity. The charge controller will regulate this power to safely charge your battery bank.
3.1 Optimal Performance
- Sunlight Exposure: Ensure the panel receives unobstructed sunlight throughout the day. Any shading, even partial, can significantly reduce power output.
- Panel Angle: Adjust the panel's tilt angle to match the sun's position for maximum energy harvest, especially during different seasons.
- System Monitoring: If your charge controller has a display, monitor the charging voltage and current to ensure the system is operating correctly.

Figure 3.1: Examples of DOKIO solar panels in various applications, including residential, RV, camping, and marine settings.
4. Maintenance
Regular maintenance will help ensure the long-term efficiency and performance of your solar panel.
4.1 Cleaning
- Frequency: Clean the panel surface periodically, especially if you notice a buildup of dust, dirt, leaves, or snow.
- Method: Use a soft cloth or sponge with mild soap and water. Avoid abrasive materials or harsh chemicals that could scratch the glass or damage the frame. Rinse thoroughly with clean water.
- Safety: Always ensure the panel is cool to the touch before cleaning. For rooftop installations, take appropriate safety precautions or consult a professional.
4.2 Inspection
- Visual Check: Regularly inspect the panel for any physical damage, such as cracks in the glass, bent frames, or loose connections.
- Wiring: Check all wiring and connections (especially MC4 connectors and junction box) for signs of wear, corrosion, or looseness. Ensure they are securely fastened and waterproof.
- Mounting: Verify that the mounting hardware is secure and that the panel remains firmly attached to its support structure.

Figure 4.1: The DOKIO solar panel is designed to endure various weather conditions, including extreme cold, heat, snow, and high winds.

Figure 4.2: Illustration of the panel's excellent durability in harsh environments, specifically its resistance to heavy snow loads and high winds.
5. Troubleshooting
If you encounter issues with your solar panel, refer to the following common problems and their potential solutions.
| Problem | Possible Cause | Solution |
|---|---|---|
| Low or No Power Output |
|
|
| Physical Damage to Panel |
|
|
| System Not Charging Battery |
|
|
6. Technical Specifications
| Specification | Value |
|---|---|
| Brand | DOKIO |
| Model Number | DSP200M |
| Material | Monocrystalline |
| Maximum Power | 200 Watts |
| Maximum Voltage | 17 Volts |
| Efficiency | High Efficiency (up to 22%) |
| Product Dimensions (L x W x H) | 44.6" x 33.9" x 1.2" (113.28 cm x 86.11 cm x 3.05 cm) |
| Item Weight | 24.5 pounds (11.11 kg) |
| Connector Type | MC4 |
| Included Components | Bag (as per specifications, though typically refers to packaging or a carrying bag for portable versions) |
| Wind Load Resistance | 2400 Pa |
| Snow Load Resistance | 5400 Pa |
| IP Rating (Junction Box & MC4) | IP67 |

Figure 6.1: Physical dimensions of the solar panel and examples of typical installations (RV, Boat, House).

Figure 6.2: Exploded view showing the internal layers of the solar panel, including the anti-corrosion frame, tempered glass, EVA film, Grade A+ monocrystalline cells, and junction box.

Figure 6.3: Comparison highlighting the benefits of 12 busbar cell technology for improved efficiency and longer service life.
7. Warranty and Support
DOKIO is committed to providing high-quality products and customer satisfaction. For specific warranty details regarding your solar panel, please refer to the warranty card included with your product or visit the official DOKIO website.
For technical support, troubleshooting assistance, or inquiries about replacement parts, please contact DOKIO customer service through their official channels. When contacting support, please have your product model number (DSP200M) and purchase information readily available.
You can typically find contact information on the DOKIO brand store page on Amazon or their official website.
Related documentsDSP200M


Ask a question about this manual
Ask about setup, troubleshooting, compatibility, parts, safety, or missing instructions. Manuals+ will review the question and use this page’s manual context to help answer it.