
1. Introduction
This instruction manual provides guidance for the proper setup, operation, and maintenance of your ZWP RF502A RF358A replacement remote control. This remote is designed to be compatible with Tempur-Pedic Ergo and Ergo Extend adjustable bed bases, including models JDLK.33.01.18 RF358A and JLDK.33.01.36 RF502A.
Please read this manual thoroughly before attempting to use the remote control to ensure correct functionality and to avoid potential issues.
2. Product Overview
The ZWP RF502A RF358A remote control features an ergonomic design and advanced infrared technology for stable signal transmission and quick response times. It includes a backlight for clear visibility in low-light conditions.

Image: ZWP RF502A RF358A remote control demonstrating comfortable feel and bed adjustment ranges for head (0-60 degrees) and foot (0-45 degrees).

Image: ZWP RF502A RF358A remote control with an adjustable bed in the background, illustrating quick response, stable signal, and extended service life.
Important Compatibility Note:

Image: Compatibility chart for the ZWP RF502A RF358A remote control, indicating that if your original remote control buttons are different from the ZWP remote, it will not work with your model. Several incompatible remote designs are shown.
If the buttons on your original remote control differ from those on this replacement remote, it may not be compatible with your adjustable bed base. Please verify button layout before proceeding with setup.
3. Setup and Pairing Instructions
Follow these steps to pair your new ZWP RF502A RF358A remote control with your Tempur-Pedic adjustable bed base:
- Step 1: Prepare Batteries. Ensure your remote has fresh batteries. The remote requires three AAA batteries (not included).
- Step 2: Locate Battery Backup Box. Find the battery backup box on your adjustable bed base. Press the POWER DOWN button on this box twice. A light on the battery backup box will illuminate.
- Step 3: Initiate Pairing on Remote. On the back of the remote, press and hold down the PAIR button. The PAIR button will illuminate blue and start flashing. Continue holding until the PAIR button stops flashing and the illuminated light on the Battery Backup Box goes out.
- Step 4: Release and Test. Release the PAIR button and test all remote functions.

Image: Diagram illustrating the remote pairing process, showing the location of the battery backup box button and the remote's pairing button.

Image: View of the remote control's battery compartment, showing where to insert three AAA batteries (not included).
4. Operating Instructions
The remote control allows you to adjust various settings of your Tempur-Pedic adjustable bed base. The buttons are clearly labeled with icons for intuitive use.
4.1. Basic Adjustments
- Head Up/Down: Use the arrow buttons on the top left and right to raise or lower the head section of the bed.
- Foot Up/Down: Use the arrow buttons on the middle left and right to raise or lower the foot section of the bed.
4.2. Special Features
- Backlight: Press the light bulb icon button to activate the remote's backlight, allowing for easy use in the dark.
- Zero G: Press the "ZERO G" button to activate the Zero Gravity preset position, which elevates the head and foot to create a feeling of weightlessness.
- Memory Presets: The remote may include numbered buttons (1, 2, 3) or a star icon for saving and recalling your favorite bed positions. Consult your bed base manual for specific programming instructions for these buttons.
- Massage: Buttons with wave icons typically control massage functions. The remote may have multiple settings for intensity or pattern.
- Sleep Mode: The 'Zz' icon button may activate a preset sleep position.

Image: Diagram illustrating various adjustable bed positions such as Zero Gravity, Elevision, Pregnancy Relaxation, Sleeping, Prevent Snoring, and Nursing Mode, all controllable via the remote.
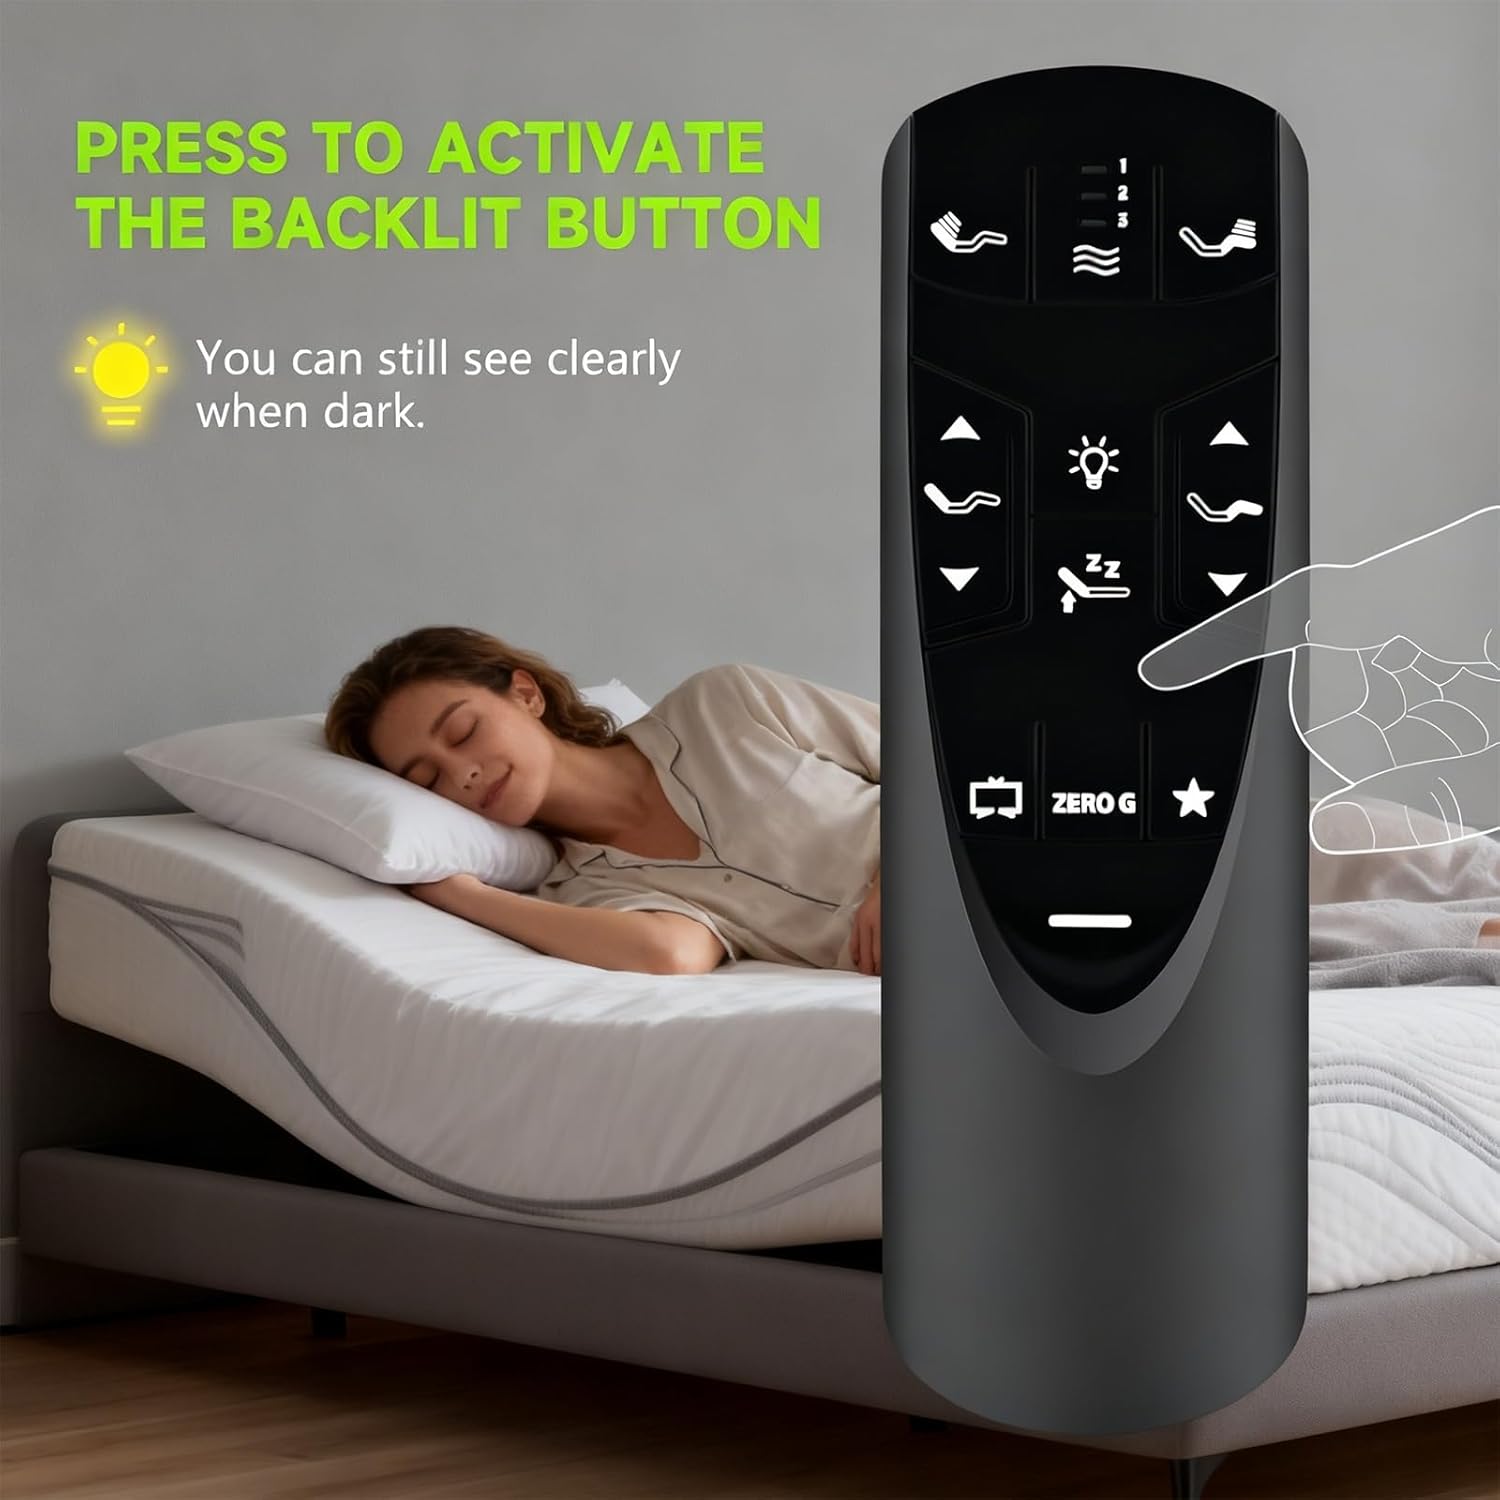
Image: A hand pressing the backlight button on the remote control, demonstrating how the buttons illuminate for visibility in the dark.
5. Troubleshooting
5.1. Pairing Failure
If the remote control fails to pair after following the steps in Section 3, please try the following:
- Ensure batteries are fresh and correctly inserted.
- Repeat the pairing process carefully.
- Deactivate Child Lock (see below) and then attempt pairing again.
5.2. Deactivating Child Lock
If the remote is unresponsive or not functioning as expected, it may be in Child Lock mode. To deactivate:
- Press and hold the FOOT UP and FOOT DOWN buttons together for approximately six (6) seconds.
- The remote backlight will flash twice. When the backlight light goes away, the remote is no longer in Child Lock, and normal operation should resume.
6. Maintenance
6.1. Battery Replacement
The remote control requires three AAA batteries. When the remote's performance degrades or it stops responding, replace all three batteries with new ones. Ensure correct polarity when inserting.
6.2. Cleaning
Wipe the remote control with a soft, dry cloth. Do not use liquid cleaners or abrasive materials, as these may damage the remote's surface or internal components.
7. Specifications
- Model Numbers: RF502A, RF358A
- Compatibility: Tempur-Pedic Ergo or Ergo Extend Adjustable Bed Base (JDLK.33.01.18 RF358A, JLDK.33.01.36, RF502A)
- Power Source: 3 x AAA Batteries (not included)
- Technology: Infrared
- Special Feature: Backlight, Ergonomic Design
- Item Weight: 2.08 ounces
- Package Dimensions: 8.74 x 2.13 x 1.65 inches
8. Warranty and Support
ZWP provides a 1-year warranty return service for this product. If you encounter any questions or issues regarding your order or the remote control's functionality, please contact ZWP customer support directly. We aim to respond to inquiries within 12 hours.
9. Product Video Overview
Video: An overview of the RF358A remote control for adjustable beds, demonstrating its features and design.