
1. Introduction
The Voyager Breeze Foldable Drone is a compact and versatile quadcopter equipped with a dual 480p WiFi camera, designed for ease of use and stable flight. This manual provides essential information for safe operation, setup, maintenance, and troubleshooting to ensure an optimal user experience.

Image 1.1: The Voyager Breeze Foldable Drone in its unfolded, flight-ready configuration.
2. Package Contents
Please verify that all items are present in your package:
- Voyager Breeze Foldable Drone
- 2.4G Remote Control (Transmitter)
- 3.7V 1000mAh Li-ion Drone Battery
- USB Charging Cable
- Spare Propeller Blades (set)
- Propeller Guards (set)
- User Manual (this document)
3. Setup
3.1. Drone Battery Charging and Installation
- Connect the drone battery to the provided USB charging cable.
- Plug the USB cable into a standard USB power adapter (not included).
- Allow approximately 80 minutes for a full charge. The indicator light on the USB cable will change when charging is complete.
- Once charged, insert the battery into the drone's battery compartment, ensuring a secure connection.
3.2. Transmitter Battery Installation
- Open the battery compartment on the back of the 2.4G remote control.
- Insert three (3) 1.5V AA batteries (not included), observing the correct polarity (+/-).
- Close the battery compartment securely.

Image 3.1: The 2.4G remote control for the Voyager Breeze Drone, showing controls and battery compartment location.
3.3. Propeller Guard Installation
For beginner pilots or indoor flight, it is recommended to install the propeller guards:
- Identify the four propeller guards.
- Gently snap each guard onto the corresponding motor arm of the drone. Ensure they are firmly attached without obstructing propeller rotation.
3.4. Folding and Unfolding the Drone
The Voyager Breeze drone features a foldable design for portability.
- To Unfold: Gently extend each of the four rotor arms outwards until they click into place.
- To Fold: Gently push each rotor arm inwards until it locks into the compact position.
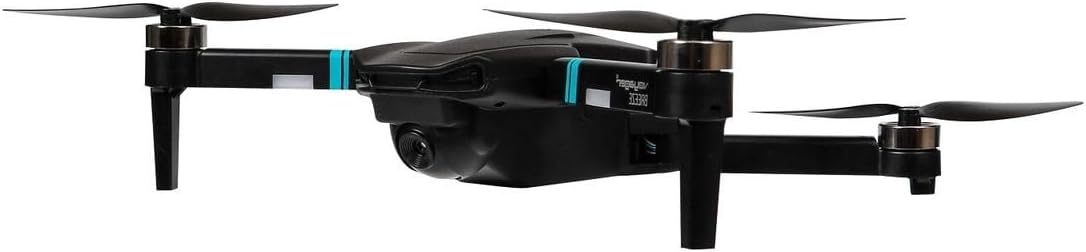
Image 3.2: The Voyager Breeze Foldable Drone in its compact, folded state for easy transport.
4. Operating Instructions
4.1. Power On/Off and Pairing
- Power On Drone: Press and hold the power button on the drone until the indicator lights illuminate.
- Power On Transmitter: Press the ON/OFF button on the remote control.
- Pairing: Push the left joystick (throttle) fully up, then fully down. The drone's lights will stop flashing and become solid, indicating successful pairing.
4.2. Basic Flight Controls
- One Key Take-off/Land: Press the dedicated button on the transmitter to automatically take off or land.
- Emergency Stop: In an emergency, press the emergency stop button to immediately cut power to the motors.
- Altitude Hold: The drone maintains a stable altitude automatically, allowing for easier control.
- Optical Flow Positioning: Utilizes a downward-facing camera to enhance stability and precise hovering, especially indoors.
4.3. Advanced Flight Functions
- Headless Mode: When activated, the drone's orientation is relative to the pilot, regardless of the drone's front direction. Press the Headless Mode button to activate/deactivate.
- 3D Flip: Fly the drone to a sufficient height, then press the 3D Flip button and move the right joystick in the desired flip direction.
- One Key Return: Press the One Key Return button, and the drone will attempt to fly back towards its take-off point. Note: This function is based on initial calibration and is not GPS-accurate.
4.4. Dual 480p WiFi Camera Operation
The drone is equipped with a dual 480p WiFi camera. To use the camera functions:
- Download the dedicated drone control app to your smartphone (refer to the QR code in the quick start guide or search your app store).
- Connect your smartphone to the drone's WiFi network (usually named 'WIFI_UFO-XXXXXX').
- Open the app to view the live camera feed, capture photos, and record videos.
5. Maintenance
5.1. Cleaning
Regularly clean the drone with a soft, dry cloth. Avoid using water or solvents that could damage electronic components.
5.2. Battery Care
- Do not overcharge or over-discharge the drone battery.
- Store batteries in a cool, dry place away from direct sunlight.
- If the drone will not be used for an extended period, charge the battery to approximately 50% before storage.
5.3. Propeller Replacement
If a propeller is damaged, replace it with a spare blade from the package. Ensure the correct propeller (A or B) is installed on the corresponding motor, matching the original configuration.
6. Troubleshooting
- Drone does not respond to transmitter: Ensure both drone and transmitter are powered on and successfully paired. Check transmitter batteries.
- Drone drifts during flight: Perform a gyroscope calibration. Refer to the quick start guide for specific calibration steps. Ensure optical flow positioning is active if flying indoors.
- Camera feed not visible on phone: Verify your phone is connected to the drone's WiFi network and the drone app is open. Ensure the drone battery has sufficient charge.
- Short flight time: Ensure the drone battery is fully charged. Flight time can be affected by aggressive flying, wind conditions, and continuous camera use.
- Drone crashes frequently: Check for damaged propellers and replace if necessary. Ensure propeller guards are installed for added protection. Practice basic controls in an open, safe area.
7. Specifications
| Model Number | VOY-DRBR838 |
| Play Time | Up to 10 minutes |
| Drone Battery | 3.7V 1000mAh Li-ion (included) |
| Transmitter Battery | 3x 1.5V AA (not included) |
| Charging Time | Up to 80 minutes |
| Control Distance | Up to 100 meters |
| Camera | Dual 480p WiFi Camera |
| Functions | One key take-off/land, emergency stop, headless mode, 3D flip, one key return, altitude hold, optical flow positioning |
| Accessories | 2.4G Remote Control, Spare blades, Propeller guards, USB charging cable |
8. Warranty Information
The Voyager Breeze Foldable Drone comes with a 1 Year Warranty from the date of purchase. This warranty covers manufacturing defects and malfunctions under normal use. It does not cover damage caused by misuse, accidents, unauthorized modifications, or improper maintenance. Please retain your proof of purchase for warranty claims.
9. Support
For further assistance, technical support, or warranty inquiries, please refer to the contact information provided with your purchase documentation or visit the official Voyager product support website.


