
1. Safety Information
Warning: This greenhouse contains sharp edges and heavy components. Always use caution when handling. The polycarbonate panels allow 70% light transmission, providing optimal plant growth but also exposing users to UV rays. Wear appropriate protective clothing and eyewear when working in or around the greenhouse. Always follow proper installation and anchoring procedures to ensure stability and safety, especially in areas with heavy snow or wind. Do not apply any chemical treatments to the greenhouse material without proper ventilation and safety precautions.
Ensure the assembly area is clear of obstructions and children. Always use appropriate safety gear, including gloves and eye protection, during assembly.
2. Product Overview
The CDCASA 10x24x10 FT Greenhouse is designed for outdoor use, providing a controlled environment for plant growth. It features a robust aluminum frame and durable polycarbonate panels.
- Durable Panels: 4mm twin-wall polycarbonate panels offer 70% light transmission and block over 99.9% of harmful UV rays.
- Sturdy Frame: Rust-resistant aluminum frame with patented Quick Connect technology for easier assembly. Designed to support snow loads up to 20PSF.
- Thoughtful Design: Features a modular design, rain gutters for drainage, swing doors for access, snap-on door handles, and 5 adjustable window vents.
- Exceptional Stability: Base feet can be buried or secured with screws for enhanced resistance to snow and wind.
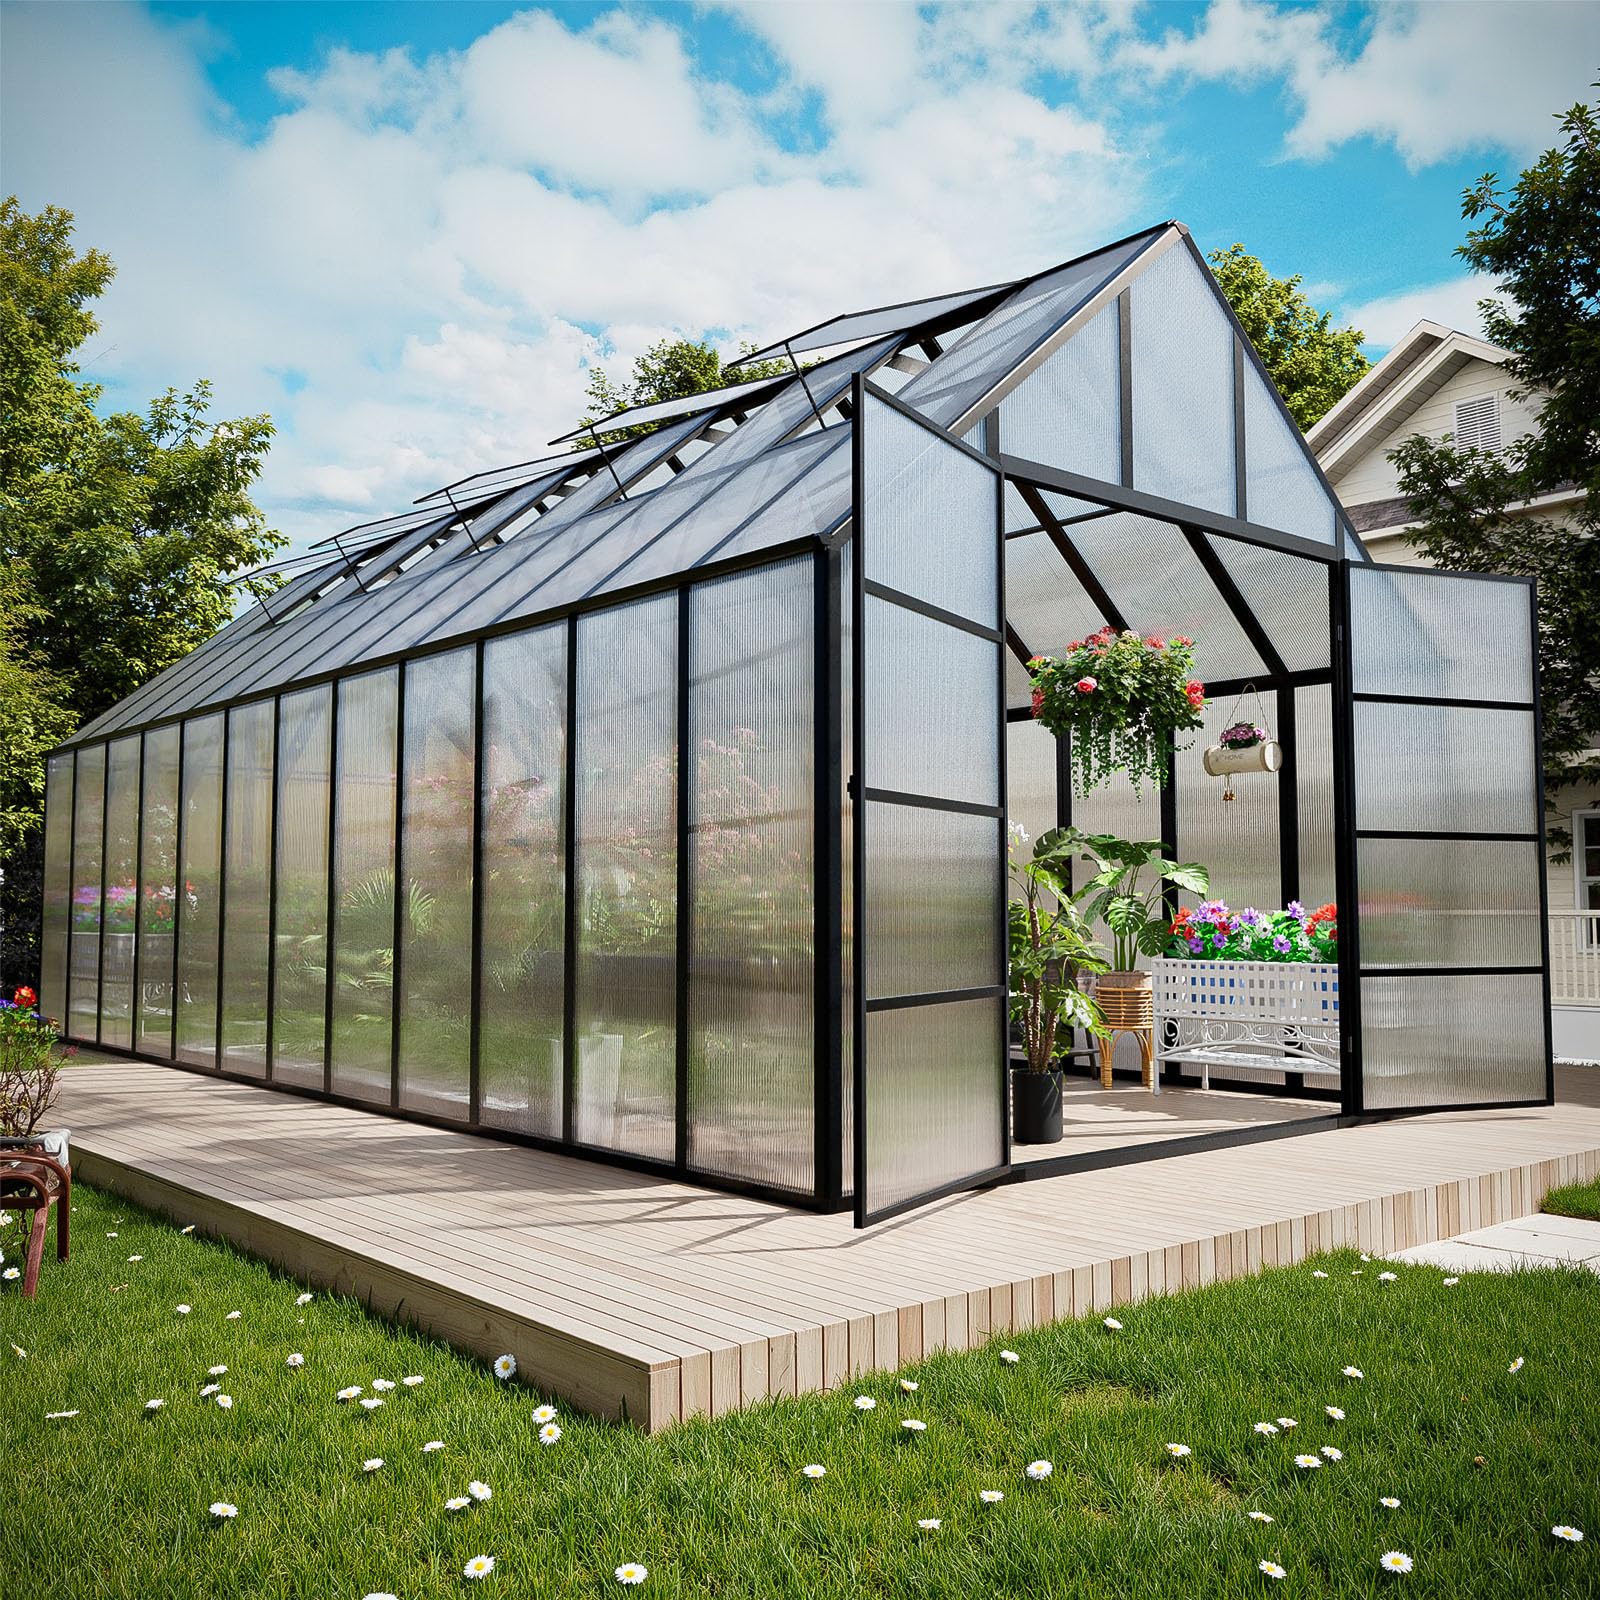
Figure 2.1: Exterior view of the CDCASA 10x24x10 FT Greenhouse.
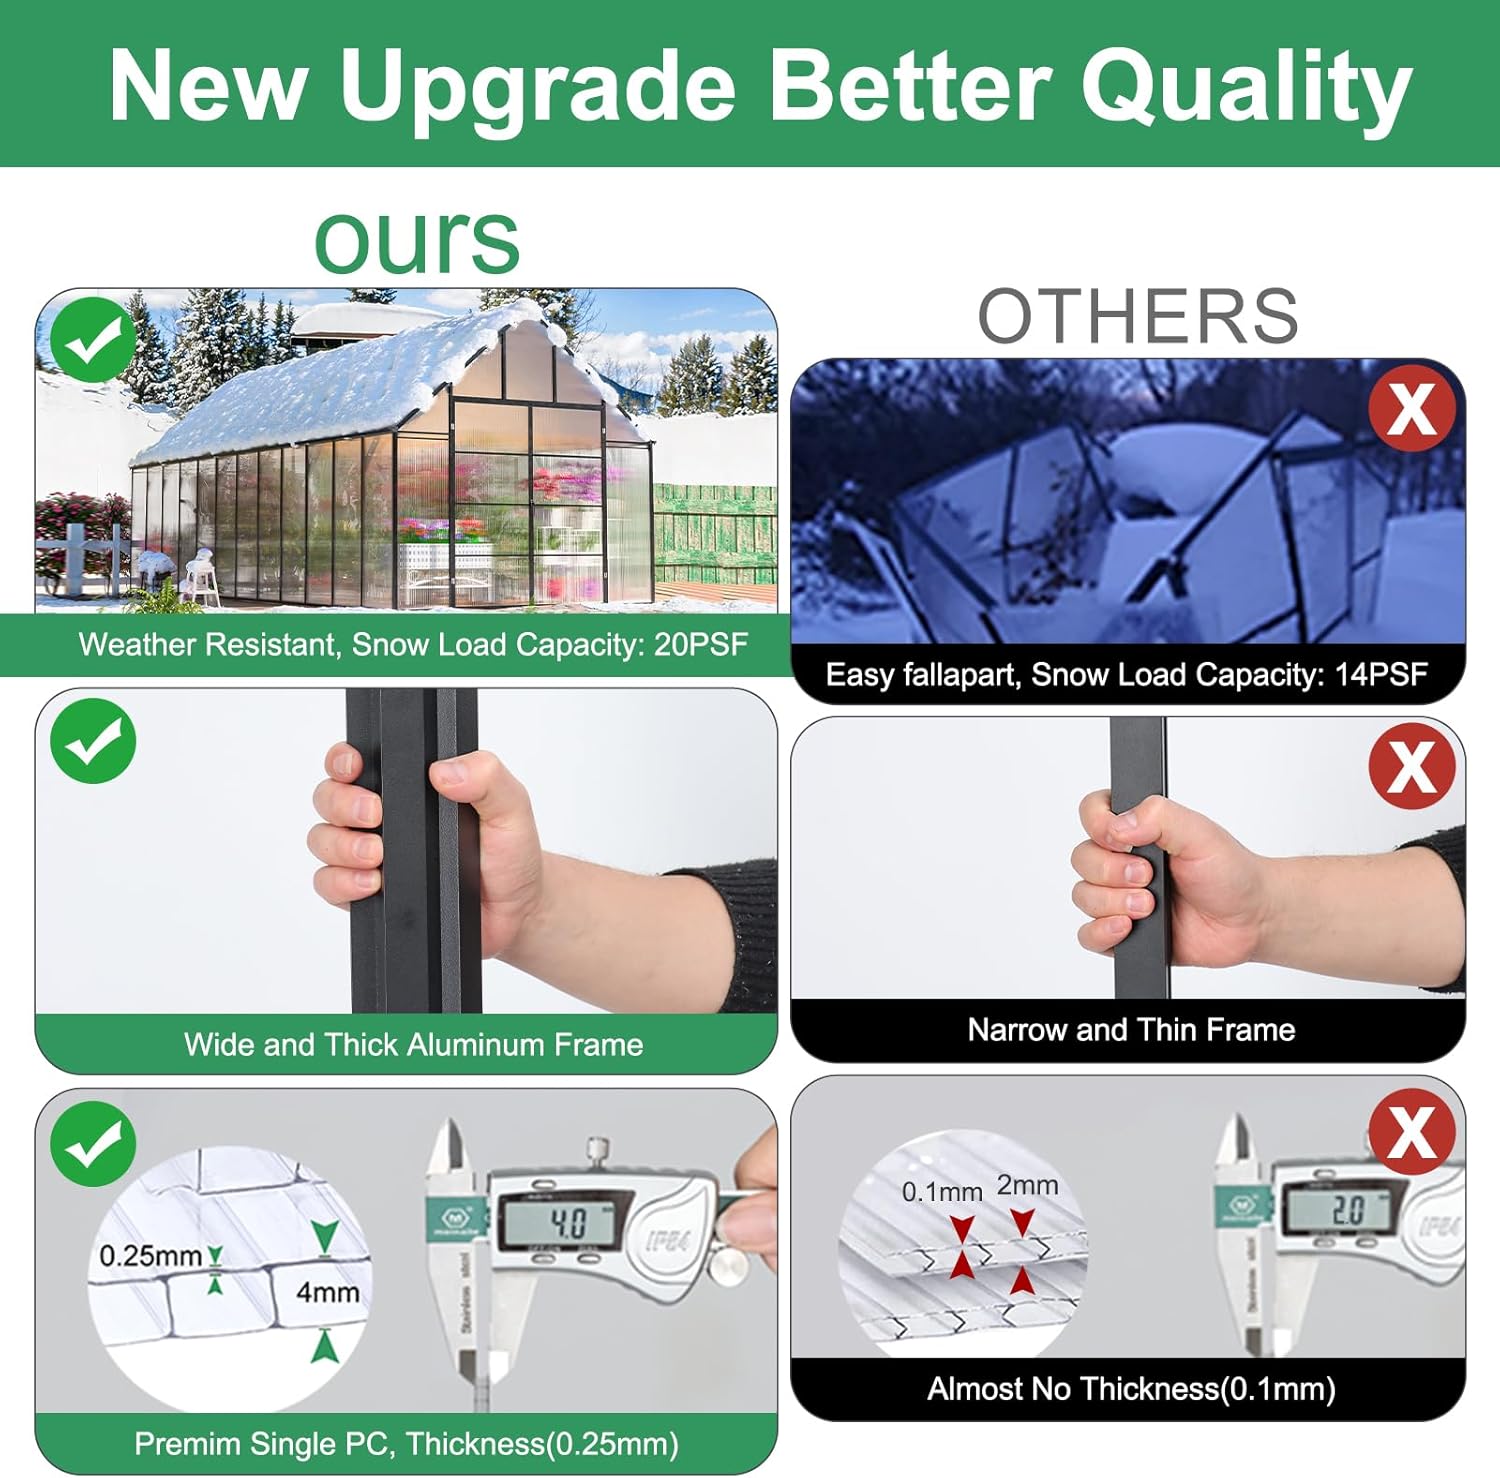
Figure 2.2: Comparison highlighting the durable panels and sturdy frame of the CDCASA greenhouse.

Figure 2.3: Interior view demonstrating the spacious design.
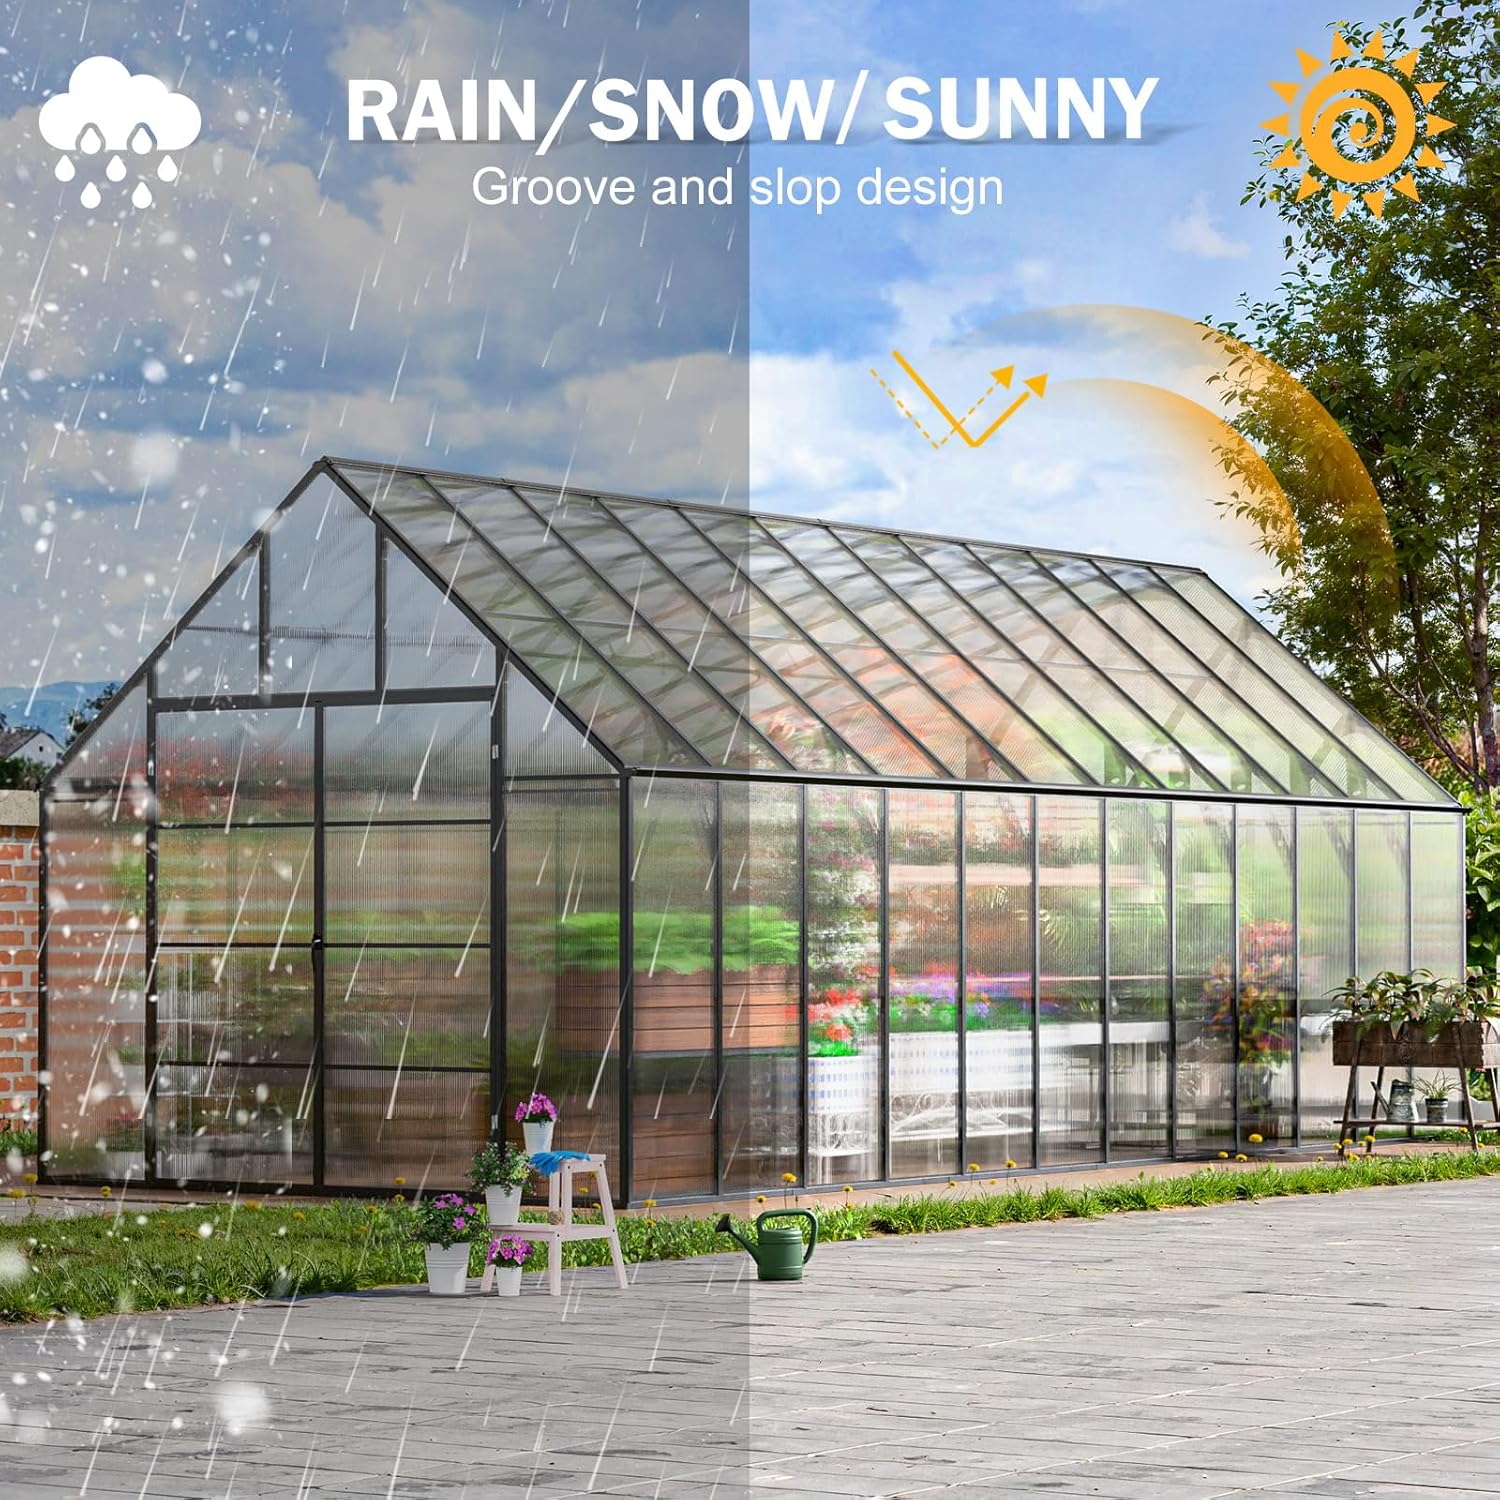
Figure 2.4: Greenhouse designed to withstand various weather conditions.
3. Assembly Instructions
Assembly typically requires 3-4 skilled individuals and can take 4-6 hours. Comprehensive instructions are included with the product.
3.1. Preparation
- Ensure all 6 boxes have been received and unpacked.
- Verify all components against the parts list provided in the separate instruction manual.
- Prepare a level foundation. The base feet can be buried in soil/concrete or secured to a board.
- Recommended tools: Powered screwdriver with Allen Key bits, 10-foot ladder, slim 10mm crescent wrench, 10mm ratchet nut driver.
3.2. Frame Assembly
The greenhouse utilizes an updated Quick Connect system for faster assembly. Components snap together with a push and locking screw.

Figure 3.1: Illustration of the Quick Connect aluminum connectors.
Video 3.1: General assembly overview for the CDCASA Polycarbonate Greenhouse.
3.3. Panel Installation
Carefully insert the 4mm twin-wall polycarbonate panels into the frame channels. Ensure they are seated correctly to provide structural integrity and weather resistance.

Figure 3.2: Visual guide for frame and panel assembly.
3.4. Door and Window Installation
Install the swing door and the 5 adjustable window vents according to the detailed instructions. Ensure door handles are securely attached for proper closure.
Video 3.2: Guide for installing the greenhouse doors.
Video 3.3: Guide for installing the greenhouse windows.

Figure 3.3: Details of adjustable roof vent, gutter system, and door handle.
3.5. Securing the Greenhouse
For extra stability, the base feet can be buried in soil or concrete, or secured to a board using matching screws. This enhances resistance to snow and wind.

Figure 3.4: Methods for securing the greenhouse against wind.
4. Operating Instructions
4.1. Ventilation
The greenhouse is equipped with 5 adjustable roof vents. Open these vents to regulate temperature and humidity, providing fresh air circulation for your plants. Adjust the angle of the vents based on external weather conditions and internal temperature requirements.
4.2. Access
The swing door provides easy access to the greenhouse interior. Ensure the snap-on door handles are engaged to keep the door securely closed when not in use, protecting plants from external elements.
5. Maintenance
- Cleaning: Regularly clean the polycarbonate panels with mild soap and water to maintain light transmission. Avoid abrasive cleaners.
- Frame Inspection: Periodically check the aluminum frame for any signs of damage or loose connections. Tighten screws as needed.
- Drainage System: Ensure the rain gutters are clear of debris to allow for effective water drainage.
- Panel Integrity: Inspect panels for cracks or damage, especially after severe weather. Replace damaged panels promptly to maintain the greenhouse environment.
- Door and Window Mechanisms: Lubricate hinges and latches annually to ensure smooth operation.
6. Troubleshooting
- Greenhouse Instability: Ensure the base is properly anchored. Re-check all frame connections for tightness. Consider additional anchoring methods if in a high-wind area.
- Water Leakage: Inspect panel seals and ensure panels are fully seated in their channels. Check for blockages in the gutter system.
- Difficulty with Assembly: Refer to the detailed instruction manual and video guides. Ensure all parts are correctly oriented before tightening. Contact customer support if issues persist.
- Poor Ventilation: Ensure all 5 roof vents are functioning correctly and are opened to appropriate angles. Consider additional passive or active ventilation solutions if needed.
7. Specifications
| Feature | Detail |
|---|---|
| Model Number | Y8L046-1024-LL |
| Brand | CDCASA |
| Product Dimensions (L x W x H) | 296.6" x 123" x 119" (10x24x10 FT) |
| Cover Material | 4mm Twin-wall Polycarbonate (PC) |
| Frame Material | Thicker Aluminum |
| Number of Doors | 2 (Swing Door) |
| Number of Vents | 5 (Adjustable Roof Vents) |
| Snow Load Capacity | Up to 20 PSF |
| Light Transmission | 70% |
| UV Protection | Blocks over 99.9% of harmful UV rays |
| Indoor/Outdoor Usage | Outdoor |
| Special Features | Heavy Duty, Quick Connect Assembly, Rain Gutters |
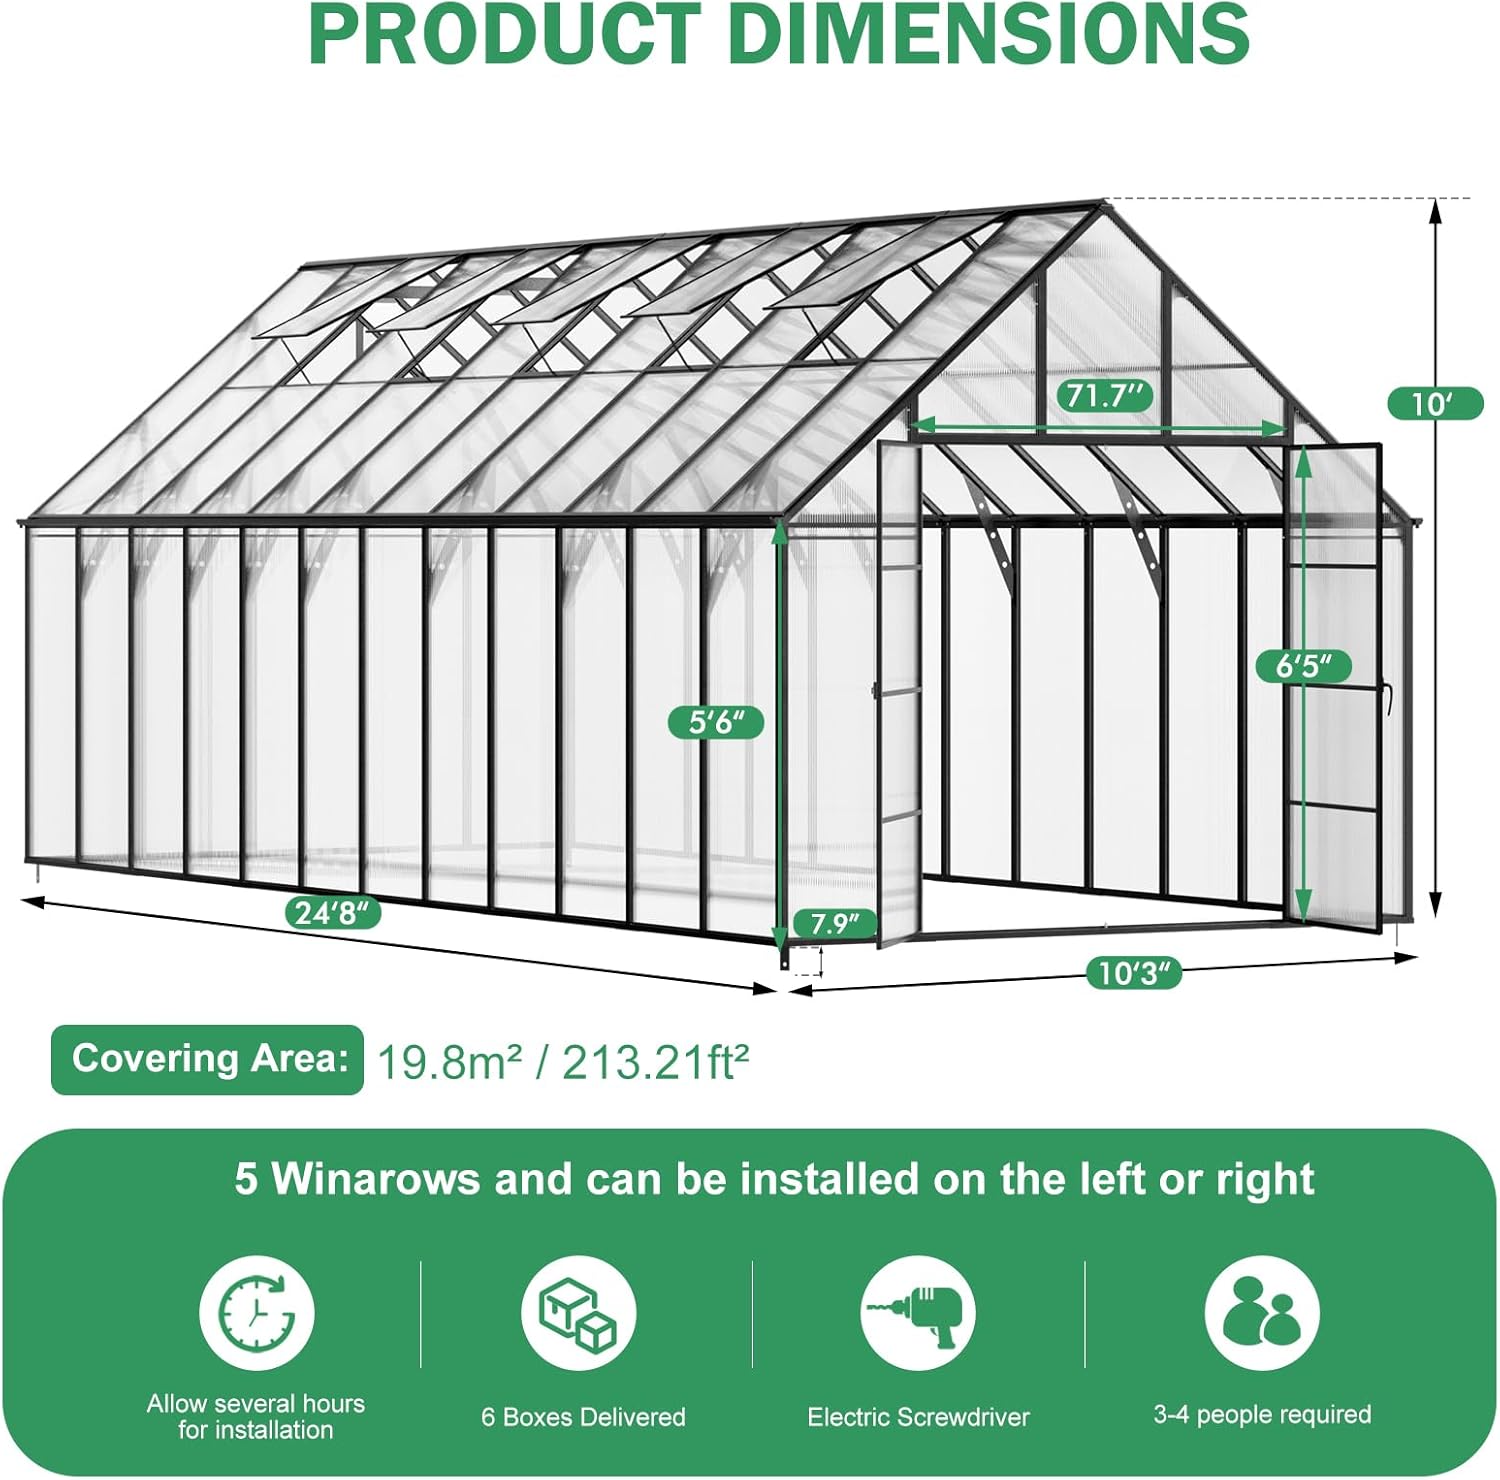
Figure 7.1: Detailed dimensions of the greenhouse.
8. Warranty and Support
For warranty information, please refer to the documentation included with your purchase or contact CDCASA customer support. If you require assistance with assembly, parts, or have any questions regarding your greenhouse, please reach out to the manufacturer's customer service. Additional video guides and support resources may be available online.