1. Introduction
This manual provides detailed instructions for the installation, operation, and maintenance of your SCS Sentinel HCN0082 Outdoor Programmable Electronic Timer Plug. This device is designed to automate the switching ON and OFF of electrical appliances, helping to manage energy consumption efficiently. Please read this manual thoroughly before using the product to ensure safe and correct operation.
Safety Information
- Ensure the timer is correctly installed and connected to a suitable power source (230V).
- Do not exceed the maximum load capacity of 16A or 3600W.
- This product is designed for outdoor use but should be protected from direct heavy rain or immersion in water.
- Do not open or attempt to repair the device yourself. Refer all servicing to qualified personnel.
- Keep out of reach of children.
2. Product Overview
The SCS Sentinel HCN0082 is an electronic timer plug featuring a clear digital display and intuitive buttons for programming. It is housed in a robust plastic casing suitable for outdoor environments.
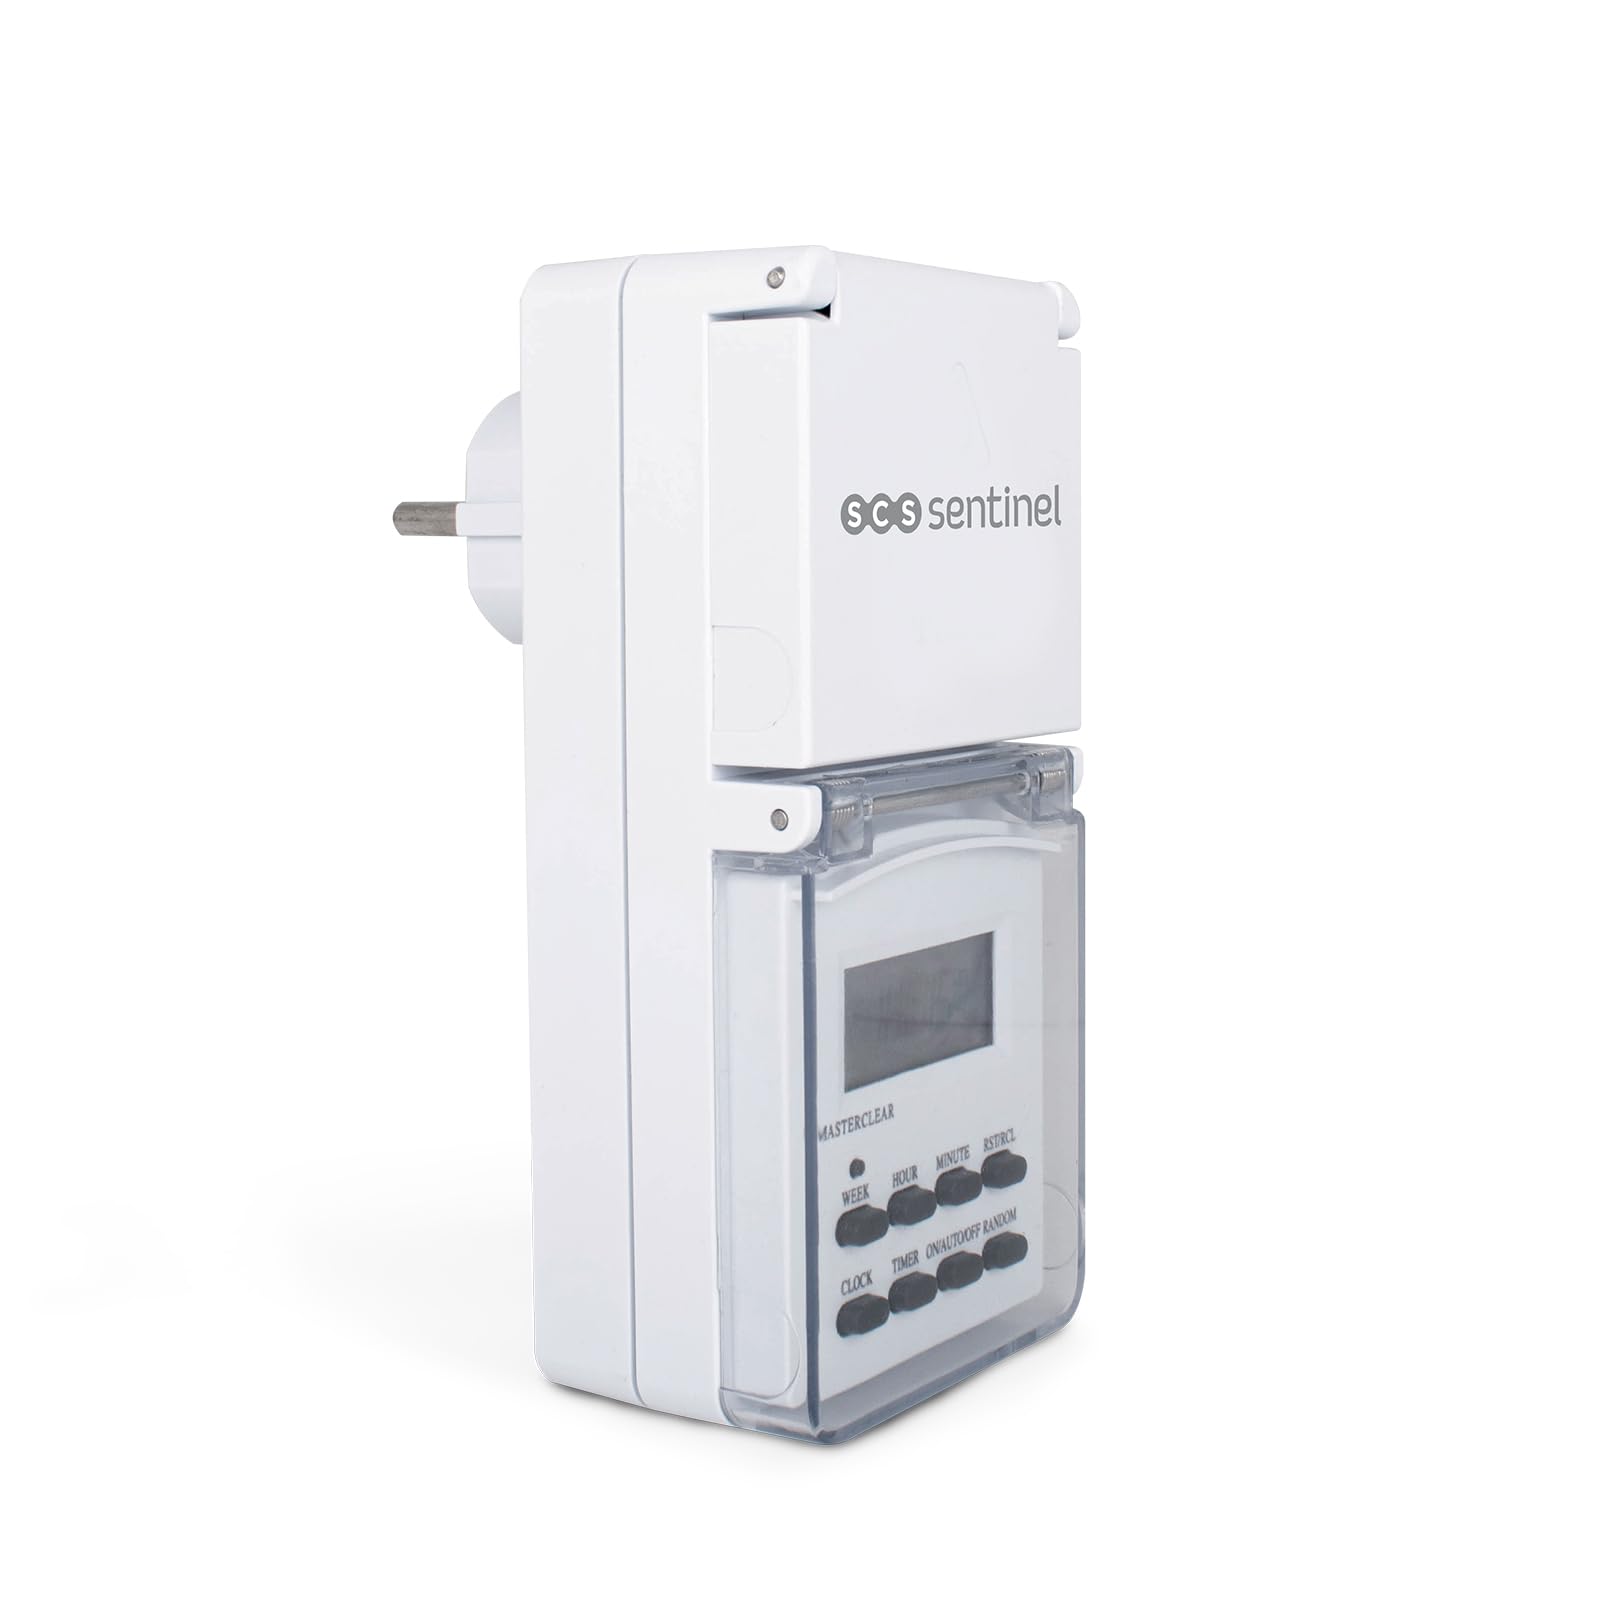
Figure 2.1: Front view of the SCS Sentinel HCN0082 timer plug, showing the digital display and control buttons. The protective cover is closed.
Components and Controls
- Digital Display: Shows current time, day, and programming status.
- Buttons:
- WEEK: Selects the day(s) of the week for programming.
- HOUR: Adjusts the hour.
- MINUTE: Adjusts the minute.
- RST/RCL: Reset/Recall button.
- CLOCK: Enters clock setting mode.
- TIMER: Enters program setting mode.
- ON/AUTO/OFF: Selects operating mode (Always ON, Automatic, Always OFF).
- RANDOM: Activates/deactivates random function.
- Protective Cover: A hinged cover protects the display and buttons from outdoor elements.
- Socket: The output socket for connecting an appliance.
- Plug: The input plug for connecting to a power outlet.

Figure 2.2: Side view of the timer plug, illustrating the protective cover for the output socket in an open position, revealing the socket.

Figure 2.3: Back view of the timer plug, showing the input plug designed for connection to a wall outlet.
3. Setup
3.1 Initial Charging and Reset
- Before first use, plug the timer into a live electrical outlet for at least 14 hours to charge the internal battery. This battery maintains your settings during power outages or when the timer is unplugged.
- After charging, use a pointed object (like a pen tip) to press the RST/RCL button to clear all previous settings and reset the unit. The display will show "0:00".
3.2 Setting Current Time and Day
- Press and hold the CLOCK button.
- While holding CLOCK, press the WEEK button repeatedly until the correct day of the week is displayed.
- While holding CLOCK, press the HOUR button repeatedly until the correct hour is displayed.
- While holding CLOCK, press the MINUTE button repeatedly until the correct minute is displayed.
- Release the CLOCK button. The current time and day are now set.
4. Operating Instructions
The timer allows for up to 7 programmable ON/OFF cycles per day, with various day combinations.

Figure 4.1: The timer plug displayed alongside its instruction manual, illustrating the compact design and the detailed guide for programming.
4.1 Programming ON/OFF Cycles
- Press the TIMER button once. The display will show "1 ON" (first ON program).
- Press WEEK to select the desired day(s) for this program. Options include individual days, weekdays, weekends, or all days.
- Press HOUR to set the desired hour for the "ON" time.
- Press MINUTE to set the desired minute for the "ON" time.
- Press TIMER again. The display will show "1 OFF" (first OFF program).
- Repeat steps 2-4 to set the desired day(s), hour, and minute for the "OFF" time.
- Continue pressing TIMER to cycle through and set up to 7 ON/OFF programs. Each program requires both an ON and an OFF setting.
- After setting all desired programs, press the CLOCK button to return to the current time display.
4.2 Manual Override (ON/AUTO/OFF)
Press the ON/AUTO/OFF button to cycle through the operating modes:
- ON: The connected appliance will remain continuously ON, overriding all programs.
- AUTO: The timer will operate according to the programmed ON/OFF cycles. This is the standard operating mode.
- OFF: The connected appliance will remain continuously OFF, overriding all programs.
4.3 Random Function
The random function can be used to simulate presence by turning the connected appliance ON and OFF at irregular intervals within a set period.
- Press the RANDOM button. The display will show "R" or "RANDOM" to indicate activation.
- When activated, the timer will turn ON and OFF randomly between 6 PM and 6 AM, with delays ranging from 10 to 31 minutes.
- Press RANDOM again to deactivate this function.
4.4 12/24 Hour Mode
To switch between 12-hour (AM/PM) and 24-hour time display:
- Press and hold the CLOCK button, then press the TIMER button. The display will toggle between 12-hour and 24-hour format.
4.5 Summer Time Adjustment
To adjust for daylight saving time (summer time):
- Press and hold the CLOCK button, then press the ON/AUTO/OFF button simultaneously. The display will show "S" and the time will advance by one hour.
- Repeat the action to revert to standard time.
5. Maintenance
5.1 Cleaning
- Always unplug the timer from the power outlet before cleaning.
- Wipe the exterior with a soft, damp cloth. Do not use abrasive cleaners, solvents, or immerse the device in water.
- Ensure the protective covers for the display and socket are clean and free of debris to maintain their sealing properties.
5.2 Storage
- When not in use for extended periods, store the timer in a cool, dry place, away from direct sunlight and extreme temperatures.
- It is recommended to fully charge the internal battery periodically if stored for a long time to maintain its lifespan.
6. Troubleshooting
| Problem | Possible Cause | Solution |
|---|---|---|
| Display is blank or dim. | Internal battery is low or depleted. | Plug the timer into a live outlet for at least 14 hours to charge the battery. |
| Appliance does not turn ON/OFF as programmed. |
|
|
| Timer settings are lost after unplugging. | Internal battery is not holding charge. | Ensure initial charging was sufficient. If the problem persists, the internal battery may need replacement (contact support). |
| Buttons are unresponsive. | Temporary software glitch or unit freeze. | Press the RST/RCL button to perform a full reset. You will need to re-program all settings. |
7. Specifications
| Model Number | HCN0082 |
| Brand | SCS Sentinel |
| Voltage | 230V (Standard European) |
| Maximum Load | 16A / 3600W |
| Material | Plastic |
| Dimensions (L x W x H) | 16.5 x 16 x 7.5 cm |
| Weight | 200 g |
| Number of Programs | 7 ON/OFF cycles per day |
| Usage Environment | Outdoor (with protective cover) |
8. Warranty & Support
8.1 Warranty Information
The SCS Sentinel HCN0082 Outdoor Programmable Electronic Timer Plug comes with a 2-year warranty, ensuring the reliability of this innovative technical product. This warranty covers manufacturing defects and ensures the product is easy to install and use as intended.

Figure 8.1: Product packaging for the SCS Sentinel HCN0082, indicating key features including a 2-year warranty and suitability for outdoor use.
8.2 Customer Support
For any questions, technical assistance, or warranty claims, please contact SCS Sentinel customer support. Refer to the product packaging or the official SCS Sentinel website for contact details.
Please retain your proof of purchase for warranty purposes.


