
1. Introduction
Thank you for choosing the Masko 3L Brake Fluid Bleeder Kit. This manual provides essential information for the safe and effective operation, maintenance, and troubleshooting of your new brake fluid bleeder kit. Please read this manual thoroughly before use and keep it for future reference.
This kit is designed for single-person operation, making brake fluid changes on disc and drum brake systems straightforward and efficient. It includes a manual pump, a 3L reservoir for new fluid, and a 1L waste fluid collection bottle.
2. Safety Instructions
Always observe the following safety precautions when using the brake fluid bleeder kit:
- Wear appropriate personal protective equipment (PPE), including safety glasses and gloves, to protect against brake fluid contact.
- Brake fluid is corrosive and can damage paintwork. Immediately wipe off any spills and dispose of contaminated materials properly.
- Do not mix different types of brake fluid unless specified by the vehicle manufacturer.
- Ensure the vehicle is securely supported on a level surface using jack stands before working on the brake system.
- Never operate the vehicle with a compromised brake system. Always test brakes thoroughly in a safe area after bleeding.
- Keep out of reach of children and pets.
- Dispose of old brake fluid responsibly according to local environmental regulations.
- Do not exceed the maximum working pressure of 70 PSI (5 bar). Monitor the integrated pressure gauge carefully.
3. Package Contents
Verify that all items are present and undamaged:
- 1x Masko 3L Brake Fluid Bleeder Kit (main reservoir unit)
- 1x 1L Waste Fluid Collection Bottle with chain
- 1x E20 Adapter (43 mm/1.7 mm)
- 1x Transparent Hose (100 cm)
- 1x Funnel
- 1x Pair of Work Gloves
- 1x Wrench

Image 1: Overview of the Masko 3L Brake Fluid Bleeder Kit and its included accessories.
4. Setup Instructions
- Prepare the Vehicle: Park the vehicle on a level surface and engage the parking brake. Ensure the engine is off and cool. Lift the vehicle using a jack and secure it with jack stands. Remove the wheels to access the brake calipers/cylinders.
- Access Master Cylinder: Locate the brake fluid reservoir under the hood. Clean the area around the cap to prevent contaminants from entering the system. Remove the reservoir cap.
- Connect the Bleeder Kit:
- Select the appropriate adapter for your vehicle's master cylinder reservoir. The E20 adapter (43mm/1.7mm) is included for most European vehicles.
- Screw the selected adapter onto the master cylinder reservoir.
- Connect the main hose from the 3L bleeder unit to the adapter. Ensure a secure, airtight connection.

Image 2: The main bleeder unit with the funnel for filling and a detailed view of the pump mechanism.
- Fill the Reservoir: Use the provided funnel to fill the 3L bleeder unit's reservoir with new, clean brake fluid of the correct type for your vehicle. Do not overfill.
- Prepare Waste Bottle: Attach the transparent hose to the 1L waste fluid collection bottle. Use the chain to hang the waste bottle securely near the brake caliper/cylinder you will be bleeding first.

Image 3: The 1L waste fluid collection bottle with its transparent hose and hanging chain, shown in use.
5. Operating Instructions (Brake Bleeding Procedure)
Follow the vehicle manufacturer's recommended bleeding sequence (e.g., furthest wheel from master cylinder first). The typical sequence is: Rear Right, Rear Left, Front Right, Front Left.
- Build Pressure: Use the manual pump on the 3L bleeder unit to build pressure in the system. Observe the integrated pressure gauge. The working pressure range is 30 PSI (2 bar) to 70 PSI (5 bar). Do not exceed 70 PSI (5 bar).
- Connect to Bleed Nipple: Attach the transparent hose from the waste bottle to the bleed nipple of the first brake caliper/cylinder. Ensure the hose fits snugly.
- Open Bleed Nipple: Using the provided wrench, carefully open the bleed nipple by turning it counter-clockwise. Brake fluid will begin to flow into the waste bottle.
- Monitor Fluid Flow: Watch the fluid flowing through the transparent hose. Air bubbles will be visible. Continue bleeding until the fluid runs clear and is free of air bubbles.
- Close Bleed Nipple: While fluid is still flowing, tighten the bleed nipple clockwise using the wrench. Do not overtighten.
- Repeat for Other Wheels: Repeat steps 2-5 for each remaining brake caliper/cylinder according to the recommended bleeding sequence.
- Depressurize and Disconnect: Once all brakes are bled, release the pressure from the bleeder unit (consult your vehicle's service manual for specific depressurization steps if needed, typically by slowly unscrewing the adapter from the master cylinder). Disconnect the bleeder unit from the master cylinder.
- Refill Master Cylinder: Top up the vehicle's master cylinder reservoir to the MAX line with new brake fluid. Replace the master cylinder cap.
- Test Brakes: Before driving, pump the brake pedal several times to ensure a firm pedal feel. Slowly drive the vehicle in a safe area to confirm proper brake function.

Image 4: The integrated pressure gauge allows precise monitoring of system pressure during operation.
6. Maintenance
- Cleaning: After each use, thoroughly clean the bleeder unit, hoses, and adapters with a suitable brake cleaner or mild soap and water. Ensure all components are dry before storage.
- Storage: Store the kit in a clean, dry place, away from direct sunlight and extreme temperatures.
- Sealing Ring: Periodically inspect the sealing ring for wear or damage. Replace if necessary to ensure an airtight seal during operation.
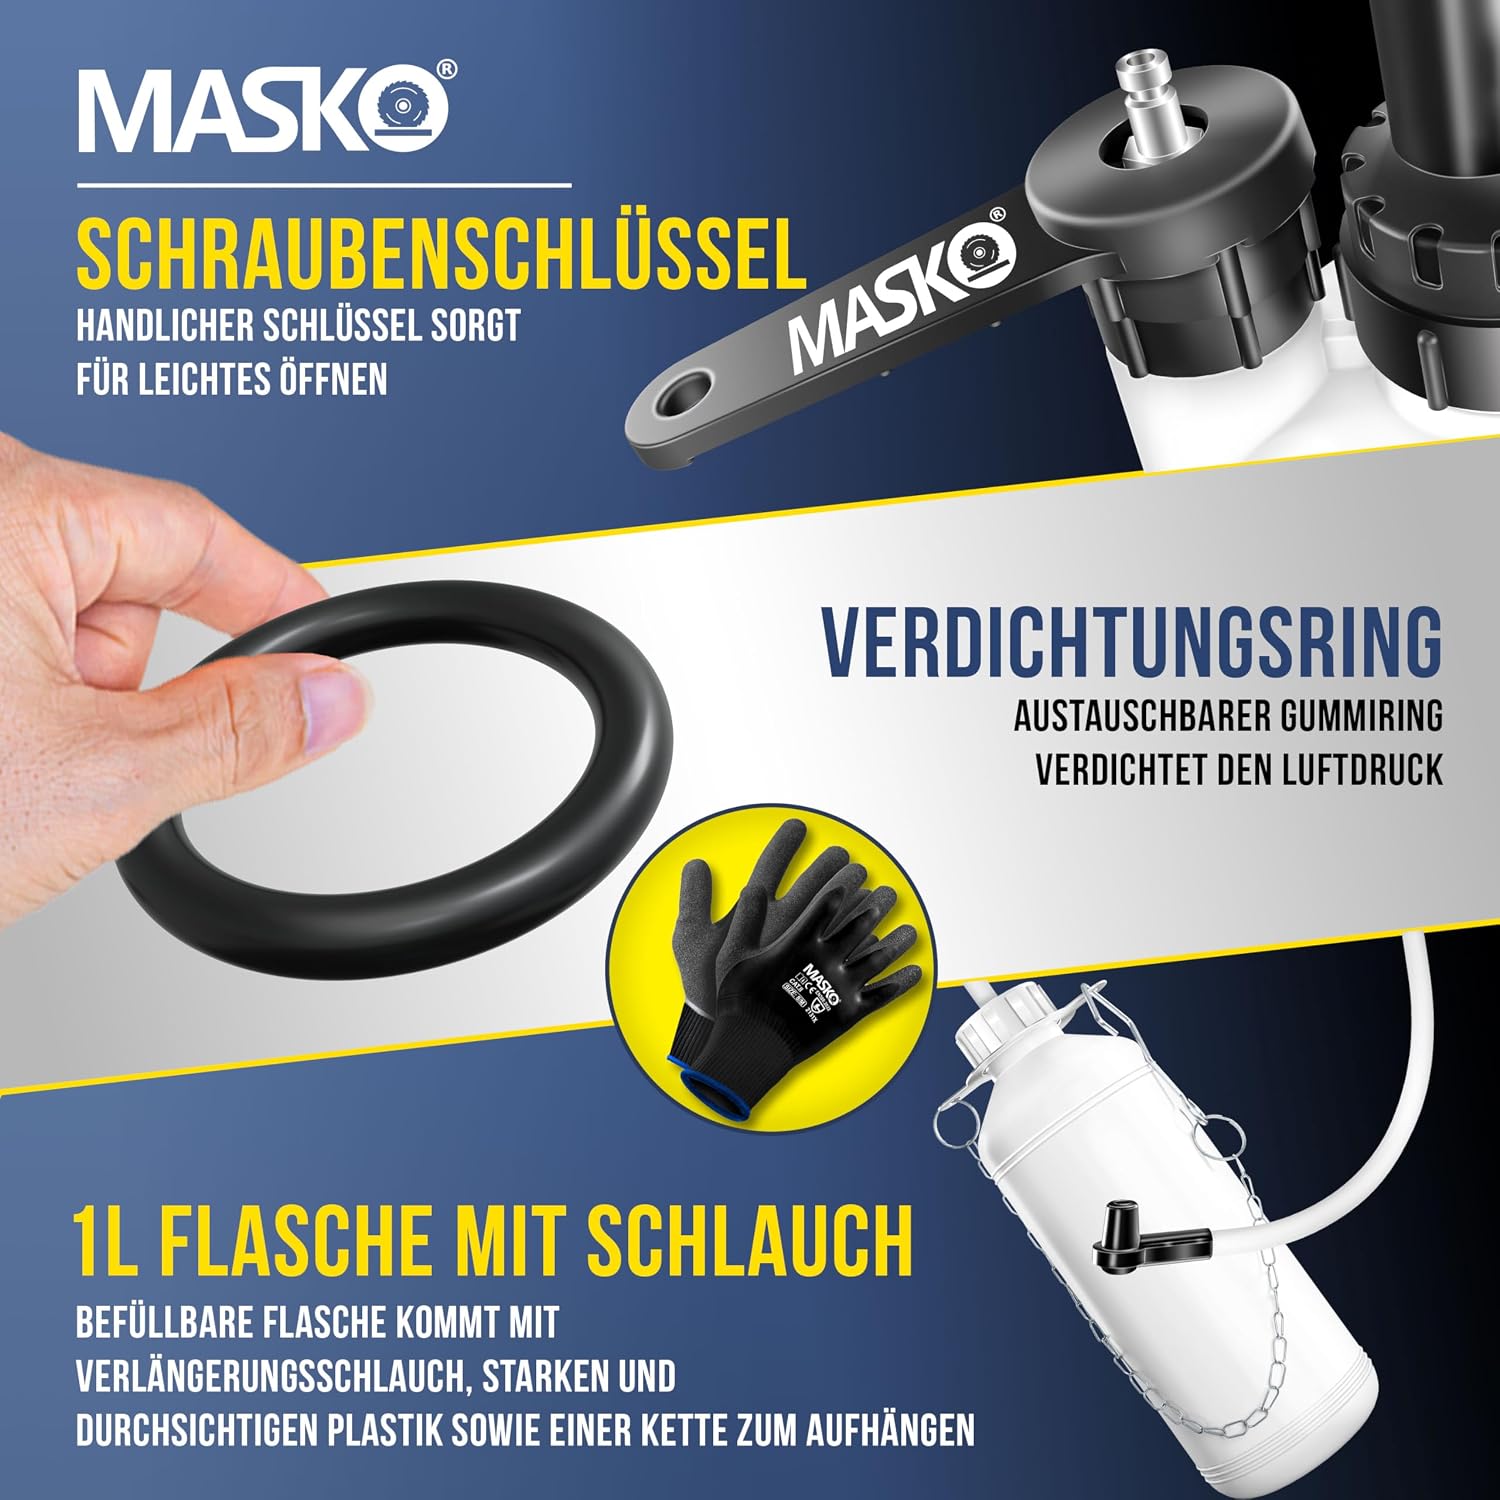
Image 5: The included wrench, a replacement sealing ring, and the 1L waste fluid bottle with its hose.
7. Troubleshooting
| Problem | Possible Cause | Solution |
|---|---|---|
| No pressure builds up in the system. | Loose connections, damaged hose, faulty adapter seal, low fluid in bleeder reservoir. | Check all connections for tightness. Inspect hoses and adapter for damage. Ensure the bleeder reservoir has sufficient fluid. Replace sealing ring if worn. |
| Brake fluid leaks from connections. | Loose connections, damaged sealing ring, incorrect adapter. | Tighten all connections. Inspect and replace the sealing ring if damaged. Ensure the correct adapter is used for your vehicle. |
| Brakes feel spongy after bleeding. | Air still in the system, improper bleeding sequence, low brake fluid in master cylinder. | Repeat the bleeding procedure, ensuring no air bubbles are visible. Verify the correct bleeding sequence for your vehicle. Ensure the master cylinder reservoir is kept full during the process. |
| Pressure gauge not working. | Gauge malfunction, no pressure being built. | Check for pressure build-up by observing fluid flow. If no pressure, refer to "No pressure builds up" solution. If pressure is present but gauge is static, the gauge may be faulty and require professional inspection. |
8. Specifications
| Brand | Masko |
| Model | 3L Brake Fluid Bleeder Kit |
| Main Reservoir Capacity | 3 Liters |
| Waste Bottle Capacity | 1 Liter |
| Maximum Working Pressure | 70 PSI (5 bar) |
| Pressure Gauge Range | 0 - 6 bar (87 PSI) |
| Hose Length | 100 cm (transparent) |
| E20 Adapter Size | 43 mm / 1.7 mm |
| Item Weight | 1.5 Kilograms |
| Dimensions (L x W x H) | 15 cm x 19 cm x 40 cm (Main Unit) |
| Country of Origin | China |

Image 6: Detailed dimensions of the Masko 3L Brake Fluid Bleeder Kit components.
9. Warranty and Support
This product comes with a standard return policy of 30 days for refund or replacement, as per the seller's terms. For specific warranty details, technical support, or to inquire about replacement parts, please contact Masko customer service or the retailer from whom you purchased the product.
Please retain your proof of purchase for any warranty claims.