
Introduction
This manual provides detailed instructions for the installation, operation, and maintenance of your Sunrosa 60" W x 60" H Frameless Tub Shower Door. Please read this manual thoroughly before beginning installation to ensure proper setup and safe use. Keep this manual for future reference.
The Sunrosa frameless tub shower door features 5/16" (8mm) clear SGCC tempered glass, a soft closing system, and premium stainless steel components for durability and a modern aesthetic. It is designed to provide a secure and elegant enclosure for your bathtub.

Figure 1: Sunrosa 60" W x 60" H Frameless Tub Shower Door, Matte Black finish.
Safety Information
Always follow these safety precautions during installation and use:
- Wear appropriate personal protective equipment, including safety glasses and gloves, during installation.
- Handle glass panels with extreme care. Tempered glass, while strong, can shatter if struck at the edges or corners.
- Ensure the installation surface is structurally sound and capable of supporting the weight of the shower door.
- Do not overtighten screws, as this can damage components or glass.
- Keep children and pets away from the installation area.
- If you are unsure about any step, consult a qualified professional.
Components List
Verify that all parts are present before beginning installation. If any parts are missing or damaged, contact customer support.
| Item | Description | Quantity |
|---|---|---|
| Glass Panels | 5/16" (8mm) Clear SGCC Tempered Glass | 2 |
| Sliding Rail | Stainless Steel, Matte Black Finish | 1 |
| Rollers/Pulleys | Stainless Steel, Soft Closing System | Set |
| Handle | Stainless Steel, Matte Black Finish | 1 |
| Wall Profiles/Brackets | Mounting hardware for wall attachment | Set |
| Floor Guide/Threshold | Water containment system | 1 |
| Sealing Strips | Full-length glass seal strips | Set |
| Fasteners & Tools | Screws, anchors, Allen wrench (if applicable) | Set |
Setup and Installation
This section outlines the general steps for installing your Sunrosa tub shower door. Refer to the detailed diagrams and instructions provided with your product packaging for precise measurements and specific hardware usage.
Pre-Installation Checklist:
- Confirm wall spacing is within 57 5/8" - 60" W.
- Ensure the bathtub rim is level and clean.
- Gather all necessary tools (drill, level, tape measure, caulk gun, screwdriver, etc.).
Installation Steps:
- Prepare the Area: Clear the bathtub area. Ensure walls are clean and dry.
- Measure and Mark: Use the provided installation auxiliary part to mark drilling points for the wall profiles. This eliminates the need for a ruler for height measurement.
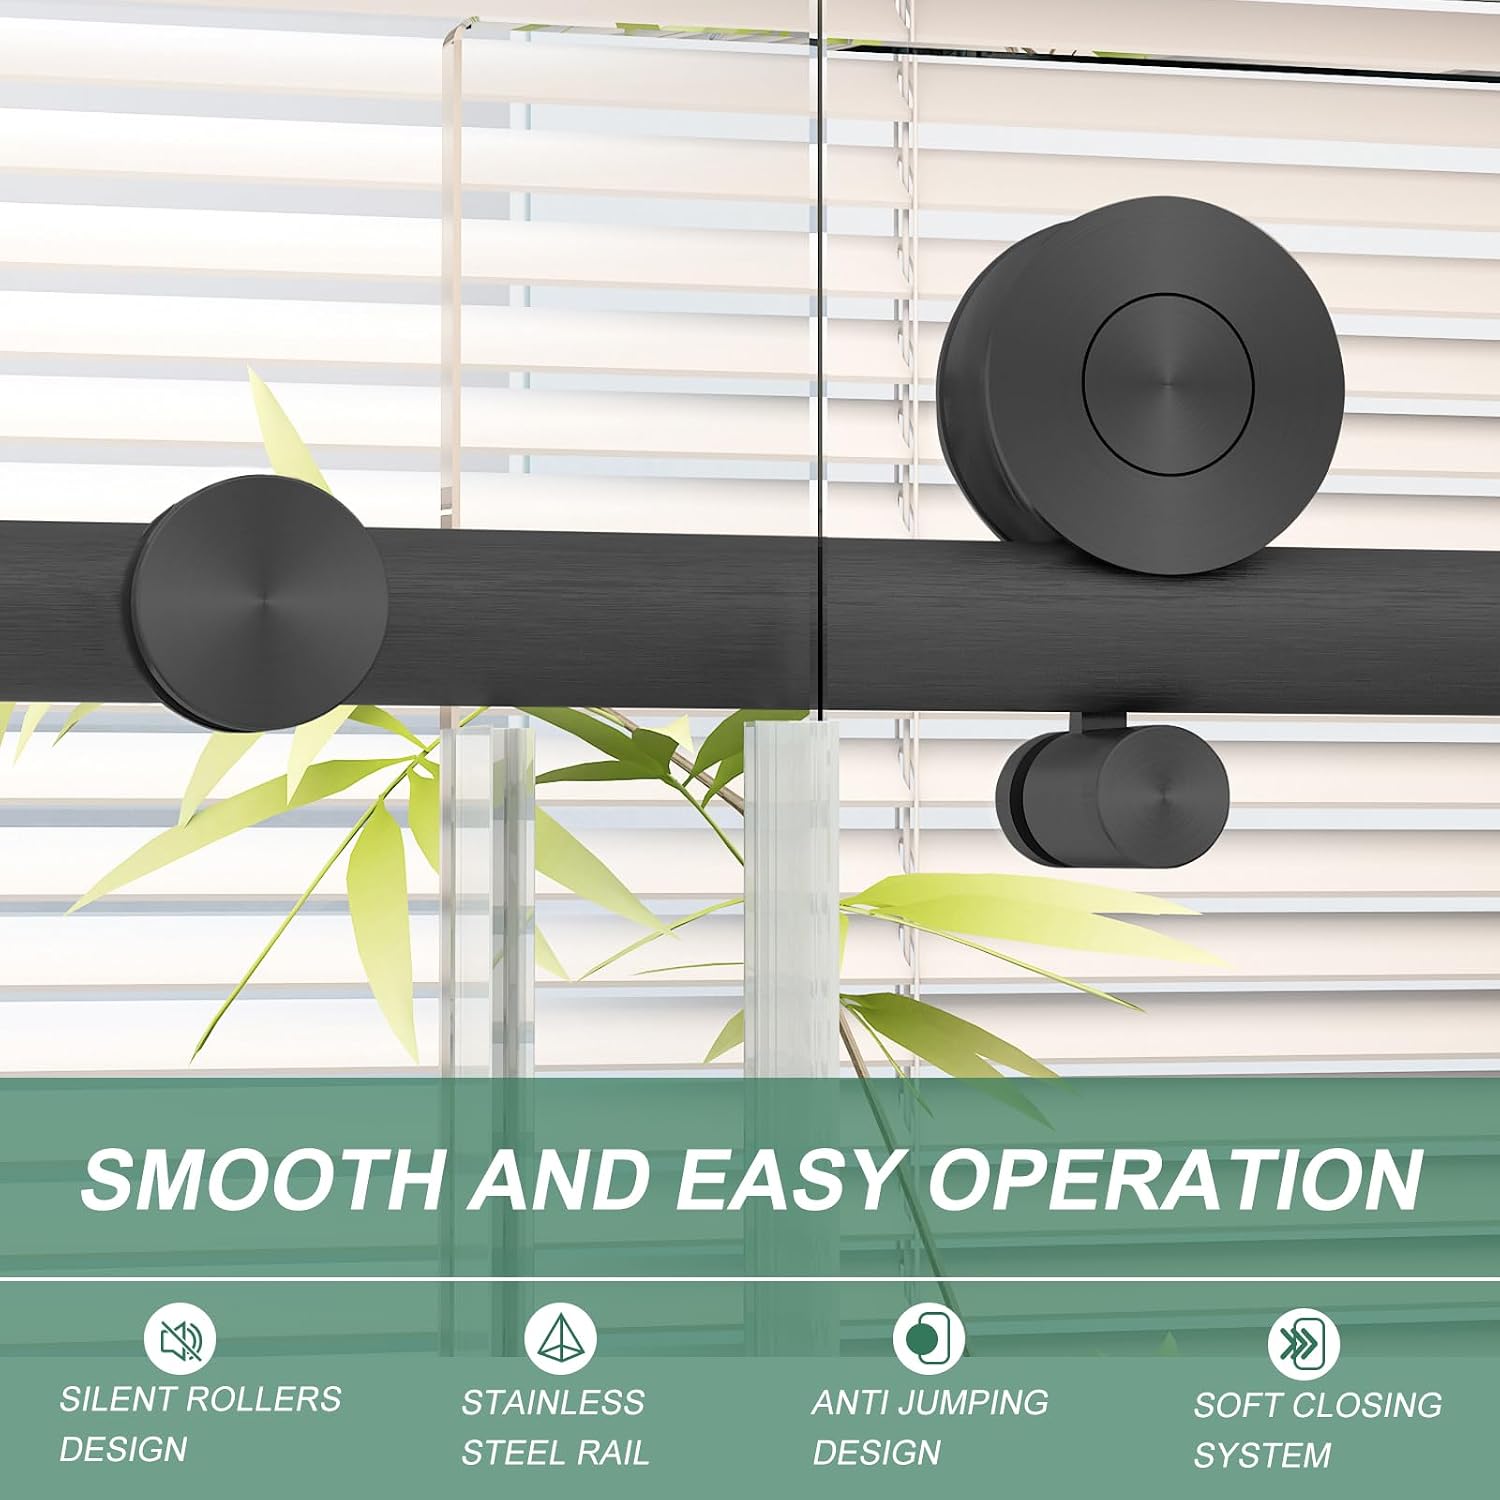
Figure 2: Using the auxiliary part for precise measurement and marking.
- Install Wall Profiles: Drill holes at the marked locations and secure the wall profiles using appropriate anchors and screws. Ensure they are plumb and level.
- Assemble Sliding Rail: Attach the sliding rail to the wall profiles. Ensure it is level and securely fastened.
- Install Rollers: Attach the rollers to the top edge of the glass panels.

Figure 3: Detail of the smooth operating rollers and stainless steel rail.
- Hang Glass Panels: Carefully lift and hang the glass panels onto the sliding rail. Ensure they move smoothly. The design allows for reversible installation for left or right door opening.

Figure 4: Reversible installation allows for flexible door opening direction.
- Install Floor Guide/Threshold: Secure the floor guide or threshold to the bathtub rim. This component is crucial for water containment.
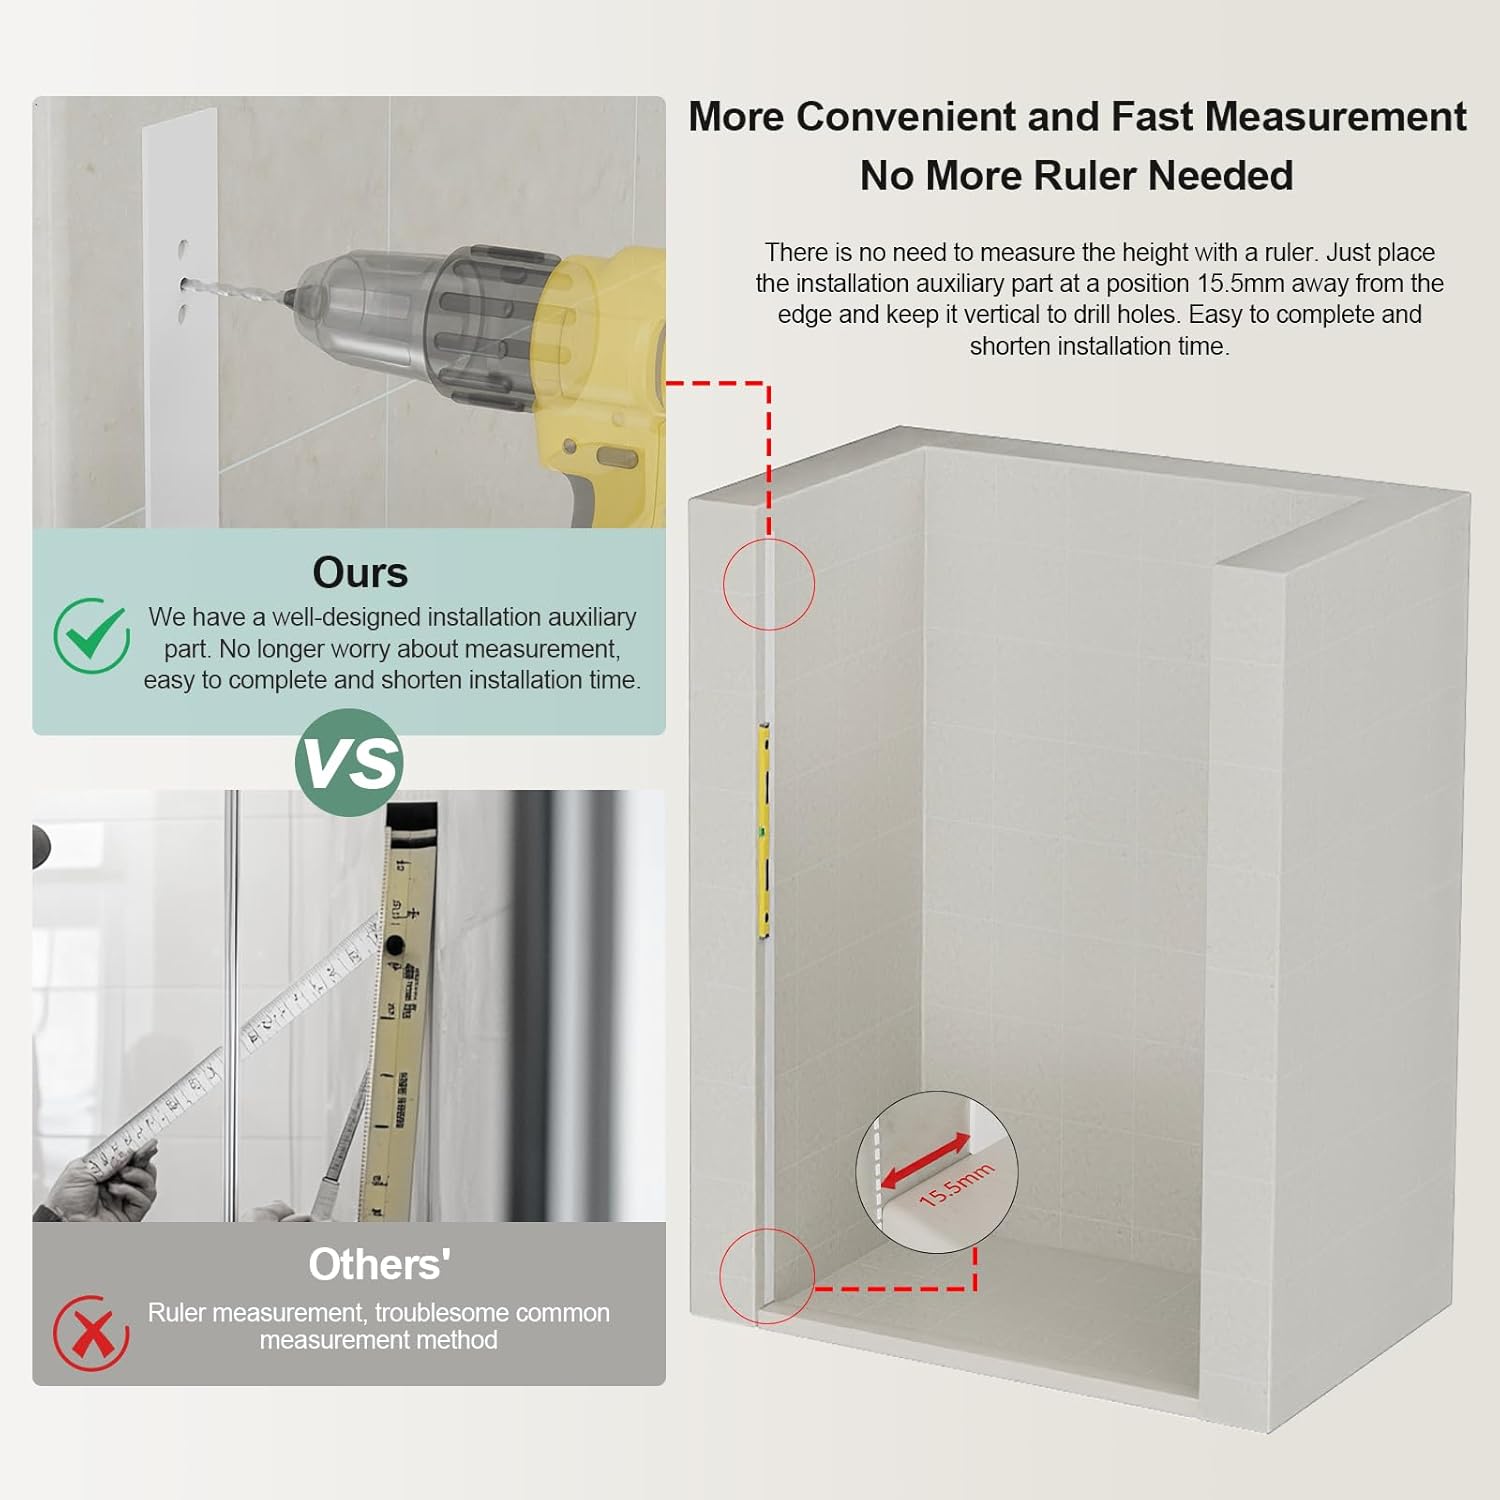
Figure 5: The anti-splash threshold ensures effective water containment.
- Attach Handle: Install the handle onto the designated glass panel.

Figure 6: Ergonomic matte black handle for easy operation.
- Apply Sealing Strips and Caulk: Apply the full-length glass seal strips to the edges of the glass panels where they meet the wall and floor guide. Apply silicone caulk along the exterior seams of the wall profiles and floor guide to ensure a watertight seal. Allow caulk to cure completely before use.
Operating Instructions
Your Sunrosa tub shower door is designed for smooth and effortless operation.
- Opening and Closing: Gently slide the door panel along the top rail using the handle. The soft closing system will ensure a quiet and controlled movement.
- Anti-Jumping Design: The integrated anti-jumping design prevents the door from derailing during normal operation, ensuring safety and stability.
Maintenance
Regular cleaning and maintenance will prolong the life and appearance of your shower door.
- Glass Cleaning: The 5/16" (8mm) tempered glass features a nanocoating for easier cleaning. Use a soft cloth or sponge with mild, non-abrasive glass cleaner. Avoid harsh chemicals, abrasive pads, or scouring powders that can damage the glass or coating.

Figure 7: Nano coating on the glass surface repels water and stains, making cleaning easier.
- Hardware Cleaning: Clean the matte black stainless steel frame and handle with a soft, damp cloth. Dry thoroughly to prevent water spots. Do not use abrasive cleaners or solvents.
- Sealing Strips: Periodically check the sealing strips for wear or damage. Replace if necessary to maintain water containment.
- Rollers and Rail: Keep the sliding rail and rollers free of debris and soap scum to ensure smooth operation. A small amount of silicone lubricant can be applied to the rail if movement becomes stiff.
Troubleshooting
If you encounter issues with your shower door, refer to the following common problems and solutions:
| Problem | Possible Cause | Solution |
|---|---|---|
| Door does not slide smoothly. | Debris in rail, worn rollers, misaligned rail. | Clean the rail. Check rollers for damage and replace if needed. Verify rail alignment with a level. |
| Water leaks from the bottom or sides. | Damaged or improperly installed sealing strips, insufficient caulk, unlevel bathtub rim. | Inspect and re-install or replace sealing strips. Reapply caulk where needed. Ensure bathtub rim is level. |
| Door feels loose or wobbly. | Loose fasteners, improper wall profile installation. | Check and tighten all fasteners. Ensure wall profiles are securely mounted. |
| Glass appears stained or cloudy. | Hard water deposits, improper cleaning. | Clean with a mild glass cleaner. For stubborn hard water stains, use a vinegar solution (diluted) and rinse thoroughly. |
Specifications
- Model: shower door
- Brand: Sunrosa
- Dimensions: 57 5/8" - 60" W x 60" H (Adjustable width)
- Walk-in Opening: 23 5/8" - 26"
- Glass Thickness: 5/16" (8mm)
- Glass Type: SGCC Certified Clear Tempered Glass with Nanocoating
- Material: Stainless Steel (Frame, Handle, Rollers, Rail), Glass
- Finish: Matte Black
- Item Weight: Approximately 121.3 pounds
- Assembly Required: Yes
- Country of Origin: China
- UPC: 665386269054
Warranty and Support
Sunrosa products are manufactured to high-quality standards. For warranty information or support, please refer to the documentation included with your purchase or contact the seller directly.
If you receive a product with an issue, follow these steps:
- Contact the Seller: Navigate to "Your Orders", click "Problem with order", and select "Contact seller".
- Describe the Issue in Detail: Attach images showing the product issue in the message chat and provide a detailed description of the problem.
- Resolve the Issue: The seller will provide a solution, such as complimentary replacement of damaged or missing parts or other appropriate resolutions.

Figure 8: Steps to resolve product issues by contacting the seller.
For additional assistance, you may visit the Sunrosa Store on Amazon.


