
1. Introduction
This manual provides essential information for the proper installation, function, and care of your BuleVina Generator Carburetor. Please read these instructions carefully before proceeding with installation or maintenance to ensure safe and effective use.
2. Product Compatibility
This carburetor is designed for specific generator models. Verify your generator's compatibility before installation.
- Compatible with Predator 4000 and 4375 watt Portable Gas Generators.
- Compatible with Generac 3500, 4000, 3000, GX120, and GX160 models.
- Note: This carburetor may not be compatible with all GX series models. Always cross-reference with your generator's specifications.

Image: The BuleVina carburetor positioned alongside a yellow Predator 4000 watt portable gas generator, illustrating its intended use and compatibility.

Image: The BuleVina carburetor displayed with an orange Predator 4000 watt portable gas generator, confirming its compatibility with various generator colors/models.

Image: The BuleVina carburetor presented alongside a green Predator 4000 watt portable gas generator, further demonstrating its broad compatibility.
3. Setup and Installation
Installation of a carburetor requires mechanical aptitude. If you are unsure about any steps, it is recommended to seek professional assistance.
3.1 Package Contents
- 1 x BuleVina Generator Carburetor
- 1 x Fuel Line
- Important Note: Gaskets are not included with this package and must be purchased separately for proper installation.
3.2 General Installation Steps (Consult your generator's service manual for specific instructions)
- Safety First: Ensure the generator is turned off, cooled down, and disconnected from any fuel source. Disconnect the spark plug wire to prevent accidental starting.
- Drain Fuel: Drain any remaining fuel from the fuel tank and carburetor bowl.
- Remove Air Filter Assembly: Carefully remove the air filter housing and filter element to access the carburetor.
- Disconnect Linkages and Hoses: Disconnect the fuel line, choke linkage, and throttle linkage from the old carburetor. Note their positions for reassembly.
- Remove Old Carburetor: Unbolt the old carburetor from the engine. Be mindful of any gaskets between the carburetor and the engine/intake manifold.
- Install New Carburetor:
- Ensure new gaskets (not included) are properly seated between the engine, carburetor, and air filter housing.
- Mount the new BuleVina carburetor, ensuring it is securely bolted.
- Reconnect the fuel line, choke linkage, and throttle linkage. Double-check that all connections are secure and move freely.
- Reassemble Air Filter: Reinstall the air filter element and housing.
- Refuel and Test: Refill the fuel tank with fresh, appropriate fuel. Reconnect the spark plug wire. Start the generator and check for leaks or abnormal operation. Adjust idle speed if necessary.

Image: The BuleVina carburetor, including the main body, fuel line, and choke lever, as supplied in the package.

Image: A detailed view of the carburetor's fuel inlet, highlighting the brass fitting where the fuel line connects.
4. Operating Principles
The carburetor's primary function is to mix air and fuel in the correct ratio for combustion in the engine. It controls the engine's speed and power output based on throttle input.
- Choke: Used for cold starts, enriching the fuel mixture.
- Throttle: Regulates the amount of air-fuel mixture entering the engine, controlling engine speed.
- Float Bowl: Stores a small reservoir of fuel, maintained by a float valve.
- Jets: Precisely meter fuel into the airflow.
5. Maintenance
Regular maintenance ensures optimal performance and longevity of your carburetor.
- Fuel Quality: Always use fresh, clean fuel. Stale or contaminated fuel is a common cause of carburetor issues. Consider using a fuel stabilizer if the generator will be stored for extended periods.
- Fuel Filter: Ensure your generator's fuel filter is clean and replaced regularly to prevent debris from entering the carburetor.
- Cleaning: If performance issues arise, the carburetor may need cleaning. This involves disassembling the carburetor, cleaning jets and passages with carburetor cleaner, and replacing any worn gaskets or O-rings.
- Storage: Before long-term storage, run the generator until it runs out of fuel, or drain the fuel system completely to prevent fuel varnish buildup in the carburetor.
6. Troubleshooting Common Issues
Here are some common carburetor-related issues and potential solutions:
| Issue | Possible Cause | Solution |
|---|---|---|
| Engine won't start | Clogged fuel jet, no fuel, stale fuel, faulty choke. | Check fuel level and freshness. Clean carburetor jets. Ensure choke operates correctly. |
| Engine runs rough/surges | Partially clogged jet, air leak, incorrect fuel mixture. | Clean carburetor. Check for loose connections or damaged gaskets. |
| Fuel leaks | Damaged float, worn O-rings/gaskets, loose fuel line. | Inspect float and float valve. Replace gaskets/O-rings. Tighten fuel line connections. |
| Lack of power | Clogged main jet, restricted air filter. | Clean main jet. Replace or clean air filter. |
If troubleshooting steps do not resolve the issue, consult a qualified service technician.
7. Specifications
Key dimensions and features of the BuleVina Generator Carburetor:
- Mounting Hole Center-to-Center: 1.69 inches (43mm)
- Core Hole Diameter: 3/4 inch (19mm)
- Choke Hole Diameter: 15/16 inch (24mm)
- Item Weight: Approximately 8.1 ounces
- Product Dimensions: Approximately 3.54 x 2.55 x 3.54 inches
- Special Features: Fuel Efficient design

Image: A detailed diagram illustrating the critical dimensions of the carburetor, such as the 1.69-inch (43mm) mounting hole spacing and 0.74-inch (19mm) core hole diameter.
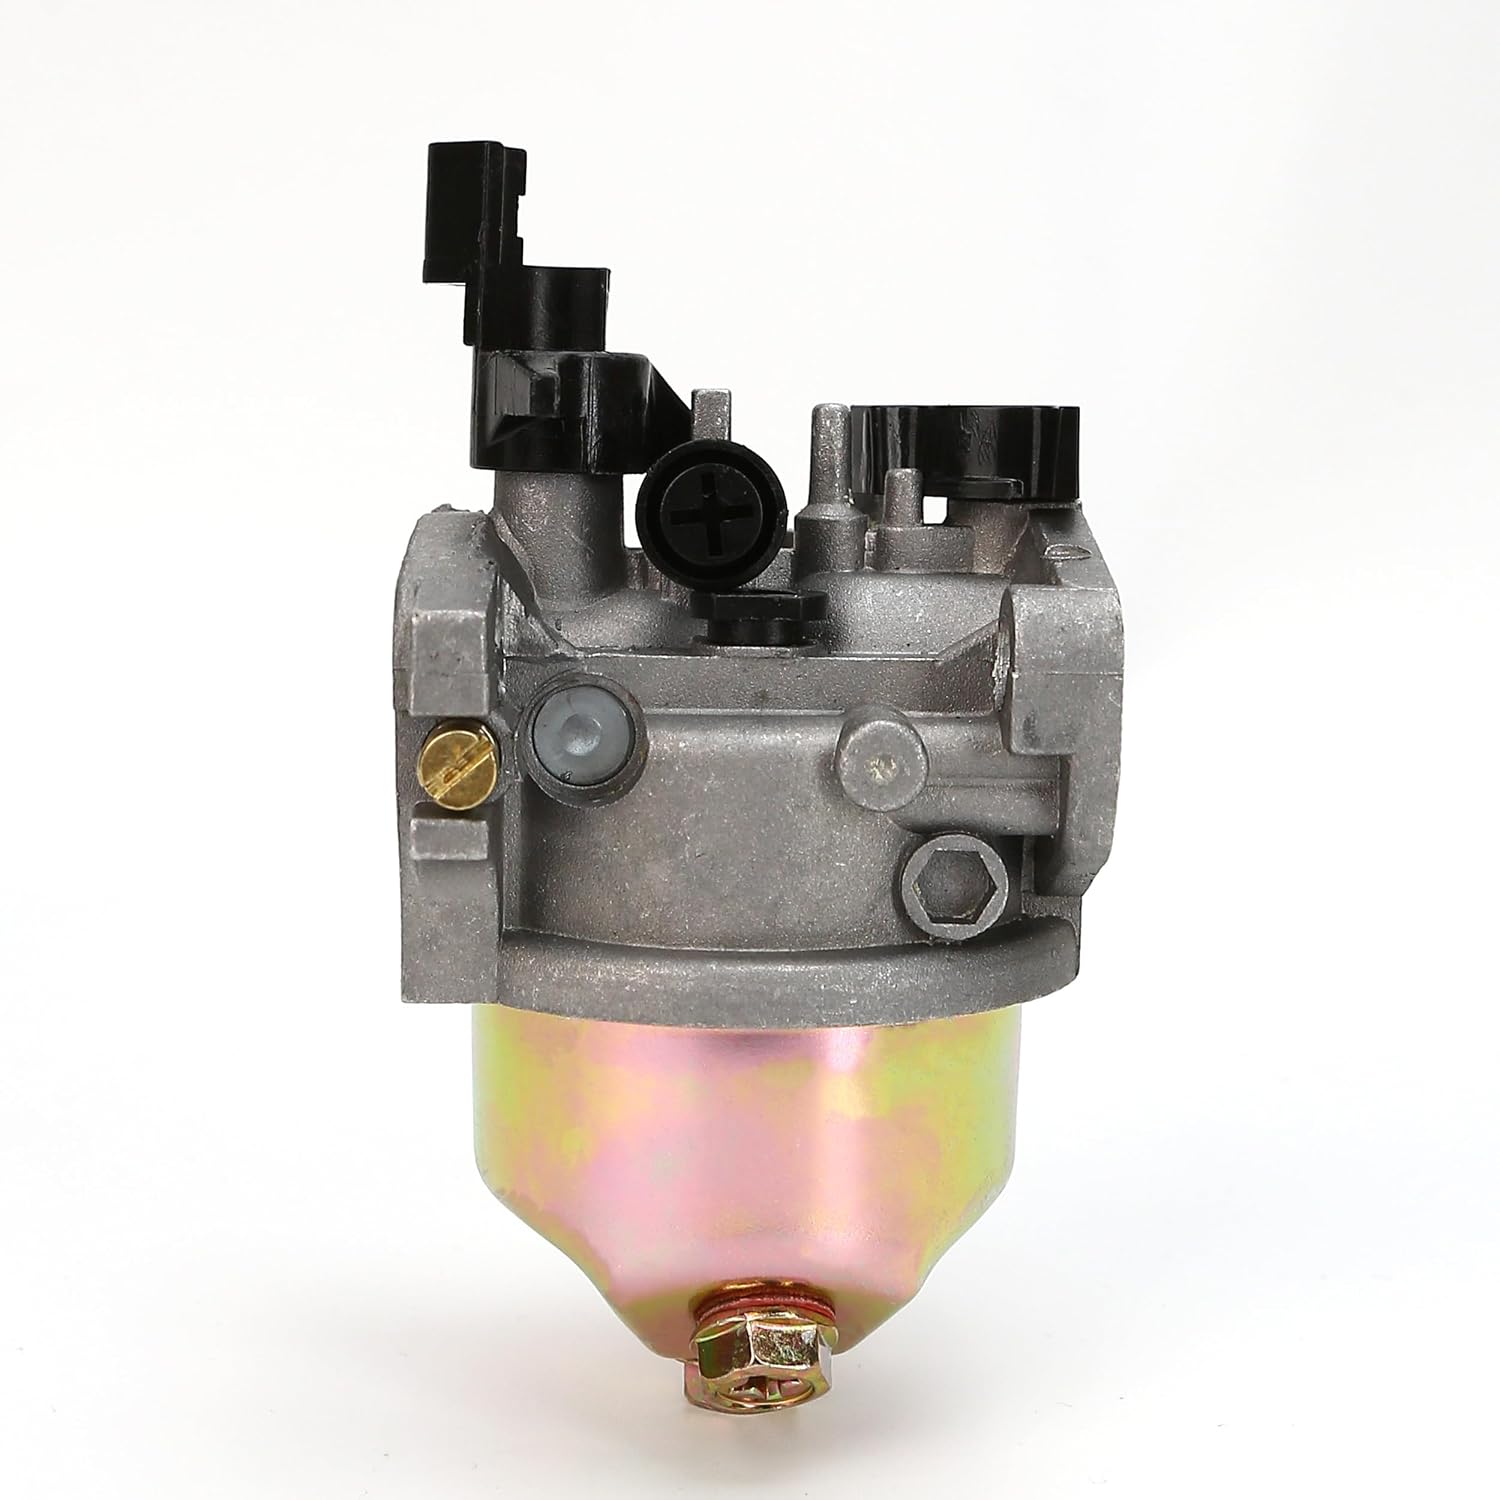
Image: A side profile view of the carburetor, providing a clear perspective of its construction and various components.

Image: A top-down view of the carburetor, showcasing the air intake area and the points for connecting control linkages.

Image: A view from the bottom of the carburetor, displaying the fuel bowl and the drain screw for maintenance.
8. Warranty and Support
8.1 Return Policy
This product is subject to a 30-day return policy for refund or replacement. Please refer to your purchase platform's specific return guidelines for detailed information.
8.2 Customer Support
For further assistance, technical questions, or to report issues, please contact BuleVina customer support through the retailer where the product was purchased.