
BOMGE 8 Channel PRO
BOMGE Professional 8 Channel DJ Audio Mixer Controller User Manual
Model: 8 Channel PRO
Introduction
This manual provides detailed instructions for the BOMGE Professional 8 Channel DJ Audio Mixer Controller. It covers essential information regarding setup, operation, features, and troubleshooting to ensure optimal performance and longevity of your device. Please read this manual thoroughly before operating the mixer.
Safety Information
Always adhere to the following safety guidelines to prevent damage to the unit or personal injury:
- Do not expose the unit to rain, moisture, dripping, or splashing liquids.
- Ensure proper ventilation; do not block any ventilation openings.
- Use only the power adapter supplied with the unit.
- Do not attempt to service this unit yourself. Refer all servicing to qualified service personnel.
- Avoid placing the unit near heat sources such as radiators, heat registers, stoves, or other apparatus (including amplifiers) that produce heat.
- Protect the power cord from being walked on or pinched, particularly at plugs, convenience receptacles, and the point where they exit from the apparatus.
Product Overview
The BOMGE Professional 8 Channel DJ Audio Mixer Controller is a versatile mixing console designed for various audio applications, including karaoke, streaming, and recording. It features multiple input options, DSP effects, Bluetooth connectivity, and USB recording/playback capabilities.

Figure 1: BOMGE 8 Channel Mixer Layout with Labeled Components
This image illustrates the comprehensive layout of the BOMGE 8 Channel Mixer, highlighting key components such as input/output ports, control knobs, faders, and the central display. Understanding this layout is crucial for effective operation.
Controls and Features
| Feature | Description |
|---|---|
| XLR/6.35mm Combo Jacks | Inputs for microphones (XLR) or line/guitar (6.35mm). Channels 1-2 and 7-8 feature these. |
| +48V Phantom Power | Provides power for condenser microphones on XLR inputs. Individually switchable for channels 1-2 and 7-8. |
| Gain Knob | Adjusts the input sensitivity for each channel. |
| 3-Band EQ (HIGH, MID, LOW) | Equalization controls for high, mid, and low frequencies on each channel to shape the tone. |
| PAN Knob | Adjusts the stereo position (left/right) of the channel's signal. |
| AUX1/AUX2/FX Knobs | Controls for sending signal to auxiliary sends or internal effects processor. |
| Channel Volume Faders | Controls the output level of individual channels. |
| 99 DSP Effects | Built-in digital signal processing effects (e.g., Hall, Room, Delay, Chorus) for enhancing audio. Selected via PROGRAM knob. |
| USB/MP3 Player | Allows playback from USB flash drives and recording to USB. Also manages Bluetooth connectivity. |
| Bluetooth Connectivity | Wireless streaming from compatible devices like smartphones and tablets. |
| Main Outputs (XLR) | Balanced XLR outputs for connecting to main PA systems or recording interfaces. |
| Headphone Output | 6.35mm stereo jack for monitoring audio with headphones. |
Setup
Power Connection
Connect the supplied power adapter to the DC IN port on the rear of the mixer and then to a suitable power outlet. Ensure the power switch is in the OFF position before connecting.
Input Connections
The mixer offers a variety of input options:
- Microphones: Use XLR cables to connect microphones to the XLR inputs on channels 1-2 and 7-8.
- Line/Instrument: Use 6.35mm (1/4") TS/TRS cables for line-level instruments (keyboards, guitars with preamps) to the 6.35mm inputs. Channels 3/4 and 5/6 are stereo line inputs.
- RCA Inputs: Connect devices with RCA outputs (CD players, media players) to the stereo RCA inputs (CD/TAPE).
- AUX Input: A 3.5mm microphone input is available for CH2.

Figure 2: +48V Phantom Power Activation
For condenser microphones requiring power, activate the +48V Phantom Power by pressing the corresponding button for the specific channel. Ensure dynamic microphones are not connected when phantom power is engaged, unless they are designed to handle it.
Output Connections
- Main Outputs: Connect the XLR Main Outputs (LEFT/RIGHT) to your power amplifier, powered speakers, or recording interface.
- Headphones: Plug your headphones into the 6.35mm PHONES jack for monitoring.
Operating Instructions
Basic Mixing
- Power On: After all connections are made, press the POWER button to turn on the mixer.
- Set Gain: Adjust the GAIN knob for each input channel until the PEAK LED occasionally flashes, indicating an optimal input level without clipping.
- Adjust EQ: Use the HIGH, MID, and LOW knobs to shape the tone of each channel.
- Pan: Use the PAN knob to position the sound of each mono channel within the stereo field.
- Channel Volume: Use the channel faders to set the individual volume levels for each input.
- Main Volume: Adjust the main volume fader to control the overall output level.
DSP Effects
The mixer includes 99 built-in DSP effects to enhance your audio.
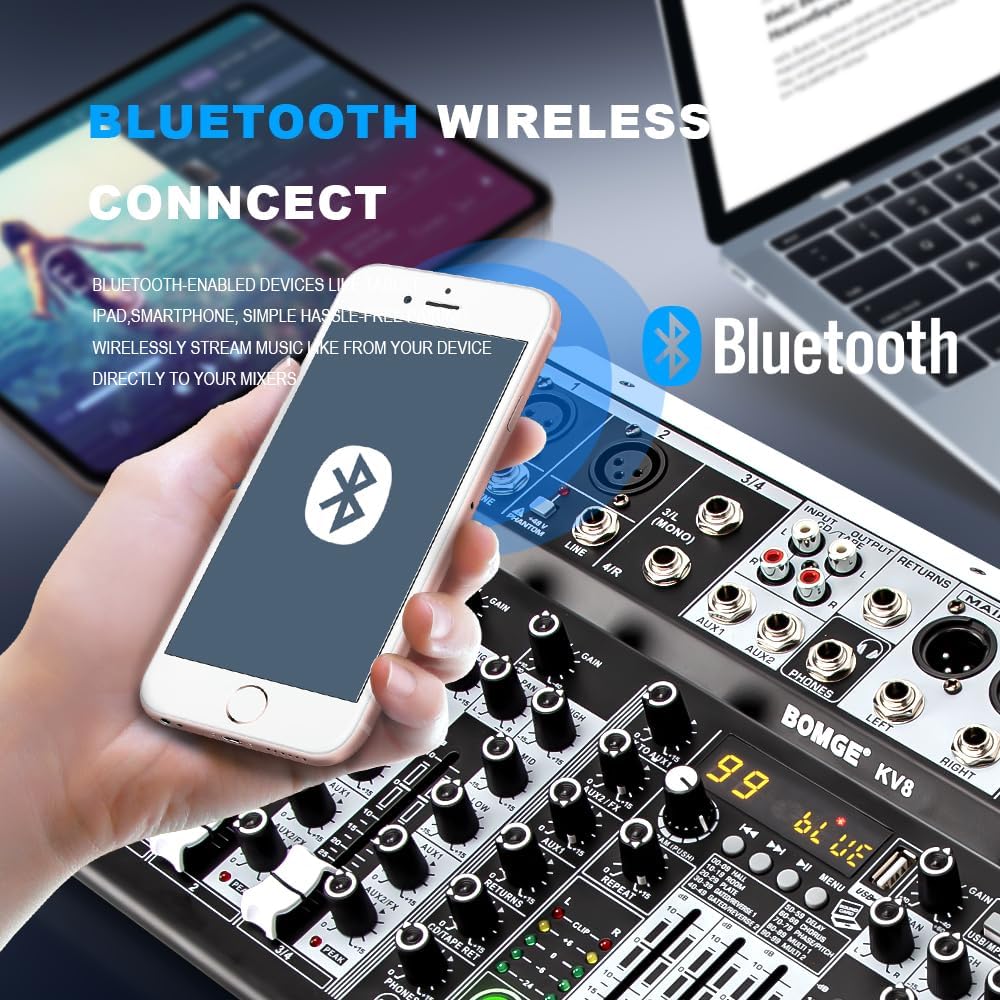
Figure 3: 99 DSP Digital Effects Interface
This image highlights the digital display and control knob for selecting and applying the 99 DSP effects. The display shows the current effect number and type, allowing for precise sound customization.
- Select Effect: Turn the PROGRAM knob to cycle through the 99 available effects. The display will show the effect number.
- Confirm Effect: Press the PROGRAM knob to confirm your selection.
- Apply to Channel: Use the FX TO AUX1 knob on each channel to send the desired amount of that channel's signal to the effects processor.
- Adjust Effect Level: Use the RETURNS knob to control the overall level of the applied effect.
Bluetooth Wireless Streaming
Stream audio wirelessly from your Bluetooth-enabled devices.

Figure 4: Bluetooth Wireless Connection
This image demonstrates the seamless wireless connection between a smartphone and the BOMGE mixer via Bluetooth, enabling convenient audio streaming without cables.
- Activate Bluetooth: On the mixer's USB/MP3 section, press the MODE button until "BLUE" appears on the display.
- Pair Device: On your smartphone or tablet, search for Bluetooth devices and select "BOMGE Mixer" (or similar name).
- Stream Audio: Once paired, you can play audio from your device, and it will be routed through the mixer's 3/4 channel (or similar, depending on model specifics). Control volume using the 3/4 channel fader.
USB Playback and Recording
The mixer supports USB flash drives for audio playback and direct recording.

Figure 5: USB Flash Drive for Record & Playback
This image illustrates the ease of connecting a USB flash drive to the mixer, enabling direct recording of your mix or playback of audio files stored on the drive.
- Insert USB: Insert a USB flash drive into the USB port.
- Playback: The mixer will automatically detect audio files (MP3, WAV) on the drive. Use the transport controls (Play/Pause, Skip) to navigate.
- Recording: Press the RECORD button (if available) to start recording the main mix to the USB drive. Press again to stop.
- USB Audio Interface: Connect the mixer to a computer via USB to use it as an audio interface for recording or playback with your DAW software.
3-Band Equalization Adjustment
Each channel features a 3-band equalizer for precise tone shaping.

Figure 6: 3-Band Equalization Controls
This image provides a clear view of the High, Mid, and Low equalization knobs for a single channel, demonstrating the ability to fine-tune the frequency response of each input.
- HIGH: Adjusts the treble frequencies. Turn clockwise to boost, counter-clockwise to cut.
- MID: Adjusts the mid-range frequencies. Crucial for vocal clarity and instrument presence.
- LOW: Adjusts the bass frequencies. Turn clockwise to boost, counter-clockwise to cut.
Maintenance
Proper maintenance ensures the longevity and performance of your mixer:
- Cleaning: Use a soft, dry cloth to clean the exterior of the mixer. For stubborn dirt, a slightly damp cloth can be used, followed by a dry one. Avoid abrasive cleaners or solvents.
- Dust Protection: When not in use, cover the mixer with a dust cover to prevent dust and debris from entering the controls and internal components.
- Storage: Store the mixer in a cool, dry place away from direct sunlight and extreme temperatures.
- Cable Management: Ensure cables are not tangled or stressed, which can lead to damage to both cables and ports.
Troubleshooting
If you encounter issues with your BOMGE mixer, refer to the table below for common problems and their solutions.
| Problem | Possible Cause | Solution |
|---|---|---|
| No sound output | Power off; incorrect connections; faders down; main volume low; faulty cables. | Ensure power is on. Check all cable connections (inputs, outputs). Raise channel and main faders. Test with different cables. |
| Distorted sound | Input gain too high; output level too high; faulty cable/device. | Reduce input GAIN. Lower channel and main faders. Check connected devices for distortion. |
| Phantom power not working | Phantom power not activated; faulty microphone/cable. | Ensure +48V button is pressed for the correct channel. Test with another condenser microphone or XLR cable. |
| Bluetooth not connecting | Mixer not in Bluetooth mode; device not discoverable; interference. | Ensure mixer is in "BLUE" mode. Make sure your device's Bluetooth is on and discoverable. Move closer to the mixer. |
| DSP effects not audible | Effect not selected; FX TO AUX1 knob low; RETURNS knob low. | Select an effect using the PROGRAM knob. Increase the FX TO AUX1 knob on the desired channel. Increase the RETURNS knob. |
| USB playback/recording issues | Unsupported file format; USB drive not formatted correctly; drive full. | Ensure audio files are MP3 or WAV. Format USB drive to FAT32. Check available space on the USB drive. |
Specifications
| Specification | Value |
|---|---|
| Model | 8 Channel PRO |
| Item Weight | 3.3 pounds (1.5 Kilograms) |
| Package Dimensions | 12.99 x 9.84 x 3.54 inches |
| Country of Origin | China |
| Power Source | Electric |
| Voltage | 5 Volts (AC) |
| Number of Channels | 8 (Note: Product description mentions 6 inputs, but model is 8 Channel PRO) |
| Connectivity Technology | Bluetooth, Auxiliary, USB |
Warranty and Support
BOMGE products are manufactured to high-quality standards. This product is covered by a limited warranty against defects in materials and workmanship from the date of purchase. For specific warranty terms and conditions, please refer to the warranty card included with your product or contact BOMGE customer support.
For technical assistance, troubleshooting, or service inquiries, please visit the official BOMGE website or contact their customer support team. Keep your purchase receipt as proof of purchase for any warranty claims.
Ask a question about this manual
Ask about setup, troubleshooting, compatibility, parts, safety, or missing instructions. Manuals+ will review the question and use this page’s manual context to help answer it.