
1. Introduction
Thank you for purchasing the XREXS PH-09 14.5-inch Digital Wall Clock. This clock features a large HD LCD display that simultaneously shows time, date, and temperature. Designed for clear readability from various angles, it operates on 4 AA batteries, eliminating the need for cables and allowing flexible placement. The clock includes practical functions such as automatic Daylight Saving Time (DST) adjustment, 12/24-hour format switching, Celsius/Fahrenheit temperature unit selection, and a programmable alarm with snooze.

Image 1.1: The XREXS PH-09 Digital Wall Clock, showcasing its large display with time, date, and temperature.
2. Package Contents
Please check the package contents to ensure all items are present and in good condition:
- XREXS PH-09 Digital Wall Clock
- 4 x AA Batteries
- Wall Mounting Nails (2 pieces)
- Screwdriver
- Measuring Rod (for mounting)
- Instruction Manual (this document)

Image 2.1: Included accessories: batteries, screwdriver, mounting nails, and measuring rod.
3. Setup
3.1. Battery Installation
- Locate the battery compartment on the back of the clock.
- Open the battery compartment cover.
- Insert 4 AA batteries, ensuring correct polarity (+ and -).
- Close the battery compartment cover securely.
The clock will power on automatically once batteries are inserted. A low battery indicator will appear on the display when replacement is needed.

Image 3.1: The battery compartment on the back of the clock, indicating where to insert the 4 AA batteries.
4. Operating Instructions
The XREXS PH-09 clock features multiple functions accessible via buttons located on the top or side of the unit. Refer to the diagram below for button identification (if available, otherwise assume standard button labels like SET, UP, DOWN, MODE).

Image 4.1: Overview of the clock's display features: Time (12/24H), Alarm, Temperature (°F/°C), Day, Month & Date, and DST.
4.1. Setting Time and Date
- Press the MODE button repeatedly until the time setting mode is activated (e.g., hours flashing).
- Use the UP or DOWN buttons to adjust the flashing value (hours, minutes, year, month, day).
- Press MODE again to confirm the setting and move to the next value.
- Repeat until all time and date settings are complete.
4.2. 12/24 Hour Format Selection
Press the 12/24H button (or a dedicated button, or cycle through with MODE) to switch between 12-hour (with AM/PM indicator) and 24-hour formats.
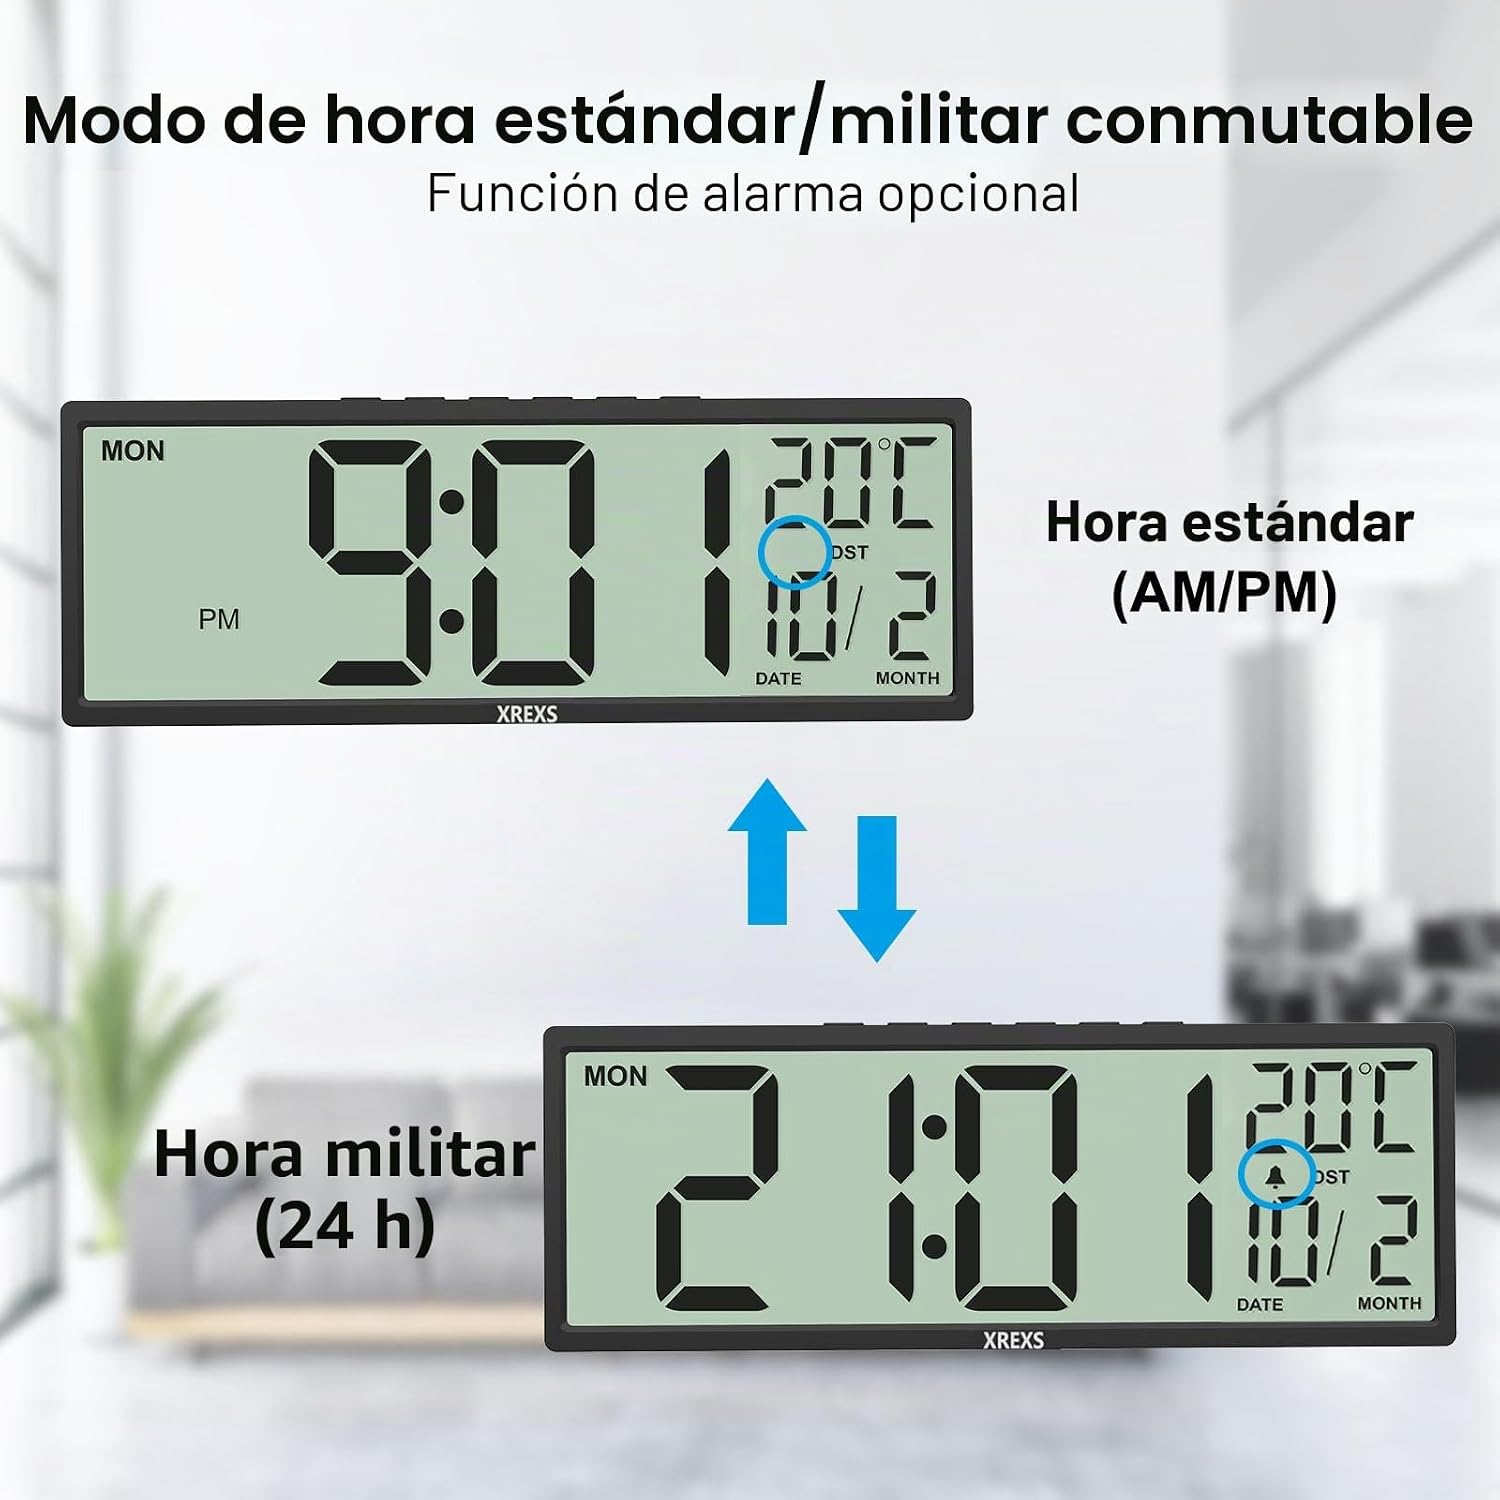
Image 4.2: The clock supports both standard (AM/PM) and military (24-hour) time formats.
4.3. Temperature Unit Selection (°C/°F)
Press the °C/°F button (or a dedicated button, or cycle through with MODE) to switch the temperature display between Celsius and Fahrenheit.

Image 4.3: The digital thermometer display showing temperature in both Celsius and Fahrenheit.
4.4. Setting the Alarm and Snooze Function
- Press the ALARM button to enter alarm setting mode.
- Use the UP or DOWN buttons to set the desired alarm time (hours and minutes).
- Press ALARM again to confirm.
- To activate/deactivate the alarm, press the ALARM ON/OFF button. An alarm icon will appear on the display when active.
- When the alarm sounds, press the SNOOZE button to temporarily silence it. The alarm will sound again after a few minutes.
- To turn off the alarm completely, press any other button.
The clock supports different alarm modes: Everyday, Working Day (Monday-Friday), and Weekend (Saturday-Sunday).

Image 4.4: Alarm clock function with support for snooze and three alarm modes: Everyday, Working Day, and Weekend.
4.5. Daylight Saving Time (DST) Function
The clock features an automatic DST adjustment function for consistent accuracy. When DST is active, a "DST" indicator will appear on the display.

Image 4.5: The clock automatically adjusts for Daylight Saving Time, ensuring accurate time display.
5. Installation
The XREXS PH-09 clock offers dual installation options: tabletop placement or wall mounting.
5.1. Tabletop Placement
The clock includes a reinforced monoblock stand. Simply place the clock on any flat surface such as a desk, shelf, or bedside table.
5.2. Wall Mounting
For wall mounting, use the integrated keyhole slots on the back of the clock. The included measuring rod can assist in marking the correct positions for the mounting nails.
- Determine the desired location on the wall.
- Use the provided measuring rod to mark the positions for the two mounting nails.
- Carefully insert the mounting nails into the wall at the marked positions.
- Align the keyhole slots on the back of the clock with the nails and gently slide the clock down to secure it.
- Ensure the clock is stable and level.

Image 5.1: Examples of the clock installed on a tabletop and mounted on a wall.
6. Maintenance
6.1. Battery Replacement
When the low battery indicator appears on the display, replace all 4 AA batteries promptly to ensure continuous operation and accurate timekeeping. Refer to Section 3.1 for battery installation steps.

Image 6.1: The low battery indicator on the digital display, signaling the need for battery replacement.
6.2. Cleaning
To clean the clock, gently wipe the display and casing with a soft, dry cloth. Avoid using abrasive cleaners, solvents, or chemical sprays, as these may damage the surface or internal components.
7. Troubleshooting
| Problem | Possible Cause | Solution |
|---|---|---|
| Display is blank or dim. | Batteries are dead or incorrectly inserted. | Replace with new AA batteries, ensuring correct polarity. |
| Time is incorrect. | Time was not set correctly or DST setting is wrong. | Manually set the time and date (Section 4.1). Check DST setting (Section 4.5). |
| Alarm does not sound. | Alarm is not activated or volume is too low (if adjustable). | Ensure the alarm is turned ON (alarm icon visible). Re-set the alarm time (Section 4.4). |
| Temperature reading is inaccurate. | Clock placed near a heat source or vent. | Relocate the clock to an area with stable ambient temperature. |
8. Specifications
| Feature | Detail |
|---|---|
| Brand | XREXS |
| Model Number | PH-09 |
| Display Type | Digital LCD |
| Screen Size | 14.5 inches (approx. 37 cm) |
| Dimensions (W x H) | 37 cm x 13.5 cm (14.5 in x 5.3 in) |
| Color | Black |
| Power Source | 4 x AA Batteries (included) |
| Special Features | Time, Date, Temperature, DST, Alarm, Snooze, 12/24H Format, °C/°F Selection, Low Battery Indicator |
| Mounting Type | Tabletop, Wall Mount |
| Material | Plastic |
| Indoor/Outdoor Use | Indoor |
9. Warranty and Support
For warranty information or technical support, please refer to the retailer where the product was purchased or visit the official XREXS website. Keep your purchase receipt as proof of purchase.