
Introduction
This manual provides detailed instructions for the installation, operation, and maintenance of your Zerodis TM919BK Programmable Digital Timer Switch. Please read this manual thoroughly before use to ensure proper functionality and safety. This device is designed for precise control of electrical appliances through programmable ON/OFF cycles and a countdown function.
Setup
The TM919BK timer switch is designed for 35mm DIN rail mounting. Ensure the power supply is disconnected before installation.
- Mounting: Securely attach the timer switch to a standard 35mm DIN rail in your electrical panel.
- Wiring: Connect the power input (85-265V AC) to terminals 1 and 2. Connect the load to terminals 3, 4, and 5 as per the wiring diagram on the device. Terminal 3 is common, 4 is normally open (NO), and 5 is normally closed (NC).
- Initial Power-Up: After wiring, restore power. The LCD will display the current time. If the display is blank, check power connections.
- Setting the Clock: Press the CLOCK button. Use the D+, H+, and M+ buttons to set the current day, hour, and minute respectively.
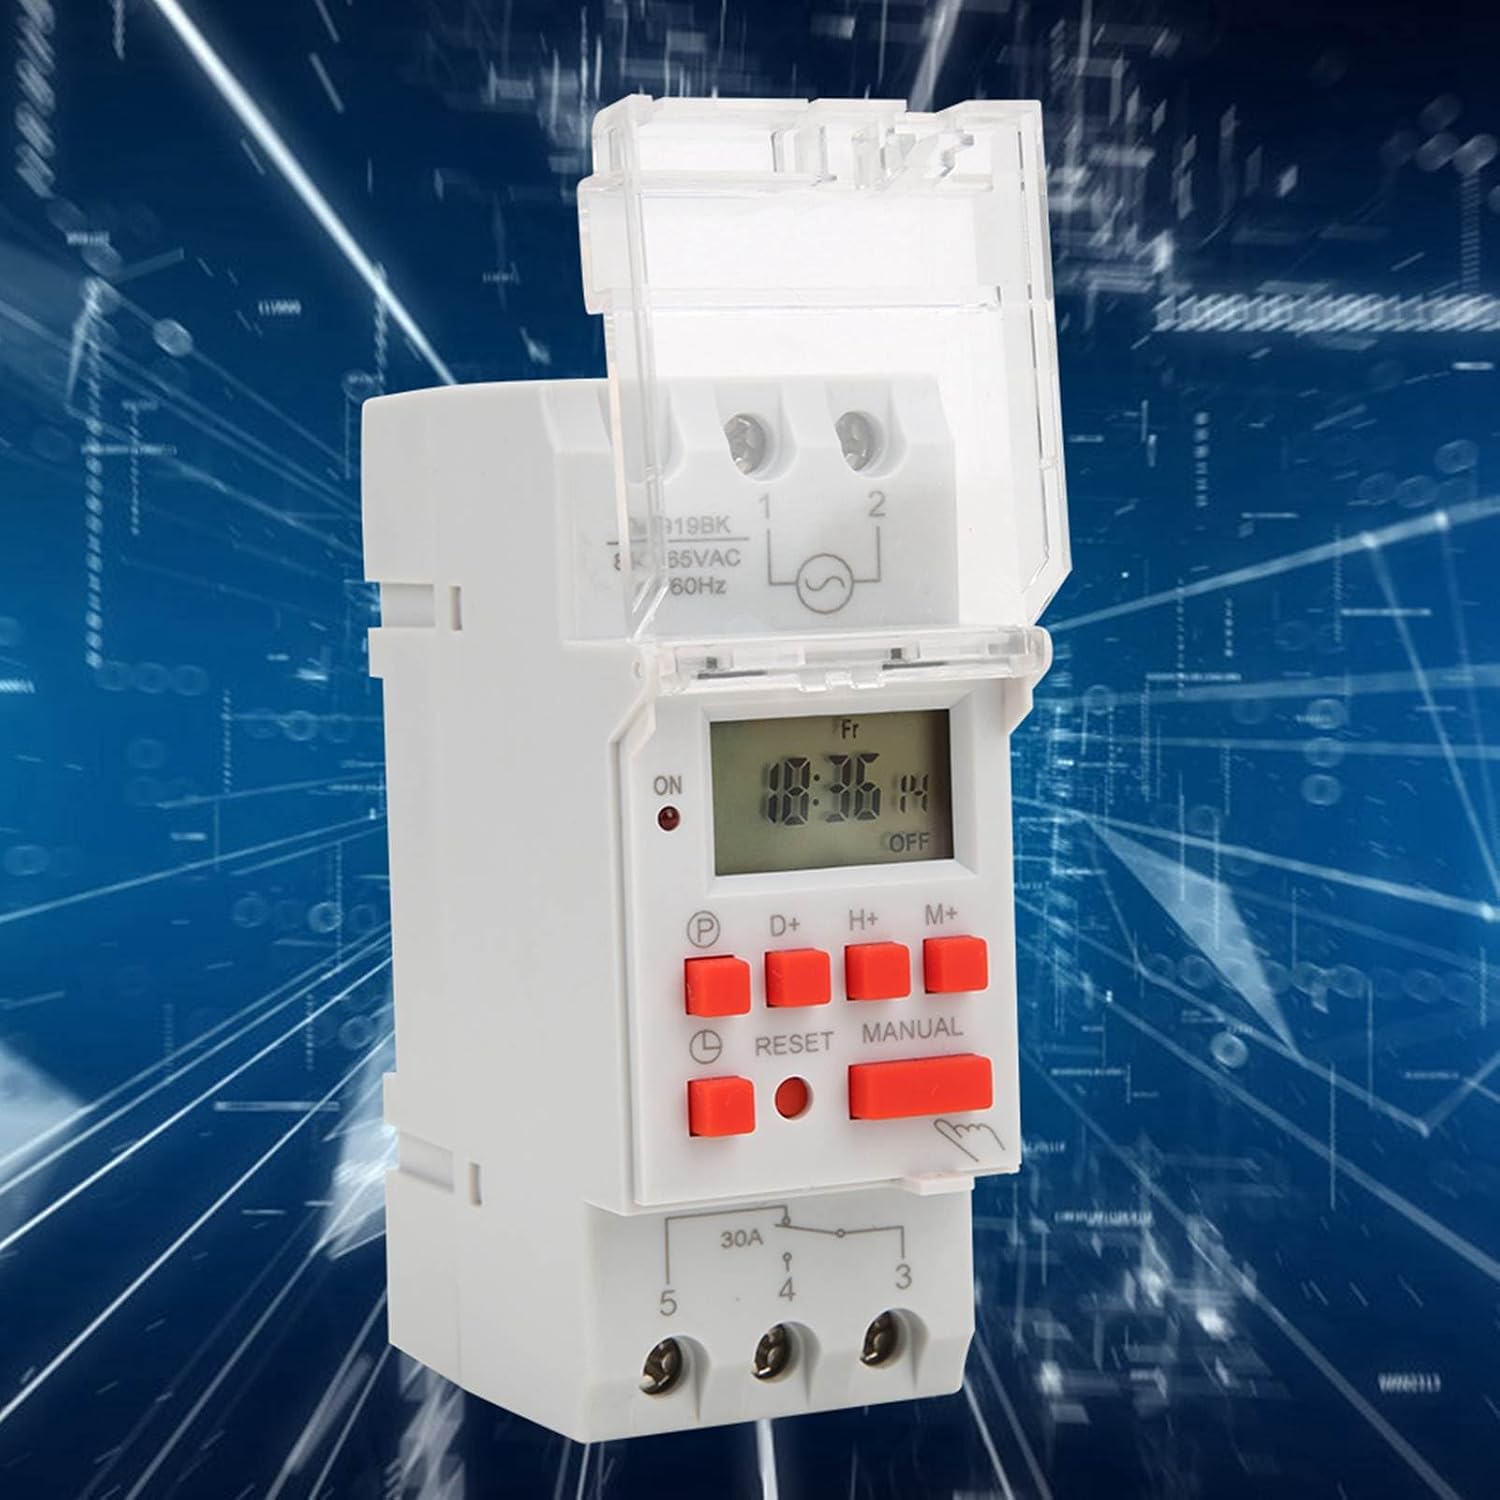
Image: Side view of the TM919BK timer switch, illustrating its design for DIN rail mounting and the terminal block for electrical connections.

Image: Detailed side view of the timer switch, highlighting the integrated wiring diagram for proper electrical installation.
Operating Instructions
The TM919BK offers flexible programming options for automated control.
Programming ON/OFF Cycles
The device supports up to 16 ON/OFF programs per day, with 15 combinations per week.
- Press the P button once to enter programming mode. The display will show "1 ON".
- Use D+ to select the day(s) of the week for this program. You can choose individual days or various combinations (e.g., Mon-Fri, Sat-Sun, Mon-Sun).
- Use H+ and M+ to set the desired ON time.
- Press P again. The display will show "1 OFF". Set the desired OFF time using D+, H+, and M+.
- Repeat steps 1-4 for additional ON/OFF programs (up to 16).
- Press the CLOCK button to exit programming mode and save settings.
Countdown Function
The timer features a countdown function, allowing a maximum 24-hour countdown to OFF.
- While in normal clock mode, press the COUNTDOWN button (often labeled with a clock icon).
- Use H+ and M+ to set the desired countdown duration.
- Press COUNTDOWN again to start the countdown. The device will switch OFF after the set time.
Manual ON/OFF Control
To manually override programmed settings:
- Press the MANUAL button to cycle through ON, AUTO, and OFF modes.
- In ON mode, the output is continuously ON.
- In OFF mode, the output is continuously OFF.
- In AUTO mode, the timer operates according to the programmed settings.

Image: Front view of the TM919BK timer switch, showing the LCD display, control buttons (P, D+, H+, M+, Reset, Manual), and the protective clear cover.

Image: Front view of the TM919BK timer switch with the protective cover removed, providing a clear view of the LCD screen and all programming buttons.
Maintenance
The Zerodis TM919BK timer switch requires minimal maintenance.
- Cleaning: Use a soft, dry cloth to clean the exterior of the device. Do not use abrasive cleaners or solvents.
- Battery Backup: The built-in battery ensures that your programmed settings are retained during power outages. This battery is designed for long-term use and typically does not require replacement.
- Environmental Conditions: Ensure the device is operated within the specified temperature and humidity ranges to prevent damage.
Troubleshooting
If you encounter issues with your TM919BK timer switch, refer to the following common problems and solutions:
- Display is blank:
- Check the power supply connections to terminals 1 and 2.
- Ensure the main power circuit is active.
- Programs are not executing:
- Verify that the timer is in AUTO mode (check the display for 'AUTO').
- Review your programmed ON/OFF times for accuracy.
- Ensure the current time and day are set correctly.
- Settings are lost after power outage:
- The internal battery backup should prevent this. If settings are consistently lost, the internal battery may be depleted or faulty. Contact support if this persists.
- Output not switching:
- Check the load wiring to terminals 3, 4, and 5.
- Ensure the connected load does not exceed the device's maximum capacity (30A, 5000W).
If these steps do not resolve the issue, please contact Zerodis customer support.
Specifications
Technical specifications for the Zerodis TM919BK Programmable Digital Timer Switch:
| Feature | Specification |
|---|---|
| Model | TM919BK |
| Power Supply | 85~265V AC |
| Capacity | 30A 5000W |
| Time Range | 1 minute ~ 168 hours |
| Programs | 16 ON/OFF per day |
| Countdown Function | Maximum 24 hours to OFF |
| Display | LCD with LED indicators |
| Mounting | 35mm DIN rail |
| Memory Backup | Built-in large capacity battery |
| Temperature Range | -10~50℃ |
| Product Dimensions | 3.54 x 2.75 x 1.96 inches (90 x 70 x 50 mm) |
| Item Weight | 5.2 ounces (147 grams) |

Image: The TM919BK timer switch with its key dimensions (length, width, height) clearly indicated.
Warranty and Support
For warranty information or technical support regarding your Zerodis TM919BK Programmable Digital Timer Switch, please contact the seller or manufacturer directly. Keep your purchase receipt as proof of purchase.
Manufacturer: Zerodis