1. Introduction
This manual provides detailed instructions for the installation, operation, and maintenance of your GYVCBREU RM Car Radio Stereo. Please read this manual thoroughly before using the product to ensure proper function and to prevent damage.
2. Safety Information
- Ensure the vehicle's engine is off and the parking brake is engaged before installation.
- Disconnect the vehicle's battery negative terminal before beginning installation to prevent electrical shorts.
- Consult a professional installer if you are unsure about any part of the installation process.
- Do not operate the device in a manner that distracts you from driving. Always prioritize road safety.
- Avoid exposing the unit to extreme temperatures, direct sunlight for prolonged periods, or excessive moisture.
3. Package Contents
Verify that all items listed below are present in your package:
- GYVCBREU RM Car Radio Stereo Head Unit (12.1-inch screen)
- 4G Antenna
- Power Plug (for 2016-2019 models)
- Power Plug (for 2020-2022 models)
- RCA Cable
- 6PIN USB Cable
- GPS Antenna
- Control Knobs (2 units)
- Microphone
- Reversing Camera Cable
- 4PIN USB Cable
- Mitten (for handling)
- Crowbar (for trim removal)

Figure 3.1: Included accessories for the GYVCBREU RM Car Radio Stereo. This image displays the main head unit, various cables (4G antenna, power plugs, RCA, USB), GPS antenna, control knobs, microphone, reversing camera cable, mitten, and a crowbar for installation.
4. Compatibility
This GYVCBREU RM Car Radio Stereo is specifically designed for:
- Vehicle Model: Toyota Tacoma
- Model Years: 2016, 2017, 2018, 2019, 2020, 2021, 2022
- A/C Type: Compatible ONLY with vehicles equipped with Automatic A/C. It is NOT compatible with manual A/C systems.
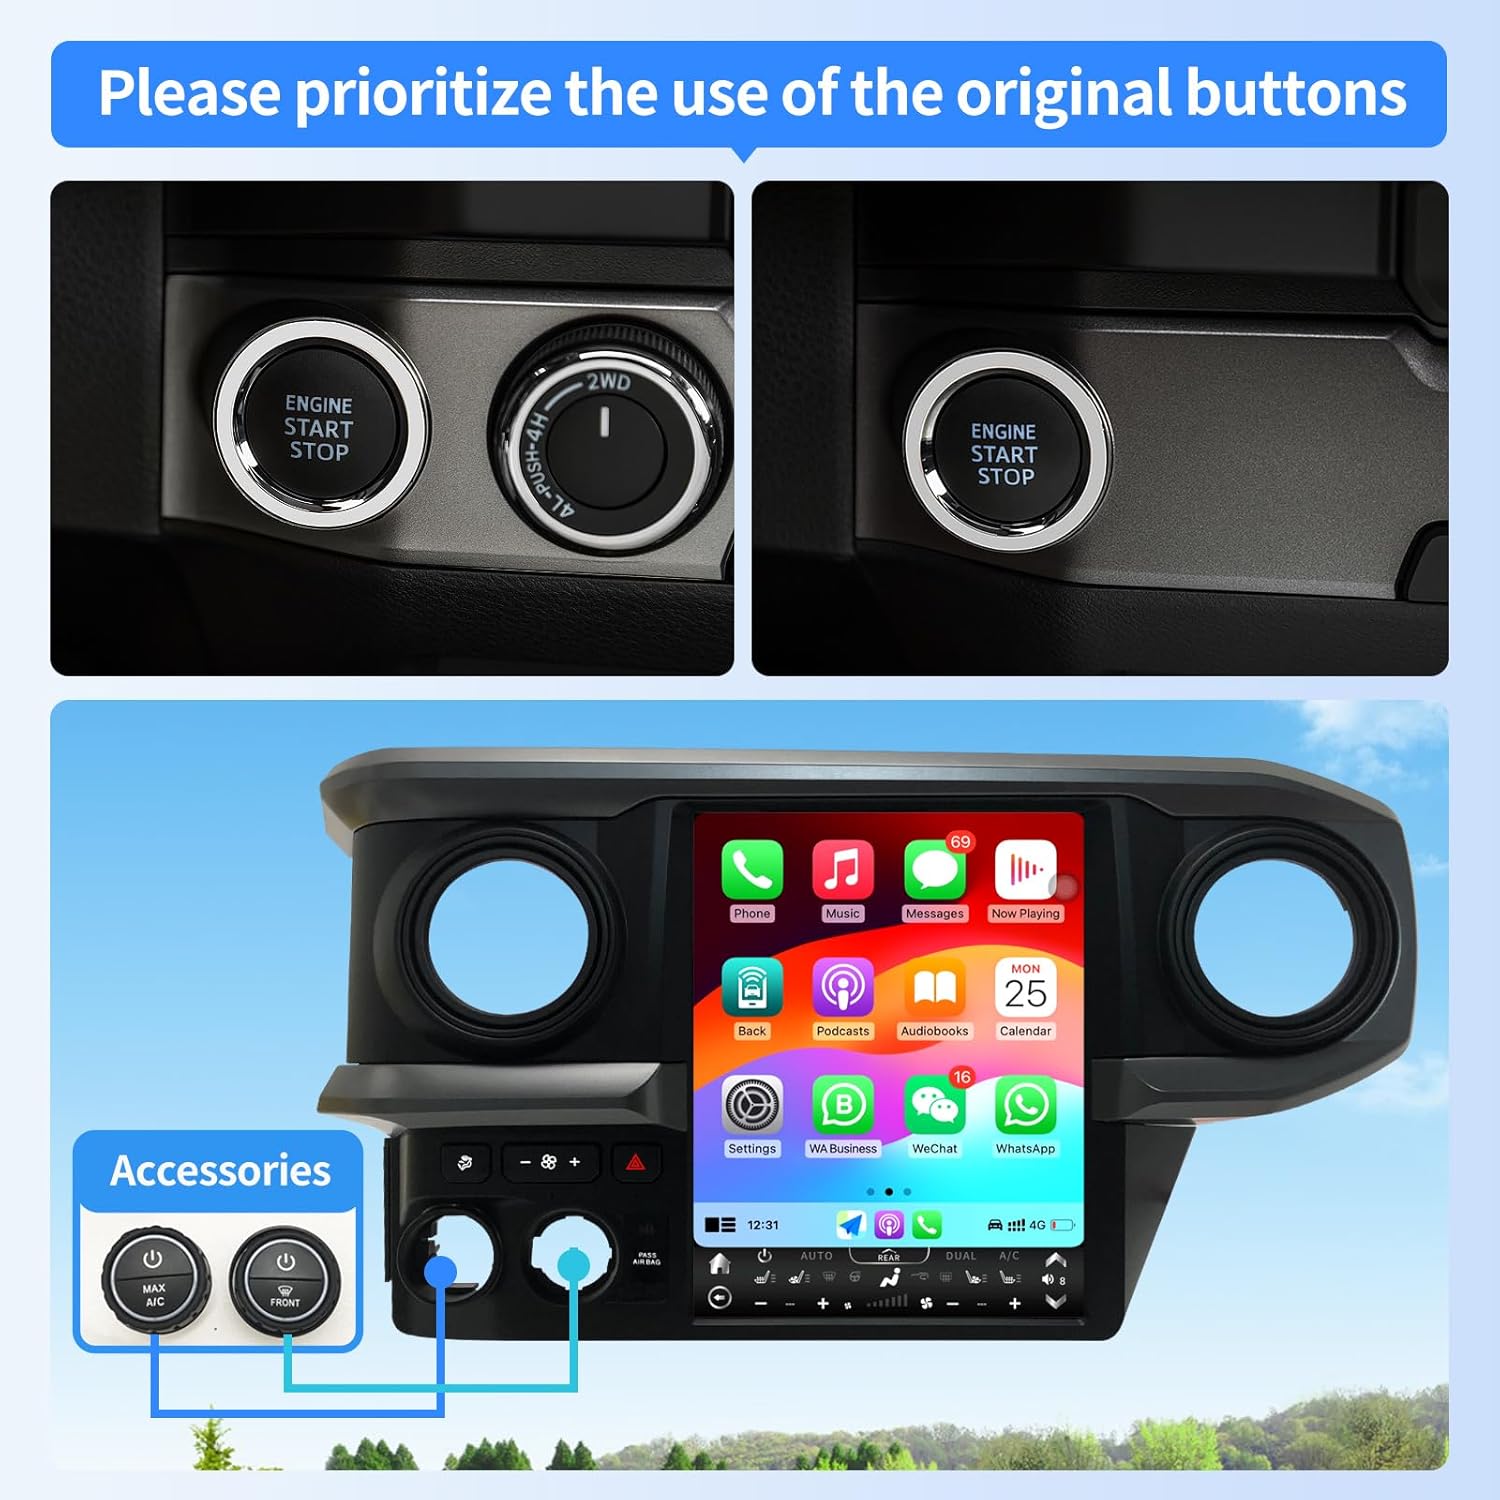
Figure 4.1: This image shows two dashboard configurations. The left panel, marked with a checkmark, displays an automatic A/C control panel, indicating compatibility. The right panel, marked with an 'X', shows a manual A/C control panel, indicating incompatibility. Ensure your vehicle has automatic A/C for proper fitment.
5. Setup and Installation
5.1 Pre-Installation Checks
- Confirm vehicle compatibility (Toyota Tacoma 2016-2022 with Automatic A/C).
- Gather all necessary tools (e.g., screwdriver set, trim removal tools, electrical tape).
- Review your vehicle's service manual for specific dashboard disassembly instructions.
5.2 Disconnecting the Battery
Before proceeding, disconnect the negative terminal of your vehicle's battery to prevent electrical damage during installation.
5.3 Removing the Factory Radio
- Carefully remove the dashboard trim panels surrounding the factory radio using the provided crowbar or a suitable trim removal tool.
- Unscrew any mounting bolts or screws securing the factory radio.
- Gently pull out the factory radio and disconnect all wiring harnesses and antenna cables from the rear of the unit.
5.4 Wiring Connections
Connect the provided wiring harnesses to the GYVCBREU RM head unit. Ensure all connections are secure. Refer to the wiring diagram (if included in the physical package) for specific connections.
- Connect the appropriate power plug for your Tacoma model year (2016-2019 or 2020-2022).
- Connect the GPS antenna and position it in a location with a clear view of the sky (e.g., on the dashboard).
- Connect the 4G antenna if you plan to use mobile data connectivity.
- Connect the microphone for hands-free calling.
- Connect the reversing camera cable if installing a backup camera.
- Connect the USB cables for external devices.
5.5 Installing the New Head Unit
- Carefully slide the GYVCBREU RM head unit into the dashboard opening.
- Secure the unit with the factory mounting bolts or screws.
- Reattach the dashboard trim panels, ensuring they snap securely into place.

Figure 5.1: The GYVCBREU RM Car Radio Stereo seamlessly integrated into a Toyota Tacoma dashboard after installation. The 12.1-inch vertical screen replaces the original factory unit.
5.6 Initial Power-Up
Reconnect the vehicle's battery negative terminal. Turn on the vehicle's ignition. The head unit should power on automatically. Follow any on-screen prompts for initial setup.
6. Operating Instructions
6.1 Basic User Interface Navigation
The 12.1-inch touchscreen display allows for intuitive control. Tap icons to open applications, swipe to navigate menus, and use pinch-to-zoom gestures where applicable.
6.2 CarPlay and Android Auto
The unit supports both wired and wireless Apple CarPlay and Android Auto. This allows integration with your smartphone for navigation, calls, messages, and music.
- Wired Connection: Connect your smartphone to one of the USB ports using a certified USB cable. The system should automatically detect and launch CarPlay or Android Auto.
- Wireless Connection:
- Ensure Bluetooth is enabled on your smartphone and the head unit.
- Pair your smartphone with the head unit via Bluetooth.
- Open the 'Car Link 2.0' application on the head unit.
- Follow the on-screen instructions to establish the wireless CarPlay or Android Auto connection.

Figure 6.1: The head unit screen displaying the Apple CarPlay interface, with icons for Phone, Music, Messages, Maps, and other applications. A smartphone is shown wirelessly connected, demonstrating the CarPlay and Android Auto functionality.
6.3 Bluetooth Connectivity
Connect your smartphone via Bluetooth for hands-free calling and audio streaming.
- Go to the Bluetooth settings on the head unit.
- Enable Bluetooth on your smartphone and search for available devices.
- Select the head unit's Bluetooth name (e.g., 'GYVCBREU RM') from your phone's list and pair.
- Confirm the pairing code on both devices.

Figure 6.2: This image illustrates the Bluetooth interface for phone calls, the FM radio tuner displaying frequencies, and the Digital Sound Processor (DSP) equalizer settings, highlighting the audio customization options.
6.4 Wi-Fi Connection
Connect to a Wi-Fi network or your phone's hotspot to access online features, download apps, and stream content.
- Navigate to the Wi-Fi settings on the head unit.
- Turn on Wi-Fi and select your desired network from the list.
- Enter the password if prompted and connect.
6.5 GPS Navigation
The unit features a built-in GPS module supporting both online and offline navigation applications.
- Online Navigation: Use pre-installed apps like Google Maps or Waze, or download others from the app store. Requires an active internet connection (Wi-Fi or 4G).
- Offline Navigation: Download map data for your region to use navigation without an internet connection.

Figure 6.3: This image illustrates the GPS navigation interface with map data, indicating support for both online and offline maps. It also highlights the Wi-Fi connection capability, allowing for online surfing, navigation, and app downloads.
6.6 FM/AM Radio
Access the radio application to tune into FM and AM stations. Use the touchscreen to scan for stations, save presets, and adjust settings.
6.7 Digital Sound Processor (DSP)
Utilize the built-in DSP to customize your audio experience. Adjust equalizer settings, balance, fader, and other sound effects to optimize audio output.
6.8 Steering Wheel Control
The unit supports integration with your vehicle's original steering wheel controls for convenient operation.
- Access the 'Steering Wheel Control' settings in the system menu.
- Follow the on-screen instructions to program each button on your steering wheel to the desired function (e.g., volume up/down, track skip, mode).

Figure 6.4: This image demonstrates the steering wheel control learning interface, allowing users to map vehicle steering wheel buttons to head unit functions. It also shows the split-screen mode, where two applications (e.g., navigation and music) can be displayed simultaneously.
6.9 Split-Screen Mode
The split-screen feature allows you to run two applications simultaneously on the 12.1-inch display. For example, you can have navigation on one side and music playback on the other.
- Open the first application you wish to use.
- Long-press the recent apps button or swipe from the side (depending on UI) to activate split-screen mode.
- Select the second application to fill the other half of the screen.
6.10 Backup Camera Support
If a compatible backup camera is connected, the display will automatically switch to the camera view when the vehicle is put into reverse gear.
7. Maintenance
7.1 Screen Cleaning
To clean the touchscreen, power off the unit. Use a soft, lint-free cloth slightly dampened with water or a screen-cleaning solution. Avoid harsh chemicals or abrasive materials that could damage the screen.
7.2 Software Updates
Periodically check for software updates through the system settings (if available) or the manufacturer's website. Updates can provide new features, performance improvements, and bug fixes.
8. Troubleshooting
If you encounter issues with your GYVCBREU RM Car Radio Stereo, refer to the following common problems and solutions:
| Problem | Possible Cause | Solution |
|---|---|---|
| Unit does not power on | Loose power connection, blown fuse, incorrect wiring. | Check all power connections. Inspect vehicle fuses and the unit's fuse. Verify wiring against the diagram. |
| No sound output | Volume too low, mute activated, incorrect speaker wiring, DSP settings. | Increase volume. Check mute status. Verify speaker connections. Reset DSP settings to default. |
| GPS signal weak or unavailable | GPS antenna obstructed or improperly placed, antenna connection loose. | Ensure GPS antenna has a clear view of the sky. Check antenna connection. |
| Bluetooth/Wi-Fi connection issues | Incorrect pairing, device out of range, network issues. | Ensure Bluetooth/Wi-Fi is enabled on both devices. Re-pair devices. Check network password. |
| Touchscreen unresponsive | Temporary software glitch, screen damage. | Restart the unit. If issue persists, contact customer support. |
9. Specifications
Key technical specifications for the GYVCBREU RM Car Radio Stereo:
| Feature | Specification |
|---|---|
| Model Name | RM |
| Display Size | 12.1 Inches |
| Display Type | LCD, IPS Touchscreen |
| Display Resolution | 1280x720 HD |
| Operating System | Android 12 |
| CPU | 8 Core |
| RAM | 4GB |
| Internal Storage (ROM) | 64GB |
| Connectivity | Bluetooth 5.0, Wi-Fi, USB, 4G Network Support |
| Navigation | Built-in GPS (GPS + GLONASS), Online/Offline Maps |
| Special Features | CarPlay, Android Auto, DSP, Steering Wheel Control, Split-Screen Mode, Backup Camera Support |
| Control Method | App, Touch |
| Item Weight | 11 pounds |
| Package Dimensions | 23 x 14 x 8 inches |

Figure 9.1: This image highlights the core specifications of the head unit, including an 8-core chip, 4GB of RAM for increased operating speed, and 64GB of ROM for expanded storage capacity.
10. Warranty and Support
For warranty information, please refer to the documentation included with your purchase or contact the seller directly. GYVCBREU is committed to providing customer support.
Customer Service
If you have any questions, require technical assistance, or need help with installation, please contact the seller, AUTOPARTS-999, through the Amazon platform. They offer dedicated support to assist you.
- Navigate to the product page on Amazon.
- Locate the 'Sold by' section, usually displaying 'AUTOPARTS-999'.
- Click on 'AUTOPARTS-999' to visit their storefront.
- On the storefront page, look for an option like 'Ask a question' or 'Contact Seller' to send your inquiry.

Figure 10.1: This image illustrates the two-step process to contact the seller, AUTOPARTS-999, for technical support via Amazon. Step 1 shows clicking on the seller's name on the product page, and Step 2 shows the 'Ask a question' button on the seller's storefront.


