
WISCENT 798-EU
User Manual for WISCENT Compact Home Stereo System
Model: 798-EU
Brand: WISCENT
Introduction
Thank you for purchasing the WISCENT Compact Home Stereo System. This versatile audio device integrates a CD player, Bluetooth connectivity, FM radio, AUX input, USB playback, a digital clock, and dual alarm functions. This manual provides detailed instructions for setup, operation, and maintenance to ensure optimal performance and longevity of your stereo system. Please read this manual thoroughly before use and retain it for future reference.
Product Overview
Familiarize yourself with the components of your new stereo system.

Image: The WISCENT Compact Home Stereo System, showing the main unit with its front display and controls, and the included remote control. The unit is black with a top-loading CD compartment and front-facing speakers.
Package Contents
- WISCENT Compact Home Stereo System (Main Unit)
- Remote Control (Batteries not included)
- AC Power Cable (5ft / 1.55m)
- 3.5mm AUX Cable
- User Manual

Image: A visual representation of the items included in the product box, showing the main stereo unit with its dimensions (12.2 x 7.3 x 4.2 inches), the AC power cable, 3.5mm AUX cable, remote control, and user manual.
Main Unit Features

Image: Detailed diagram of the stereo system's front and back panels, labeling key components such as the Power Standby button, CD Door Switch, Next Selection/Alarm 2, Play/Pause & Scan, Previous Selection/Alarm 1, USB Port, AUX-in, Function/EQ, Program/Repeat, Time Set/FM M+, Stop, Volume/Snooze, FM Radio Antenna, AC Power input, and Main Power Switch.
- CD Player: Top-loading mechanism compatible with CD/CD-R/CD-RW/MP3/Audiobook CDs.
- Bluetooth: Wireless audio streaming from compatible devices.
- FM Radio: Digital FM tuner (87.5-108MHz) with telescopic antenna.
- USB Port: For playing audio files from USB drives.
- AUX Input: 3.5mm jack for connecting external audio sources.
- Digital Clock: Real-time clock display.
- Dual Alarm Clock: Set two independent alarms with adjustable wake-up songs or radio.
- Speakers: Integrated 20 Watts RMS speakers.
- Display: Adjustable backlit LED display.
Setup
1. Power Connection
- Ensure the main power switch on the back of the unit is in the OFF position.
- Connect the AC power cable to the AC power input on the back of the unit.
- Plug the other end of the AC power cable into a standard wall outlet (AC 100-240V, 50/60Hz).
- Flip the main power switch on the back of the unit to the ON position. The unit will enter standby mode, and the clock display will illuminate.
2. Antenna Setup (for FM Radio)
For optimal FM radio reception, fully extend the telescopic antenna located on the back of the unit. Adjust its position for the best signal.

Image: The stereo system placed on a surface, with its telescopic FM antenna fully extended upwards, indicating readiness for FM radio reception.
Operating Instructions
Power On/Off
- To turn on the unit from standby mode, press the POWER button on the front panel or the remote control.
- To put the unit into standby mode, press the POWER button again.
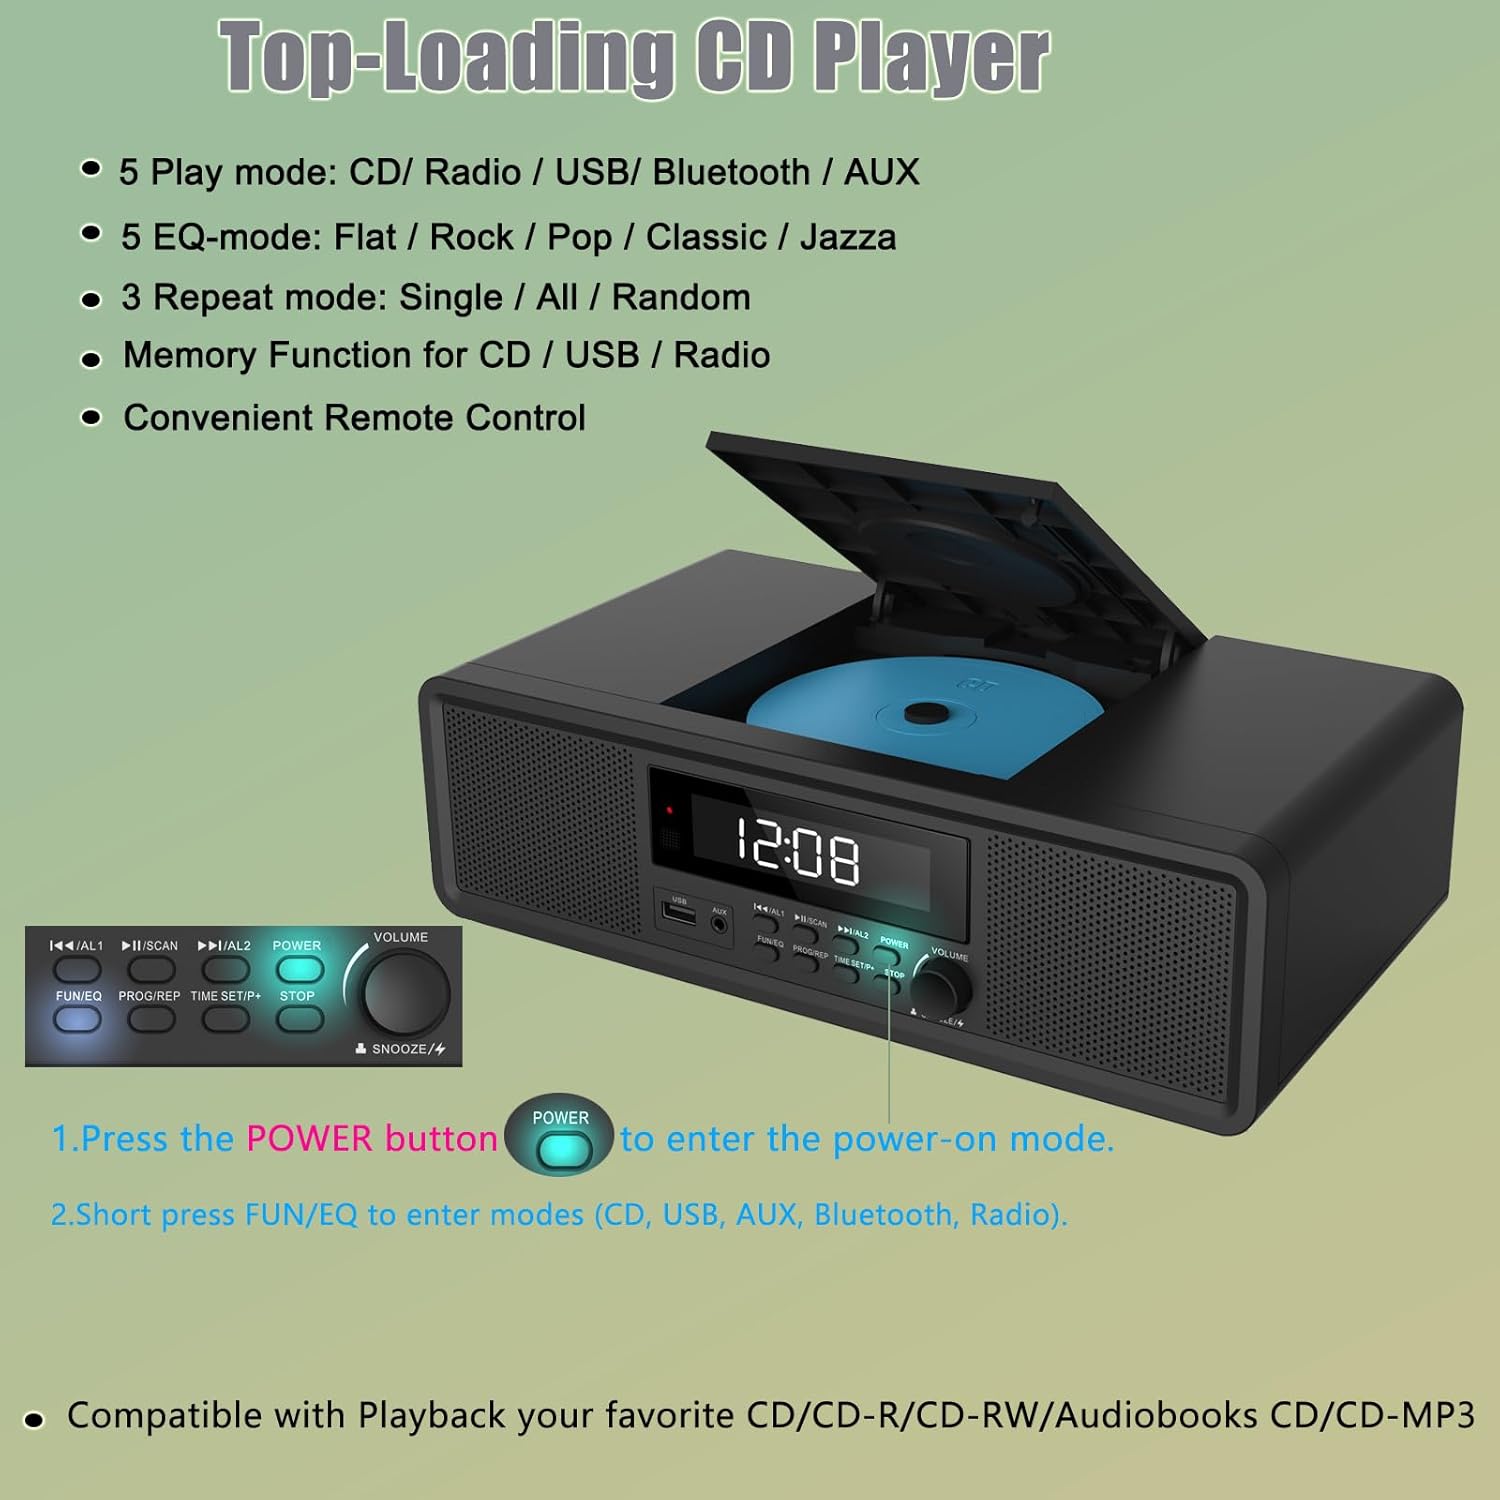
Image: Close-up of the stereo system's top-loading CD compartment and front controls, with the "POWER" button highlighted, indicating its function to turn the unit on or off.
Mode Selection
Press the FUN/EQ button on the front panel or the MODE button on the remote control repeatedly to cycle through the available modes: CD, USB, AUX, Bluetooth, and Radio (FM).
CD Playback
- Open the CD compartment cover on top of the unit.
- Place a CD (CD/CD-R/CD-RW/MP3/Audiobook CD) with the label side facing up into the compartment.
- Close the CD compartment cover.
- Select CD mode using the FUN/EQ or MODE button.
- The CD will begin playing automatically. If not, press the PLAY/PAUSE button.
- Use the PREVIOUS/NEXT buttons to skip tracks.
- Press the STOP button to stop playback.
- Use the PROG/REP button to select repeat modes (Single, All, Random) or to program tracks.
Bluetooth Pairing
- Select Bluetooth mode using the FUN/EQ or MODE button. The display will show "BT" or "Bluetooth" and an icon will flash, indicating it's in pairing mode.
- On your Bluetooth-enabled device (e.g., smartphone, tablet), turn on Bluetooth and search for available devices.
- Select "WISCENT" or a similar name from the list of devices.
- Once paired, the Bluetooth icon on the stereo's display will stop flashing and remain solid. You can now play audio from your device through the stereo system.

Image: A smartphone displaying a music player interface, with a Bluetooth symbol indicating a wireless connection to the WISCENT stereo system, which is placed on a wooden cabinet.
FM Radio Operation
- Select Radio mode using the FUN/EQ or MODE button.
- Extend the telescopic antenna for better reception.
- Auto Scan: Press and hold the SCAN button (often combined with Play/Pause) to automatically scan and save available FM stations.
- Manual Tuning: Briefly press the PREVIOUS/NEXT buttons to fine-tune the frequency.
- Saving Presets: After tuning to a desired station, press the PROG/REP button (or a dedicated MEMORY button if available on remote) to enter preset saving mode. Use PREVIOUS/NEXT to select a preset number, then press PROG/REP again to confirm.
- Recalling Presets: Use the PREVIOUS/NEXT buttons to cycle through saved preset stations.
USB Playback
- Insert a USB flash drive into the USB port on the front of the unit.
- Select USB mode using the FUN/EQ or MODE button.
- The unit will automatically detect and begin playing compatible audio files from the USB drive.
- Use the PREVIOUS/NEXT buttons to skip tracks.
- Press the PLAY/PAUSE button to pause or resume playback.
AUX Input
- Connect one end of the 3.5mm AUX cable to the AUX-in port on the front of the stereo system.
- Connect the other end of the AUX cable to the headphone jack or audio output of your external audio device (e.g., MP3 player, smartphone).
- Select AUX mode using the FUN/EQ or MODE button.
- Play audio from your external device. The sound will be output through the stereo system's speakers.
Clock Setting
- In standby mode, press and hold the TIME SET button (often combined with FM M+) on the front panel or remote. The hour digits will start flashing.
- Use the PREVIOUS/NEXT buttons to adjust the hour.
- Press TIME SET again to confirm the hour and move to minute setting. The minute digits will flash.
- Use the PREVIOUS/NEXT buttons to adjust the minutes.
- Press TIME SET one more time to save the time.
Alarm Setting (Dual Alarms)
The unit supports two independent alarms (AL1 and AL2).

Image: The stereo system's display showing "12:08" and text overlays explaining how to set dual alarms, including short and long presses of the AL1/AL2 buttons to turn alarms on/off and adjust time.
- In standby mode, press and hold the AL1/AL2 button (e.g., AL1) on the front panel or remote. The alarm time will flash.
- Use the PREVIOUS/NEXT buttons to adjust the alarm hour.
- Press AL1/AL2 again to confirm the hour and move to minute setting.
- Use the PREVIOUS/NEXT buttons to adjust the alarm minutes.
- Press AL1/AL2 again to select the alarm source (CD, FM, or Buzzer).
- Press AL1/AL2 one more time to save the alarm setting.
- To activate/deactivate an alarm, short press the corresponding AL1/AL2 button. An alarm icon will appear/disappear on the display.
Sleep/Snooze Function
- Snooze: When an alarm sounds, press the SNOOZE button (often combined with Volume knob) to temporarily silence the alarm for a few minutes. The alarm will sound again after the snooze period.
- Sleep Timer: While the unit is playing, press the SLEEP button on the remote (if available) repeatedly to set a sleep timer (e.g., 15, 30, 60, 90 minutes). The unit will automatically turn off after the set time.
Equalizer (EQ) Modes
Press the FUN/EQ button on the front panel (or a dedicated EQ button on the remote) repeatedly to cycle through different equalizer presets: Flat, Rock, Pop, Classic, Jazz.
Maintenance
- Cleaning: Use a soft, dry cloth to clean the exterior of the unit. Do not use abrasive cleaners, waxes, or solvents.
- CD Compartment: Keep the CD compartment clean and free of dust. Avoid touching the CD lens.
- Ventilation: Ensure proper ventilation around the unit. Do not block any ventilation openings.
- Storage: If storing the unit for an extended period, disconnect it from the power outlet and store it in a cool, dry place.
Troubleshooting
| Problem | Possible Cause | Solution |
|---|---|---|
| No power | Power cable not connected; Main power switch off; Power outlet faulty. | Check power cable connection; Ensure main power switch is ON; Try a different power outlet. |
| No sound | Volume too low; Incorrect mode selected; Mute function active; External device not playing (AUX/BT). | Increase volume; Select correct mode; Deactivate mute; Ensure external device is playing and volume is up. |
| CD not playing | CD inserted incorrectly; CD dirty/scratched; Incorrect mode. | Insert CD with label side up; Clean or replace CD; Select CD mode. |
| Bluetooth not pairing | Stereo not in Bluetooth mode; Device Bluetooth off; Device too far; Already paired with another device. | Select Bluetooth mode; Turn on device Bluetooth; Move device closer; Disconnect from other devices. |
| Poor FM reception | Antenna not extended/positioned correctly; Weak signal area. | Fully extend and adjust antenna; Try moving the unit to a different location. |
| Remote control not working | Batteries dead/incorrectly inserted; Obstruction between remote and unit. | Replace batteries (ensure correct polarity); Remove any obstructions; Point remote directly at the unit's sensor. |
Specifications
| Feature | Detail |
|---|---|
| Brand | WISCENT |
| Model Number | 798-EU |
| Color | Black |
| Connectivity Technology | Auxiliary, Bluetooth, USB |
| Power Source | Corded Electric |
| Style | Vintage |
| Power Output | 20 Watts |
| Supported Standards | CD/CD-R/CD-RW/MP3/Audiobook CD |
| Bluetooth Compatible | Yes |
| Number of Speakers | 2 |
| Dimensions (L*W*H) | 12.2 x 7.3 x 4.2 inches (310 x 186 x 107 mm) |
Warranty and Support
For warranty information and customer support, please refer to the documentation provided with your purchase or contact WISCENT customer service directly. Specific warranty terms may vary by region and retailer.
Related documents798-EU


Ask a question about this manual
Ask about setup, troubleshooting, compatibility, parts, safety, or missing instructions. Manuals+ will review the question and use this page’s manual context to help answer it.